Welcome to another edition of Big Chuck’s Automotive Blog! This post, being a little long in anticipation, will also be extremely long and full of content. I intend to cover the chronology of a handful of van adventures stretching back to around New Years, after the Great Oil Pan Debacle, and ending most recently with fighting some alternator troubles. Guess what? There’s more bodywork!
Operation: RUSTY MEMORY Part II
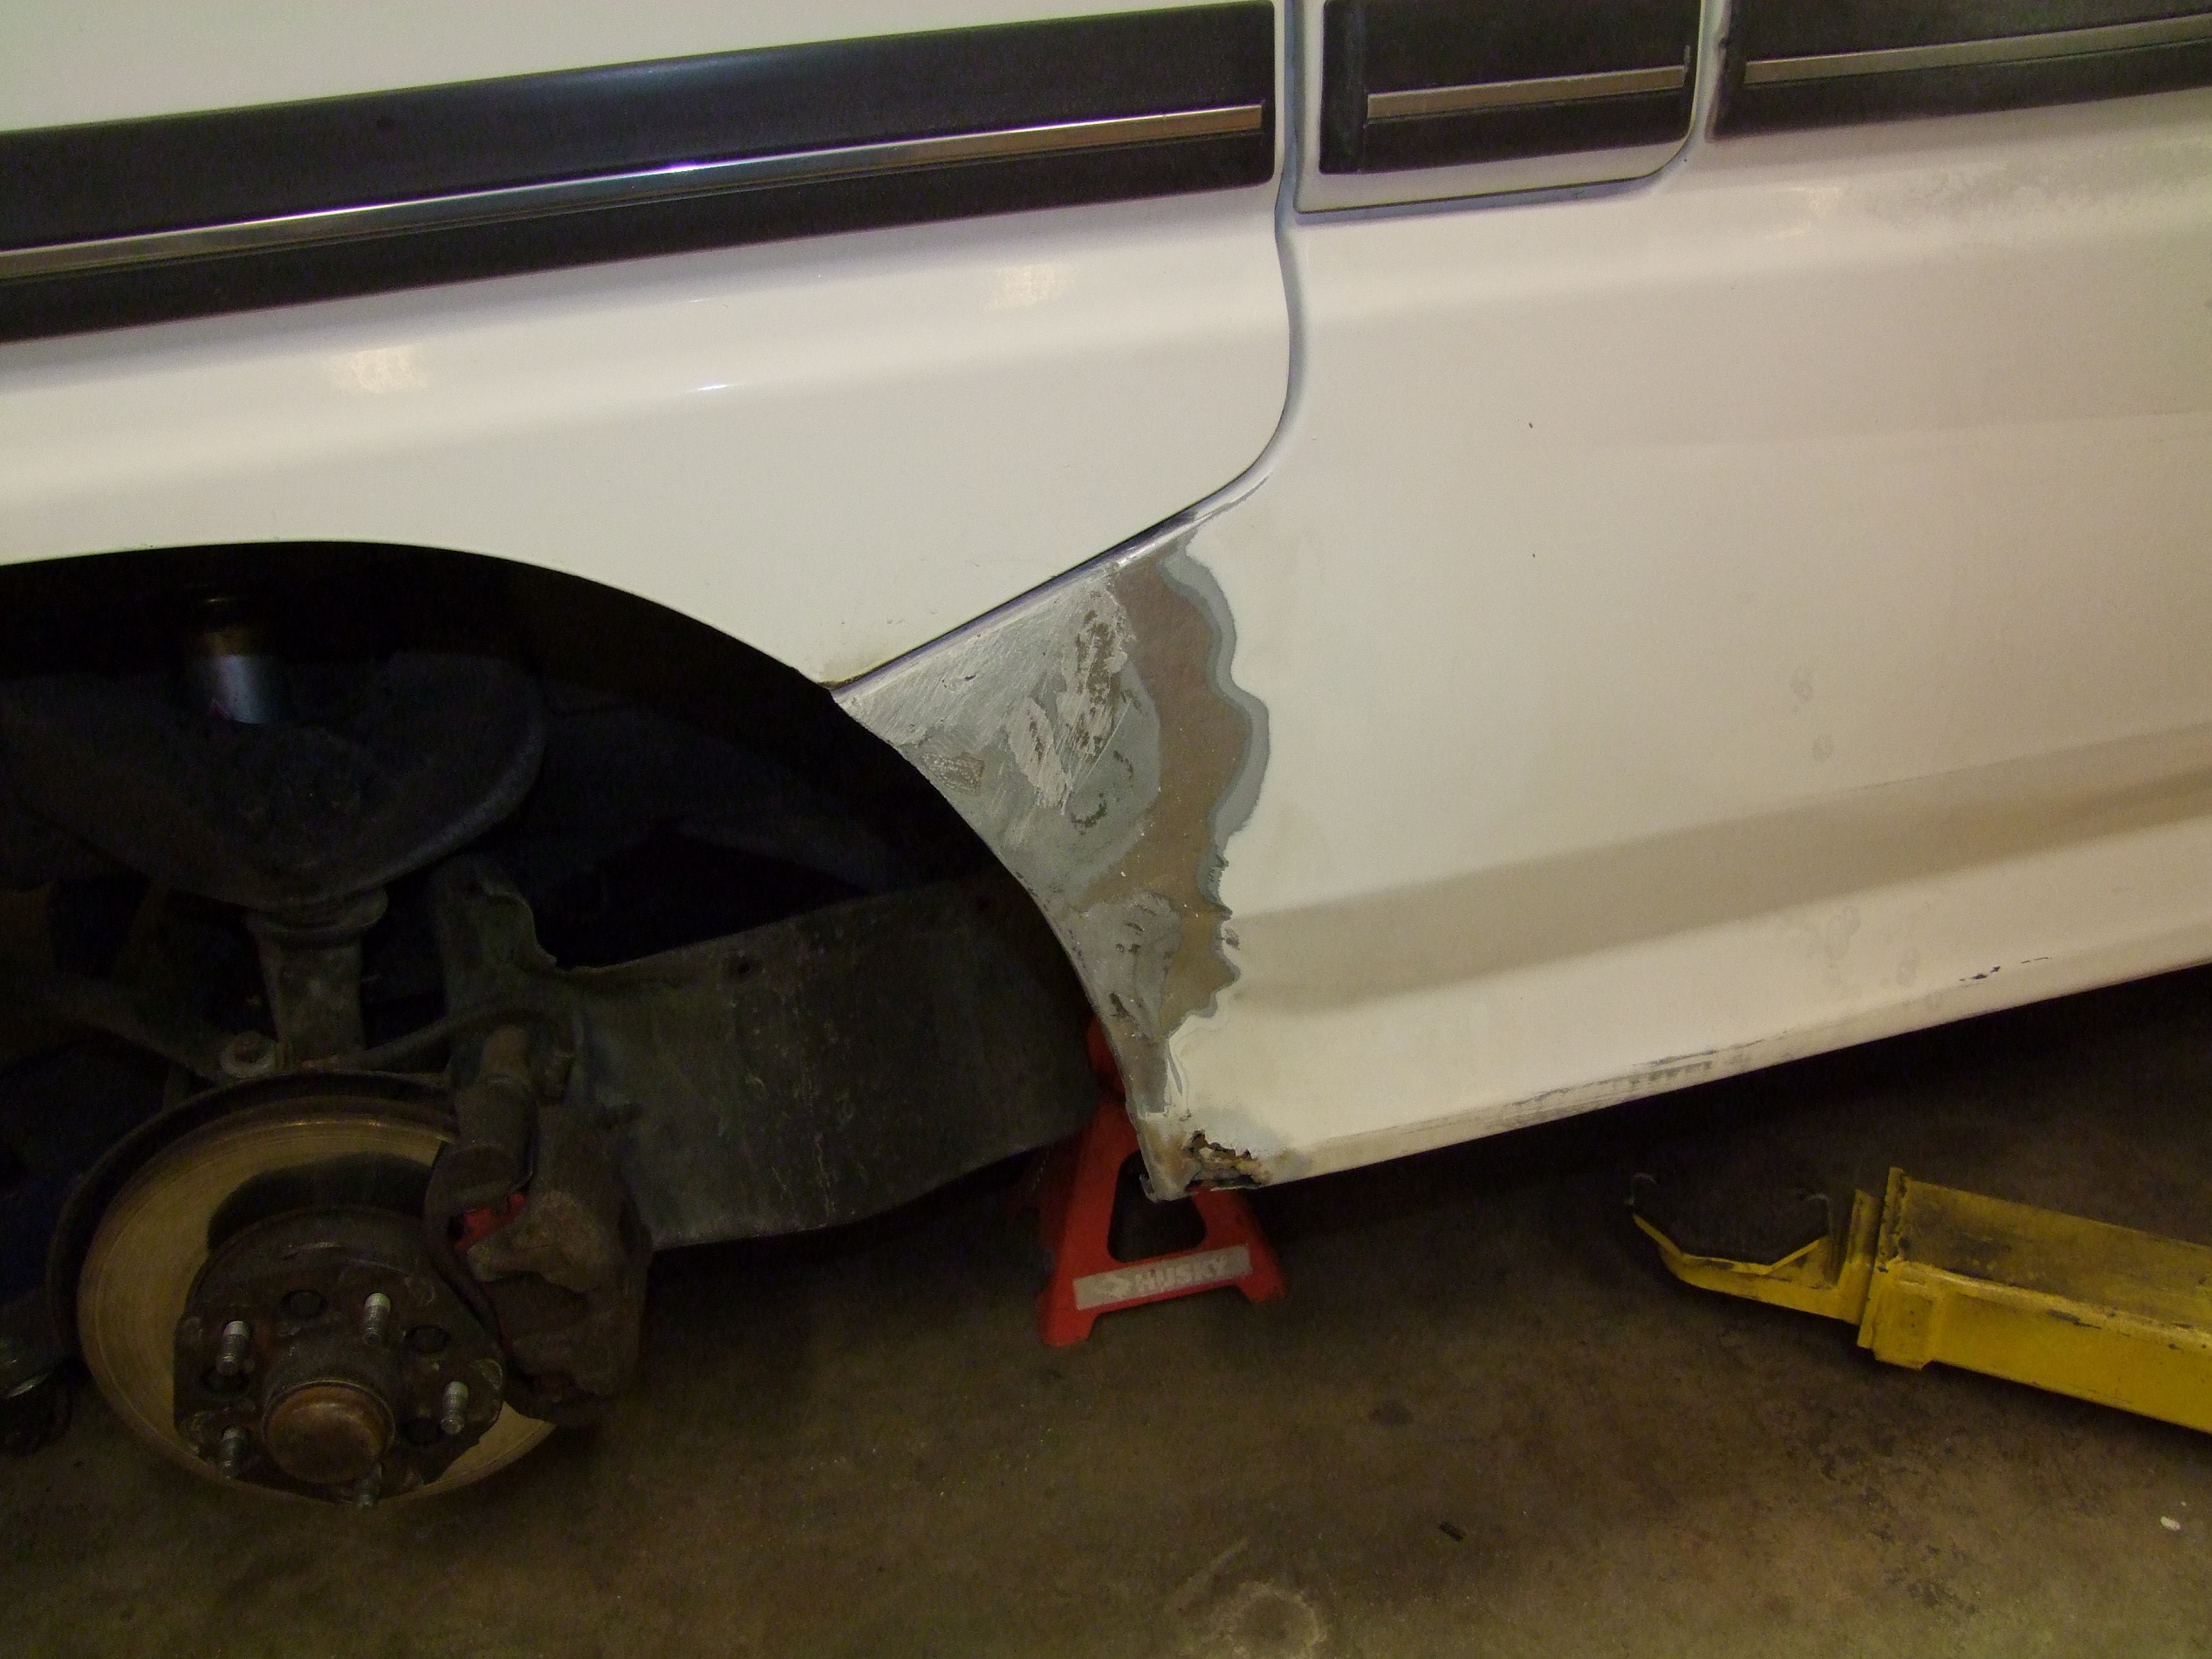
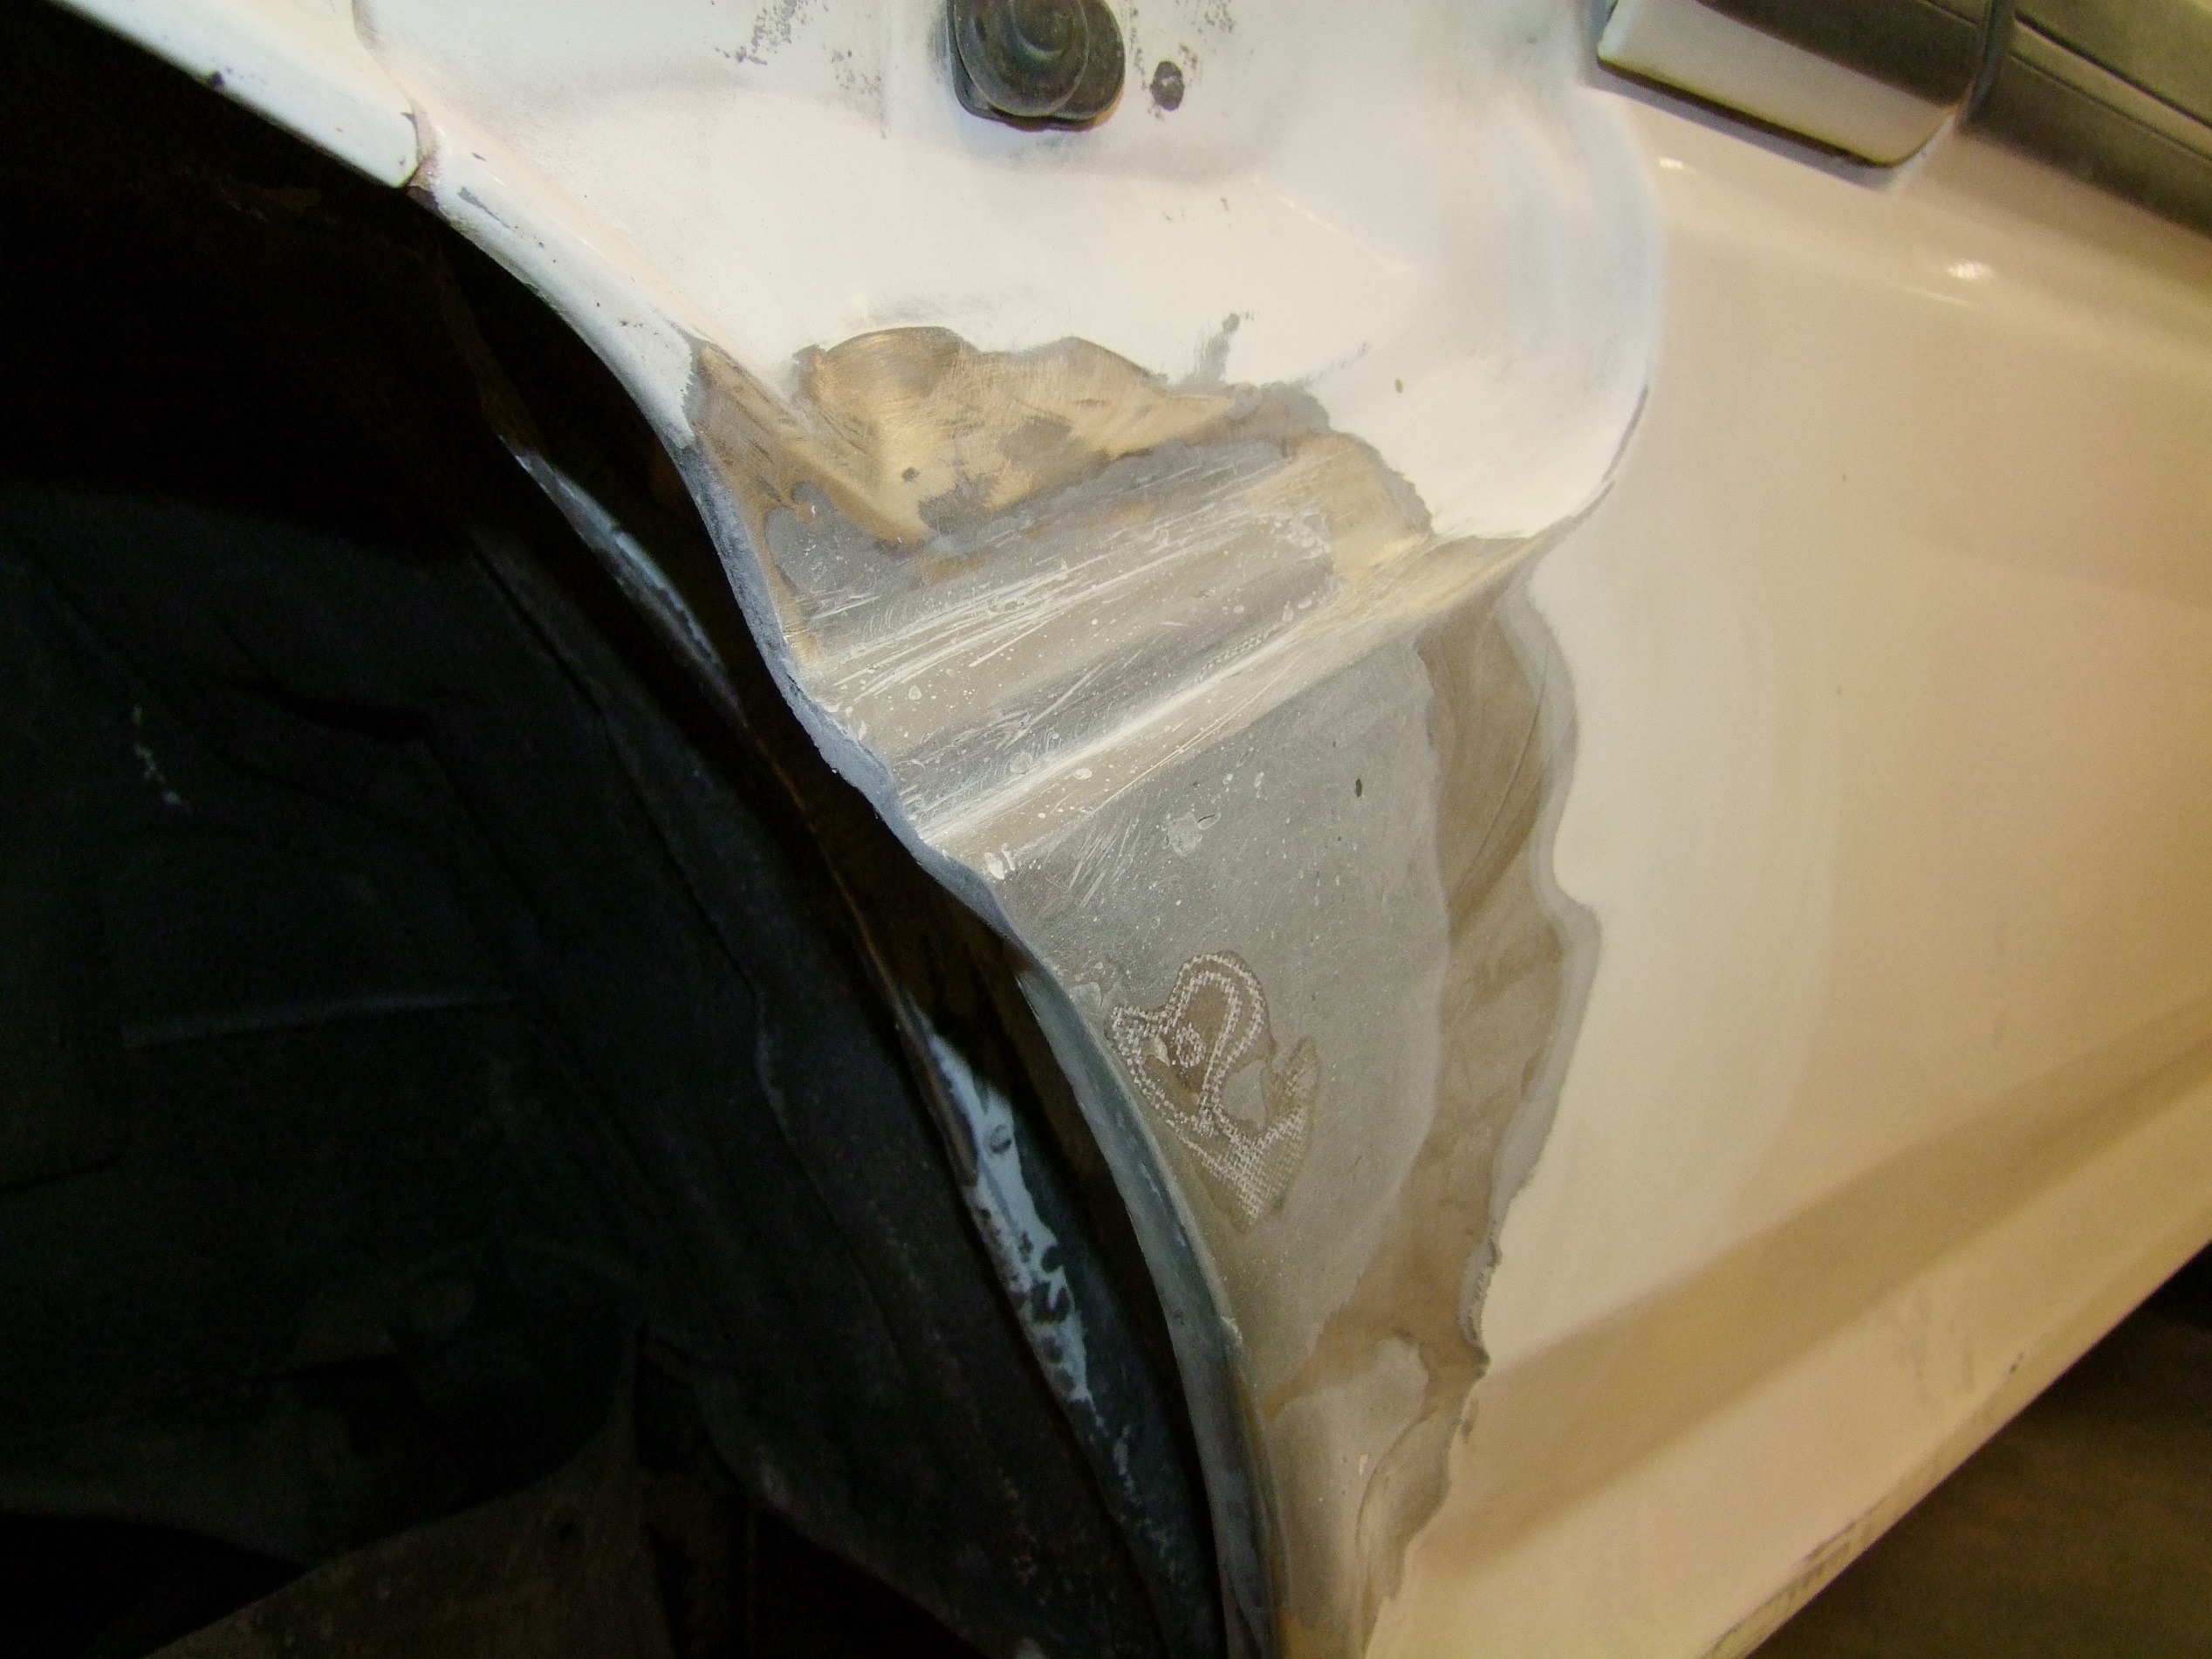
Originally, I posted a picture of the boarding step hole, and was intending to work on that. However, the very weird concave geometry in that area scared me away for the time being. I decided instead to focus on another problem spot – one that, oddly enough, I don’t have a good picture of. The best picture might actually be this, from when I got a new set of winter tires:
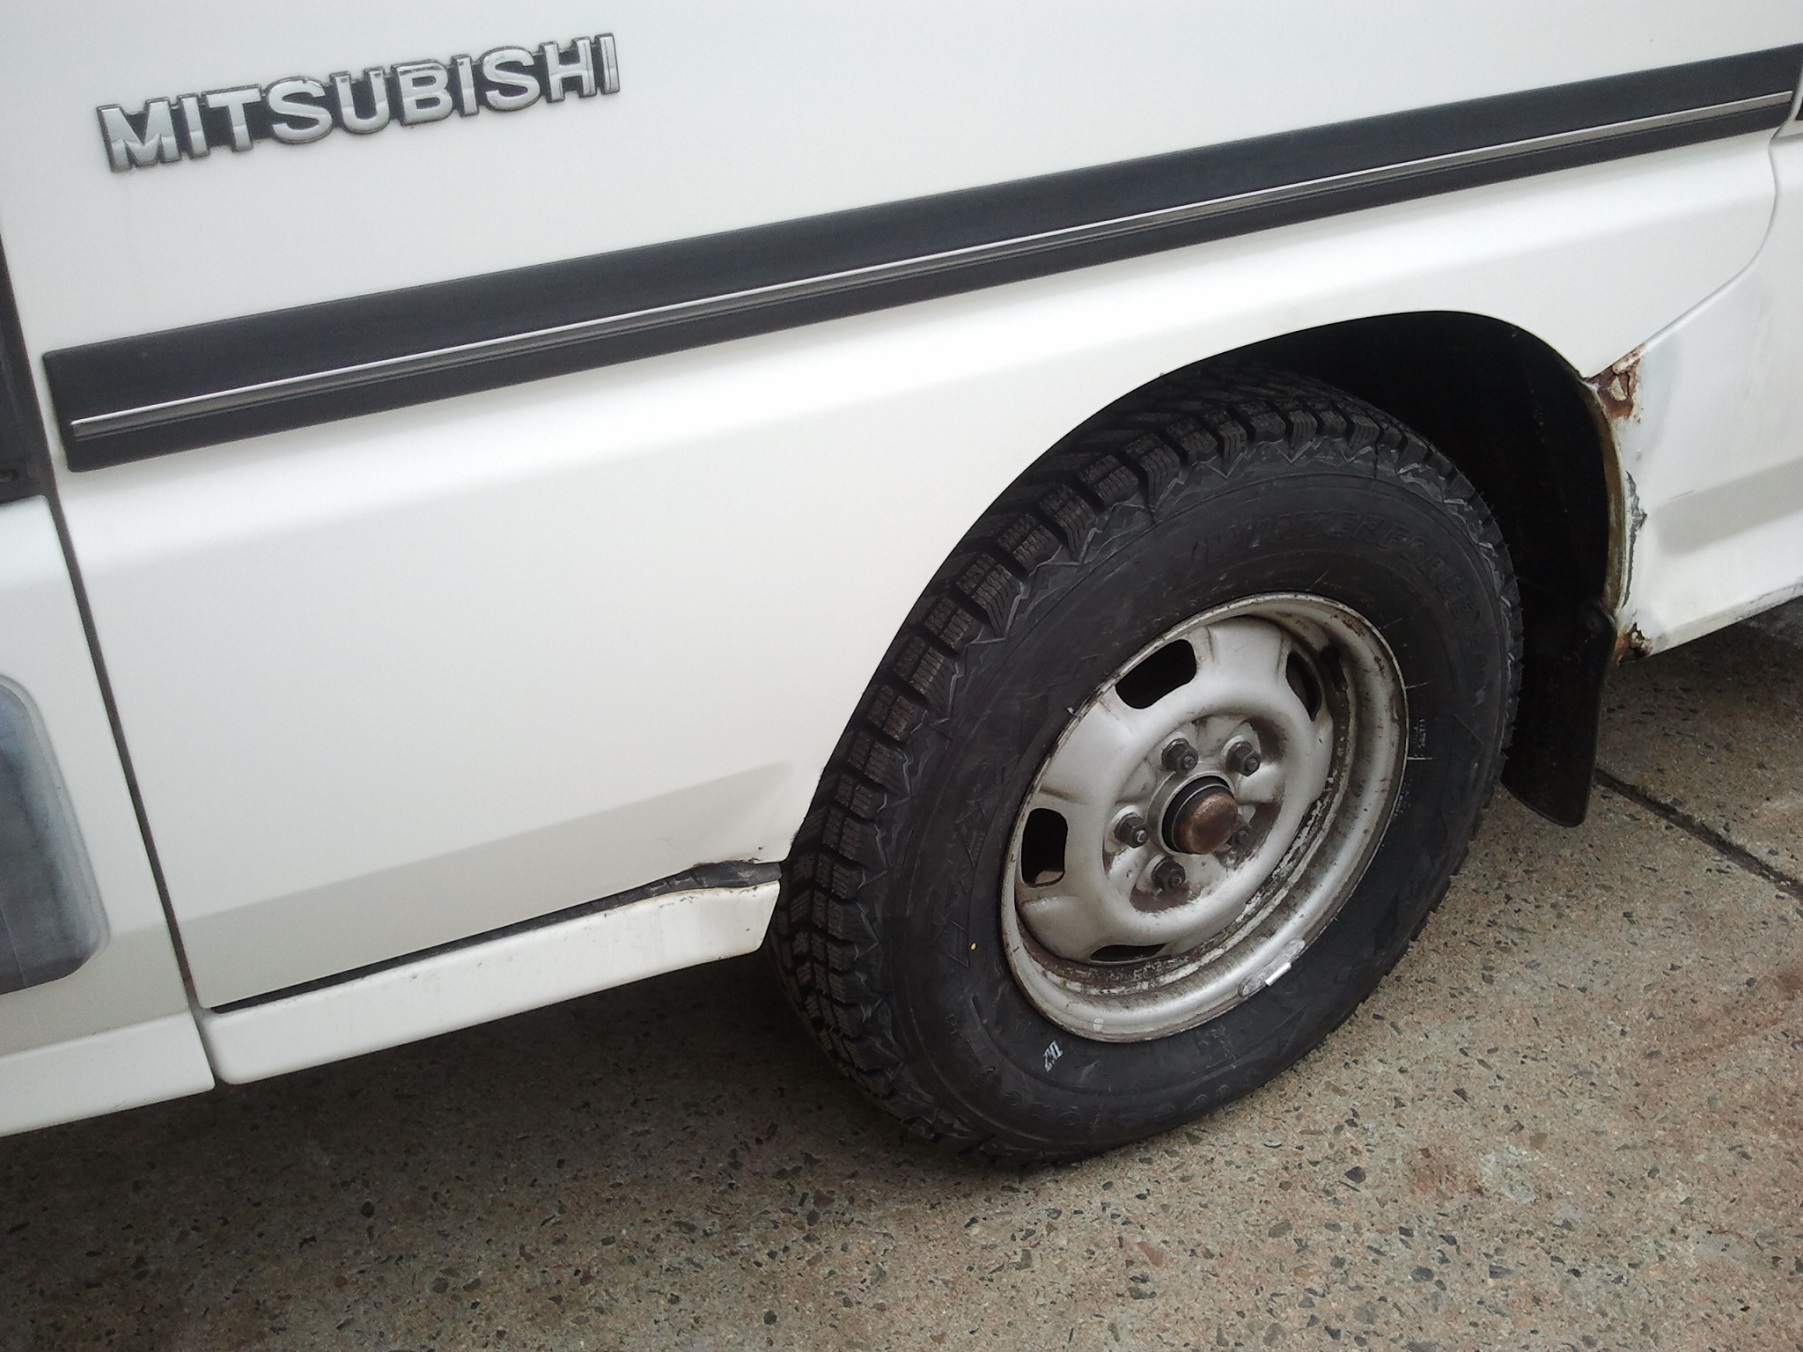
It’s the spot by the rear of the wheelwell, which is also visible in one of the first images.
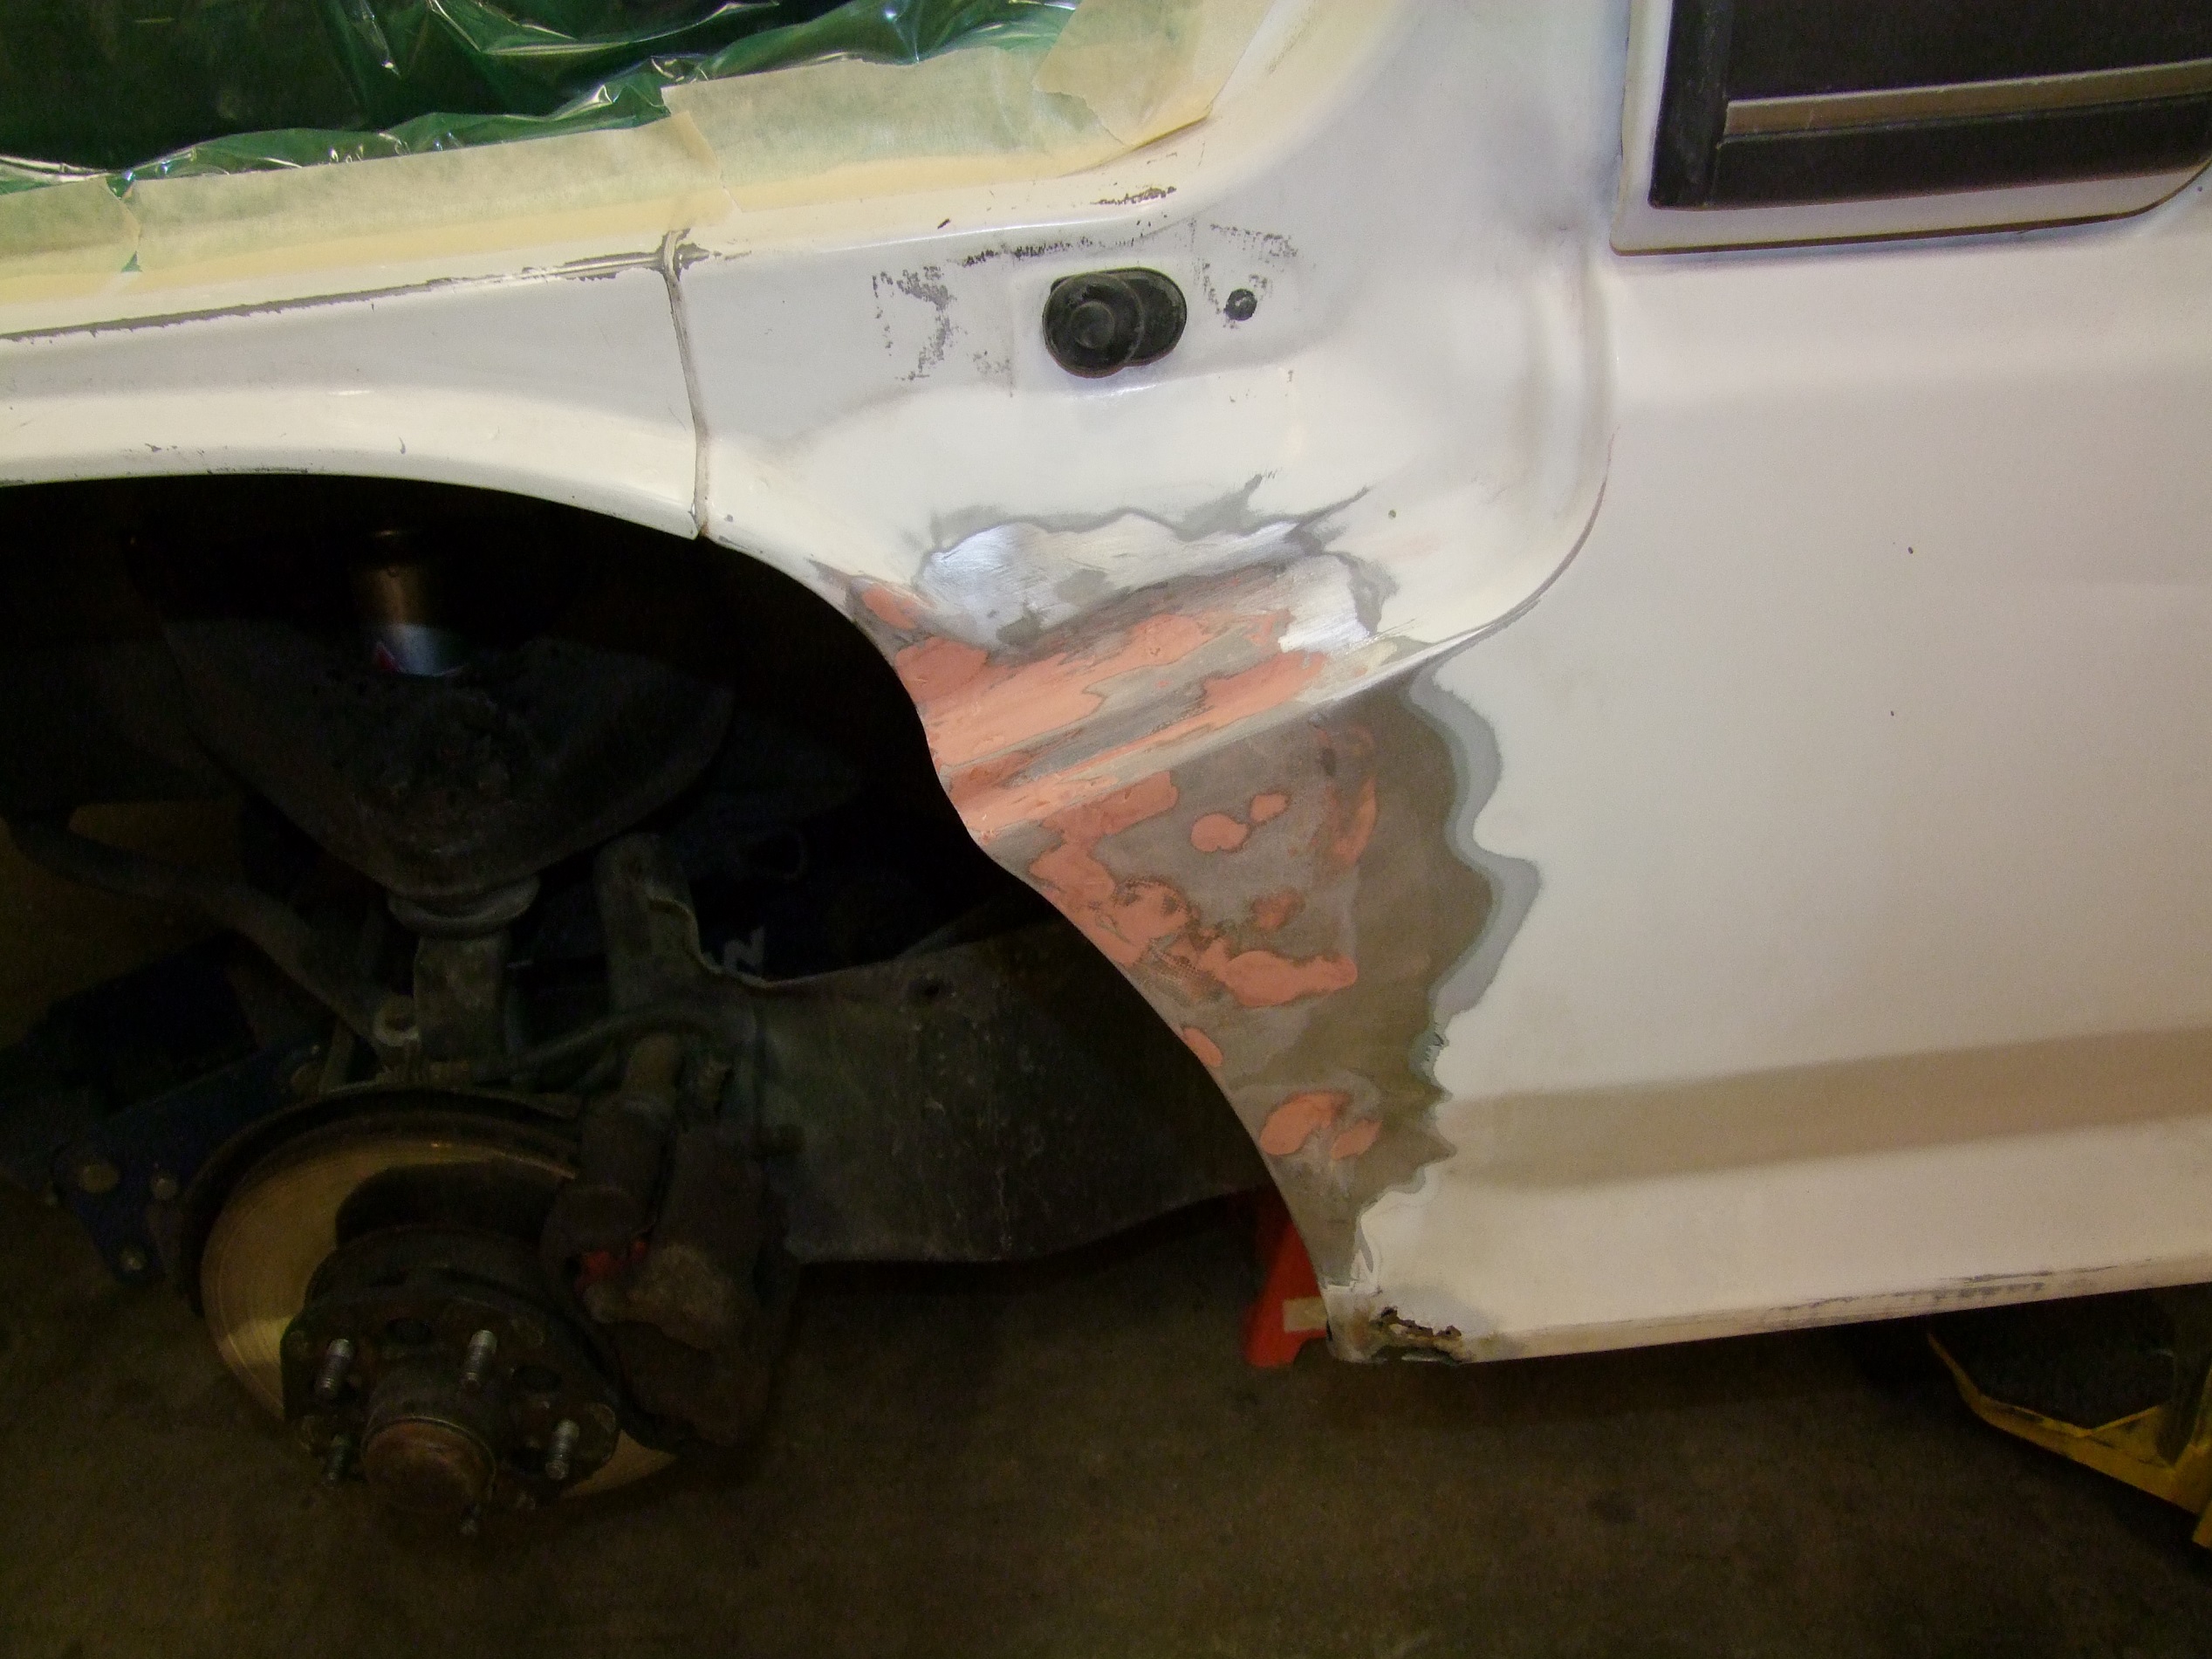
At first, this spot seemed to be better suited for practicing, since it was primarily convex or flat. I knew that I would be chipping off someone else’s hack to add my own, because the area was clearly made of flaking Bondo and not metal, but I figured it couldn’t be too bad.
Famous last van words.
This spot was different than the hatch and underside which I’ve done in prior posts. First, this is a prominently visible part of the vehicle. Second, through the first two jobs, I’ve become more confident in my “body man” skills. I planned this job to take more time and detail than the previous ones. Hell, I even asked the Solar Car and FSAE teams if I could hog the garage for the whole weekend plus some, instead of just pulling in, beasting it, and slinking away.

So here I am in the auto shop one weekend with an air saw and Dremel with a carbide burr, shaving a yak.
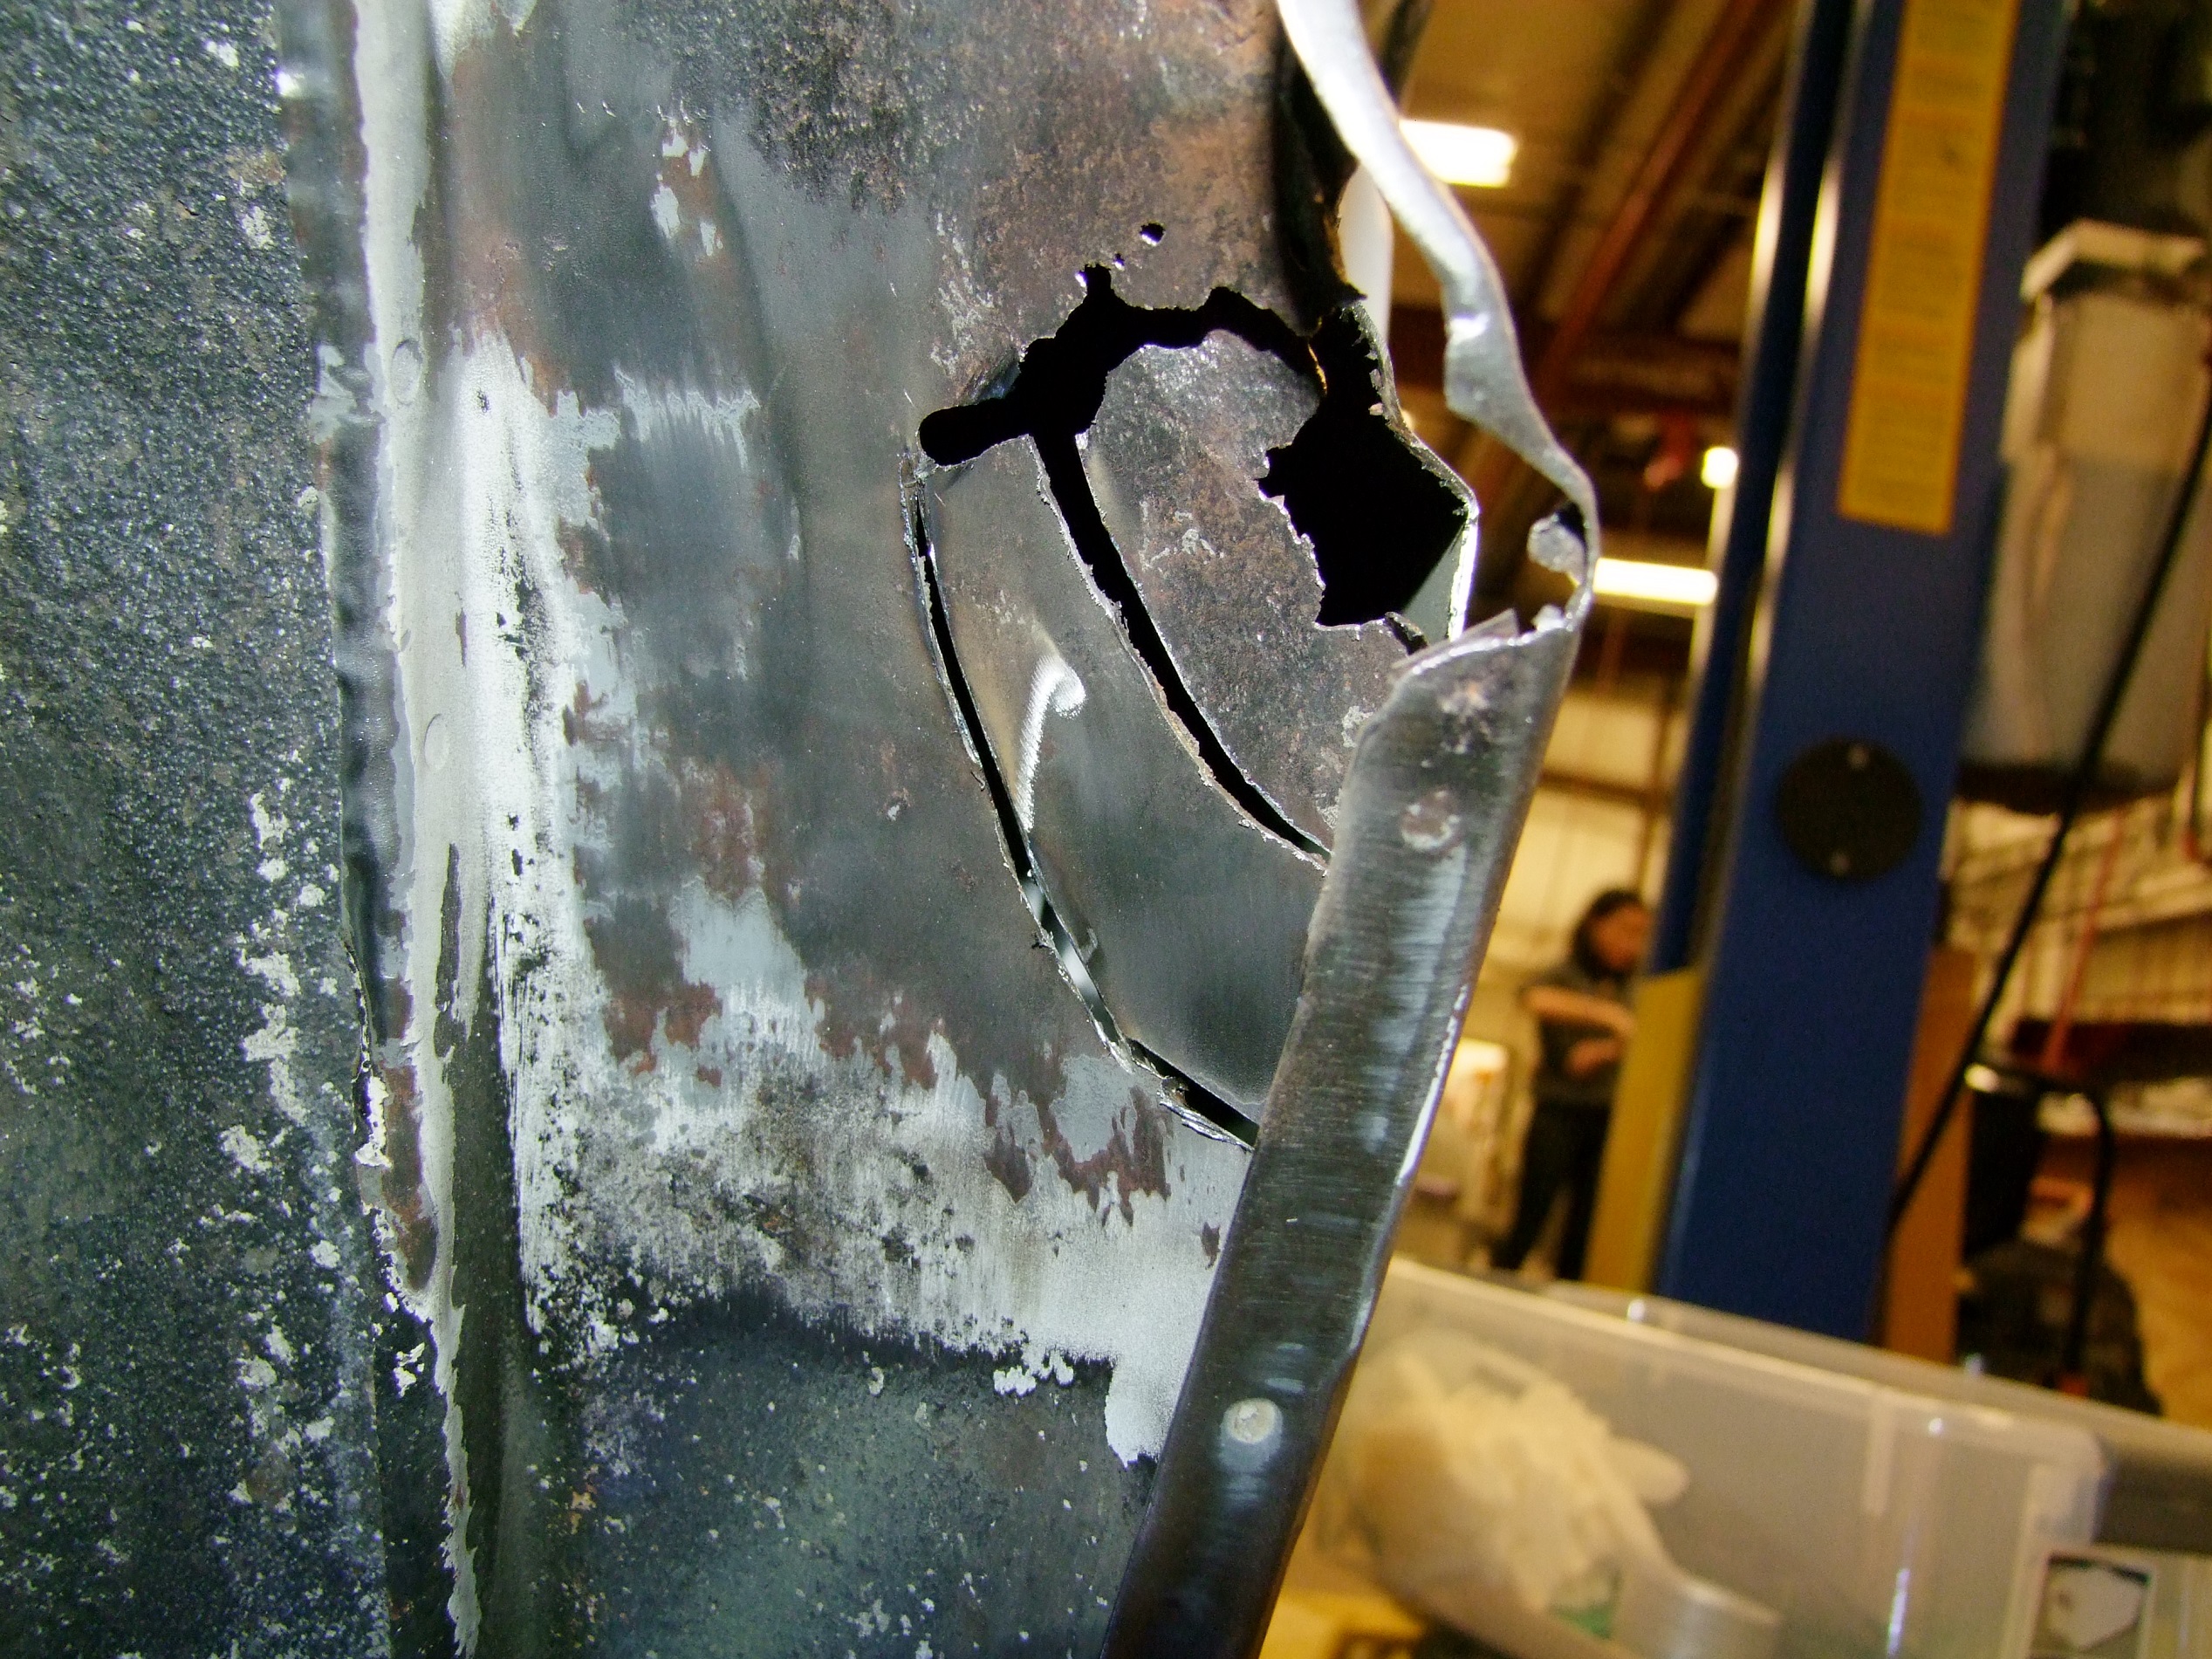
Step one was, as usual, discovery and exploration. I started by knocking that corner in and breaking it up into dust; the old adage “by the time you see rust, it’s too late” holds. Next, I carved away most of the steel around where rust gave way to ductile metal out to about half an inch away.
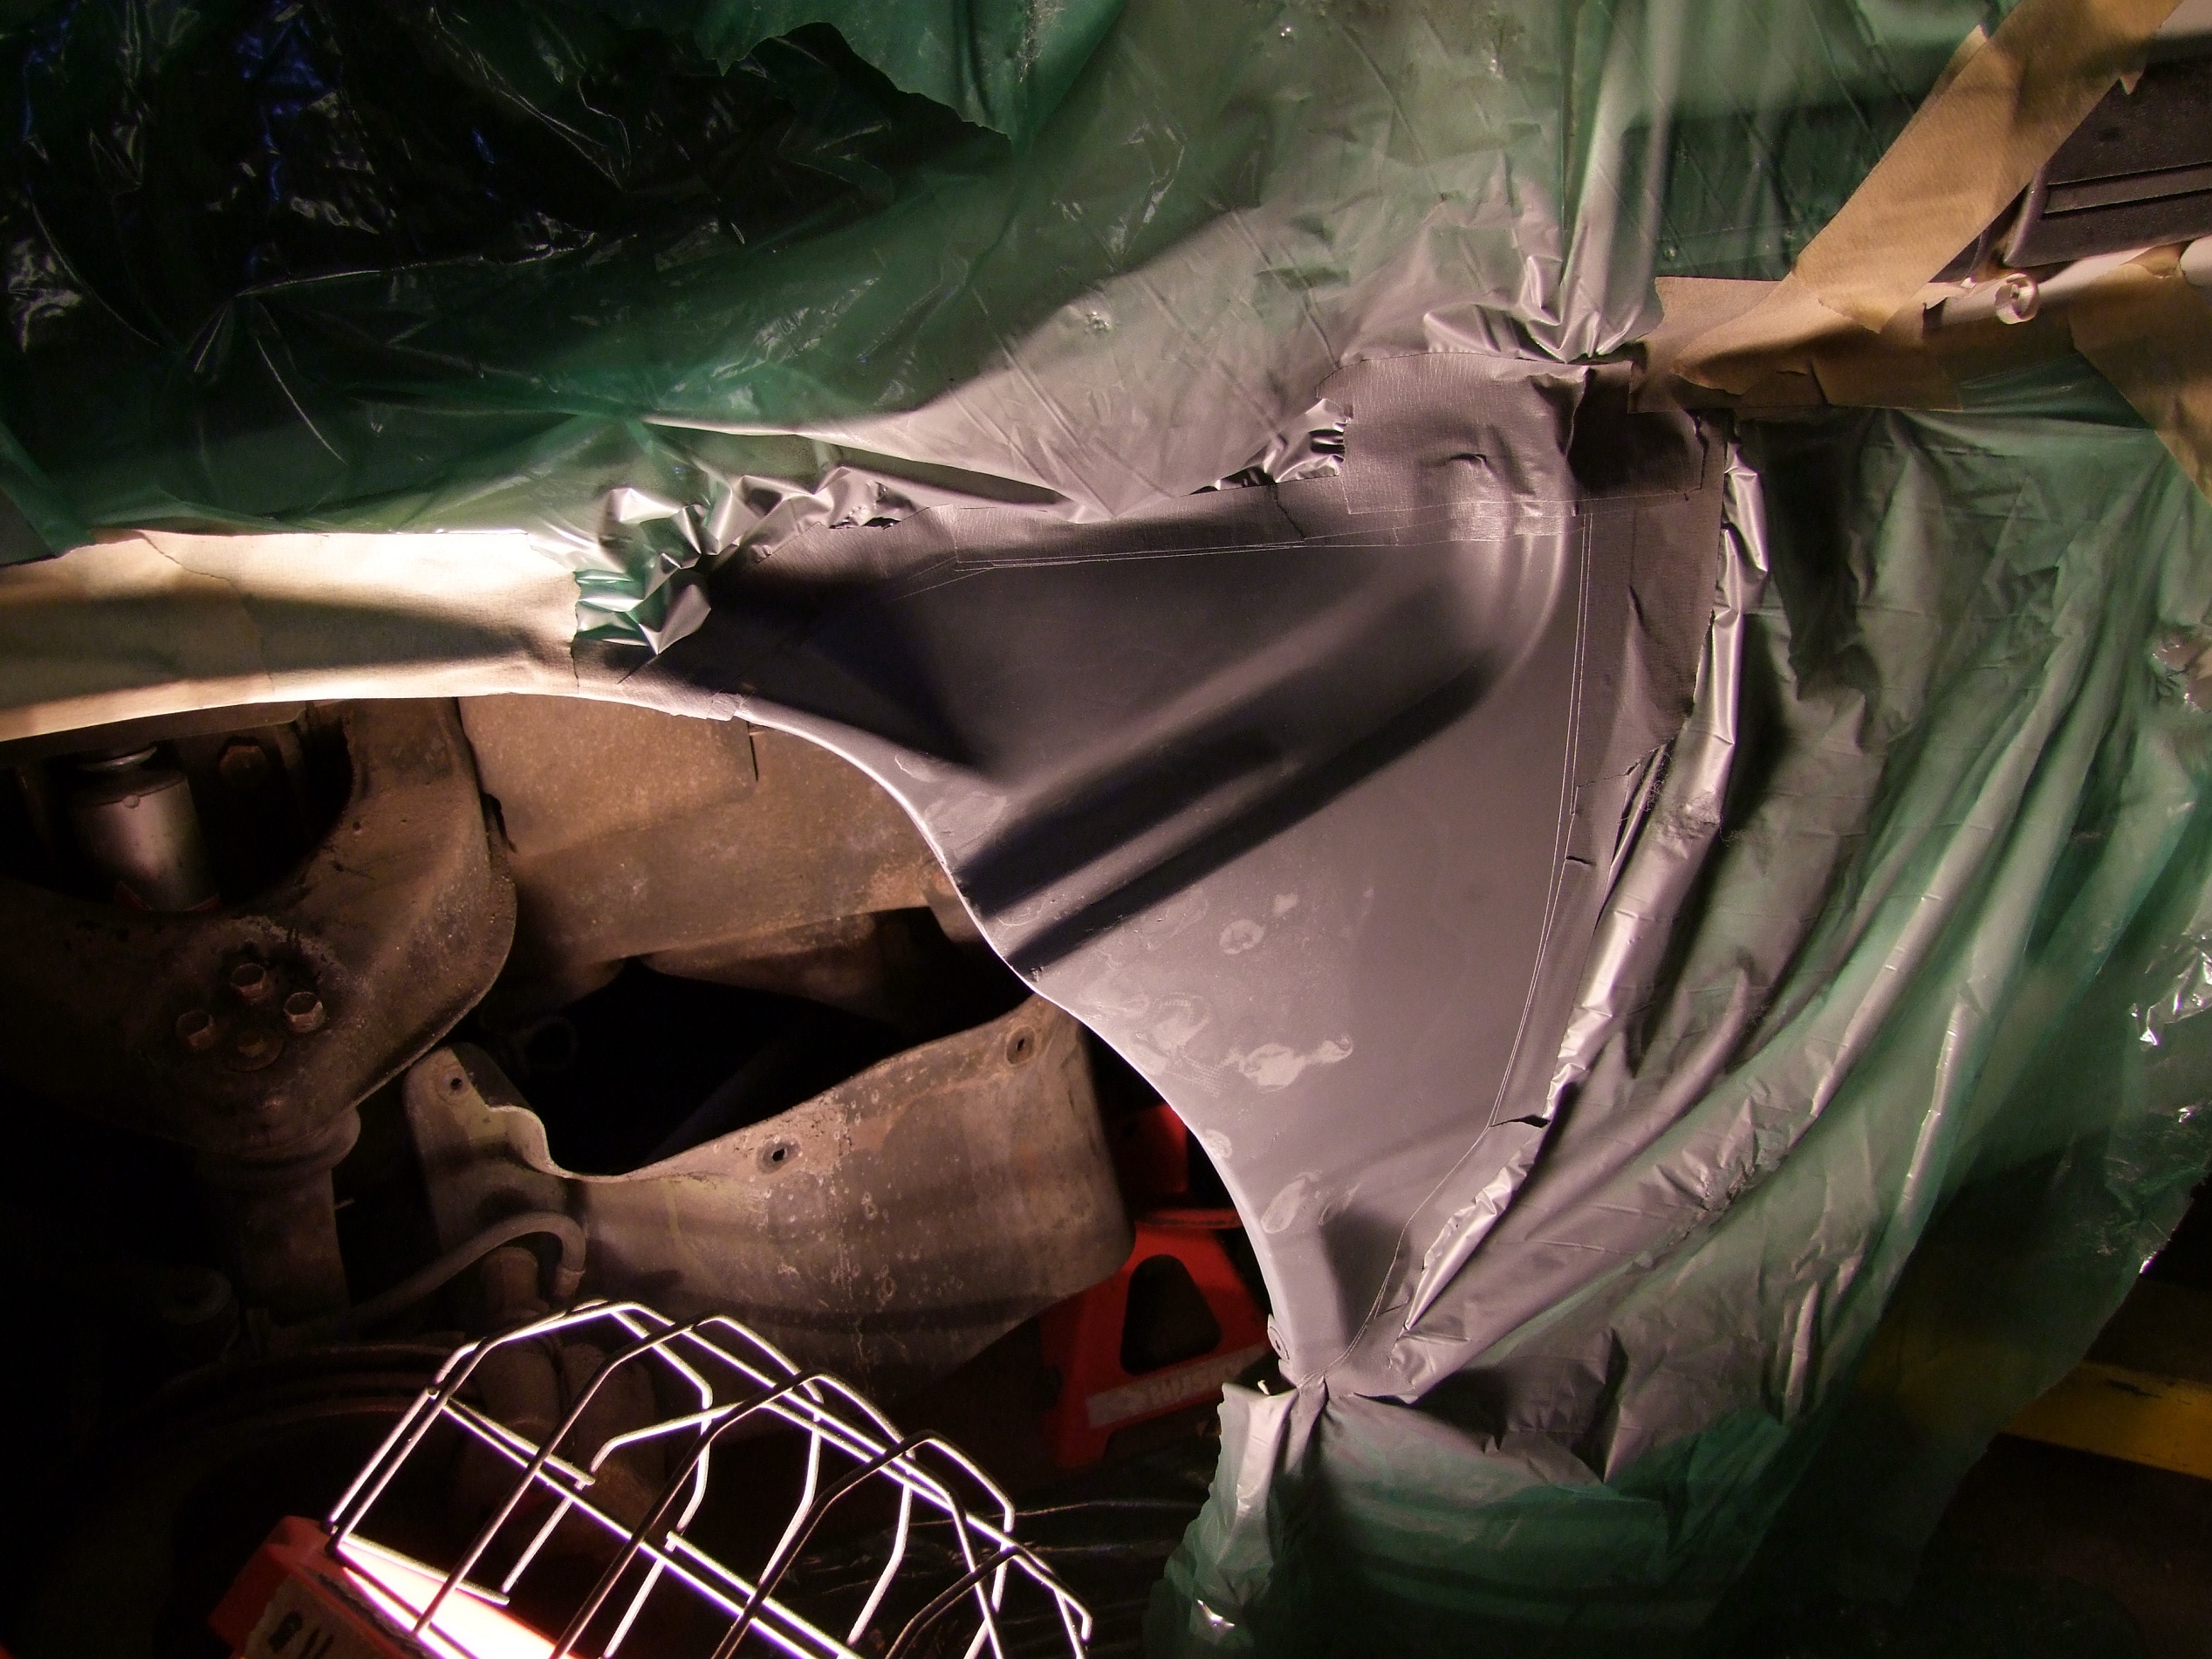
Notice the green coating inside – that’s a dose of “rust encapsulation” compound that I bought on recommendation. About a week before I broke into this region, I gave a thorough covering through the holes in the bottom. Hey, at least they were good for something. I was told that this would aid in holding off worse corrosion and give me some more months to get to repairs.
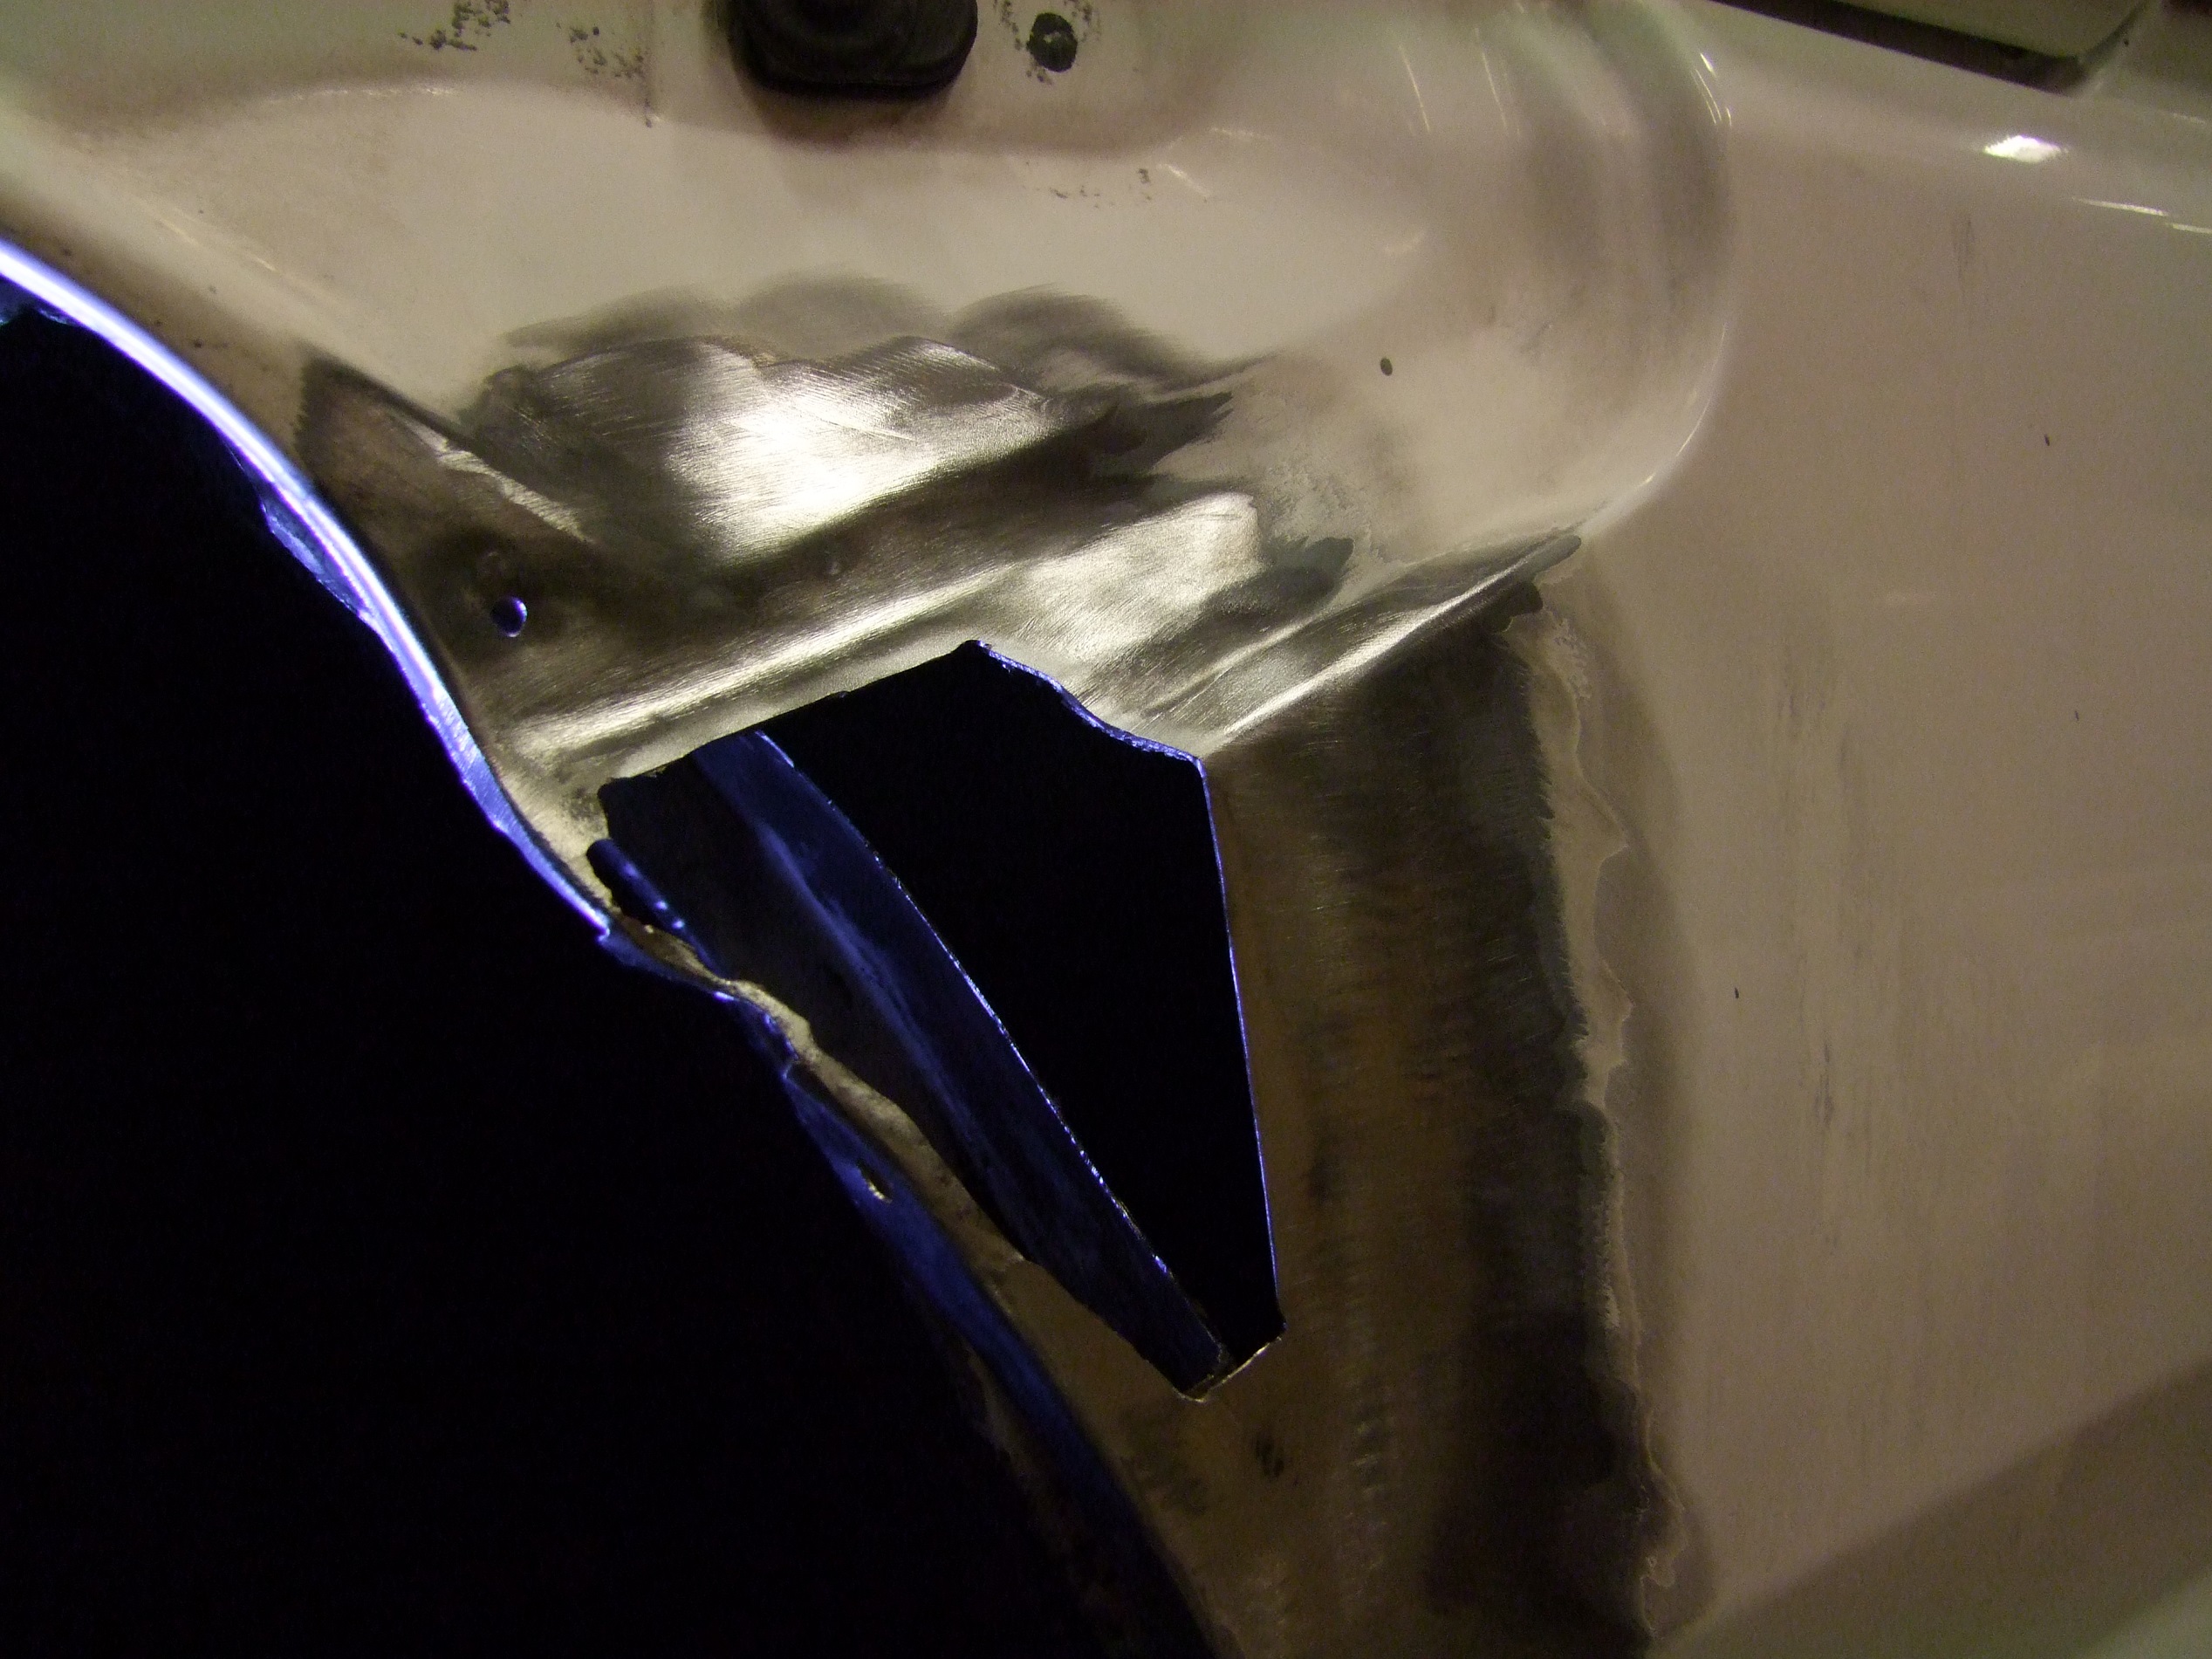
Only the outside skin has been carved in this picture – the inside wheelwell area is still in the process of discovery. Check out that thin sliver remaining of the outer skin – that was kept so I had an idea of the lines to follow.
Taking sweeping cuts with the Dremel on the inside now.
The whole area cleaned up, corners filleted, and more paint sanded off in preparation for fiber layup.

The final pile of excised cancer, plus a mass grave of deceased Dremel wheels.

My usual tactic is three layers of fiberglass cloth on the outside only, but that would have caused too much protrusion here. Instead, I only did two on the outside…
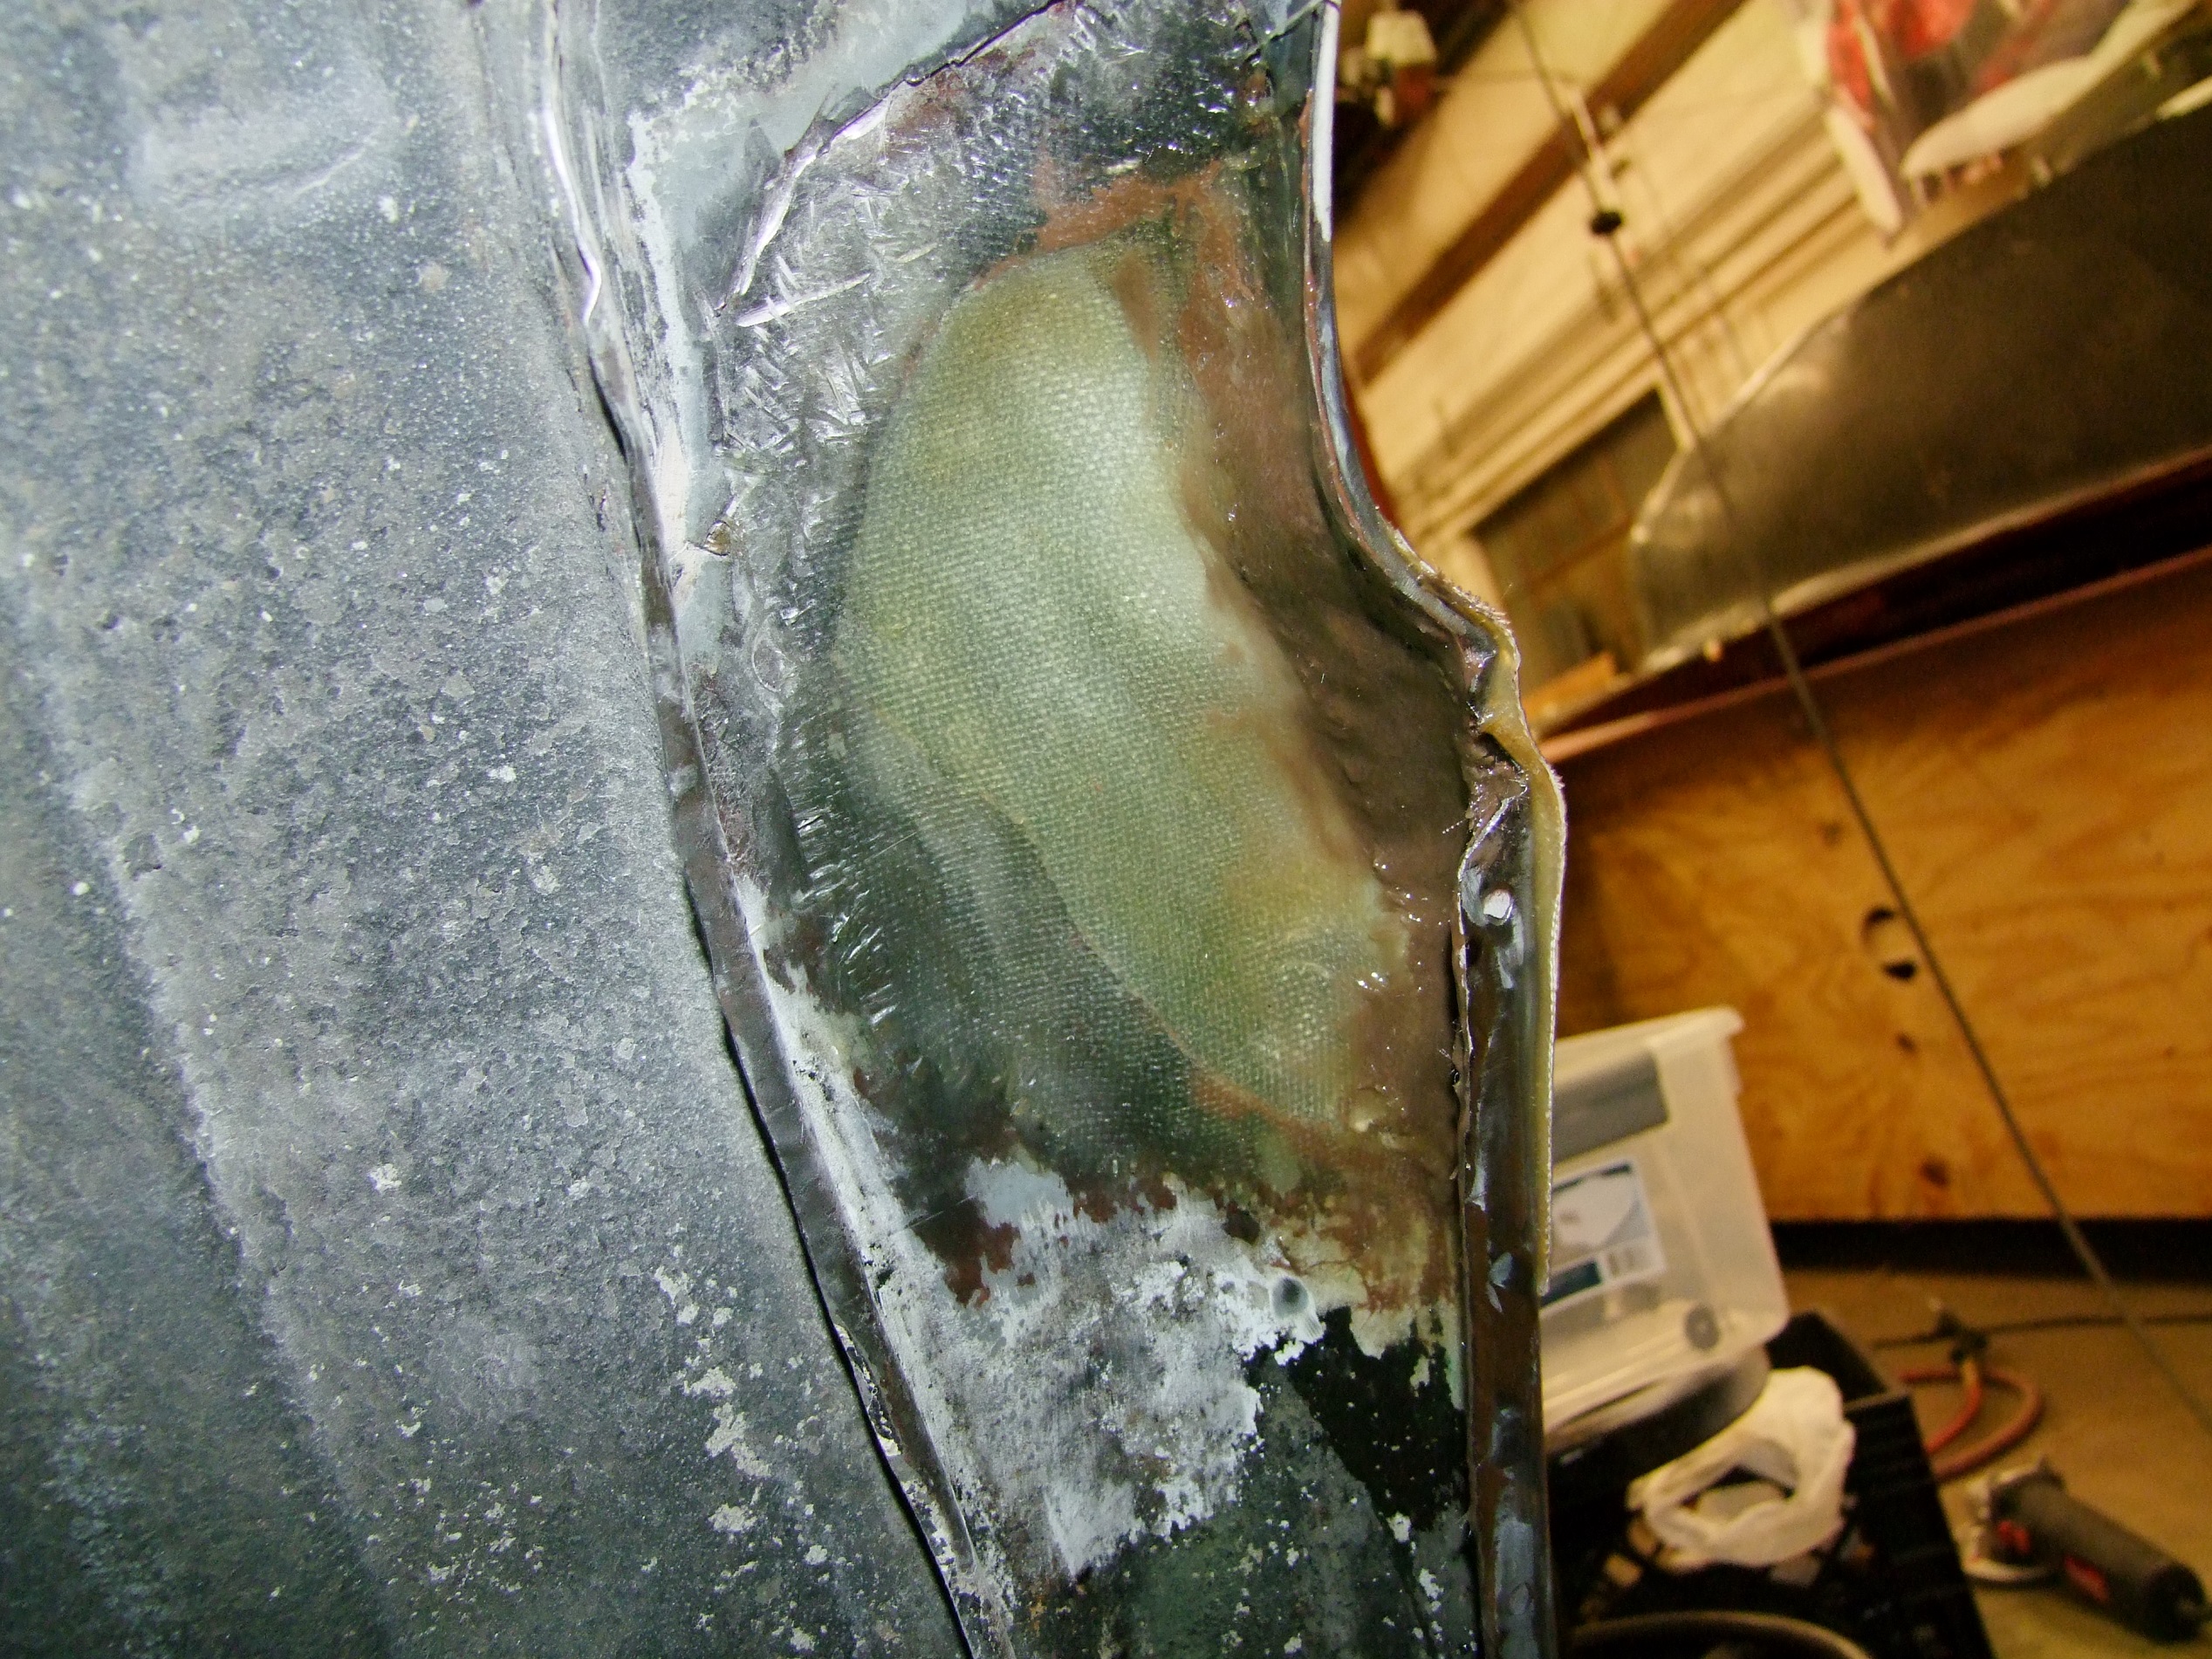
…and two from the inside, reaching through the wheelwell hole. I then closed the area off with two layers in the wheelwell area.
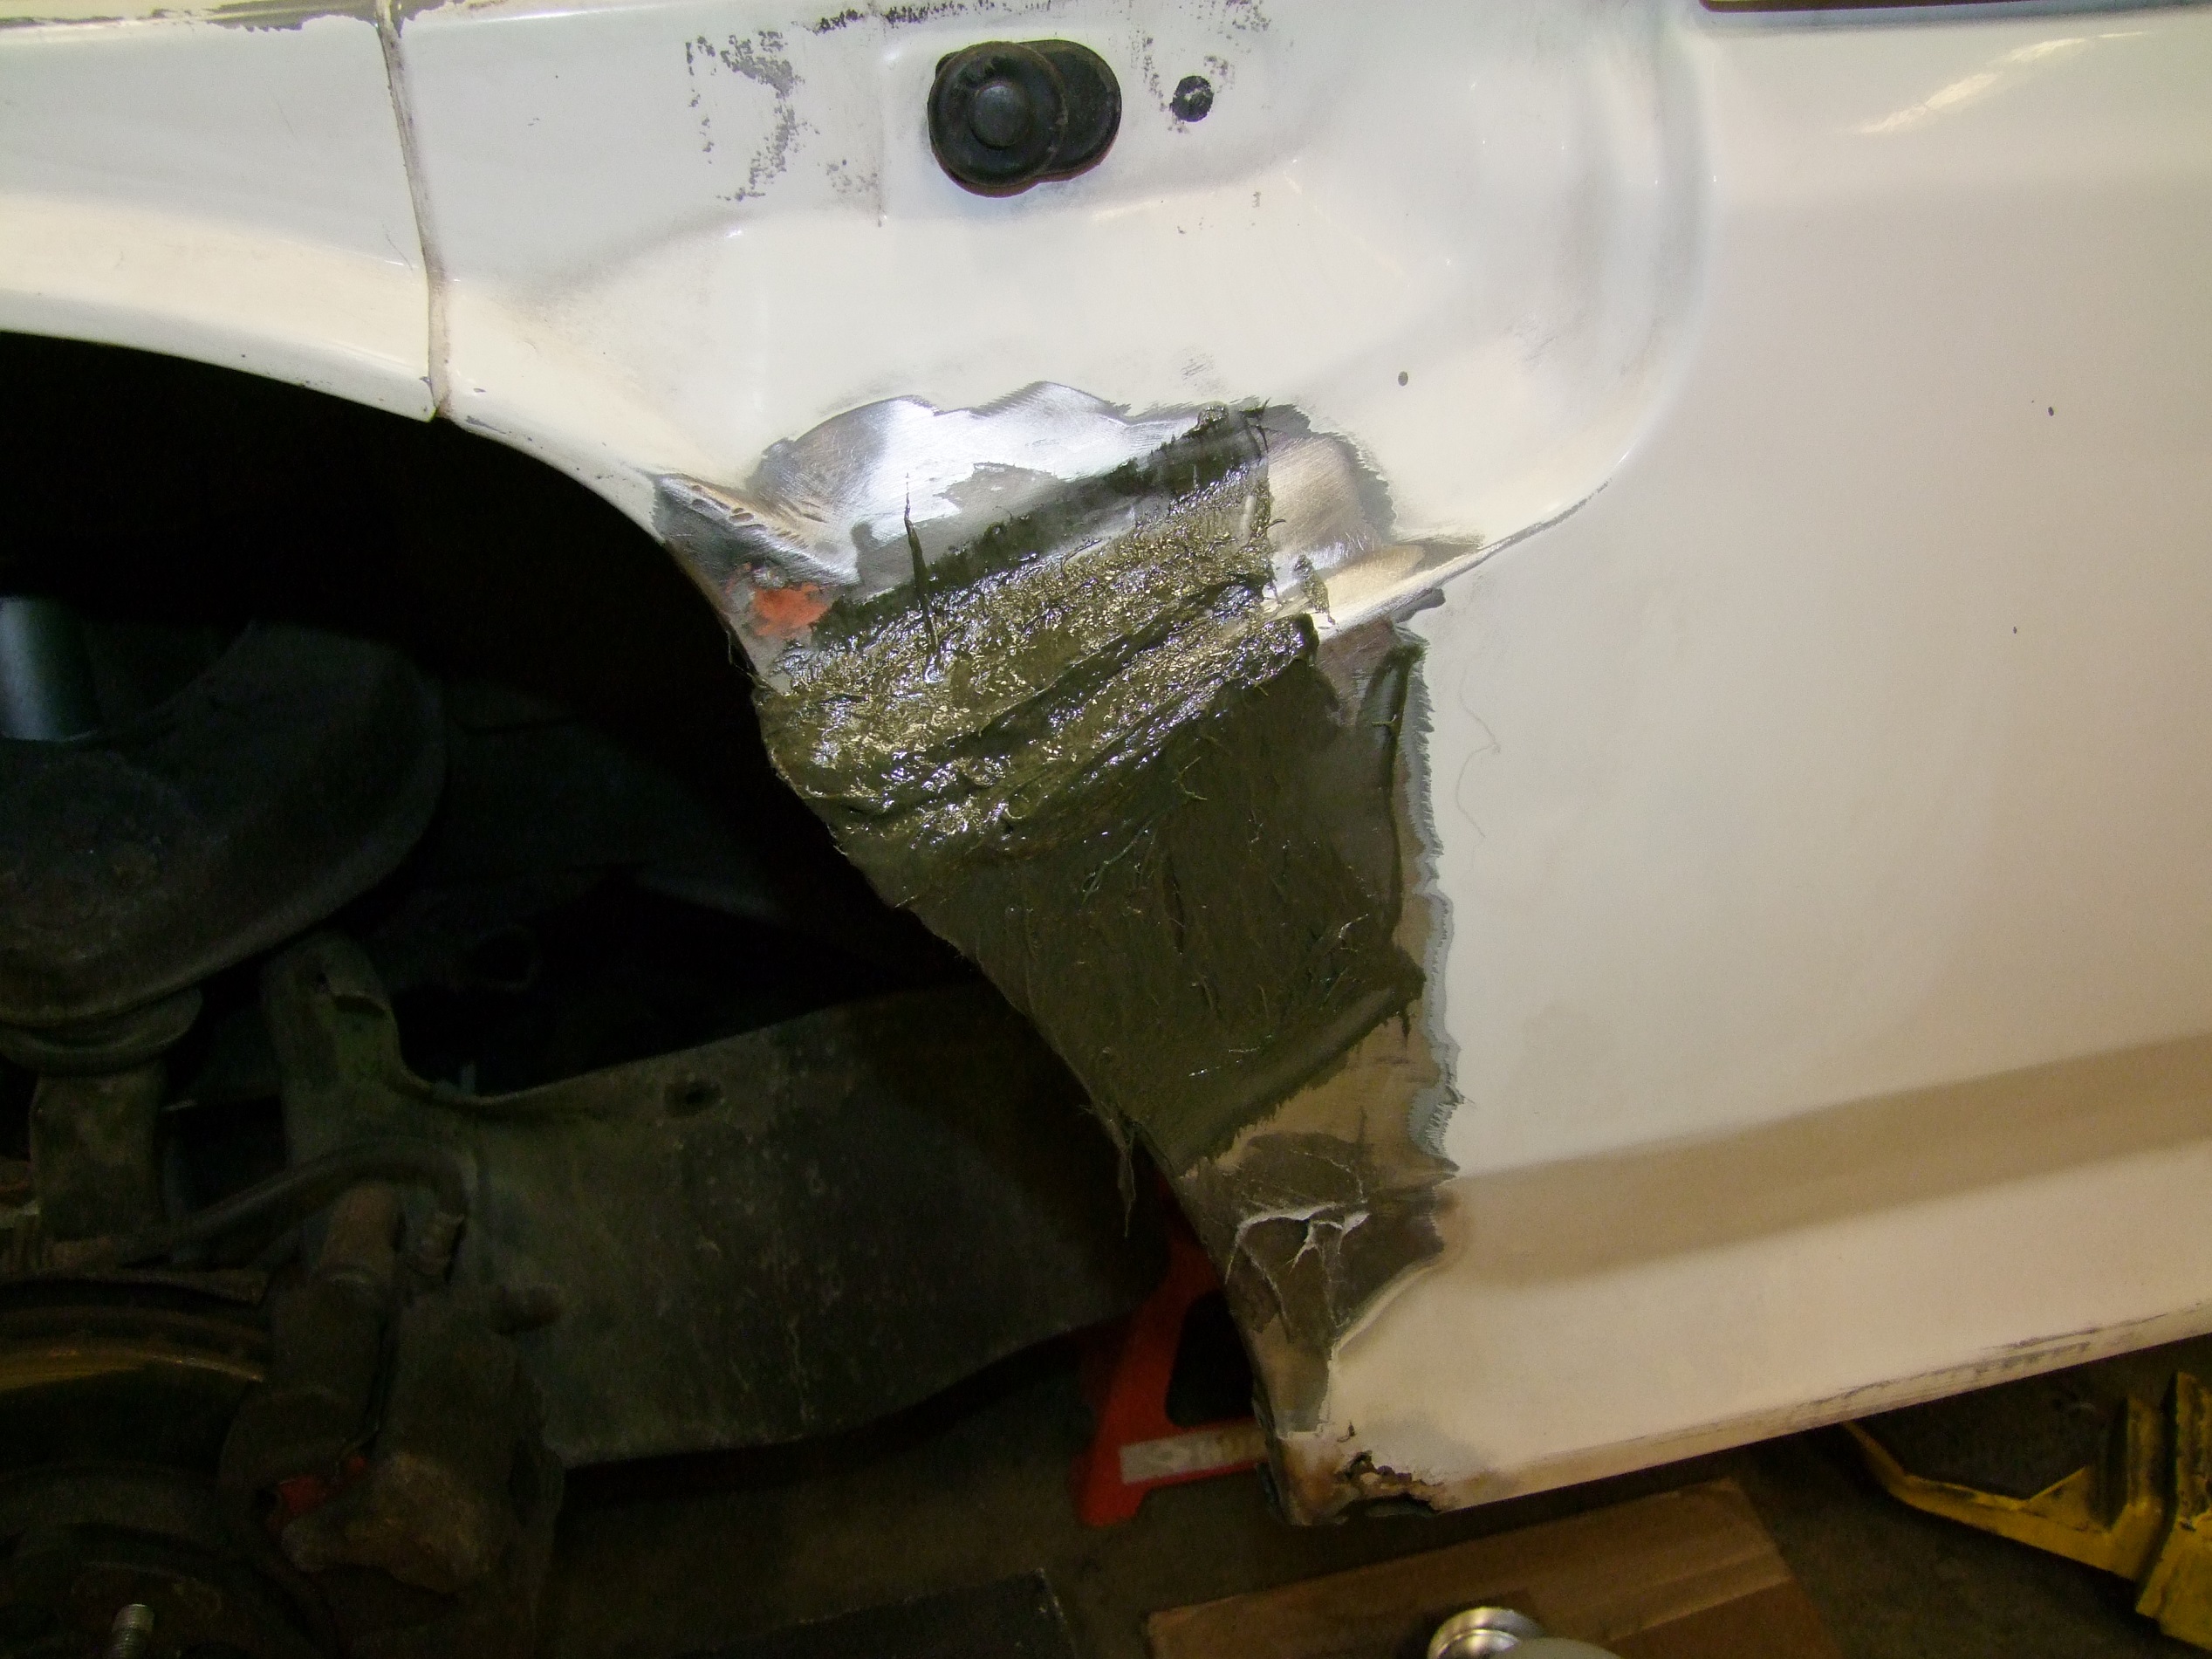
The large brown patch in both preceding images is a berm made of fiberglass-filled Bondo I picked up because I was advised it has much higher strength than the regular pasty stuff. I then mixed in some short-strand glass filler from the Solar Car team (basically, the whole thing will eventually turn into a solar car).
The finished region is probably the strongest point on the whole body. I’ve heard of people mixing their own glass filler with normal pasty Bondo before, but who’s gone even harder and done glass-filled-glass-filled-filler?

Night #1 was spent letting the whole goopy pile cure under the influence of a work lamp.
The next day was devoted to finishing and sanding. First, some of the excess glass and filler had to be removed from the wheelwell area behind the folded flange, but I couldn’t get in there with anything facing the right way. Solution?
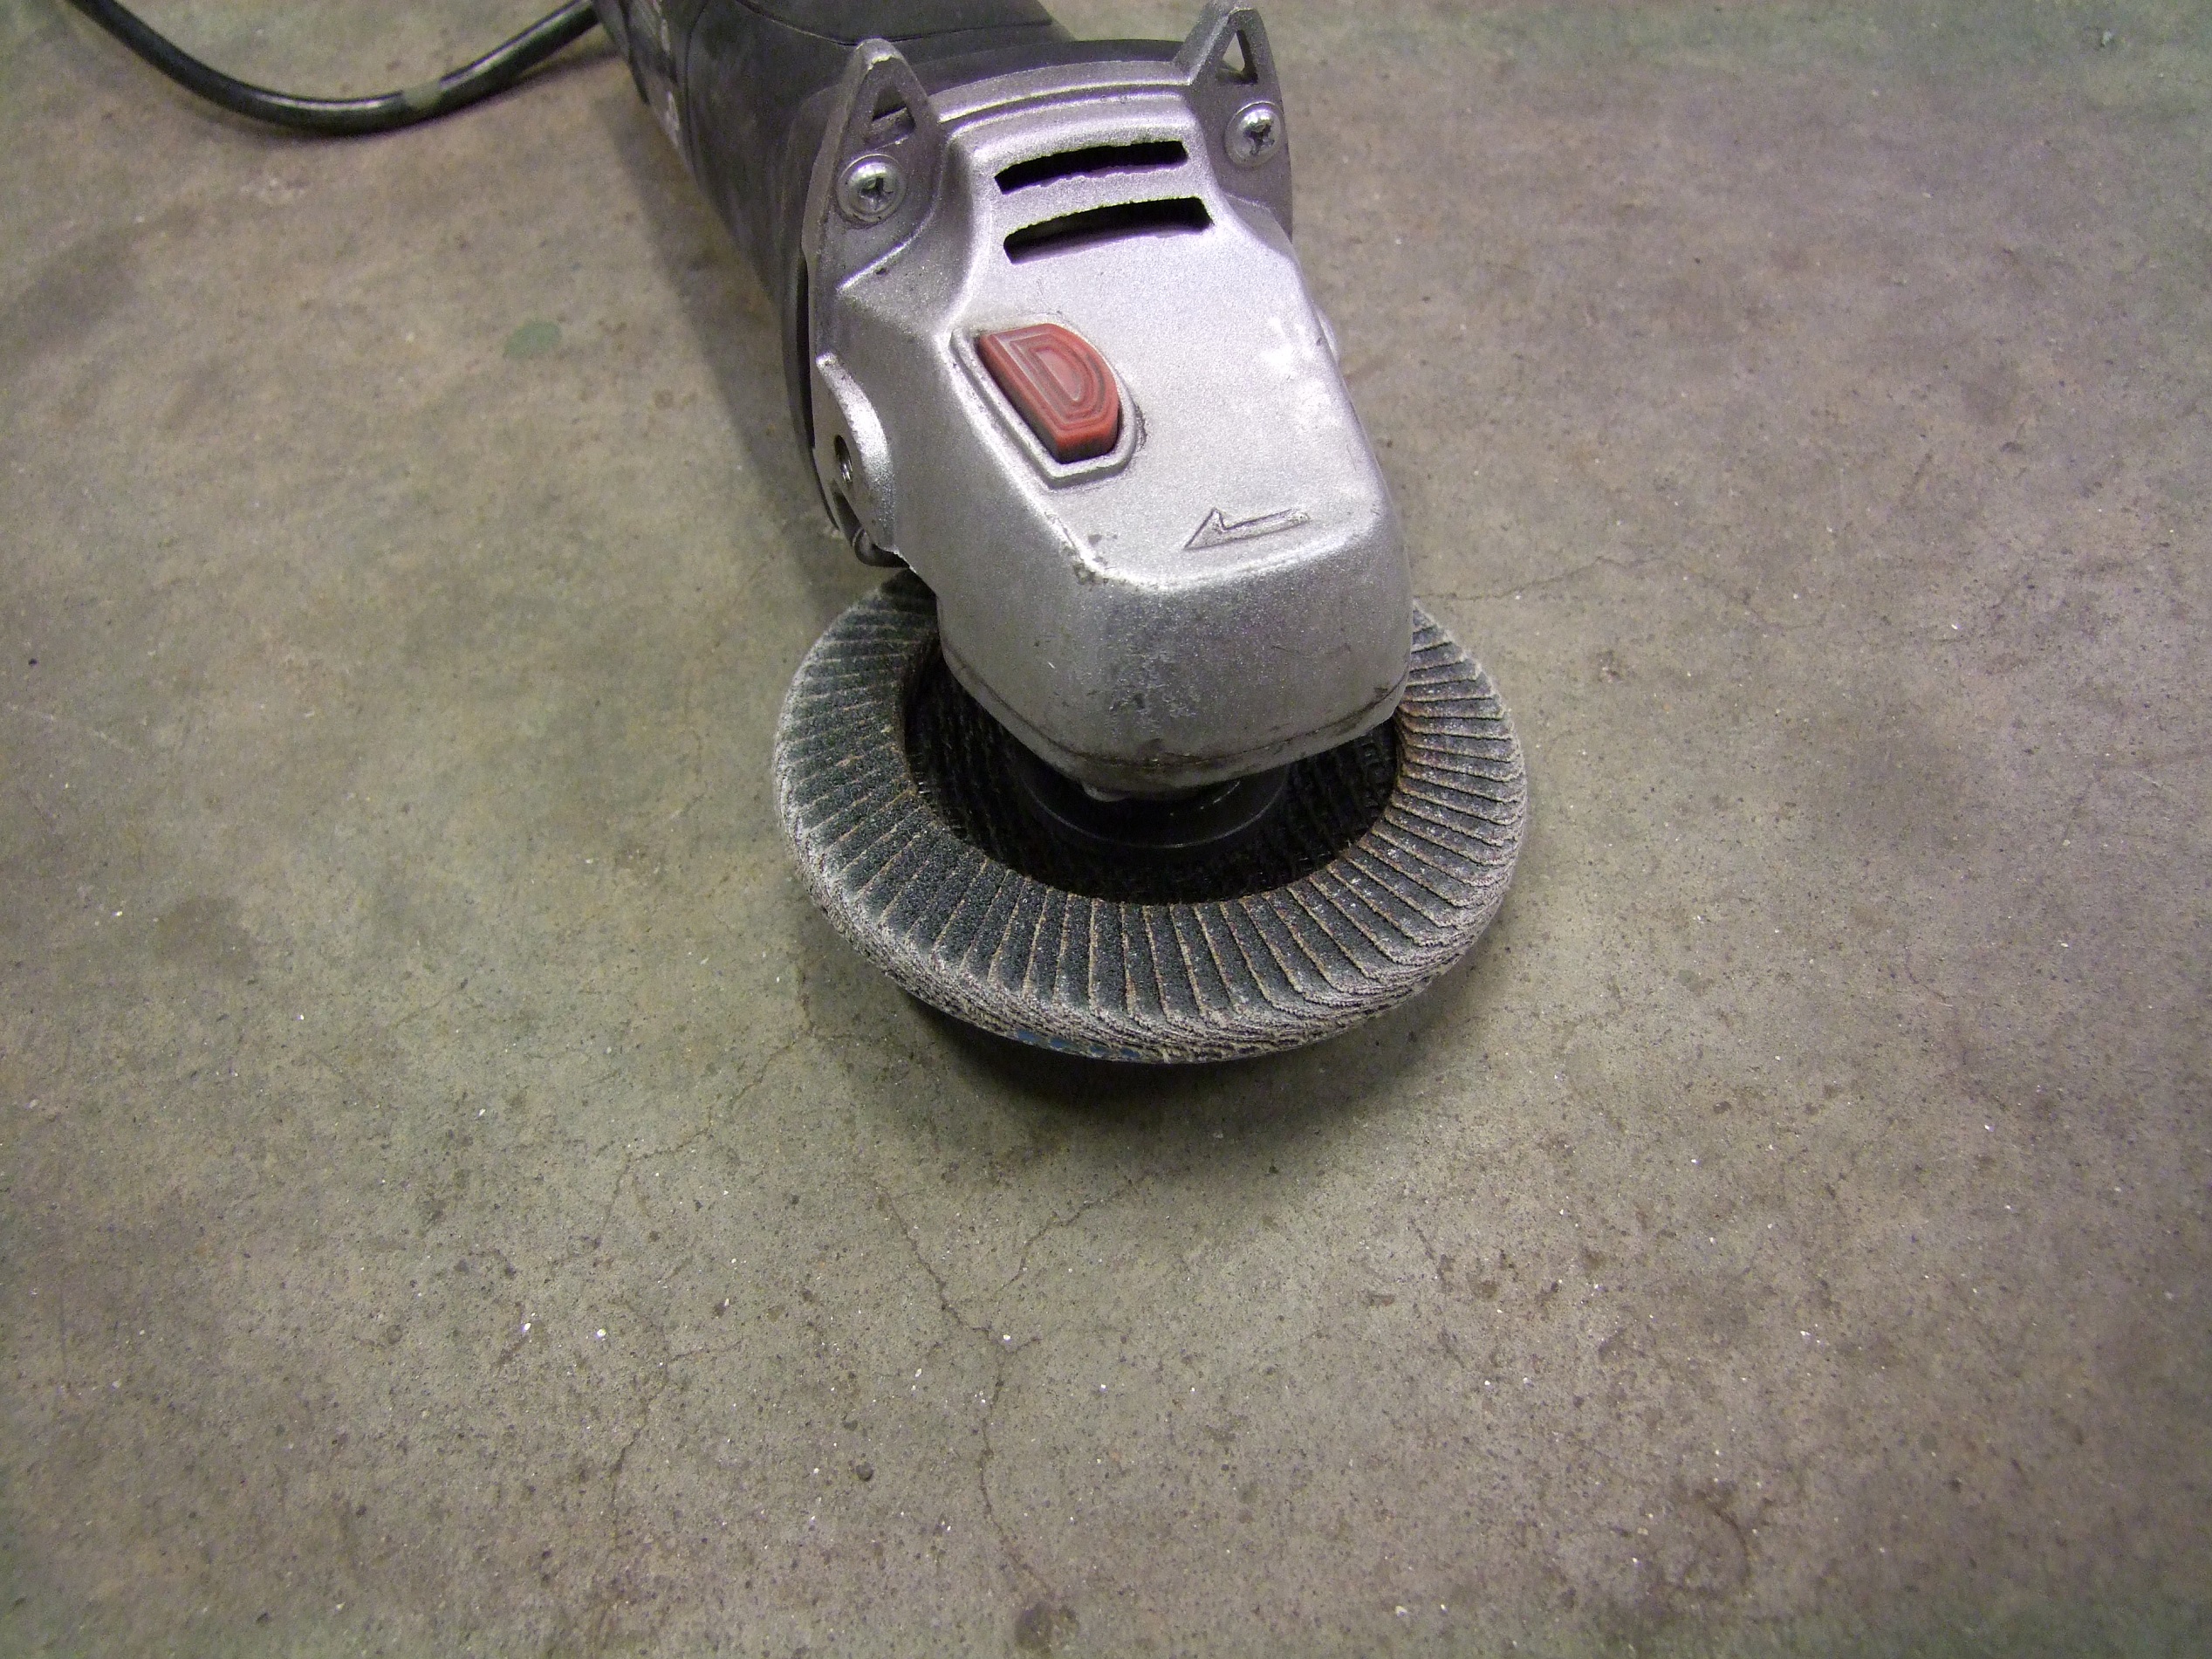
Face it the wrong way. This upside down flap disc was a shoot-around-the-corner method that I made accidentally at first but realized the brilliance. With light pressure, this was actually working beautifully.
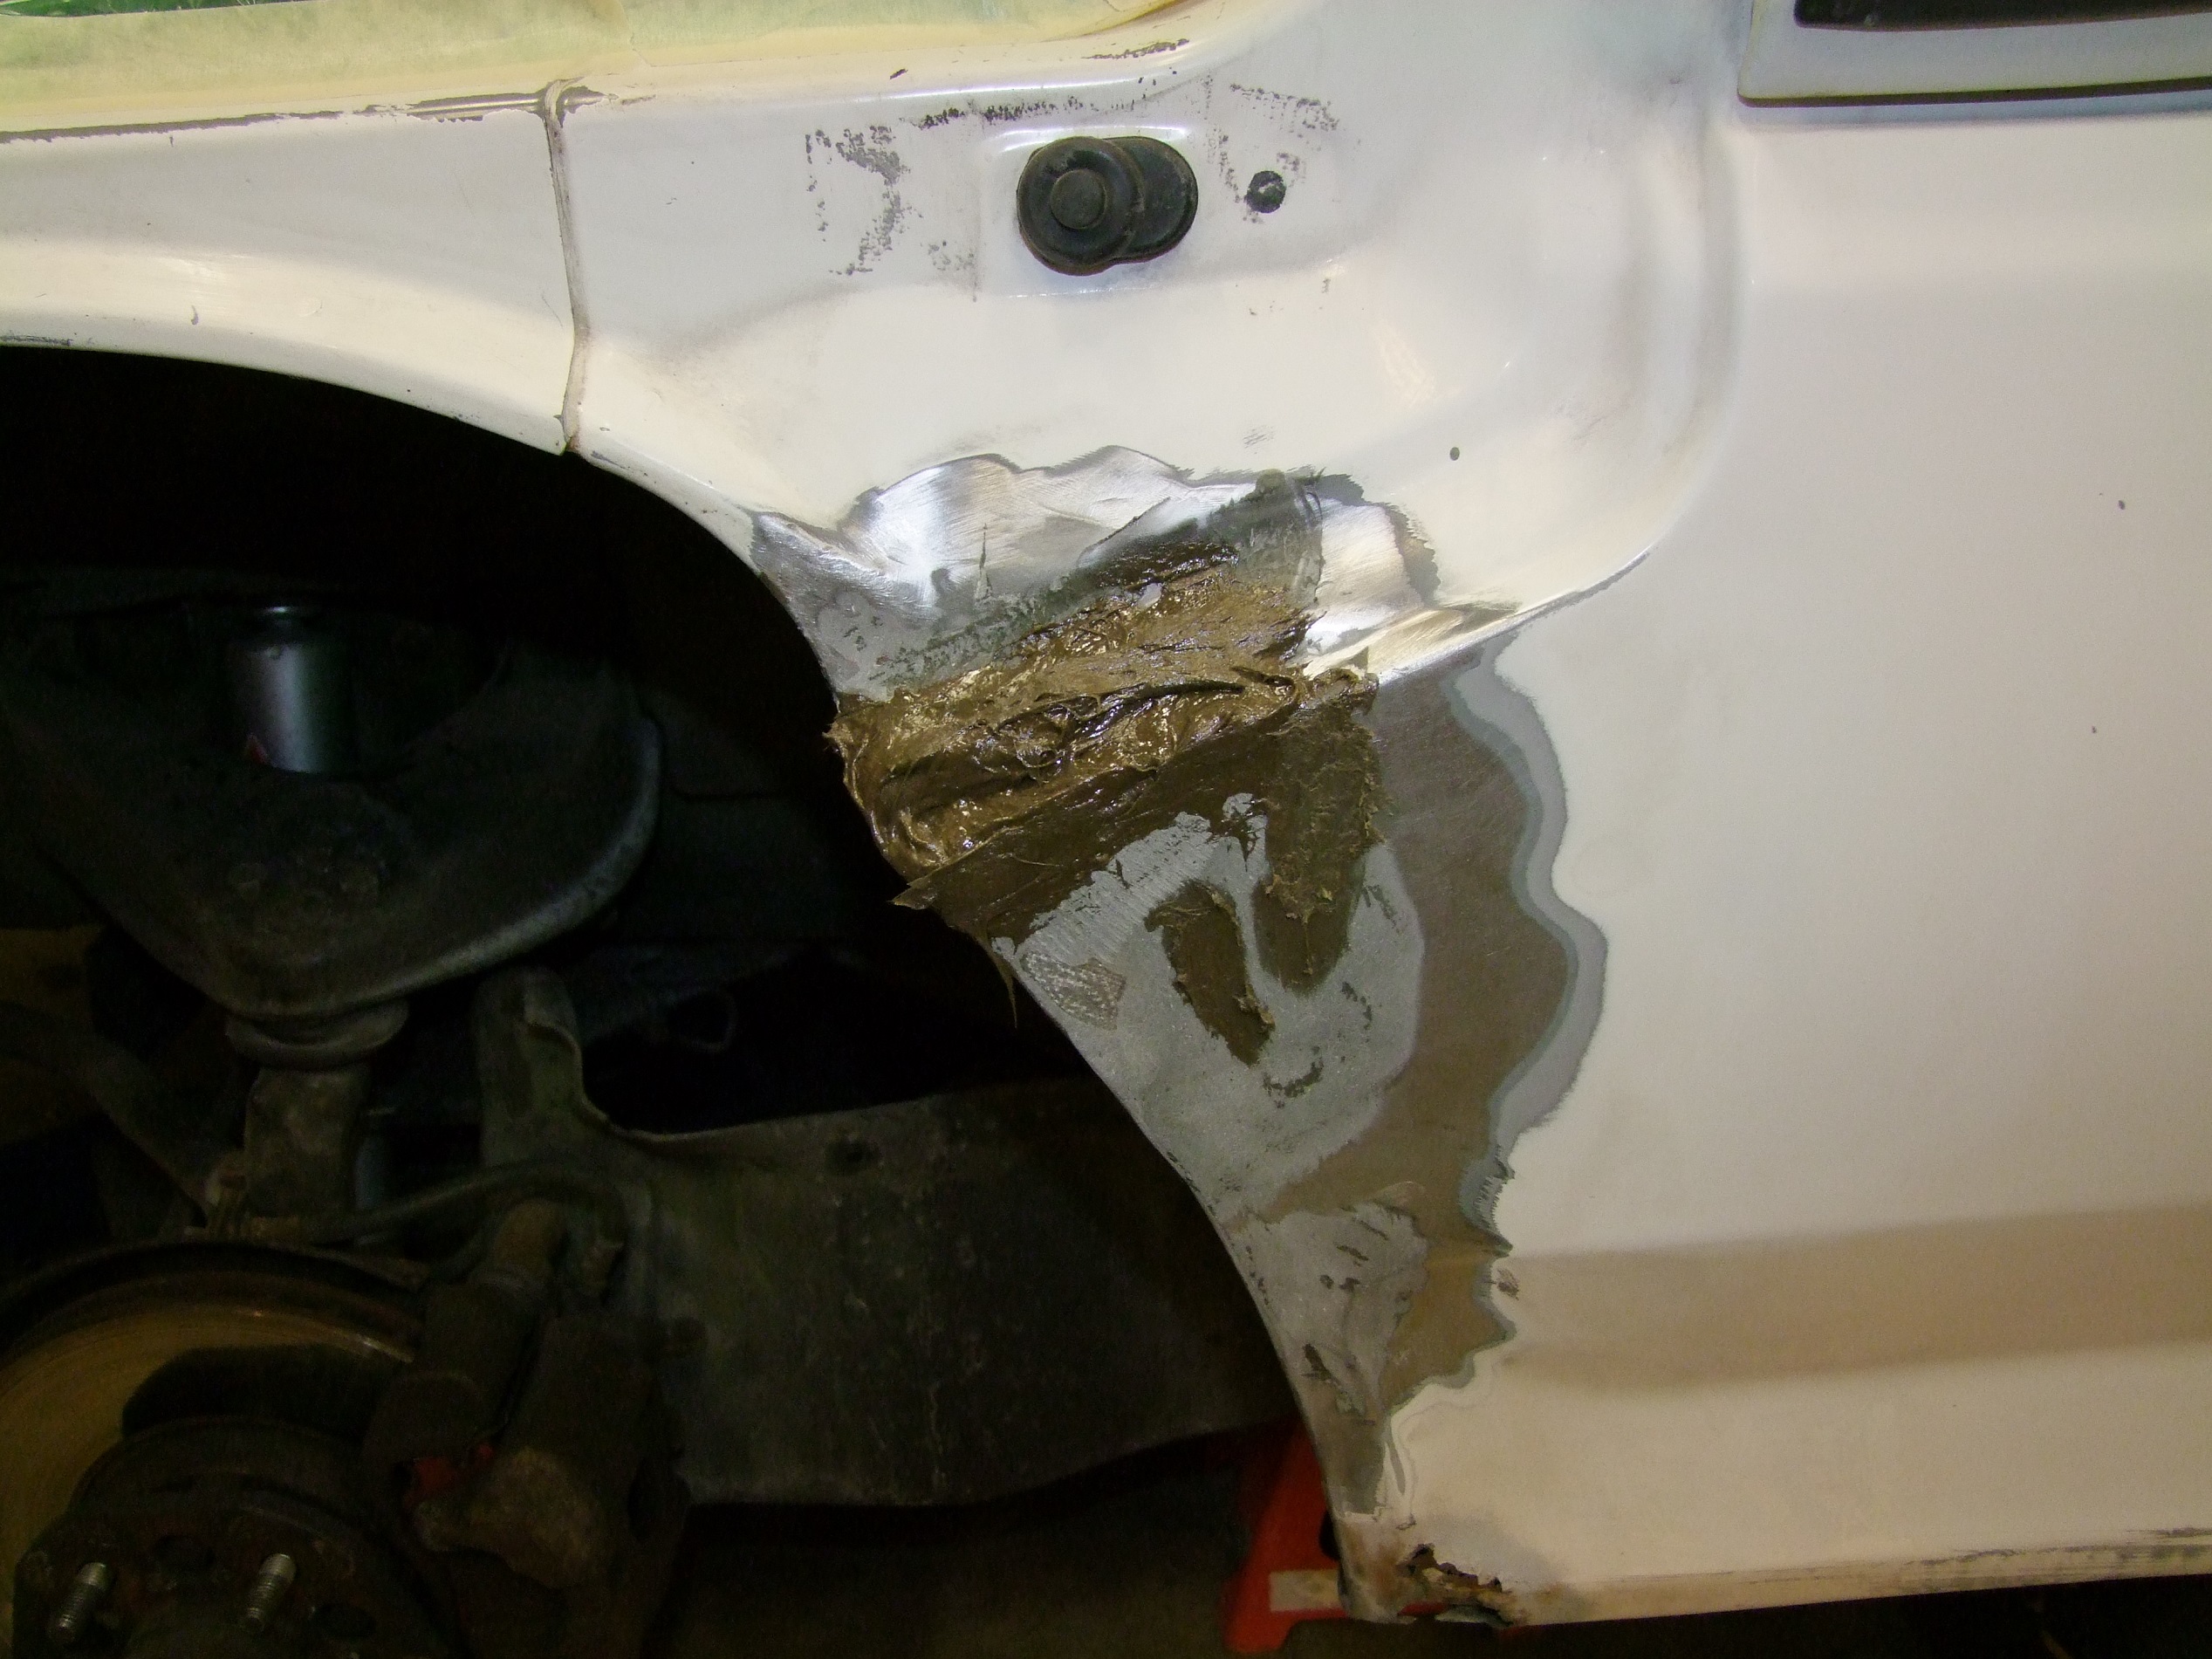
After initial sanding and cleaning, this is Bondo layer 1. I continued using the fibery stuff, but without additional fiber. I do like this substance a lot, but it IS substantially more difficult to mix and apply because of its tendency to behave like trying to fork spaghetti out of a serving dish – some of it wants to come along, some of it doesn’t, and you end up making a drooly mess. It was easier to mix small wads, grab the whole wad, and smear it all over the place (rubber gloves are basically mandatory here).

In the middle of hand and power sanding the mountaintops down. At this point, I was still going for rough fit.

Hmm, not quite there yet. I promised myself I would take time and put energy into making this corner look nice, so…
Layer two time! One thing I learned about body filling is that slathering is essential, compared to being conservative. You slather and then shape & sand away, and so the method leaves you the maximum possible error budget to make adjustments. I’ve been too stingy before, which pains me greatly to admit.

This time, in order to have more control of the shape, I only used a power palm sander briefly to knock down the peaks, then used a flexible body file to d….
Wait, no, I didn’t have a body file. I used a short rough D-profile wood file here. This stuff sculpts easily, and the process did not take as long as I imagined.
The other side, which doesn’t have damage in this region, was used for reference. This is also another reason why I shyed away from the step holes for now: No reference, because both sides have holes.
Looking way better now – this was near the end of the rough shaping process.
I moved onto fine finishing with manual sanding. This time, I had 80, 240, and 360 grit sandpapers (guess who I stole it from….) and went progressively finer as I converged on the shape. Serious body guys would go even finer.
After I was satisfied with the outline, I used “spot putty” compound to cover minor divots. There were multiple passes of this stuff too – apply and smooth, come back in half an hour to sand gently, repeat. It seems to be nail polish filled with the same mineral fillers that make up Bondo.
In fact, that must be how it was invented.
After that ordeal, it was time to start painting. First, I rough-sanded and cleaned an area substantially outside the boundaries of the repair for the new primer to stick to. I used auto store spraypaint primer – nothing special. It was applied in several light coats – I’m getting way better at making spraypaint not run.

The next day, it was time for several body color and clear coats. After the first white coat, I took away most of the masking plastic and let it “blend” the surrounding area, which got a quick hit with left over 360 grit beforehand. No actual mechanical polishing blending was done, it was all just technically overspray. Luckily, white is a hard color to fuck up. You can discern the color difference if you’re looking for it, but I’m again counting on the fact that 99.7% of everyone will not know I am a fake body guy.

The interior of the wheelwell got the Slather Policy. I cleaned and painted this area in the same passes as the exterior, but did not care where it ended up. In fact, the more overlap, the better!
It was finished off with a few coats of spray-on underbody paint.
So there we go. This took from Friday evening until Monday afternoon – the first night was dedicated to glass curing, the second to let the filler layers cure, and the third was in the middle between primer and top coats.
With this experimental application of glass-filled-glass-filled Bondo being successful, I think I’ve formulated a plot for the wheelwell area. Cut away what I can, make a ‘backing’ glass layer in the wheelwell itself (which nobody will look at), then fill the whole area with this concoction and sculpt to shape, following with a top glass layer. I’m interested in reading up on how to deal with concave areas, since you can’t really reach a file or similar into a corner.
Operation: ALTERNATIVE SOLUTION
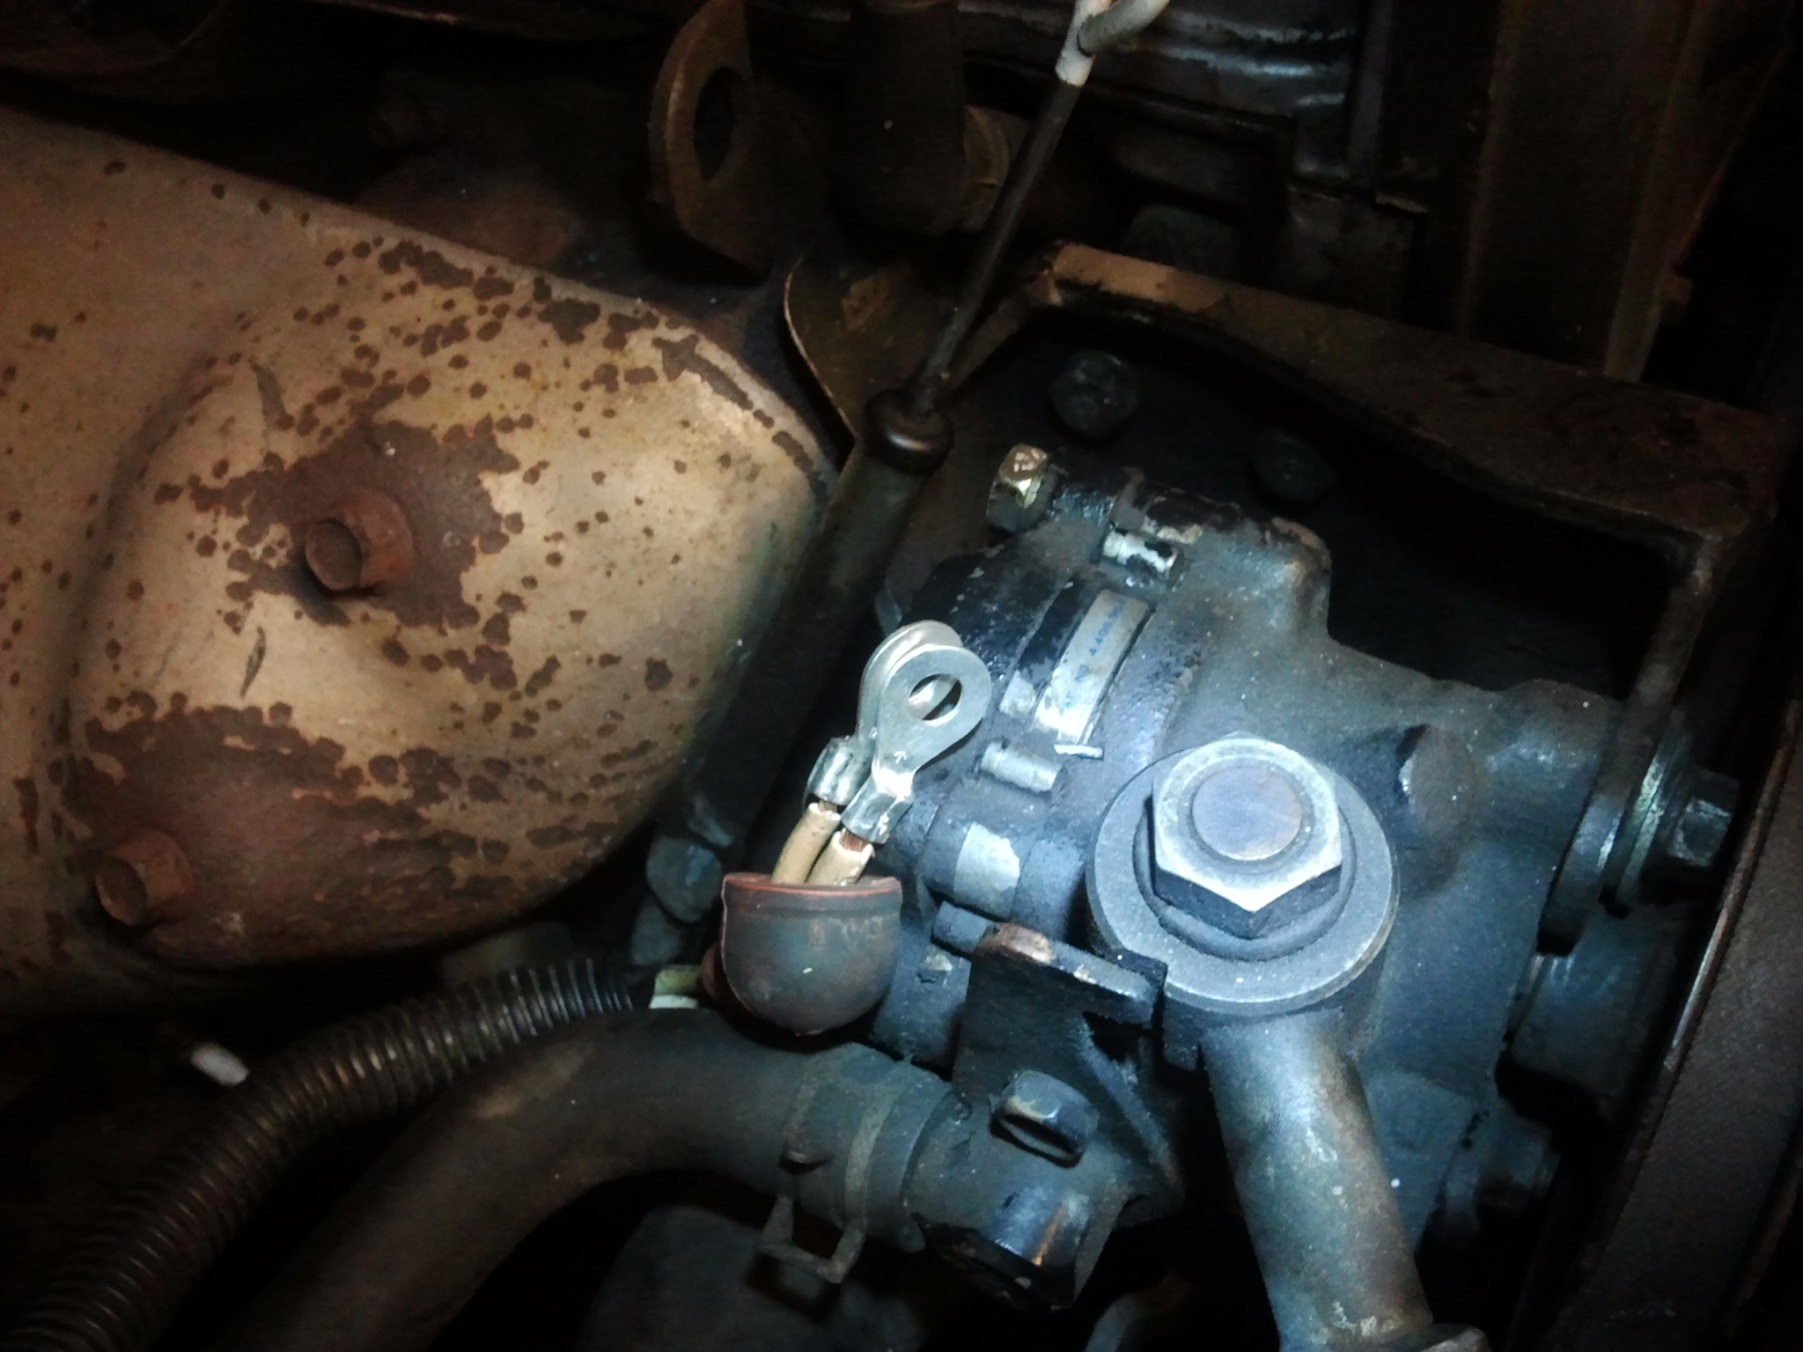
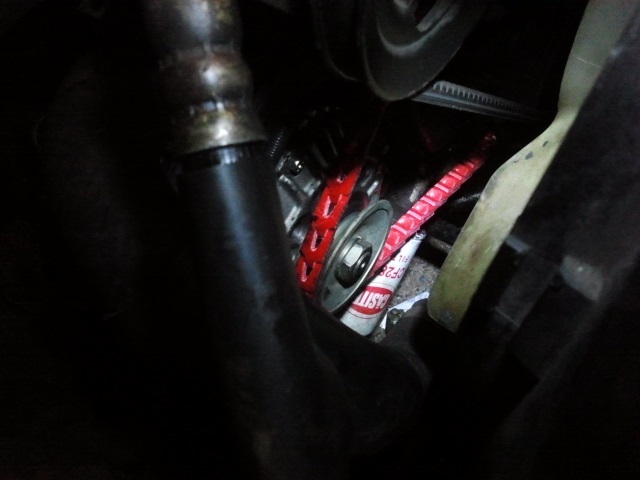
As mentioned during the Week of Motorama Hell, on the Monday of the competition week, the (probably original) alternator stopped alternating at some point. In this nondescript picture of the front of the engine, it’s the blob of grunge with a pulley on it to the lower left.
In fact, it probably gave out over the weekend, but I only noticed on Monday night when hey, all my lights are really dim and stuff and it’s kind of running like shit since reserve charge on the battery is enough to scoot around town getting parts for a few hours. I’m amazed at just how many parts on this thing were within 10,000 miles of peacing out. Like small prey rodents, reliability engineered machines tend to hide illnesses until there is no other choice.
Well, there was not much I could do but buy a replacement and get it shipped fast. I went the Rock Auto route, because all of the area auto stores had to special order this part anyway. Since the vehicle hasn’t exhibited any electrical trouble up until that point, I figured the alternator just finally ran out of brushes. Having taken apart a few in the recent past to investigate using them as wound-field AC motors, I know they have brushes, and I also know that brushes like to wear out over time, so….
Anyways, the alternator wasn’t hard to get to. What I’ve learned is that there are often two ways of removing a part – following the carefully laid out instructions in the service manual and disassembling the entire vehicle, or just forcefully shoving my arm into a nether region with a mini-ratchet and accepting that I’m going to leave some blood and skin on something. I actually prefer the latter because I can see the screw from right here, dammit!.
(Note: the previous sentence was a dramatization; only small scrapes were suffered from being shoulder deep in the cooling fan, power steering pump, and radiator)

So I’ve gotten the tensioner loosened and the pivot bolt thing out and now it’s time to unbolt the B+ terminal and…
…it shears right off. Great. At least I can solder.
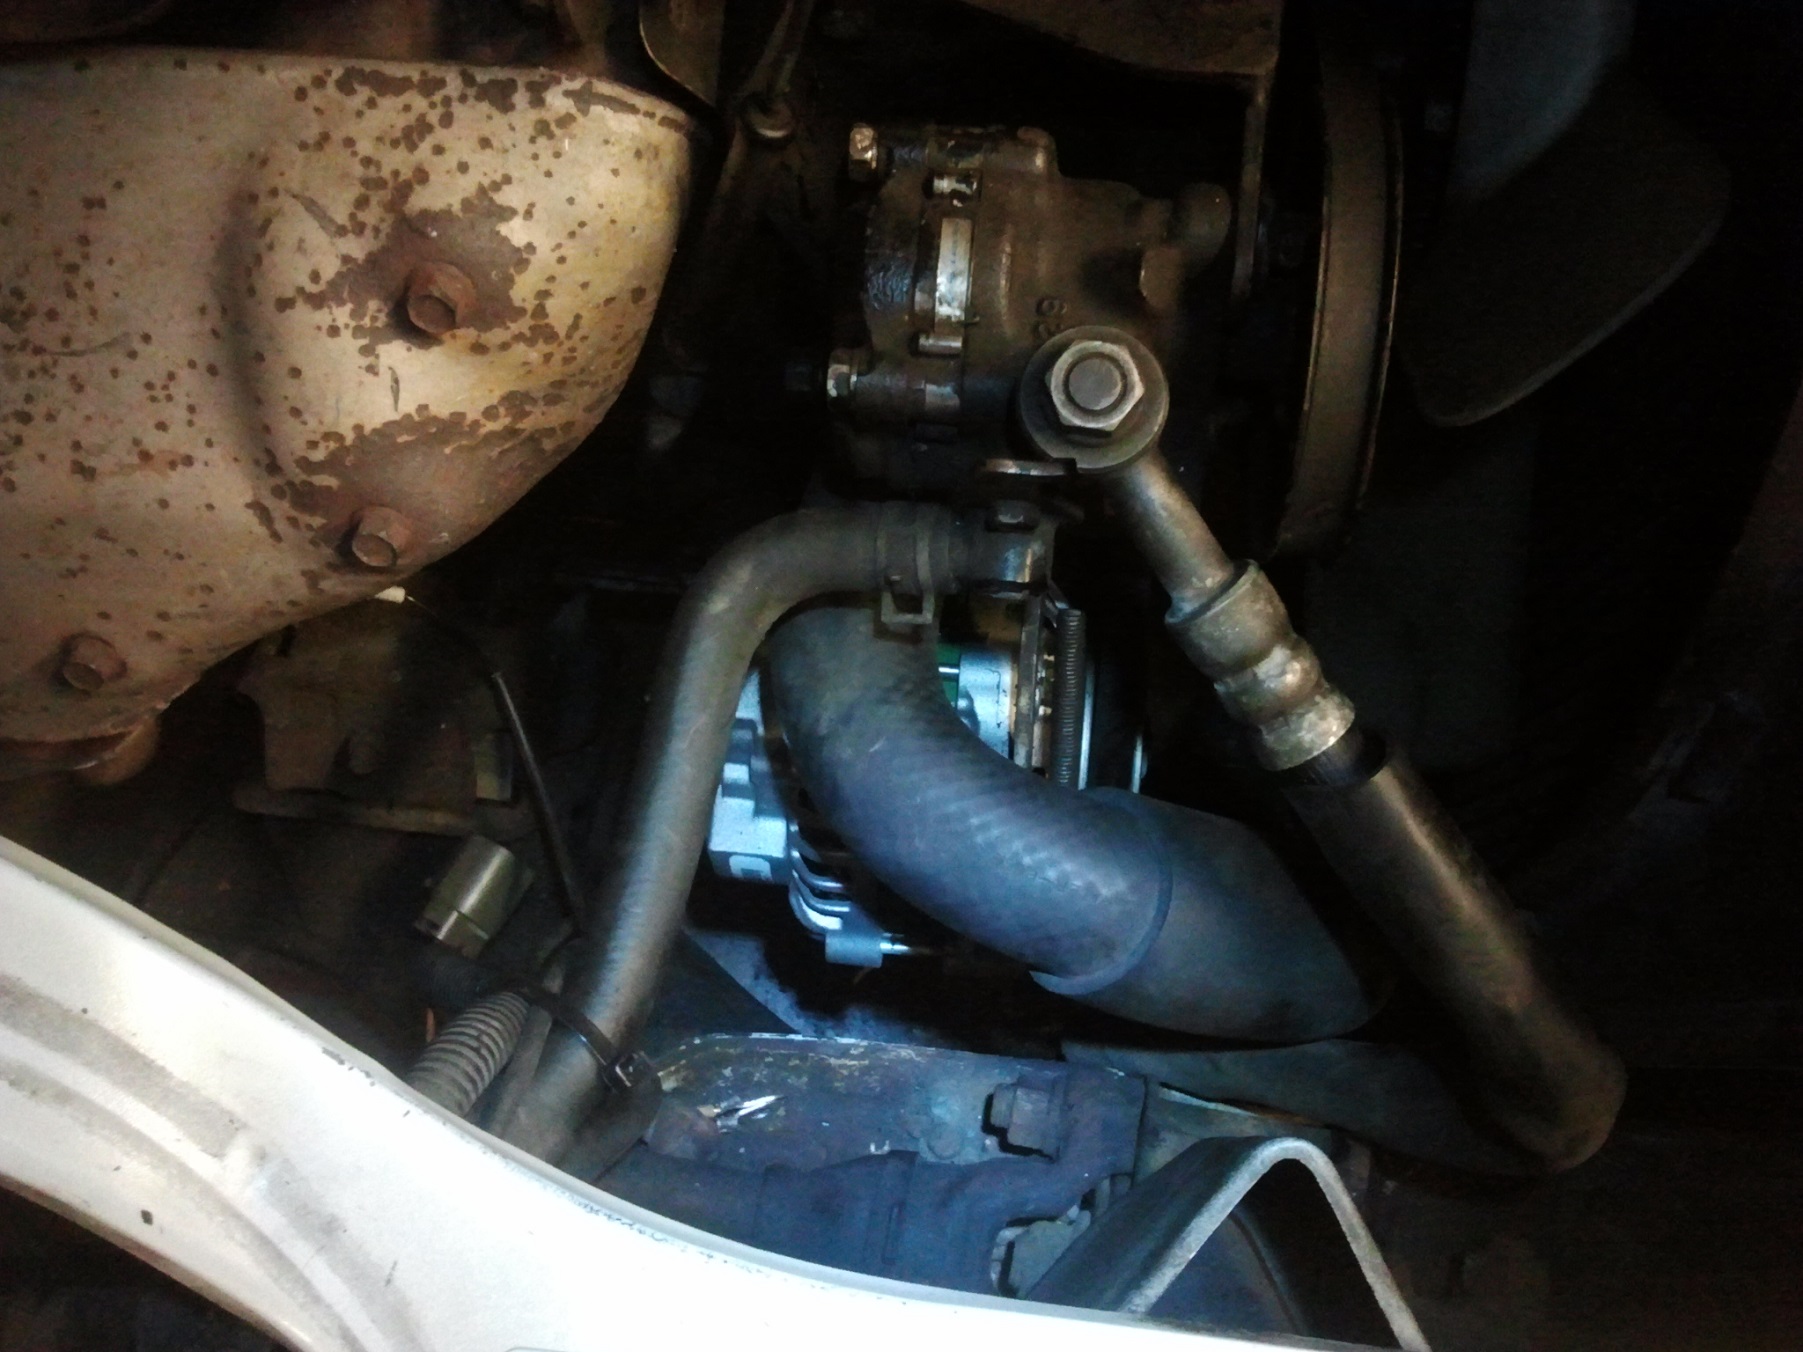
Getting this thing out was a careful multi-point reorientation job while slowly pulling up. The gap next to the exhaust manifold cover and the lower wiring harness seen was its escape path – it just barely fit. One… alternative… path is to take off the oil filter and drop it out underneath. The official by-the-book replacement is 75% of the way to a new timing belt.
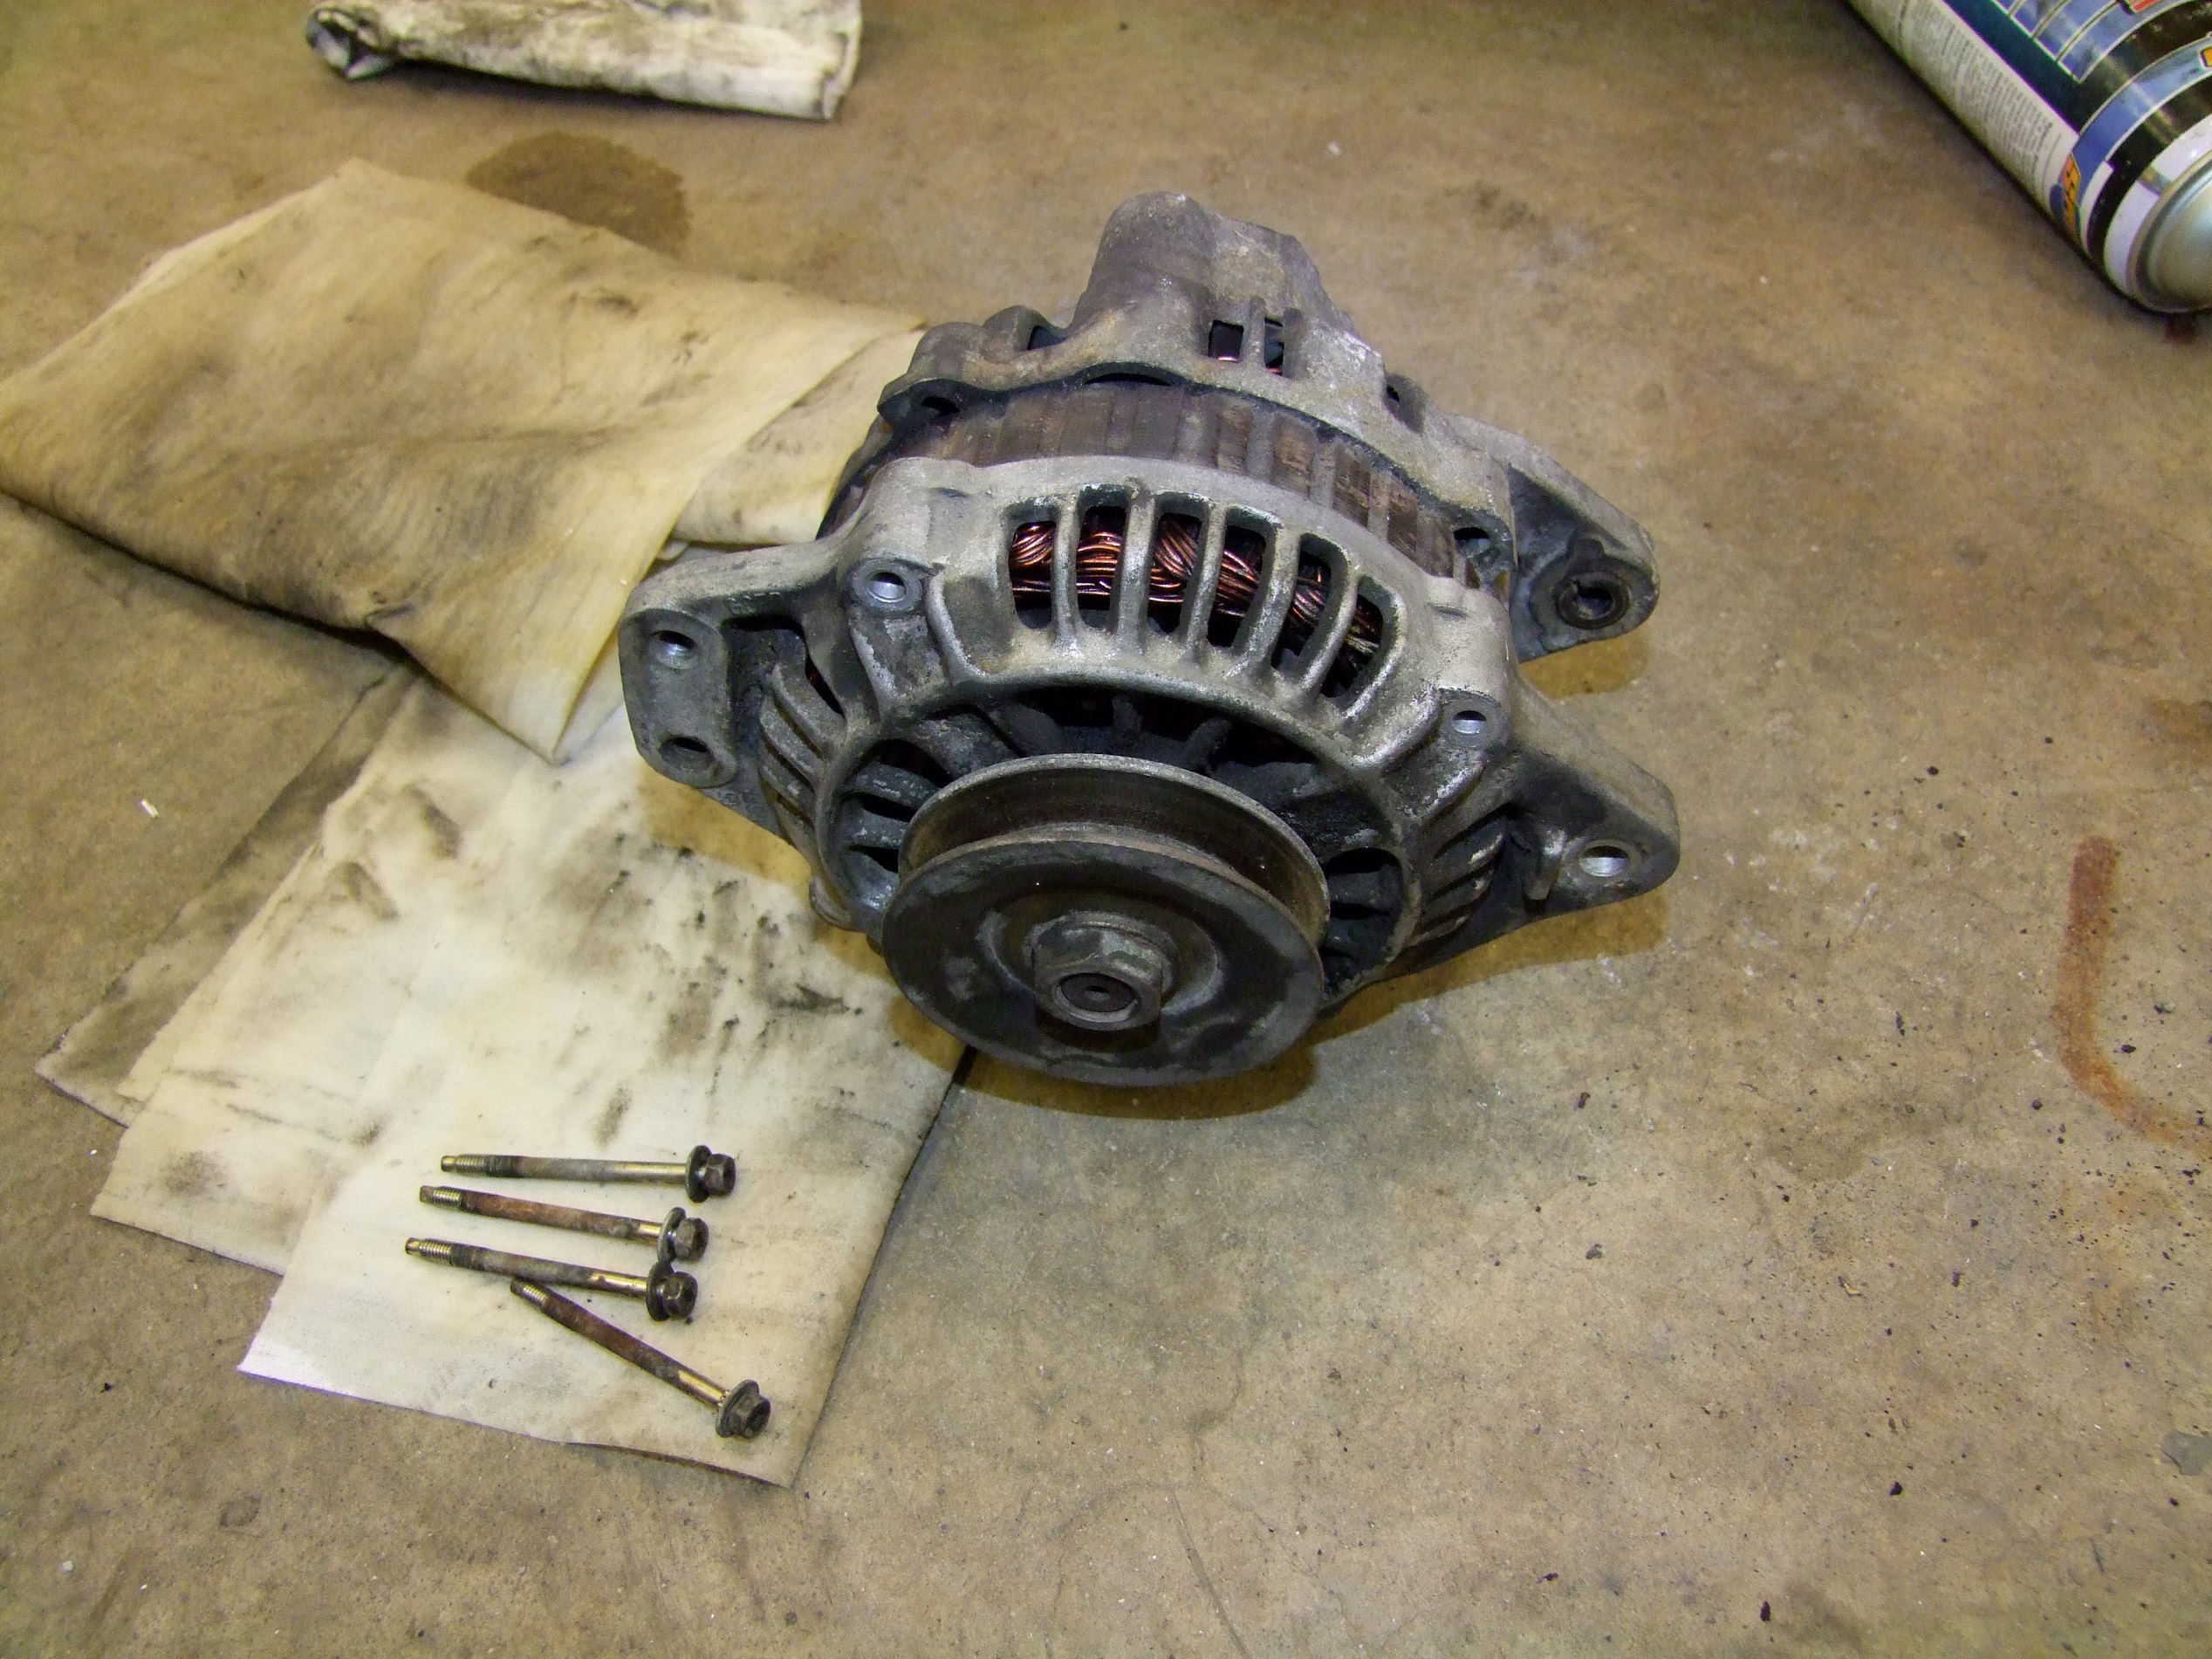
This thing is looking pretty ragged. Because it was Motorama Thursday at this point, and my package was nailbightingly undelivered, I decided to try rebuilding it with scooter motor brushes. I hold to my statement that Mikuvan will soon become 1. a solar car, or alternatively, 2. a small, cheap Chinese electric scooter.
I rebuilt the air conditioner blower motor with harvested scooter motor brushes. It’s still working.
So, how do I take the alternator apart? Why, the old “Pry with screwdriver”. In the electrical service manual, it literally tells me to stick a plain screwdriver between the bracket and stator and pry. There’s even little slots in the laminations to jam said screwdriver into.
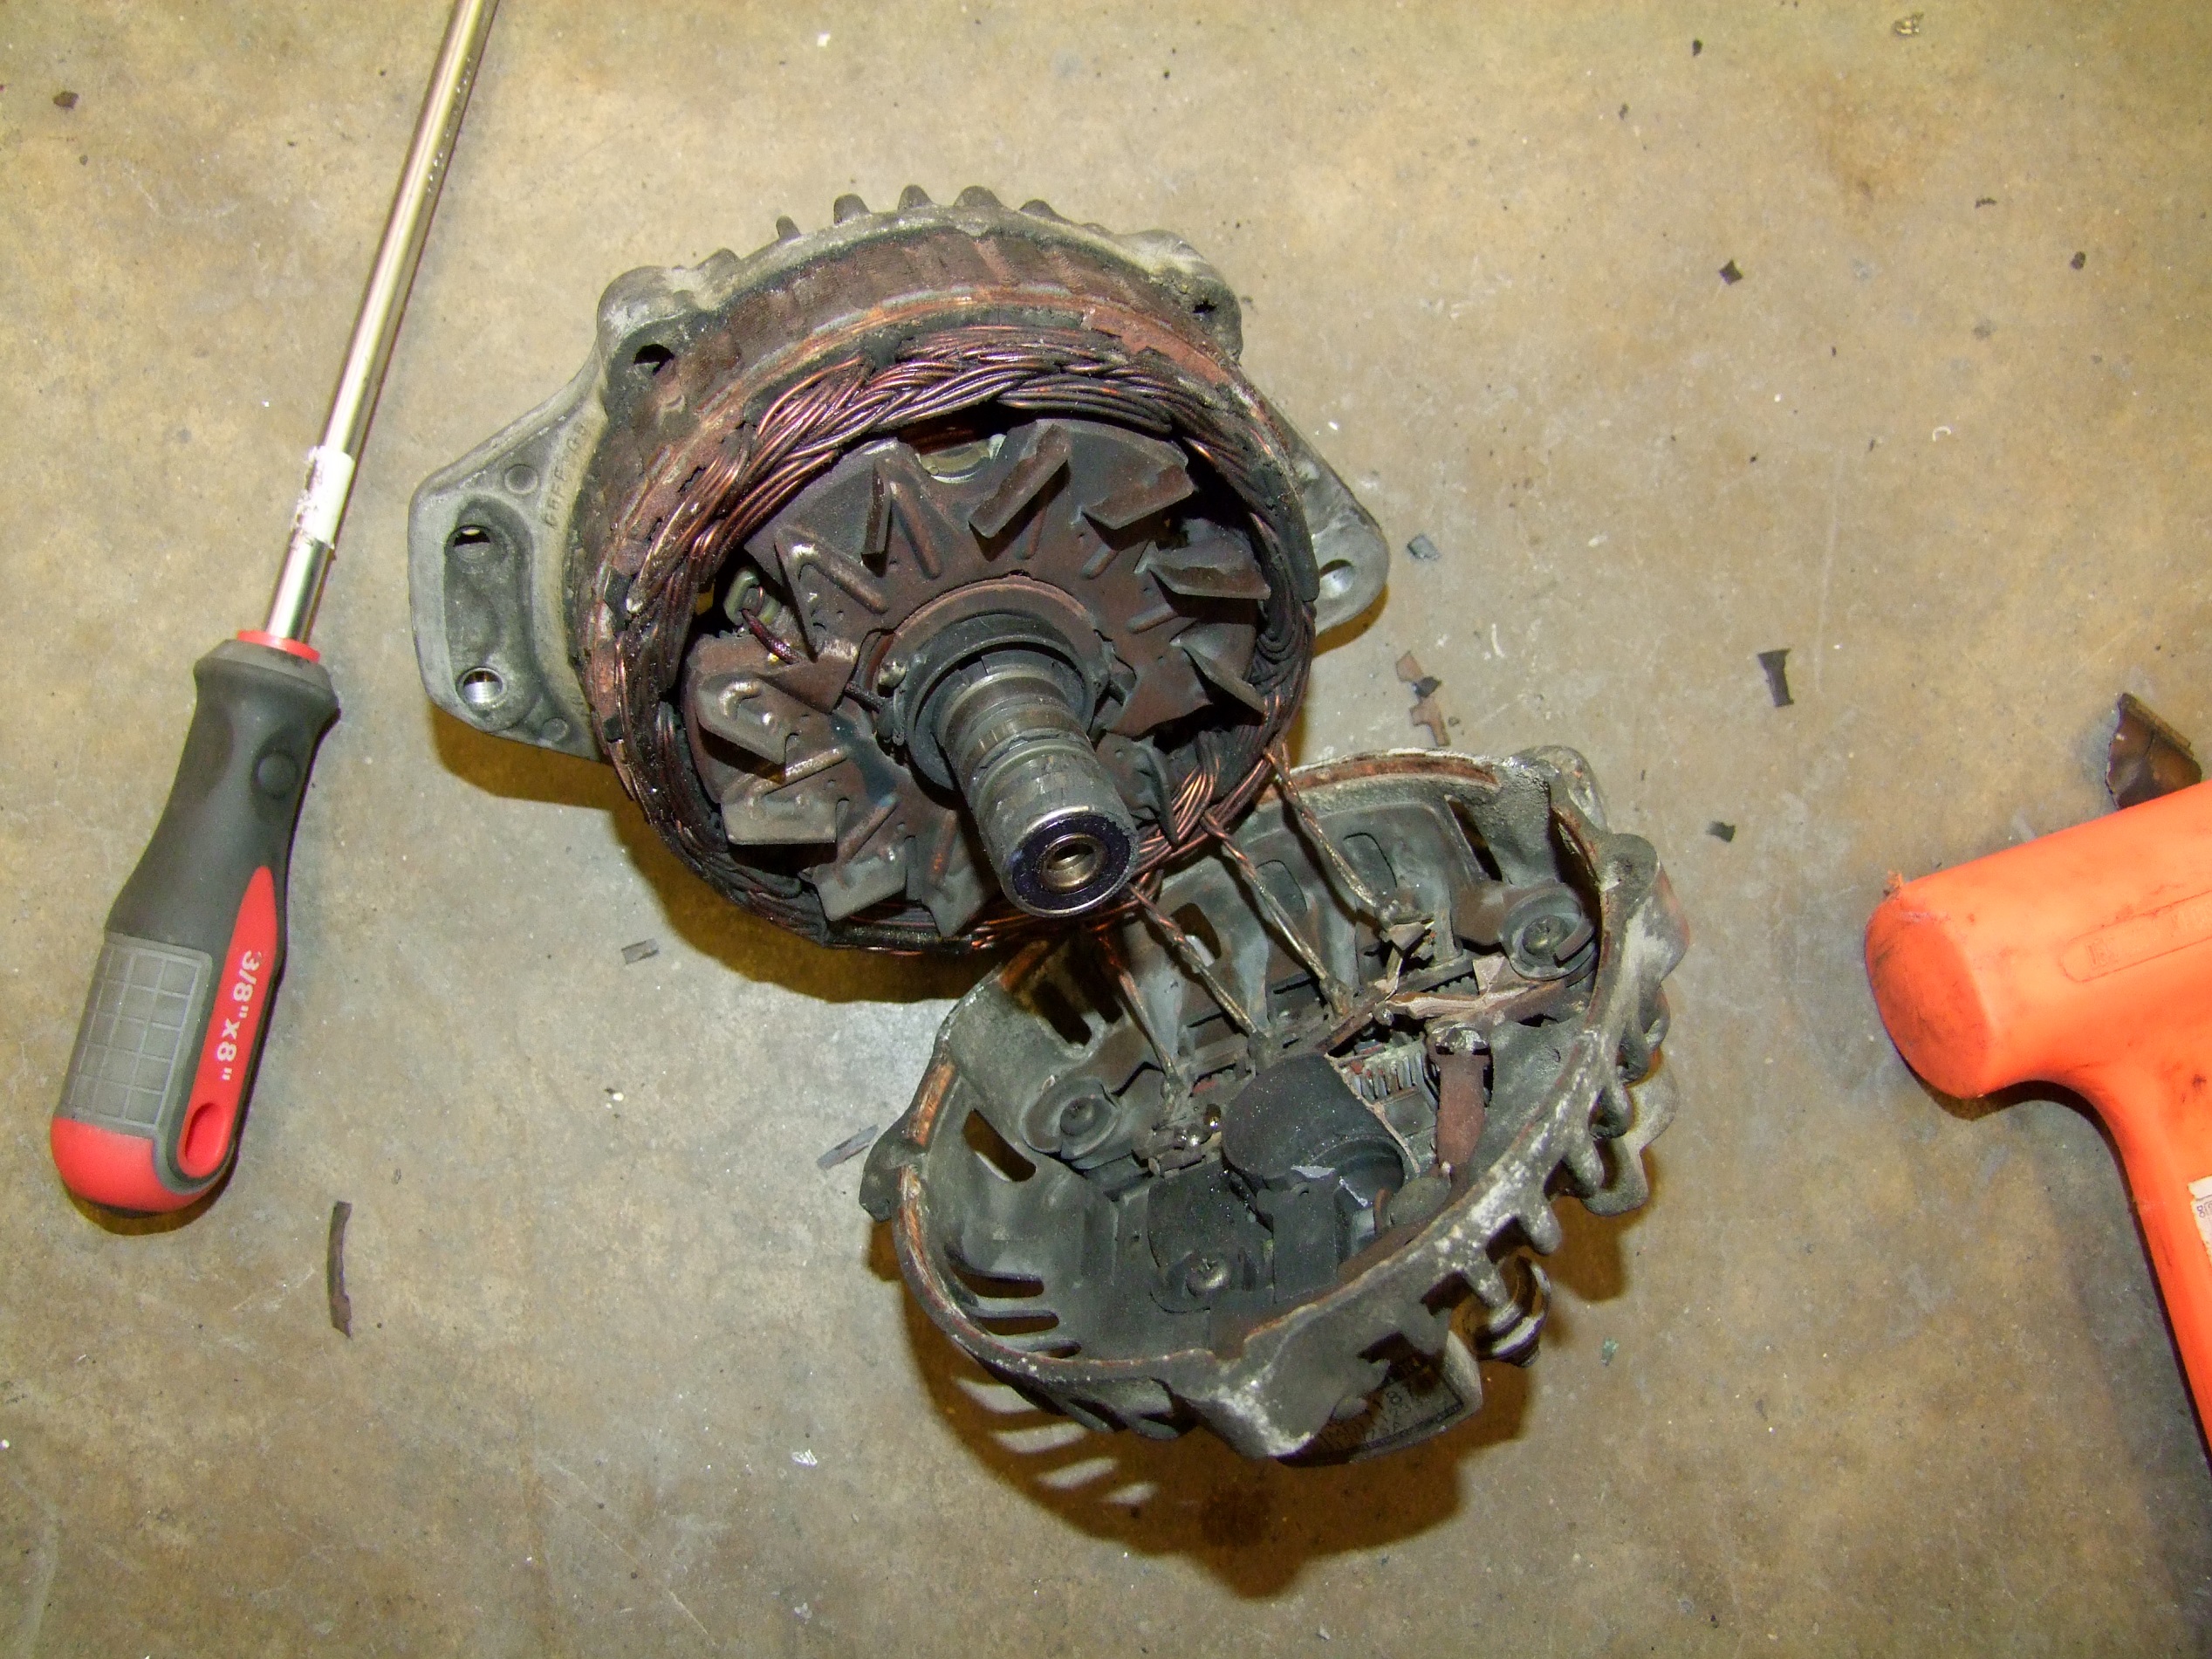
Haven’t I learned anything from the last time something told me to “Pry with screwdriver“? It must be the Harbor Freight screwdriver.
Alright, now that I’ve successfully torn the diodes off, time to sit and wait for Fedex. At the very least, I confirmed that it did run out of brushes – they barely moved when the rotor was taken out, having reached the end of their spring travel.
(I now know that I was supposed to pry the front bracket off, which would have caused the [pulley, front bracket, rotor] assembly to come apart from the [stator, rectifier, brush holder, rear bracket] assembly cleanly. But there were no screwdriver slots there!)
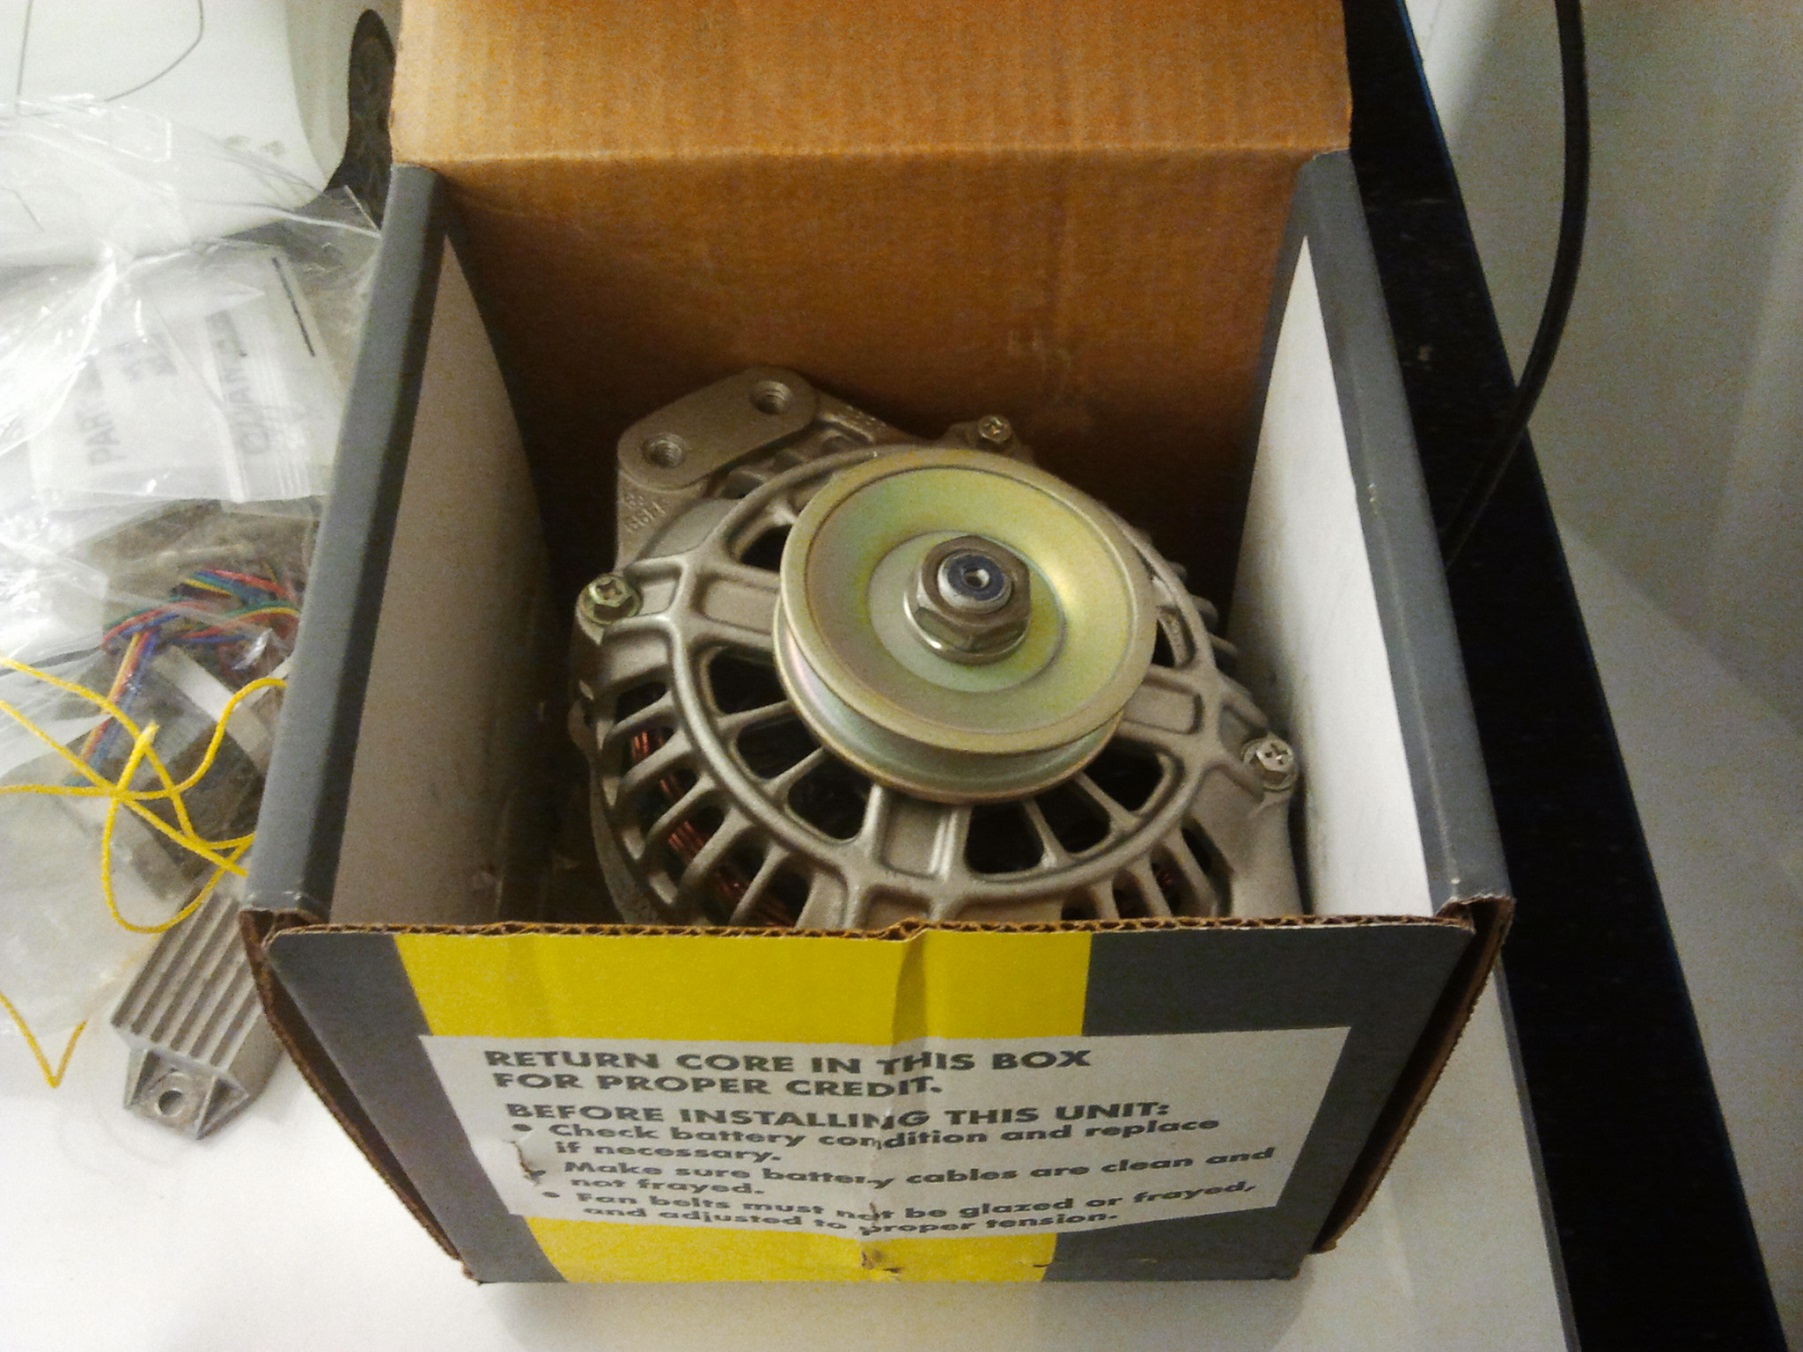
Fortunately, Fedex delivered at 7:30pm on Thursday. In the days prior, we were hit with a few more inches of snow, so everything was backlogged a little. I was fresh off destroying the old alternator, and so was getting ready to call the car rental place by this point.
Hey, you guys sure you want the core?!
Once again, I found myself outside, at night, in Massachusetts, in the middle of winter, trying to solder.
I had to replace the B+ terminals that got ripped off, so I crimped then soldered some 1/4″-stud ring terminals on.
Here it is. At around midnight Friday, everything was back up and running. To reinstall the alternator, I carefully dropped it through the same hole the old one was fished out from, then some more deep-arming with a ratchet on the front side and everything was tight again.
There was only one problem. Either the new pulley is a tad smaller, or the alternator belt that was installed was of the wrong length, because I bottomed the tensioner out and still had enough slack to cause squealing problems at low engine speeds. This translated into neutral-coasting towards red lights while keeping the engine RPMs above 2000, where it could finally catch on. Consider it practice for a manual transmission, but this was how the entire Motorama trip went down (highway cruising wasn’t a problem, luckily).
Afterwards, I decided to try an experiment as long as new belts were within reasonable reach at local parts stores.
The Brief Tragedy of Slinkybelt
I’ve always wondered if adjustable-length V-belts were a legitimate replacement for a conventional endless V-belt. They come in a few flavors, such as PowerTwist or Acculink. The story is the same – interlocking drink can tab shaped beltlets that twist-lock into place and allow you to formulate a custom length belt, as well as install them like you would chain drives -no disassembling machinery. That last part I really liked the sound of.
The alternator belt is the last thing to come off before I start removing timing belt covers – it’s the last accessory belt in the disassembly path. I didn’t want to spent 6 hours doing all that again, so I took an interest in the adjustable length belts for this reason. I ended up discovering that I could violate general topology by threading the belts slowly over the 7 blades of the cooling fan, but this did not end my curiosity.
I bought a few feet of the Powertwist type off eBay last week. When I got it, I took the cheap shot route and cut the old belt off. Here’s a picture of Slinkybelt installed:
My initial assessment was that it seemed to work, but definitely “grew” more than a standard belt. This seemed to be indicated in the instruction sheet, so I was just happily adjusting the tension out to an absurd amount to compensate. It was also making rather unhappy slappy sounds, where it was advertised to be quieter….
Unfortunately, it blew up on the next drive. I noticed the unhappy sound growing louder, then suddenly it all went quiet and all the dashboard warning lights lit up. Awesome!

And that was all Slinkybelt wrote. The rest of it fell off on a side street somewhere around here.
A few robot builders on Facebook who had used this type of belting in large robot weapons noticed that I had installed the belt backwards. Wait, belts have a direction?! These do, apparently – whether the twist tabs travel “leading” or “trailing” matters in how the pulley transmits forces to the beltlet bodies. Trailing is the correct direction; I had them leading. It seemed more intuitive, but it was wrong. There were arrows printed on every tenth link that I didn’t notice. On closer inspection, yes, there were, but they were heavily smudged or almost illegible.
Using my remaining stock, I fashioned a new one out of obstinacy and wanting to see if the claims made by its sellers were legitimate; user error doesn’t discount a product’s efficacy, in my opinion. After driving around a few days with the belt correctly installed, I’ve come to the following conclusions:
- The urethane material they’re made from seems to have less traction against the drive pulleys than rubber. This results in slippage even if the belt tension is tight – it seems to count on a large wrap angle, such as those present in two-pulley industrial fan drives or something, where my alternator has maybe 110 degrees of wrap at most. I noticed substantial slippage at low engine speeds when the alternator’s field has to be more strongly energized.
- The slippage failure mode makes very little noise, unlike the screeching of a rubber belt, so it was hard to just discern by sound. I was actually watching how bright or dim the dashboard lights became as a function of engine speed.
- I did have to adjust the tension multiple times as the beltlets “bit” into eachother at first. This is probably more trouble than anyone would actually go to in practice.
Overall, I see the appeal for near constant speed and load industrial drives (like fans and pumps) which they are sold for. For automotive applications, I’m not sure if they’re worthwhile for the above reasons – wildly varying speeds and loads, plus a different general belt path topology that tends to give less wrap per pulley, meaning that the individual beltlets have even less surface area to grip with. The alternator has to deal with speeds between 1000 and 10,000 RPM (if I really hammer it from a light or tollbooth), and wattage loads of between maybe <100 to nearly 1000 watts if all the accessories are going full power.
Yesterday, I decided to end the experiment and spend half an hour violating said topology to install a standard drive belt. Slinkybelt will live under one of the seats to be used for emergencies, or maybe in a future robot.
That’s all for now! Next up, time to return to working on the tiny version of Mikuvan. If I’m not working on one van, clearly because I’m working on another…
Every time I look at the little rust bubbles sprouting on my car’s rear fenders I think,” If Charles can do this, so can I.”
So once it gets warm, I’m going to Harbor Fright and the hardware store with some coupons. That rust will last no longer than spring.
This thing has been practically sponsored by Harbor Freight. If they offered me a sticker or logo I’d mount it completely unironiccally.