If you are Harbor Freight legal counsel, please do not continue reading this website.
You’ve been warned.
It’s time for the BIG MEME. All of the preparation and prototyping of the past 18 months comes down to this. What I’m going to do is install the pre-assembled 7.3 IDI and E4OD transmission as a SINGLE unit. I get the impression you’re generally supposed to do an engine and transmission removal/install separately, but for me it would have been far more awkward since I don’t have a lift (or pit) and only a modicum of help.
When I was looking over the whole system with Snekvan last year, I got the impression that with some massaging and rotating the whole assembly as I moved it in and out, it could actually all pop out as one piece.
While I alluded to that in the post, I wasn’t brave enough yet to try it on Snekvan’s dissection to retrieve this engine. Over time, though, I got cockier. The “Rigid Birthing” of the old engine and transmission was an experiment to see if it was feasible. They say that removing the IDI from a van chassis is like birthing a watermelon. Well, it was time to Morse taper the watermelon, which now has an entire new cantaloupe growing from it.
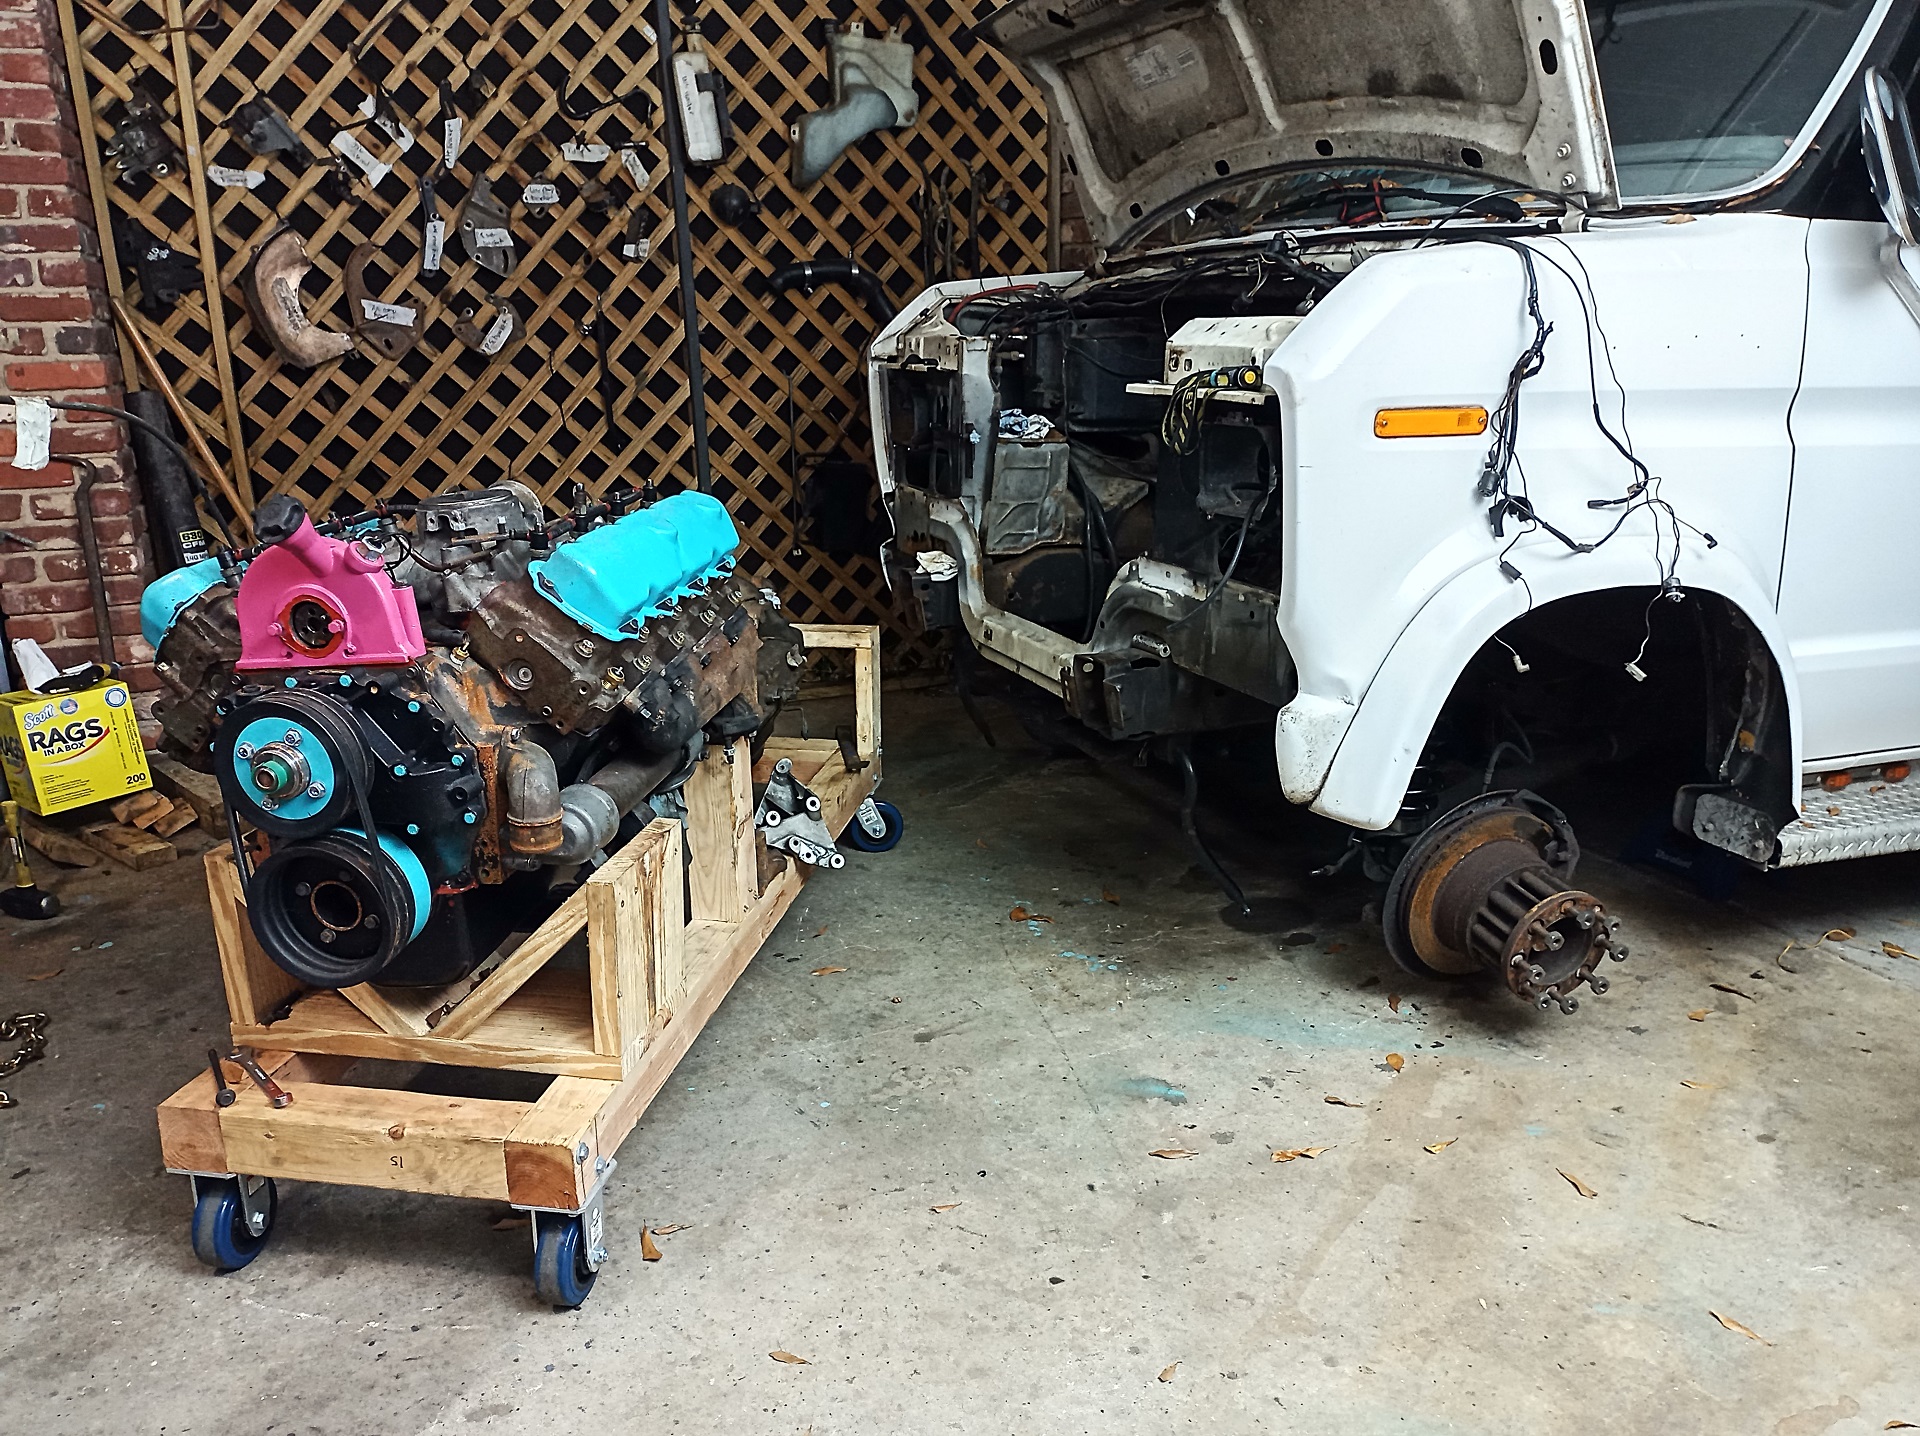
To buy me the most maneuvering space, I lowered Vantruck’s jackstands almost to the point where the brake rotors were on the ground.
I wanted the crane arm to be pointing downwards if I could help it. The timing gear cover (in pink) has the oil fill cap portion which sticks up very inconveniently. It’s offset to one side to ALLOW you to actually hang the engine from the lifting hooks, but the main body still presents a limit to how far you can pitch the engine.

I moved the OEM lifting points as far back on the intake manifold as I could. This is a similar procedure to the removal of the 460. The engine weight dominates the assembly, and the center of mass still is towards the front of the engine.

Here we go! This was not much more difficult than the 460 and C6 raise. Realistically, I think it’s only about 300 more pounds, accounting for the larger E4OD as well.

And here it is, the image that will haunt Harbor Freight lawyers’ dreams.
The crane extended with a DIY boom which is 150% longer than stock, hanging a more than 1/2 ton object well past the 1/2 ton mark basically right over the front wheels, using car batteries ratchet strapped to the back of it as an anti-tipping weight.
That I could even shove this thing around myself was surprising. The smooth concrete helped, as did greasing all of the wheels beforehand because I knew this would be brutal.

Installation is the opposite of removal, they say. Let’s go! After applying the Attitude Control Ratchet Strap, the first motion is just “Push straight in until you run the back of the engine into the windshield sill”

The obstacle here on the push is to clear the bottom of the oil pan over the body’s front channel shaped stamping.

This is the position of the transmission tail cone at this stage. The next step is to drop the whole thing until the front of the oil pan barely clears the body:

Now the Attitude Control Ratchet Strap is tightened to tilt the assembly upwards, forcing the transmission end downwards.

This will allow the transmission to clear the “doghouse” cutout, and the next inward push can commence. We’re basically all good at this point, but there’s some more dumb shenanigans for the last few steps.

Pushing backwards with the oil pan barely clearing the engine mount cross member, the point is reached where the crane arm will hit the cabin firewall.

No way around it as far as I can tell. This is all the travel that the height of the engine will permit. This is when we start getting REALLY sketchy!

I jacked the transmission up a little to install a small dolly with some propping wood blocks on it. This meant it was free to roll along the ground once I put the weight back down.

Next, I supported the engine with wood blocks and released the lifting chain. What… it’s shoved inside a van chassis. Not like it can tip over anywhere.
I transferred the Attitude Control Ratchet Strap to the main crank pulley and used it as a sort of lifting sling. Sorry, crank bearings. I’m sure you see more force on a regular basis.
With the engine being lifted by this point, and the transmission able to slide on the wheeled dolly, now I kinda tractrix the whole thing back little by little, lowering the oil pan past the cross member.

And we have touchdown! Aligning the engine mount studs with the slots in the brackets took some creative shoving. I lowered it slightly, then shoved it in whatever direction it needed to go. At one point, I was dual wielding a crowbar in my right hand and the crane’s pump handle in the other, attached to the release valve screw. Finally, I landed the studs on the brackets and it settled!
We have a problem.
Something didn’t look quite right once everything started bearing weight, but I couldn’t quite figure out what from the front. I inspected the inside and…

Uh oh. The engine was pushed so far right that I SCRATCHED MY BEAUTIFUL VALVE COVERS it was pushing on the interior cover (“doghouse”) edge, bending it. What happened?!

Looking at the outside in detail, I noticed there was much more space on the driver’s side than usual. My working theory of “Every part in a Ford van chassis is 0.25 inch away from every other part” was not holding true here. There’s definitely more than 0.25 inch here, but like -0.25 inch on the other side.

In fact, the engine was rotated (rolled) a few degrees towards the passenger side. The bottom of the oil pan is supposed to be parallel to the cross-member. It was clear that the driver’s side engine mount adapter bracket was too tall.
So what gives? I inspected the others (Spool Bus, Econocrane) and while I didn’t make measurements to back it up, I swear Vantruck’s engine cross-member here is shallower in angle and depth. This means the OEM driver’s side engine mount adapter bracket would be too tall and force the engine to sit too far to the right.
I had some custom bracketry to invent. It looked like I had to figure out a low-profile solution for the driver’s side. But first, I decided to mark and drill the transmission cross-member so I didn’t have the thing propped up on dollies.

The transmission cross-member is different between the E4OD and C6, and Vantruck did not have the mounting holes needed to accommodate it (seeing as it was still 2 years from being invented or something).
I used a jack and stands to move the transmission into what seemed like the correct vertical position, using Econocrane as a reference with its E4OD transmission. I used the two large holes in the frame, which are present on both sides, as a reference to mark a reasonable spot to drill for the new cross-member.

Using a step drill and a lot of swearing and grunting, I knocked two holes – one per side, just for now, to hang the transmission. I found that step drills were better for handheld use in van steel – twist bits tended to grab easily because drilling while laying sideways is far from a rigid tool holding position, and step drills were shorter which transmitted my off-kilter drilling pressure without bending the bit.
I intended to wait until the engine was in final position before drilling the second set of holes, because I did not want to fix the rotation of this part yet. So, on the next season of Operation IDIocracy: Making the custom low-profile engine mounting bracket and finalizing the install!
Well done! I’ve done similar on British cars and that was hard enough….but everything was half the size and likely 1/4 the weight!