It turns out when removing the engine from a Ford Econoline, you can’t just yank it straight up. You have to execute a series of arcane Old Hong Kong Airport maneuvers, nearly hitting everything around it, to pull it out of the front. Ford Econoline: A series of unfortunate compromises made of Ford truck parts.
People have come up with some creative workarounds to use a regular cherrypicker style engine crane. Generally, the chain that hangs from the crane boom can’t be used since it needs too much vertical clearance. It’s usually recommended to sling the chain over the boom itself instead to gain those precious few vertical inches.
Also, it would seem like this type of buffoonery crosses oceans, as people also have made special low-profile lifting hooks for European vans!

What makes it even more awkward is that with the usual Harbor Freight 2-ton class crane, you have to do the initial lift at full extension because otherwise it doesn’t reach far enough to get to the center of mass of the engine. And, to make it still worse than that, I had bright ideas of lifting the engine and transmission out as one unit down the road. I still have the #OSHACrane boom from lifting Vantruck’s bed, so I decided to go ahead and cut it up to make a lifting appendage.
Here’s my mockup so far. I was going to just weld this chunk of C-channel on top of the boom and be done with it. However, since I have the fabrication ability and facility, I decided to trade some complexity for newbie maneuvering space – I’d never done this pull, so I’d rather have the extra 2.5 inches if at all possible.

The plan is to sink the C-channel into the 2.5″ square, 1/4″ wall steel tube that made up the #OSHACrane. I wasn’t concerned about the weight of the whole engine causing issues here, since it’s a lot of steel remaining. I made the cutout using an angle grinder and cutting disc, then blazed it on with Limewelder running on its deserved 240 volts, which actually made very quick and smooth work of the 1/4″ steel.

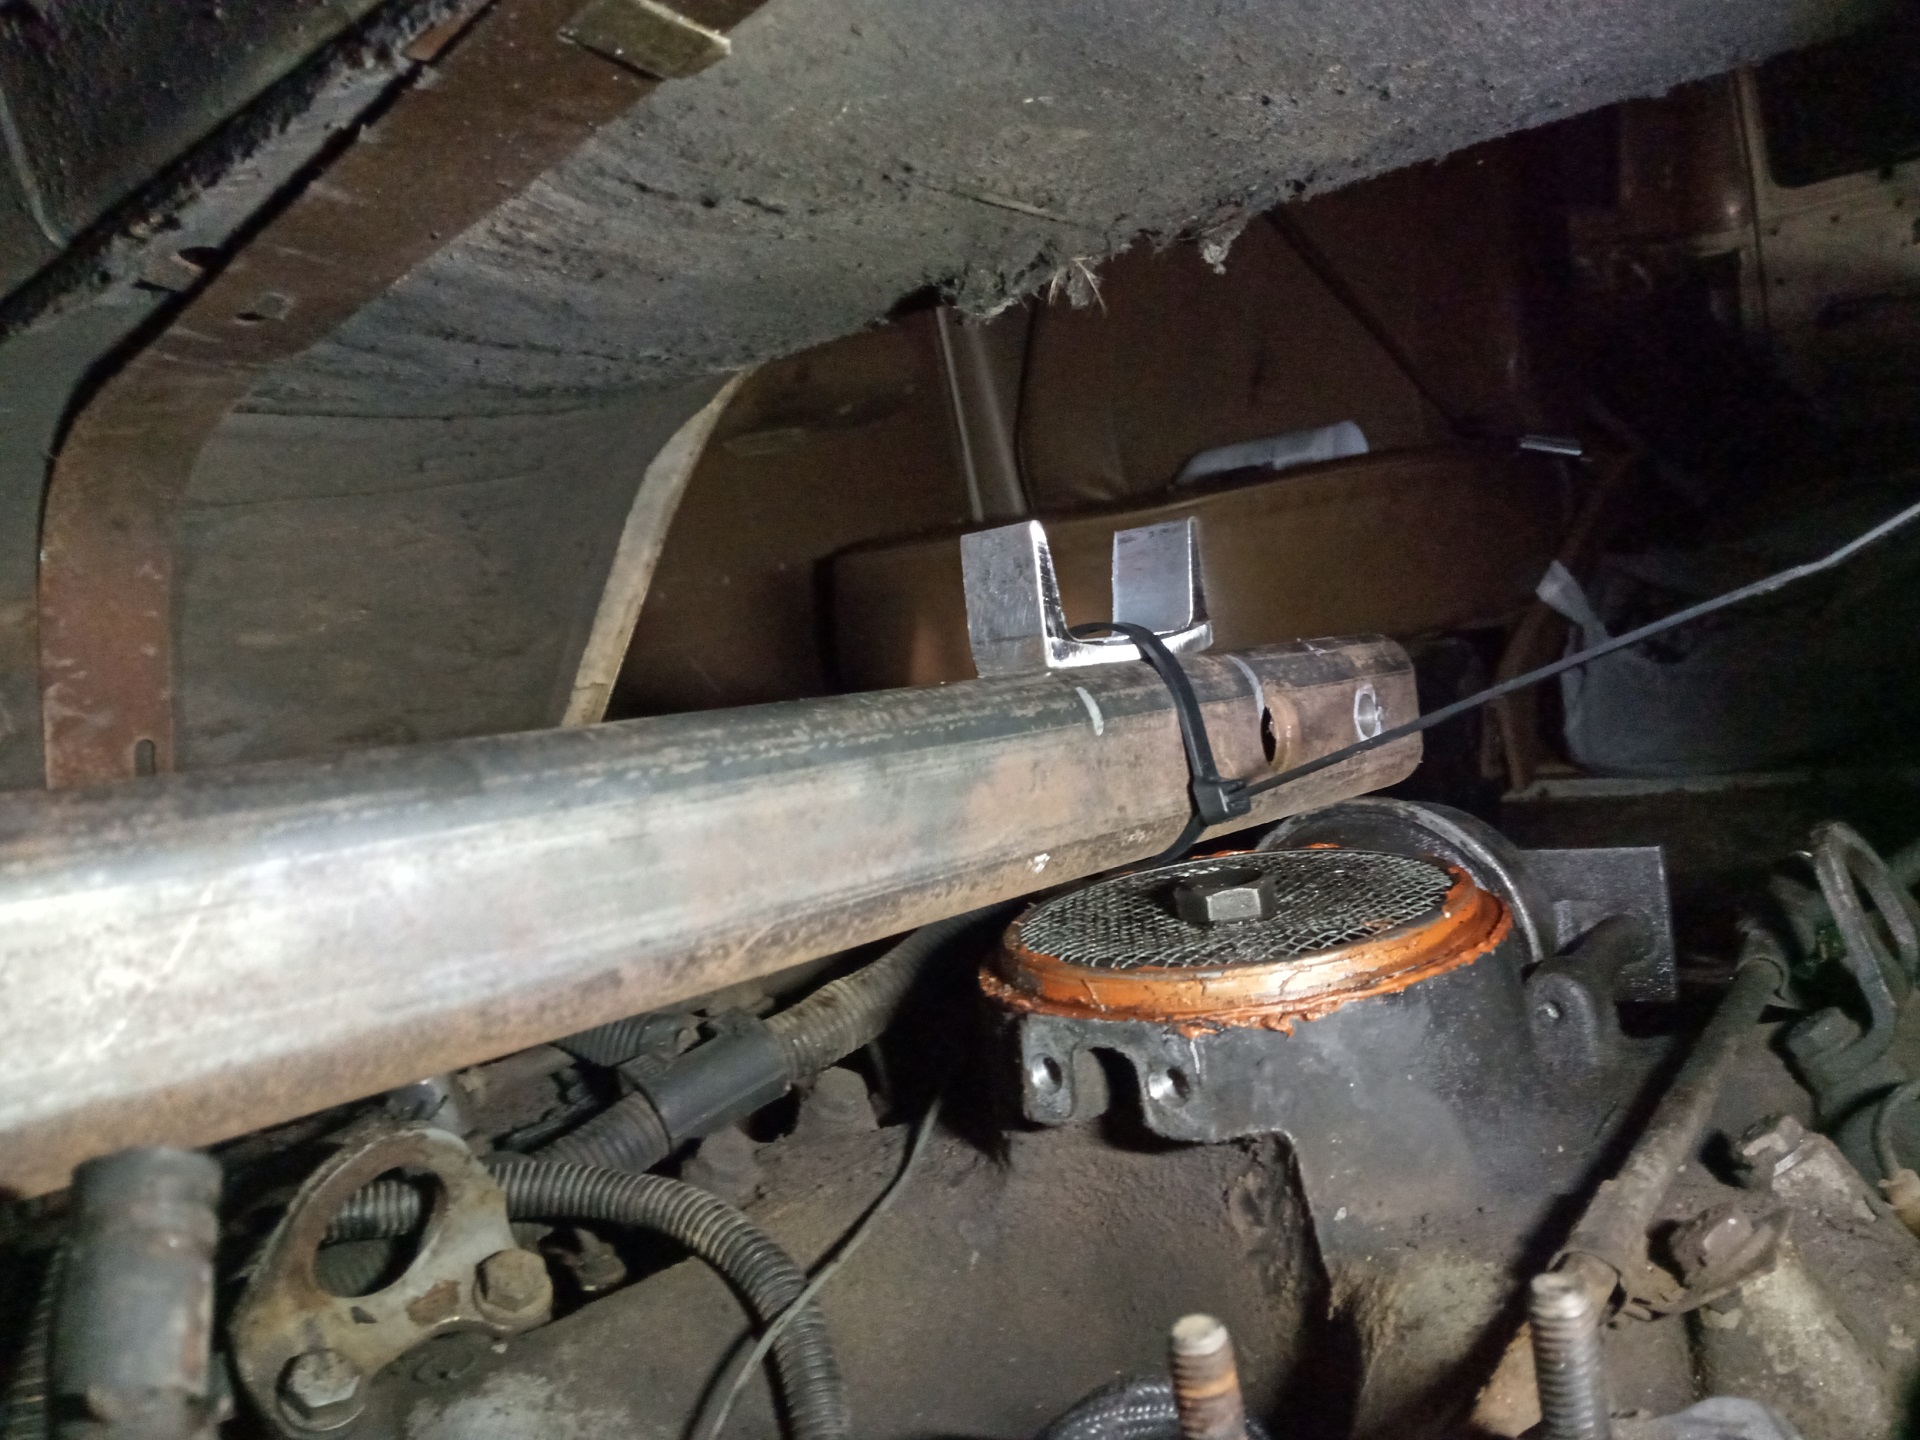
Using a length of Vantruck’s everyday-carry 5/16″ tow chain, I wrapped it around all of the OEM lifting loops as well as a 4th lift point that I invented out of a 1/4″ thick barstock. That mounts to where the OEM fuel filter fitting was. I wasn’t confident that the three point right-triangle lift points would result in any sort of stability. It can be seen here that the crane boom pretty much rests on the intake manifold.
(Incidentally, Ford has a part number T75T-6000-A for hoisting up the 460 by its carburetor bolt holes… which seems a little wrong, but it was what I was recommended for yanking the engine from Vantruck.)

We begin the initial lift – a few pumps of the handle, and the engine has popped off its mounting slots.

At this point, I dive under to brace the transmission with a jackstand and remove the bell-housing and adapter plate bolts. I’d already removed the torque converter bolts holding it to the flywheel a few days before.

I then pumped the crane just enough to see that it was relieving the weight of the engine and transmission some. One good pull later, and the engine is free of the transmission after popping the dowel pin mate.

I realized the lift location I chose was slightly too aft – the engine rocked forward as I was pulling it up. The center of mass is more towards the front of the air intake, not the dead center.

To remedy this, I added an “attitude control” ratchet strap so I could adjust the tilt of the engine as I went.

So here’s what goes on with an engine pull:
- Lift upwards from mounts until the mounting studs clear the engine cradle crossmember
- Pull forwards until the lower engine oil pan hits the cradle
- Lift upwards to barely clear the oil drain plug over the cradle and no more – if you have rear heater lines that run across the underside of the engine cave roof, the hookup fittings might get in the way if you lift further. Snekvan has these (Vantruck and Spool Bus do not), so I had to actually swivel the crane a little on the ground to avoid them
- Pull forward all the way until the harmonic balancer or upper oil pan face starts hitting the lower sheet metal sill of the body.
- Lift upwards to clear the upper oil pan over the sill, and you may also need to tilt the engine to avoid the heater lines (Nick’s site is a great explainer for this)
- Pull forwards until the lower oil pan reaches the sill
- Lift upwards to clear the oil drain plug and lower oil pan
- Finally, pull forwards to exit out!
Yeah, that’s a lot of maneuvering. Luckily, I greased the crane wheels beforehand so it was possible to do by my not too engorged self.

And just moments before 2022 hit, the 7.3 IDI was birthed successfully.

The van went up like 3 inches and got all pigeon-toed doing this. That’s a lot of weight coming off the front suspension there!

There was now a new problem.
The Harbor Freight crane and 1-ton engine stand do not mate to let you perform the handoff. This seems like an OVERSIGHT.
Alright, so now what? I had to come up with a way to attach the stand to the whole thing first, then slowly back it off while supporting the engine so I can remove the crane.

Step 1: Unlock the legs of the stand, and sling them upwards over the crane. This lets you attach the engine using the bolts and standoffs.

I picked this configuration of the little standoff arms. Notice that the faceplate is actually upside down – the other orientation could not produce a solution.

Next, I introduced the floor jack in the middle in order to prop the engine up by a third point while I removed the crane. After slackening and removing the chain, I carefully moved the crane away before clicking the leg pins back into the stand.

I back the floorjack off, and we’re finally free!

This engine is absolutely filthy in every sense of the word. It’s probably got 50,000 miles of oil leaks on it or something. In the days prior, I swope a parts washing basin off Craigslist in anticipation of having to degrease The Everything. I filled it up with a terrifying concoction of Simple Green and Purple Power degreaser, gave most of the parts I removed from the van a couple of swipes with a wire brush to… uhh, break the crust, and let them bake for days.

What”s not shown easily here is the immersion heating element I wired into the thing, so it’s actually keeping this teratogenic menagerie just under boiling temperature. FOR DAYS. I periodically topped the water off.

After days and days of this, everything looked great! Well, except the solution, which had turned into this steaming brown sludge. We speaketh not of what happened to it.

I realized I’d already started losing track of what parts went where or did what, so I began what I called the “Kaizen Wall”, labeling parts in the rough order they were removed and with names I hope I’ll rememeber in a few months.
From this point, Operation IDIocracy will focus on the rebuild of this engine and gradually turn into pulling Vantruck apart the same!
All I can say in OMG… seems like some serious work. Is this your van or for a customer?
All my own stuff. Heaven forbid anyone ever asks me to do this for money.
So what’s gonna happen with the donor van unless it’s already been sent to the great parking lot in the sky?
Getting pushed into a corner of the property and used as a shed-on-wheels, optionally with a foliage colored tarp thrown over it to appease neighbors and deter crackheads from living in it?
Or kept around just in case some idiot or idiots wrecks their smartphone on wheels, so you can pilfer the EV go-fast bits and use the van as a development platform just because?
Snekvan was taken by the methy scrap man after I emptied the rest of the goodies I cared about out of it. I don’t have the land or permanence (renting) to want to hang onto entire husks.
One day though! Sad to let such a clean body/chassis go. Fortunately that part is far from rare.