Last fall/winter, I went through redoing the front brakes with a seizing caliper and leaking master cylinder. We’ll now timeskip from last November or thereabouts to the April/May timeframe to round out the story. After a mountain blasting adventure before Memorial Day weekend (because you never go there on actual holiday weekends), the first thing I noticed was a very gentle pull to the right under moderate to heavy braking, almost like if one of the calipers had frozen again.
However, I remembered that the rear brakes should be activating first – and more experimentation led me to find out that the left rear drum brake was seemingly not contributing to the whole “braking” bit. My usual habit these days is to bust out Mikuvan for random life errands and weekend warrior adventures, only occasionally taking it to the lab, so it wasn’t a high-priority interrupt. I had figured maybe the rear drum brakes were finally wearing down, as they typically last a long time.
So I parked it until the weekend to have a look at the rear brakes, since the last time I thought about them at all was way back in 2013 (on this very site!). Well, come Friday night, I dive under to have a look and find…

Well crap. A quick wine tasting confirmed it was gear oil from the differential. Looks like I have some leaking axle seals to contend with!
Mikuvan’s rear axle is a Mitsubishi light truck axle that is some times (but not universally) called the “8 inch”, presumably for the diameter of the ring gear. At least, that was the only name I could seemingly find in repetition on the Internets. It’s not nearly as commonly found as the popular American axles like the Dana 60/70 models found in vantrucks.
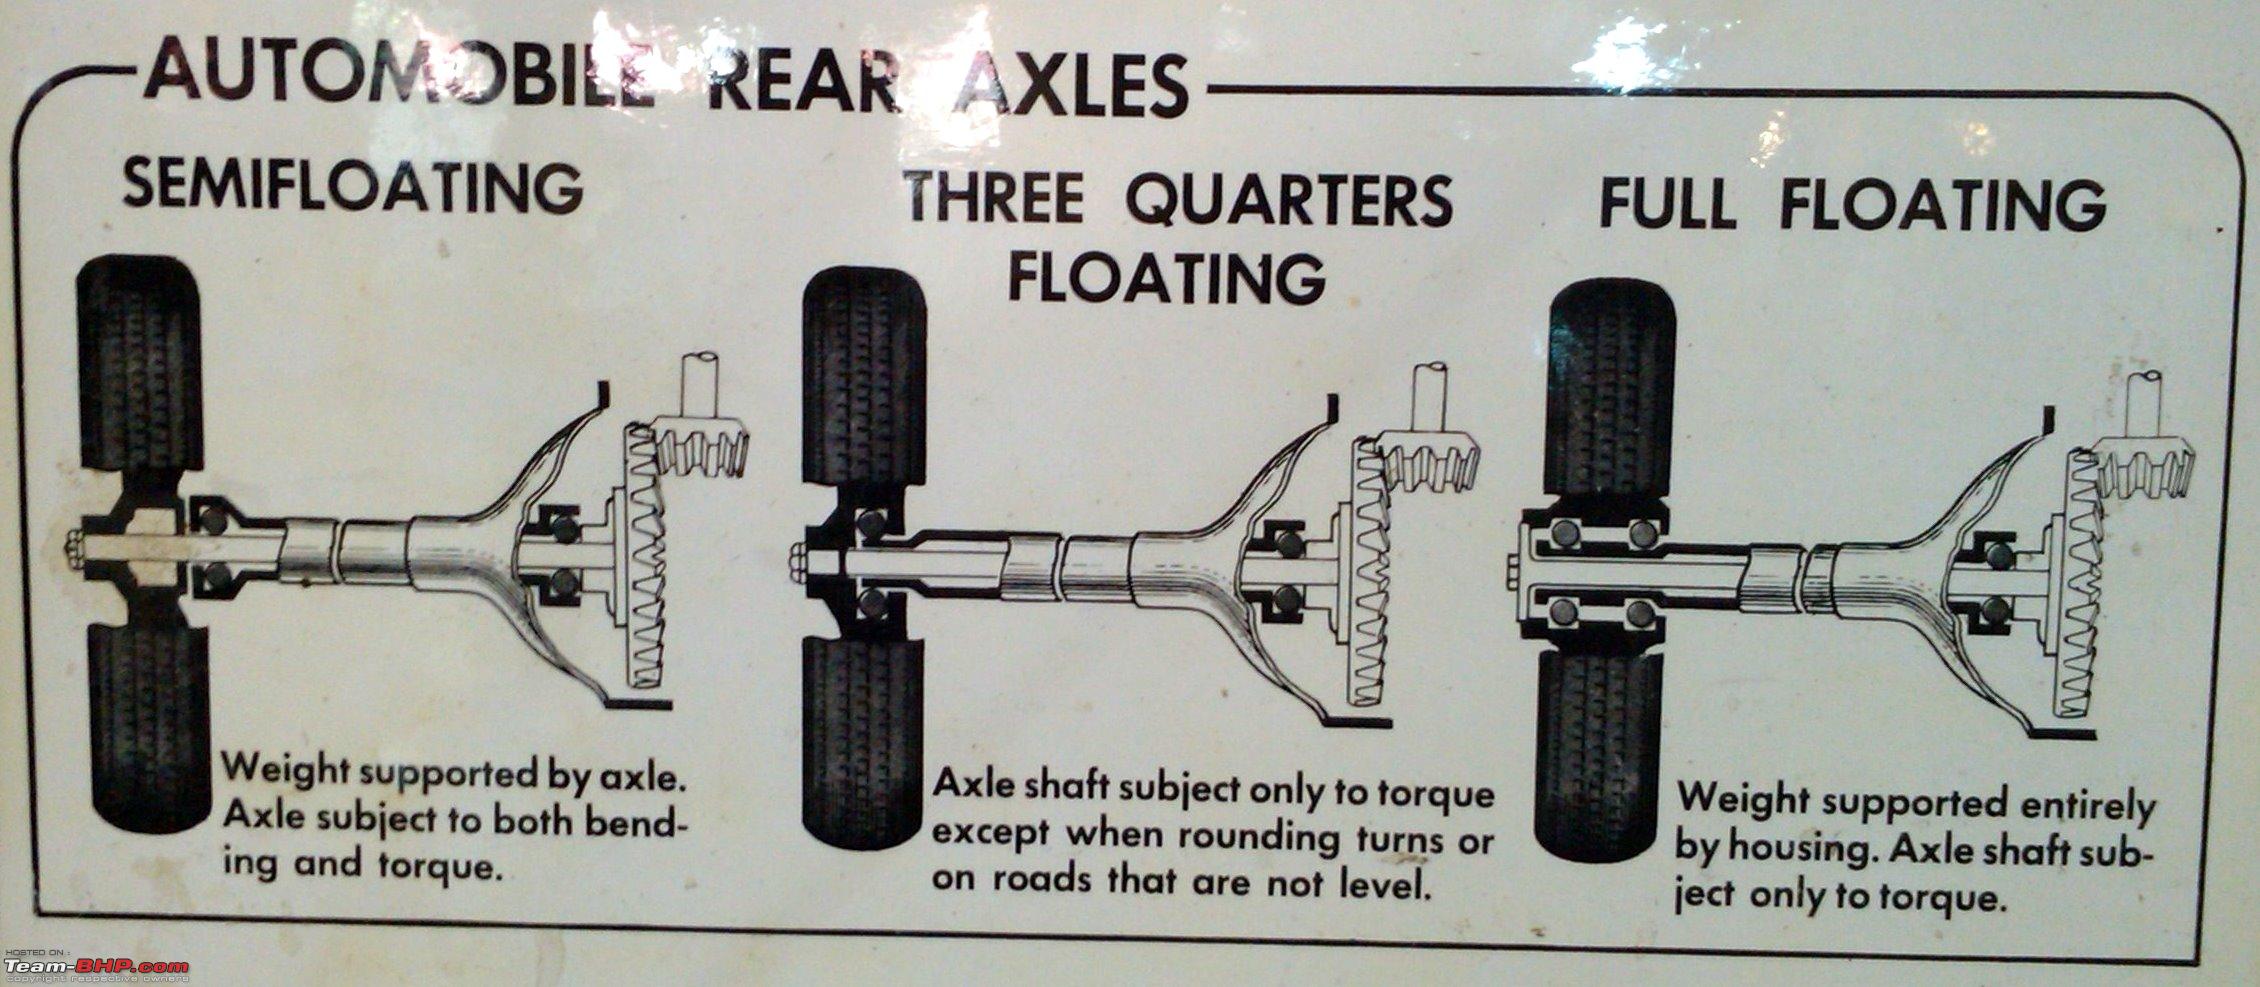
It’s a “semi floating” design where the axle shaft itself runs in bearings mounted on the inside of the axle tube. In robot land I might call it a “live” axle (which means something different in vanland, incidentally what is shown here with a solid straight-across axle tube and differential).
Having also done Vantruck’s rear brakes recently, another post series on its own, taking this thing apart is going to be a lot more gory. By the book, it will involve deconstructing the brakes and wheel hub assembly just to get to the seals. Vantruck has a Dana 60 full-floating type rear axle, where the shaft is an entire separate thing and the wheels ride on bearings on the outside of the axle tube.
So this was not going to be a casual one-day repair, at least for me. There was a lot of mentions of pressing this and shimming that, on top of needing to deconstruct and reconstruct drum brakes. While I’m in there (famous last words), those might as well get replaced.
I ended up making a battle plan for parts that I needed to change or inspect and put a couple of things on order from RockAuto: the inner and outer seals for each side, new bearings, and a drum brake hardware kit. I already had brake shoes and wheel cylinders from many moons ago.
Well the first thing to do is take the wheels off. This turned out to be a side quest all on its own, because…

Last spring not long after Mikuvan was retired from handling daily drudgery, I got a set of Chinesium wheel spacers off eBay Motorsports to push the rear wheels out about 2 inches on each side. For some reason, the 2WD vans have a narrower rear track – and it’s always looked kind of funny to me. For reference, check this old (2016) photo of Mikuvan on the Dragon and notice how much inset the rear right tire is. I figured the 2″ of spacing would rectify the visual oddity and might buy me some more stability while I was at it.
Well, to nobody’s surprise, the lug nuts were 1. very small compared to what I was used to, and 2. made of cheese. I probably should have thrown these nuts out the moment I got them, but burnouts first good ideas later, etc.
And here we are, a year later, when one of them just ripped the fuck apart when I hit it with my 1/2″ Nut Destroyer.
Certainly suboptimal. In lieu of going out to get some lug nut eater sockets, I decided to try some Reddit Mechanic techniques.

It was time to weld a nut to the stripped nut. I found a random left over 1/2-20 thin hex nut, sanded the chrome coating off the sides, and gently snugged it against the questionable nut. Crank Limewelder up all the way and make a little plug weld looking bead on each side, and then I used a flap disc to grind each puddle down.

This is the result. Now, crank carefully with a breaker bar, and…

…watch the cheese nut just shear in half. No, my welds did not fail. They peeled an entire strip off the cheese nut.

Okay, we’re going to try this again, but I’m going to make the welds fatter this time. Now it worked!

Unfortunately, the mangled remains of the cheese nut also wrecked the threads on this stud on the way out. I’ll have to press this out and repair the thread or cut it short in this area later.
Class 10.9, indeed. So, which cliffside roads have you been maniacally scrambling up and down again with these studs and nuts made of tofu?

Alright, well with THAT debacle concluded, I could actually pop the drum off. The brake shoe linings are definitely much thinner than in 2013, so they’ve been working!
They’re also covered in gear oil goop. Well, having oil in your brake pads probably will make them not work.

I spent a while just removing chunks of congealed brake pad oil goo with cleaner and a wirebrush to reveal the machinations underneath. Mikuvan’s drum brake setup was actually easier to take apart than Vantruck’s, which I’ll detail in due time. The problematic seals lie behind all of this.
The order of operations from here are removing this whole axle hub, retainer, and brake backing plate assembly, taking the hub and retainer apart, and popping seals out. Then hopefully shove everything back in correctly!

First step was removing the brake line fittings on each side. I went and bought a set of Inch and metric flare nut wrenches between last year and now, by the way, so there was no more horsing with a DIY flare nut wrench. The backing plate assembly is retained by four regular ol’ nuts and washers.
The thin shim in the middle between the axle tube’s flange and the backing plate is the means by which the bearing preload is set. I most definitely do not have a set of those shims, so unless I see dramatic bearing disasters coming once it’s apart, I’ll just clean everything, regrease it, and make no changes.

See, the axle inner seal was easy enough. Once I pulled the assembly out, it was behind the whole thing (you can see the shiny band it rides upon), and I just used the seal driver claw tool in my slide hammer set. Here, you can see the large Magic Nut of Wheel and Bearing Retaining as well.

The outer seal is behind the axle shaft flange and the bearing carrier, and to release that is…. a few steps. First, I decided to not monkey it up with vise grips and Channel-locks, and waited a few days for a Magic Nut Wrench to show up. Next, the 4 studs that formerly went through the brake backing plate and retained the bearing assembly had to be pressed out (alright, brass hammered out).

Next, in lieu of having a special tool to extract the bearing (which is pressed onto the shaft), I invented something that had the same general idea.
The procedure is to back the Magic Nut up the top of its threads, and then use this chunk of C-channel as a pusher to shove the axle shaft’s bearing shoulder downwards.

Just incrementally tighten each side’s nut and screw together, and…

It all pops out. The outer seal is the gold ring visible under the bearing race. I was happy to see that the bearing seemed to be in good condition, if not a bit degreased from the oil wash.

At the end of all this mess, it took 30 seconds to replace the $1.19 seal.

I cleaned the bearing completely and repacked the rollers and cavity with new grease, also making sure to pack the cheeks of the outer seal as well. I used a brass rod as a punch/driver to get the bearing cone back onto its shoulder, and then then back on the Magic Nut goes to act as the rest of the bearing press. Because the preload is set by the housing shims, you just crank this part as tight as you want:

Like so. The little toothed sections on the lockwasher are to be folded into the nearest Magic Nut slot they line up with.

The inner seal was just “Installlation is the Opposite of Removal”. I turned a small chunk of leftover Overhaul tube to act as a seal driver tool so I didn’t bend or crimp it on the way in.
With the important seal work finished and axle shaft remounted, it was time to repair the drum brake assembly itself.

The new drum brake shoes had to have the adjuster levers transplanted on, which was simple and involved two snap rings and pressing the mounting post (top of the brake shoe, the pin sticking out) into the new ones.
Now, allegedly these brake shoes have a leading-trailing distinction according to the shop book, where the front shoes are supposed to be shorter. But I couldn’t figure out a single difference between the two pairs. They seemed to be completely symmetrical. Guess I’m about to find out!

Here I’m test fitting things in accordance with the pictures I took before it all came apart, and trying out the new drum brake spring installation tool. Yeah, it does make things easier – go figure. Between the brake shoes and the backing plate, I made sure to blob some copper antiseize grease.

With the help of the grabby-pullers or whatever they’re called, I’ve looped the retaining springs onto both sides. Mikuvan’s “simplex” style drum brakes have only these two springs, and the retainers on each side. Things get more complicated from here as they get bigger – Vantruck has what I learned are called “servo” style drum brakes, and there’s like 17 things going on in there.

Check out that weird rust pattern on my only few months old exhaust job. I got those pipes from the same place, yet the upper 90 degree bend seems to be going through its coating already!
I got the hang of things using the left side, so doing the right hand side was a simple rinse and repeat. The same steps applied – I cleaned everything with a wire brush and terrifying van juices anyway to establish a good baseline, then popped the axle shaft assembly, dismantled the bearing assembly, cleaned it all up and regreased, and stuffed the new seals in.

This surgery generated no less than three new Special Van Tools in my Special Van Tool drawer.

While I was doing surgery on the right hand side, I was also doing the obvious to the new drums.

Yeah, yeah… Paint your iron brake drums a bright color and then install them with greasy hands and a hammer anyhow. Unlike most recommendations for how to do your drum brakes, I set the initial adjuster wheel width to aggressively drag, almost like accidentally driving with the parking brake half-assedly on.
What I found is that because the brake shoes aren’t smooth, nor are they made perfectly to the same diameter circle as the drums, and the drum surface is machined and not precision ground anyhow, the “slight drag” usual recommendation is just deburring them and taking the edges off the molded material for a good while. I had to dive under Vantruck 4 times to keep clicking the adjuster because I didn’t feel like the parking brake adjustment approach was doing it fast enough.

Out on the test drive after reattaching the brake fittings and doing a complete rear circuit flush and bleed! It only took a couple of miles for the rears to firm up. Overall, a good dive into another “This is terrible, why was this considered okay” subsystem. Since we’re here and I wrote this post, I can confirm that nothing failed and I did not sail off the side of a mountain somewhere in eastern Tennessee.


