Over the weekend, I took Chibikart (and a few tagalongs) to the Ol’ Silley Vehicule Proving Grounds and took a few metered runs up:
It was actually slower than Chibikart1 by a fair margin, hitting only a 72 second best time, compared to Chibikart 1’s best of 62 seconds. On the whole, though, it was more efficient, consuming only 11Wh of battery during that run. The best product score was 784.8 Wh*s.
Neither result – that it’s slower but more efficient overall – is surprising. First, we already know that hub motors are less efficient than indirect drive systems – they have to pull more current, generally, to perform the same amount of work and being would for high torque also necessarily increases the motor resistance (for the same form factor).
But DPRC is slower because the Turnigy 5065 motors have a much lower torque produced per amp even after accounting for the 2.5:1 geardown between them and the wheels. From my adventure building the new motors, I know their torque constant Kt to be roughly 0.12 Nm/A. For the Turnigy motor, at 236 RPM/V, that translates to a Kt of 0.04 [1] – multiply by the 2.5:1 torque increase of the chain drive that that comes right out to 0.1 Nm/A.
This different alone isn’t enough – Chibikart 1 has four motors, for a grand total (lumped parameter) of 0.48 Nm/A, whereas DPRC only has 2 motors for a total of 0.2 Nm/A. Given that the 350W Jasontroller is safely limited to 25A output in all cases, DPRC can only produce half of the acceleration of Chibikart 1. But most of the garage race is spent flooring it, or at near-constant velocity, so only significant speed changes will contribute to the time. Hence why the discrepancy isn’t, say, 50% slower or something.
I have a feeling that Chibikart 1 on 2 motors will get a much worse result than DPRC – it’s only a ~16% time gain (7/6ths) for half of the available torque!
Kind of like Kim Jong-Il, nobody really knows when the Democratic People’s Republic of Chibikart was born, or where. I think it was some time on Wednesday, actually, but I haven’t put up an update on it here because I’ve been plowing through the Instructable that I promised pretty much every day since then. This thing is a book. It’s 46 Instructables steps long, but each one has on average 5 or 6 “substeps” because otherwise I was facing the prospect of a 200+ step Instructable. But more on that later.
First, a recap of… what essentially is Wed. night, I suppose. (The prior update which include some of the frame construction is here)
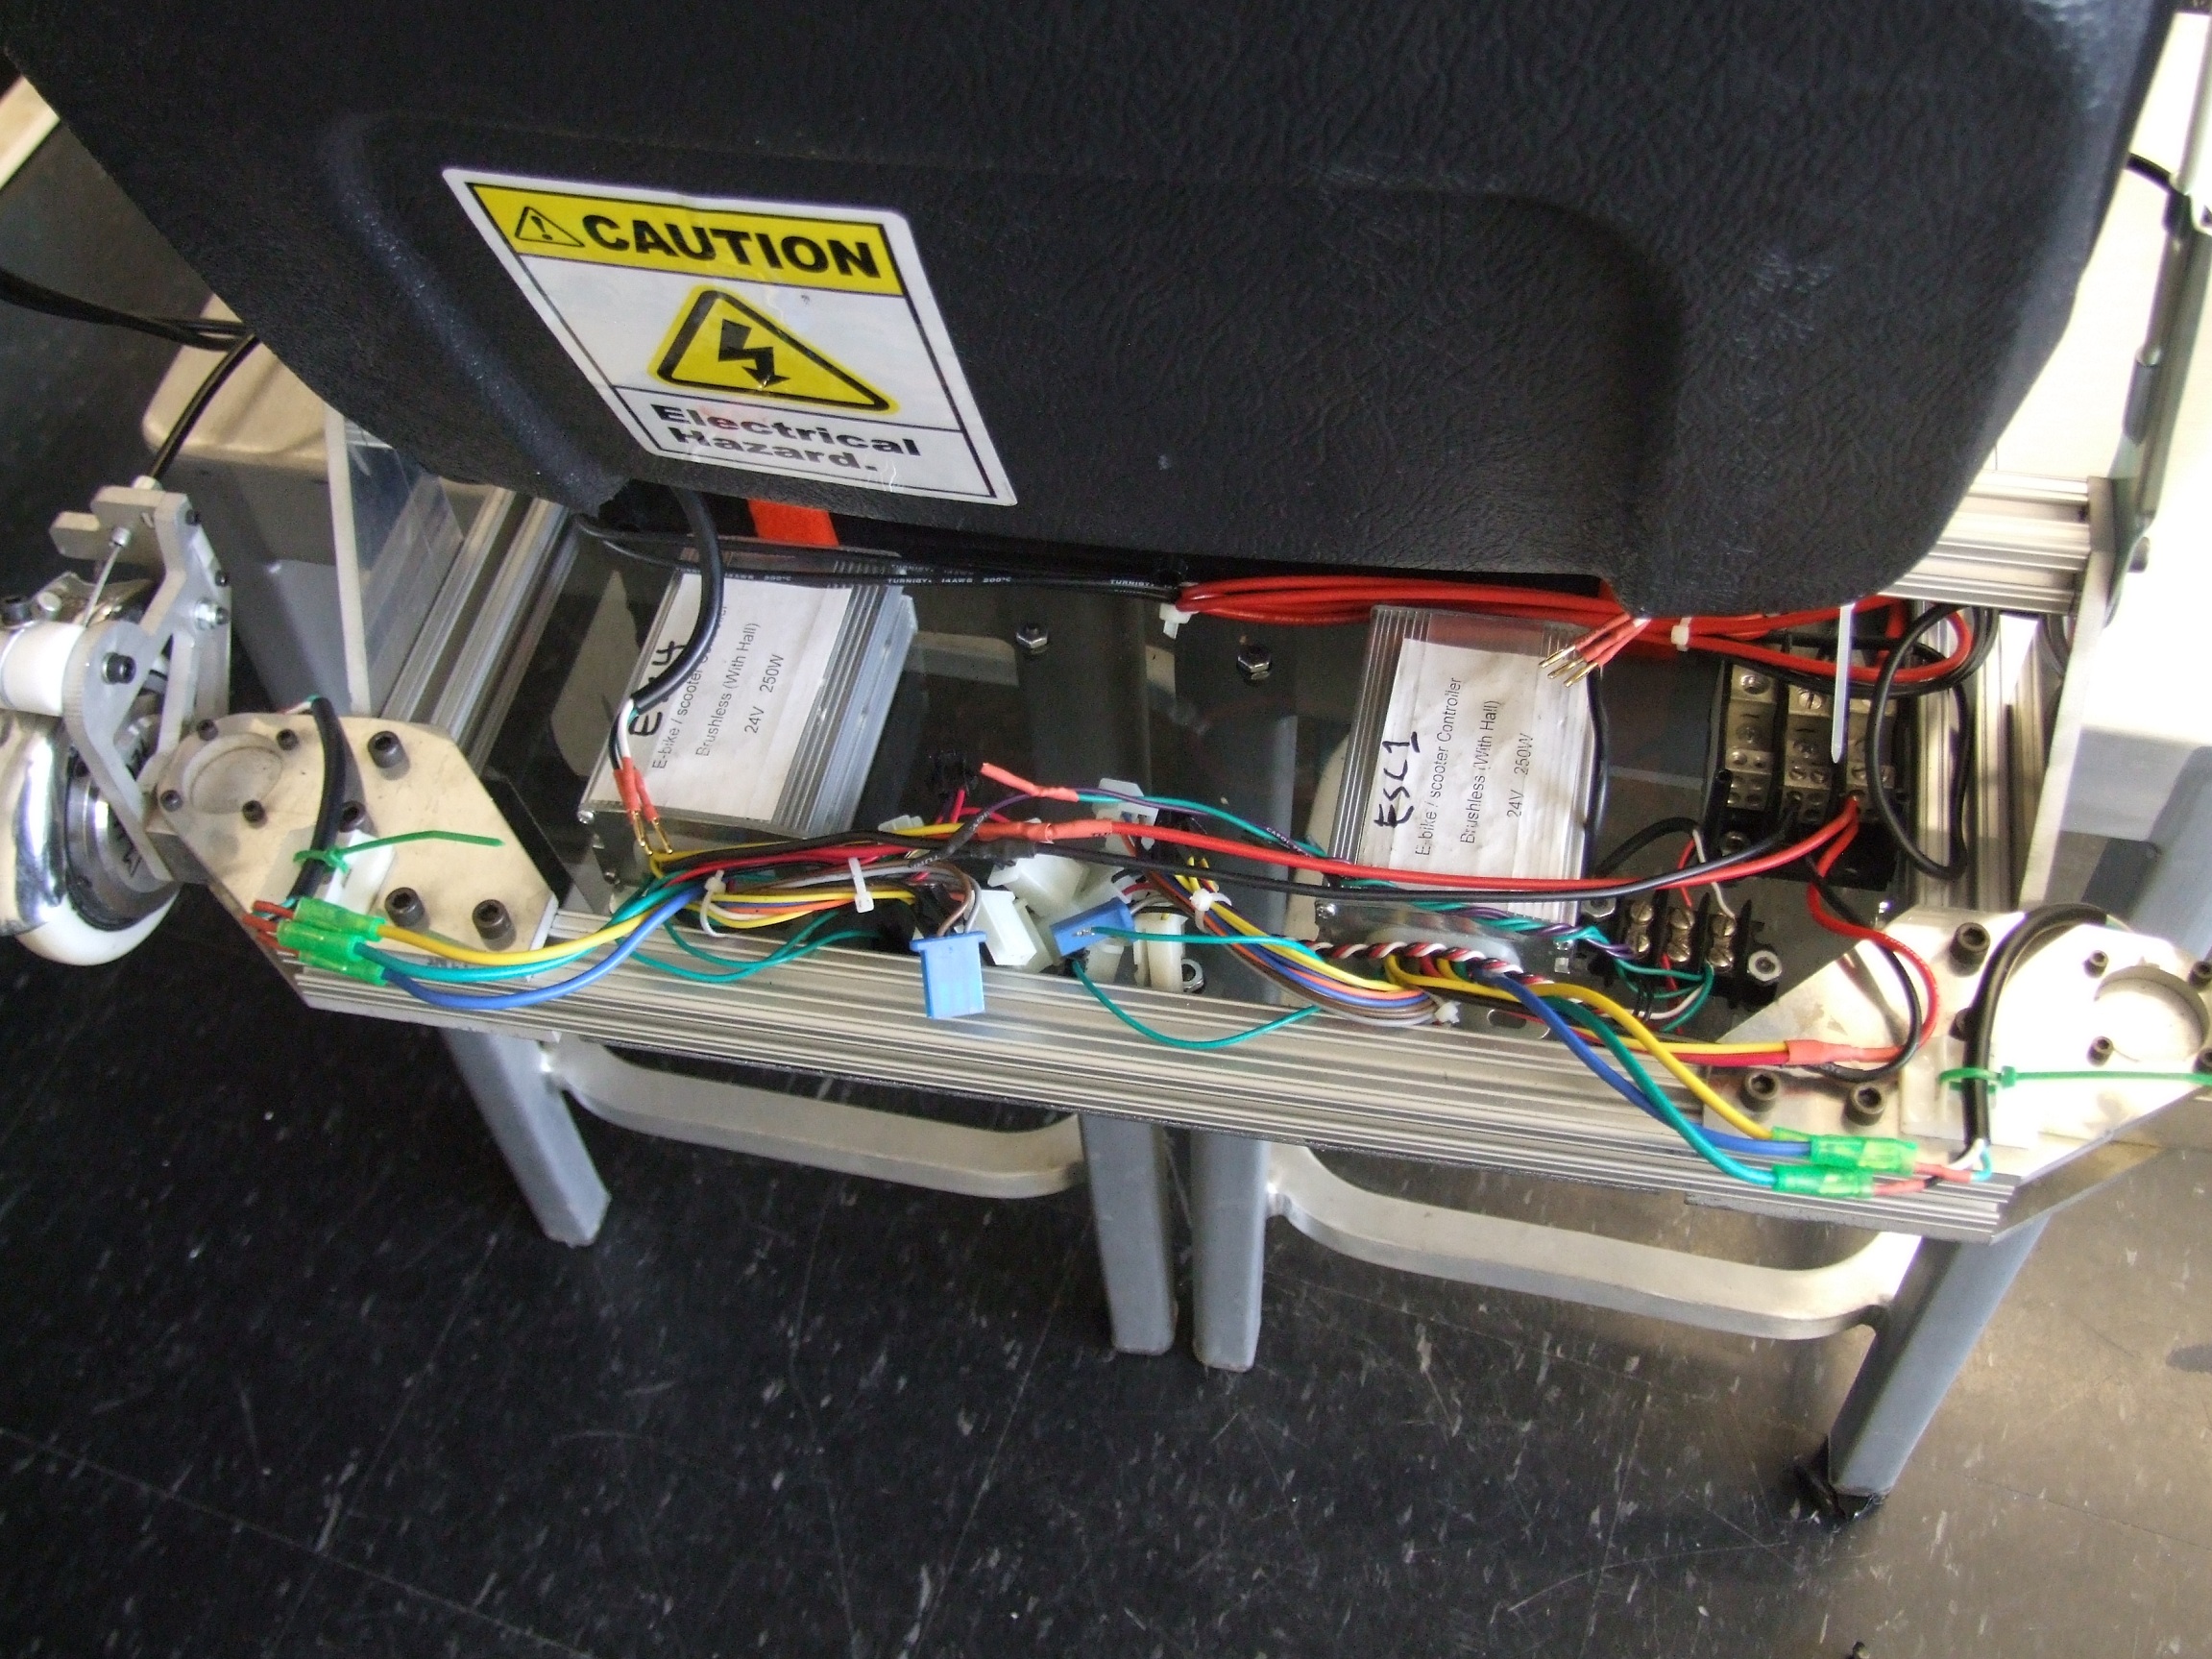
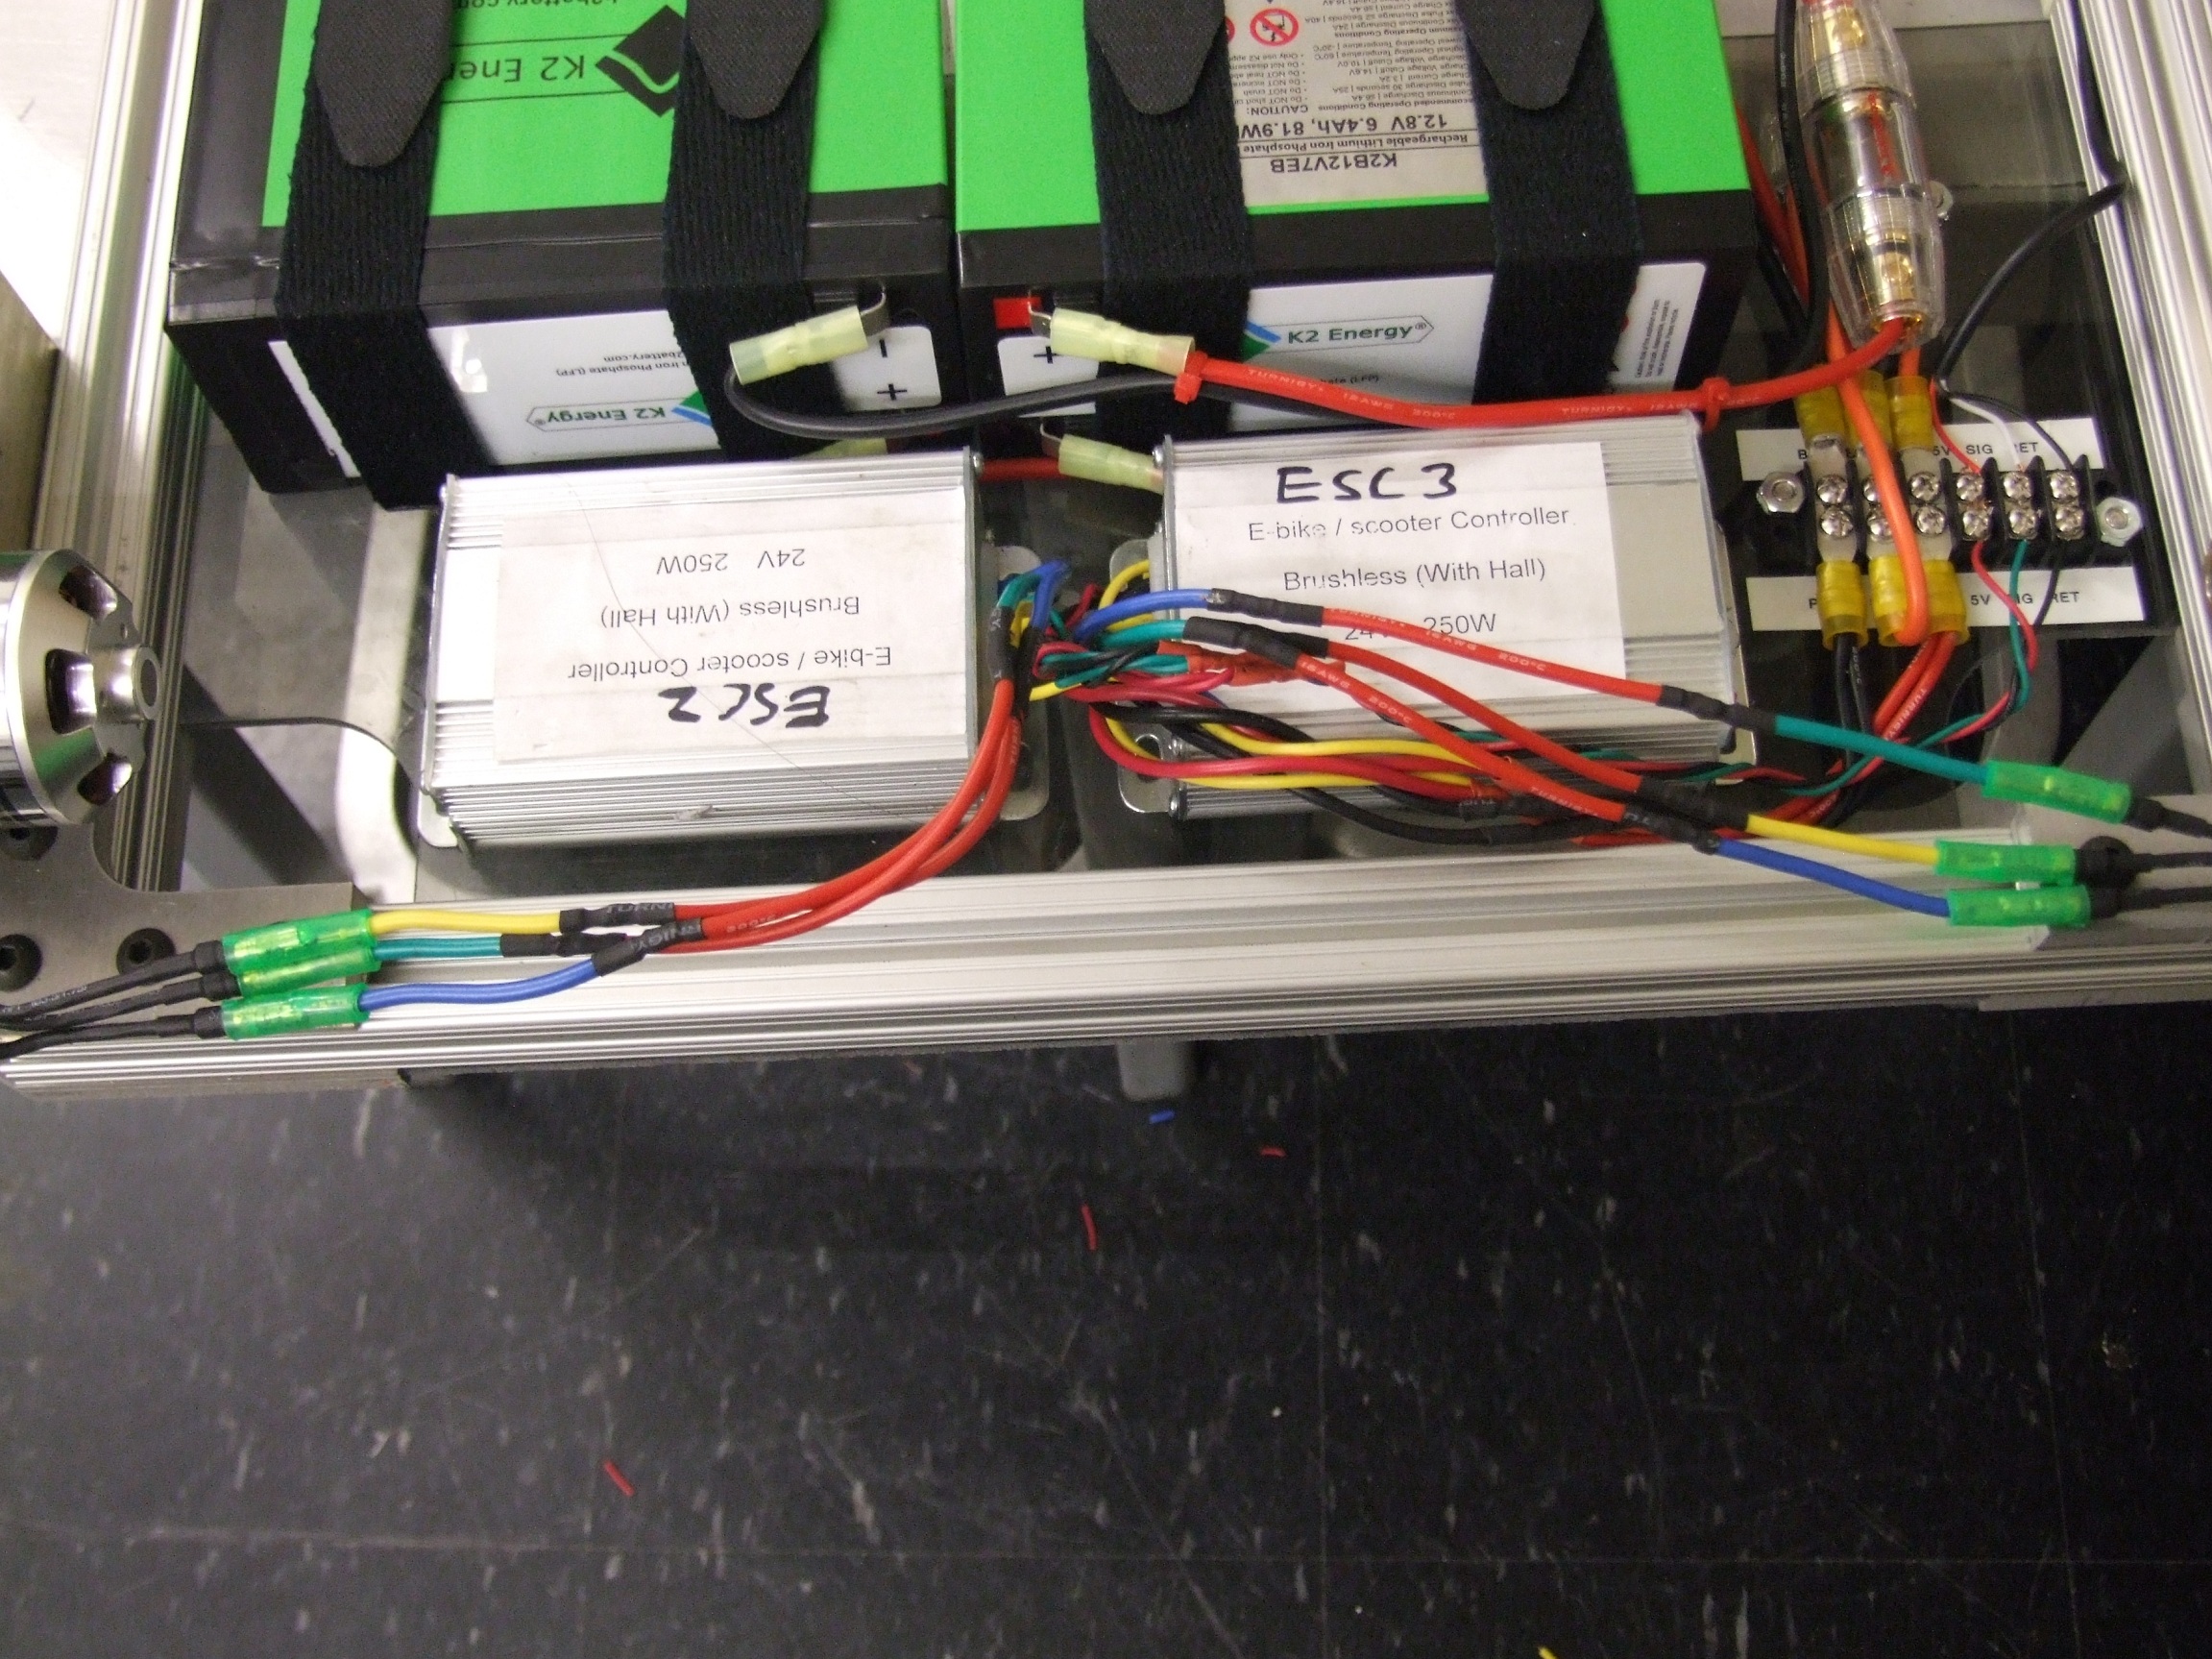
First off is the electronics deck. Compared to Chibikart, wiring this thing was a breeze. I gave the Jasontrollers a well-deserved haircut since I was not using any of their auxiliary functions, and that instantly made the wiring like 10 times cleaner.
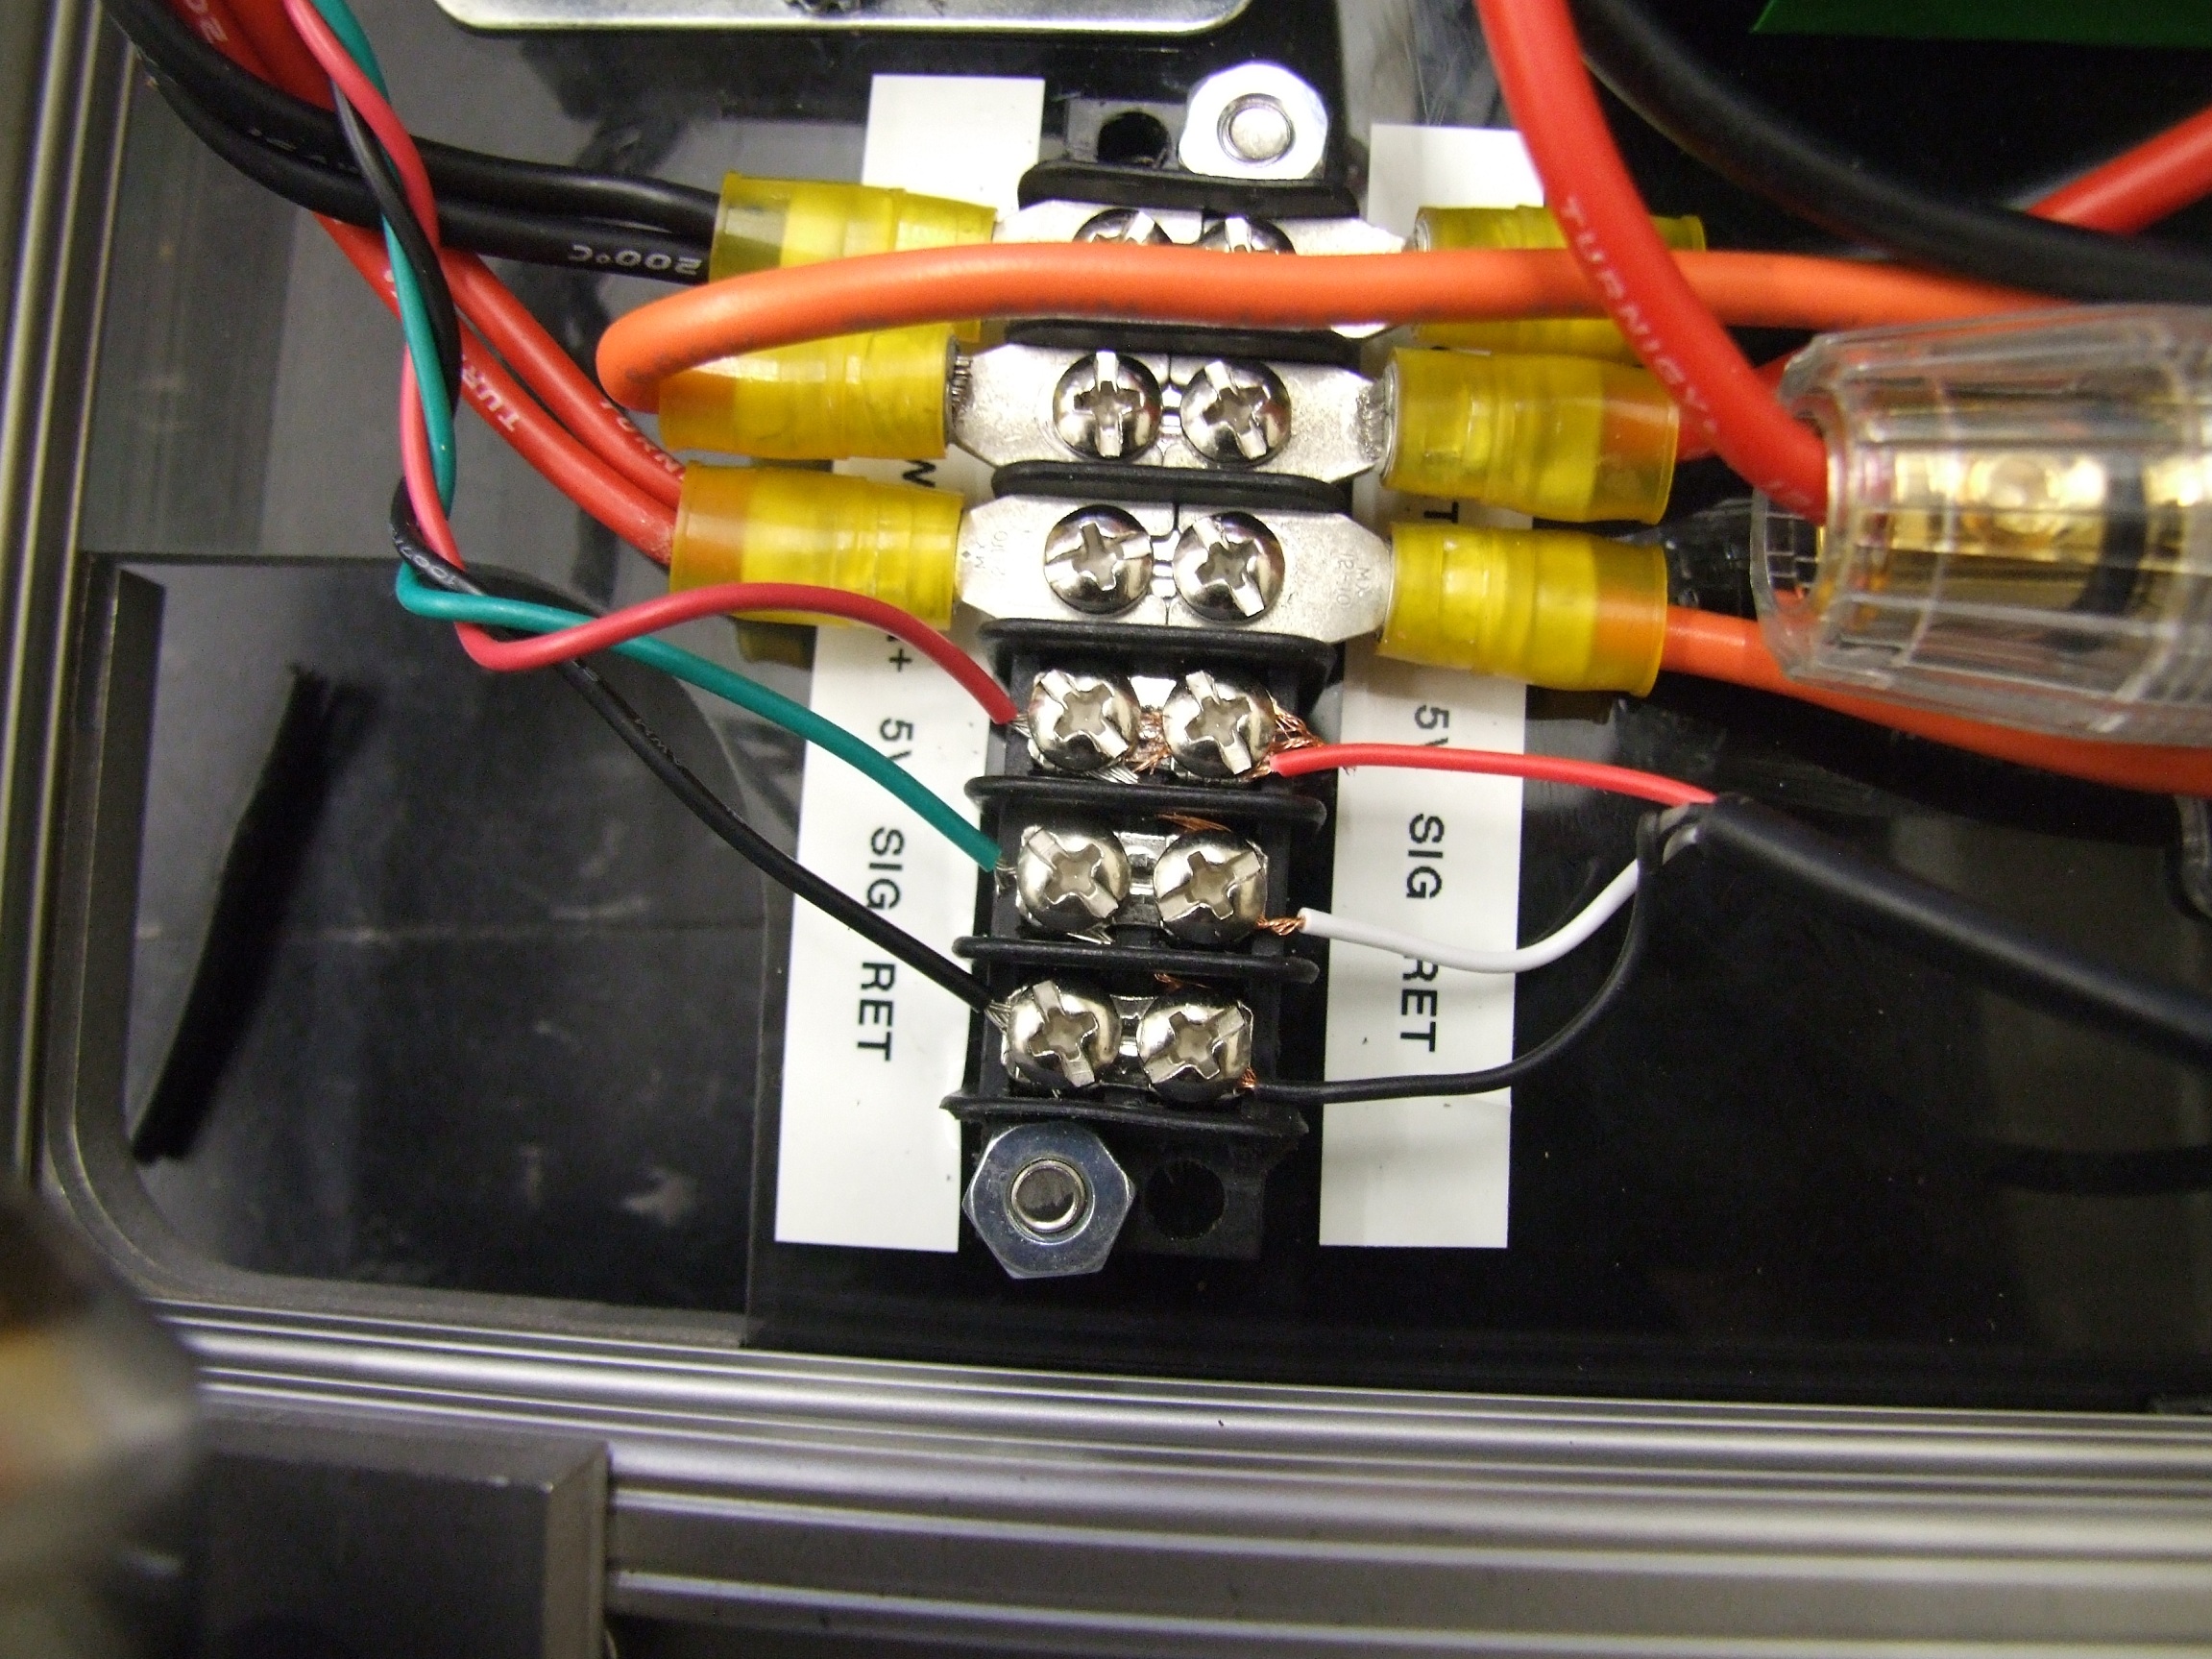
DPRC features a real terminal block which serves all the power distribution and signal connections, so the plan itself was more open to begin with.
I do like this arrangement of parts – it’s fairly clean, and the plate is entirely under the seat so you don’t really see any of it from a standing position. The plate can be pushed forward if I ever want to switch to the bigger 500W class Jasontroller, but in my mind this is not really worthwhile.
If those Jasontrollers look a little familiar, almost like I used them for something else before, that’s because…
Poor Chibikart.
Well, my next batch of Jasontrollers didn’t come on Wednesday, and last time I pledged that
If they don’t come by Wednesday, I might actually knock two Jasontrollers off Chibikart for now just to get it over with. Because I want to ride it. Badly.
-me, a few days ago
Chibikart still runs fine on 2 motors, though! In fact, for a while, it totally did. The acceleration is a little less glamorous.
Here’s the electronics deck installed in DPRC with wire extend-o-splices already made. The e-deck drops onto the frame from the bottom – the whole frame is turned over, the e-deck bolted on, and then it’s turned back over to finish wiring the switch and other parts. The seat is off this whole time. It was alot more elegant than trying to jiggle all the components while the seat was already covering them, like I had to do for Chibikart1.
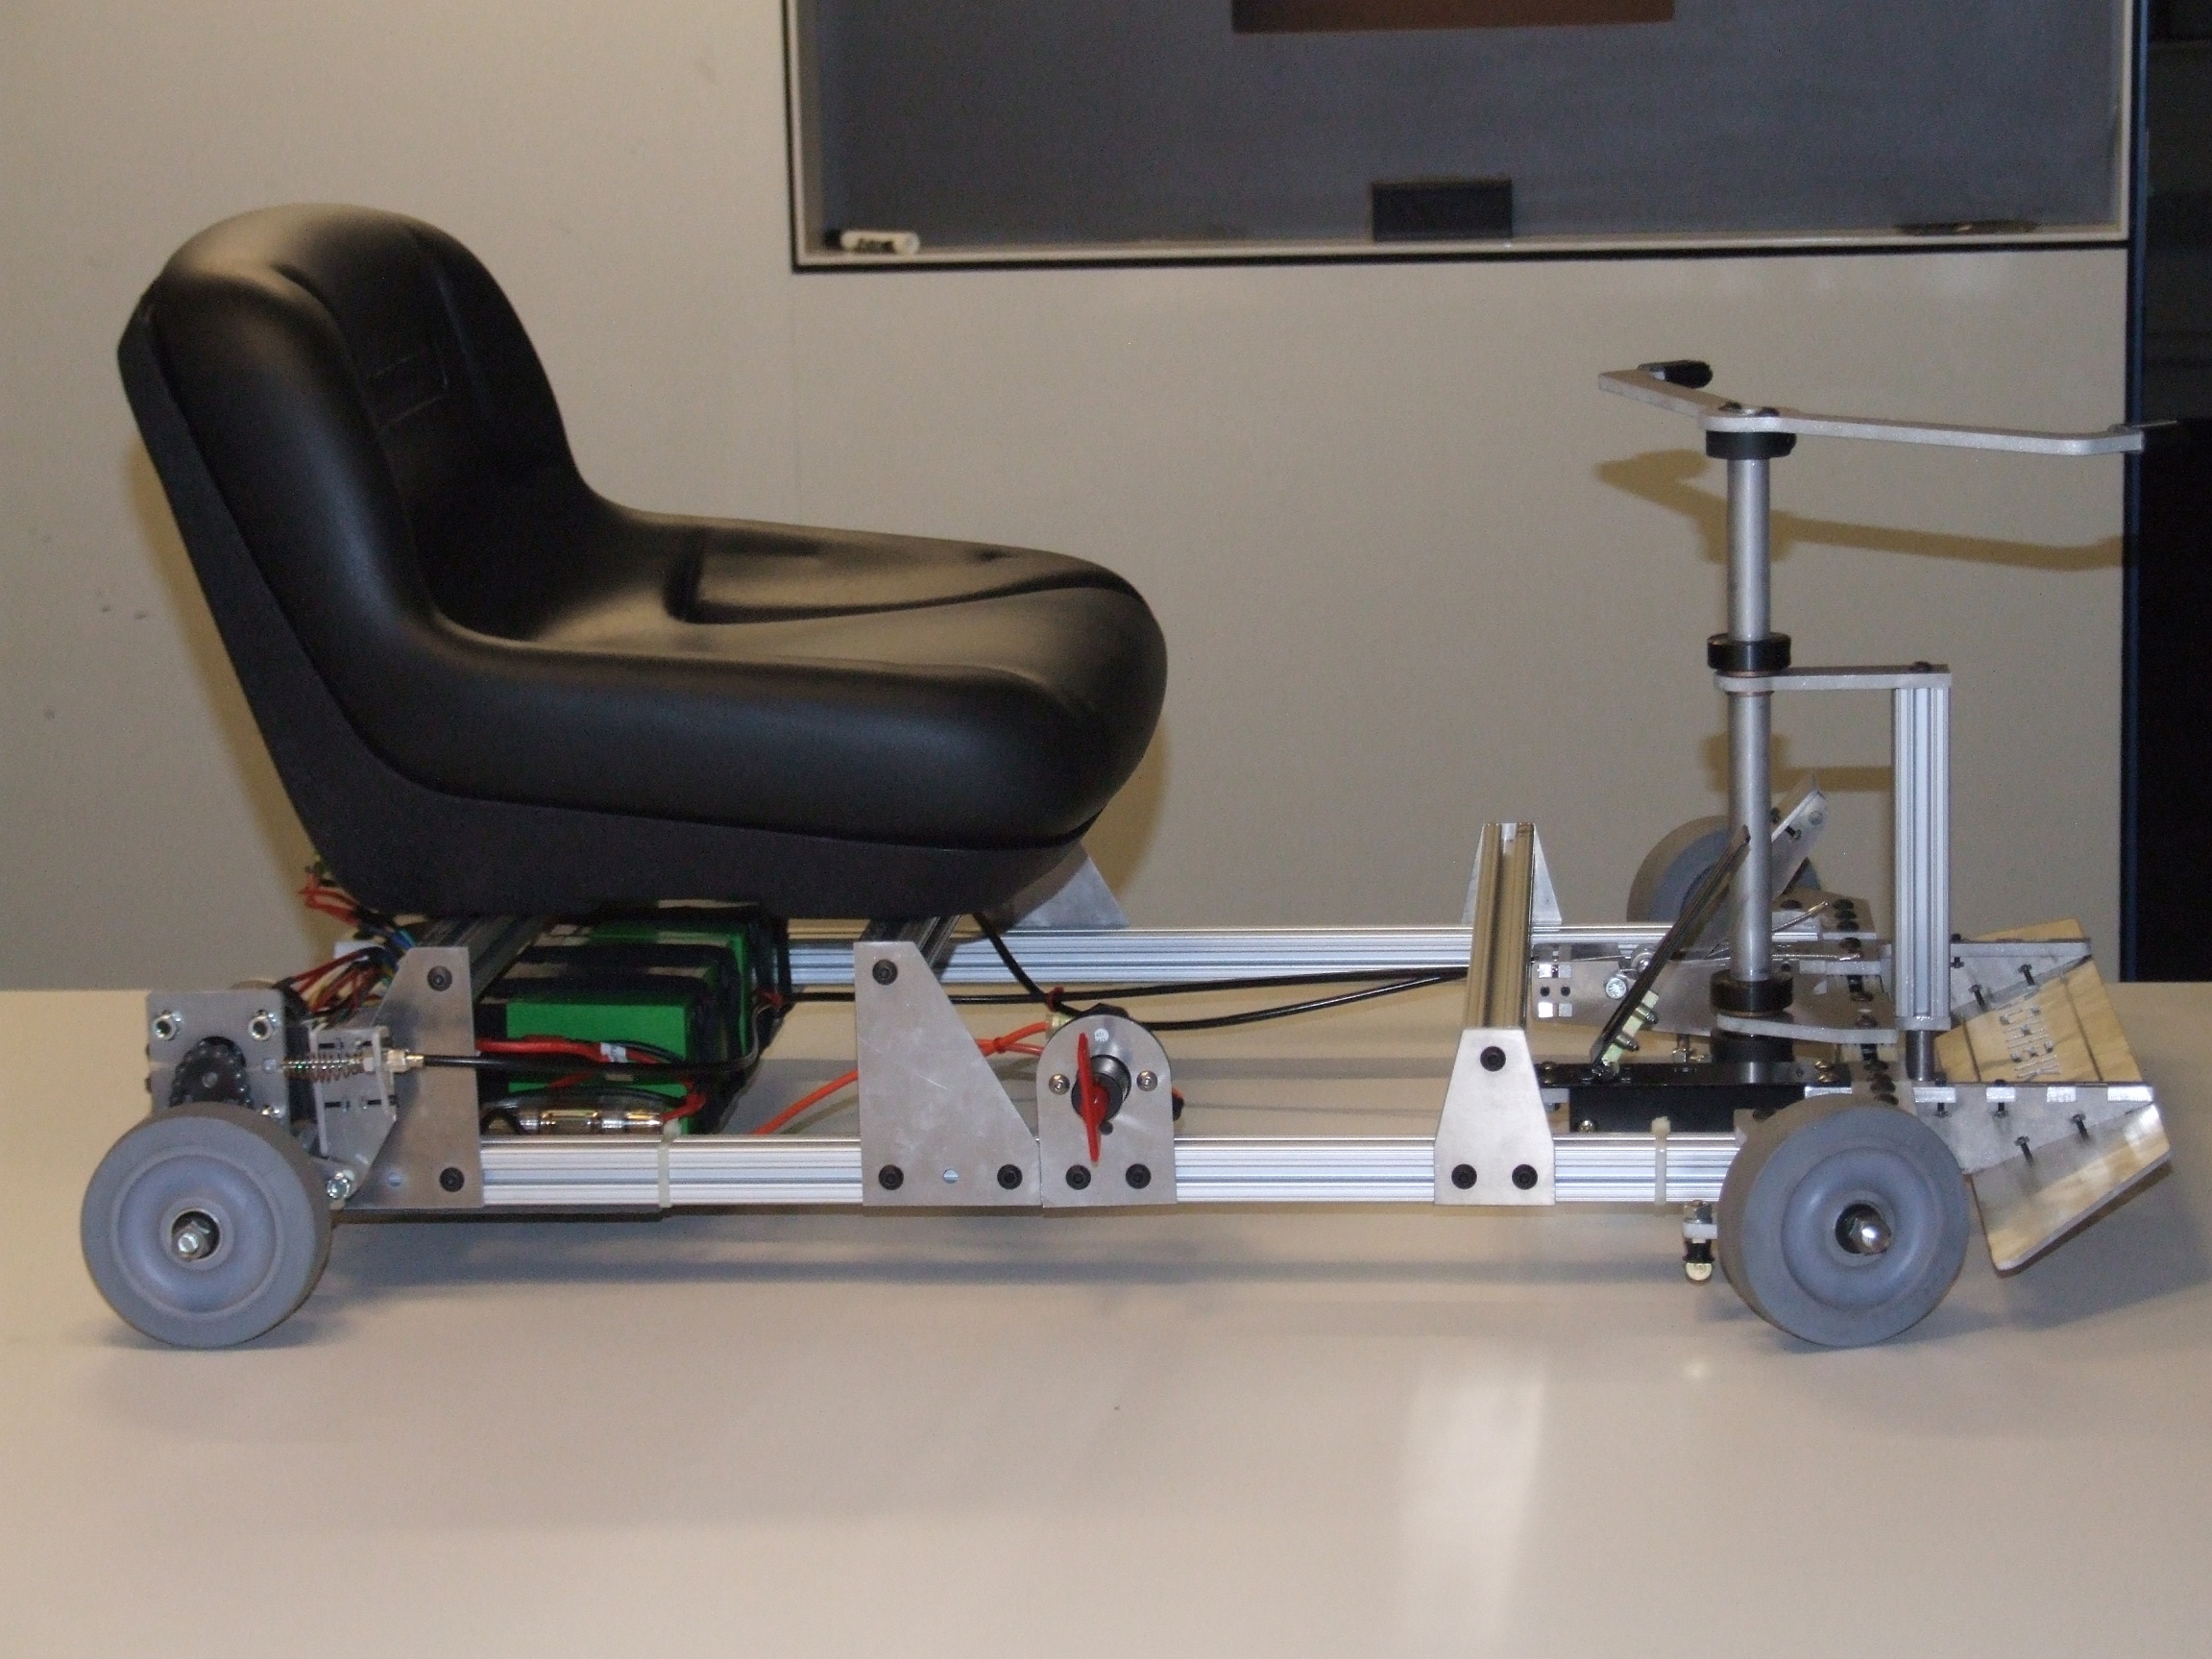
And here is the completed Pretty Shot!
This build is way cleaner, and also much lighter. We weighed Chibikart versus DPRC, and Chibikart actually weighs almost exactly 50 pounds. This was over my estimates, but Chibikart also has an unnecessarily huge battery and much heavier motors.
DPRC weighed in at only 36 pounds, with everything on it. I swear Melonscooter is about that heavy…
Compared to Chibikart 1. They’re the exact same outer dimensions and exact same height otherwise. Seeing Chibikart1 weigh so much really makes me want to downgrade the A123 module to some A123 12V7 bricks or the equivalent K2 bricks. I do have a few more A123 bricks left over, so perhaps it’s time for an Alphanumeric Battery Company (ABC) shootout with Chibikarts!
As promised in the original mission statement, I’ve finished the Instructable document. In it, you will find the above build progress pics and MANY MANY MANY more. The “Instructable pictures” folder in my DPRC build pics folder has 298 items in it. I don’t even have a word count, but I am positive it is well over 9000. I’ve entered it into the “Make It Real” contest, because the line of 3d printers in the IDC shop needs expanding – either the Objet or the PP3dP Up would be a fun addition to the lineup in the minishop.
hoonage video
This is probably the part that people actually care about – the test video! We made use of the convenient closed loop found in the building architecture yet again. I used Chibikart1 to film a few people driving around the… uhhh…. course.
Additionally, the first spinup video is here – it was linked in the Instructable too.