I obtained a physical plant from my cruft heap in the form of an old 5.25″ hard drive.

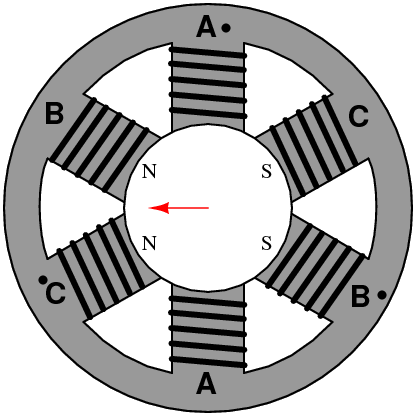
Okay, so it’s just the thorax and abdomen of a 5.25″ hard drive. Nonetheless, it contained a brushless DC motor. One way to tell a sensored BLDC motor is to count the wires – inevitably it will have 8 or 9. Three for the 3 phases, one for each sensor output, and a power & ground for the sensors. The “star point” of the 3 phases may or may not be accessible.
Pretty much immediately after getting the handout, I started scribbling all over it trying to adapt the 3 sensor outputs of an average BLDC motor to run the state machine. The 74LS163 would have to go, replaced with sensor interface circuitry and/or buffers.
But wait, is my HDD motor even “average”? What if it was 11 phase? Let’s take some scope readings to find out. Here’s a picture of the back-EMF (voltage generated) by the motor when I gave the disks a twirl. Every motor has a BEMF signature because every motor can also work as a generator.

Hey! It’s a trapezoidal waveform, telltale of a permanent magnet rotor. Notice the relative positions of the waveforms. They are identical, but phase shifted. Taking wave 2 as the reference, wave 1 is 1/3 wavelength ahead in time and wave 3 is 1/3 behind in time. In electrical terms, they exhibit 120 degree phase lead/lag.
That’s a good thing. That means my motor works.
Now let’s look at the Hall sensor outputs. I didn’t pay attention to exactly which wire corresponded with which phase yet, so orange, purple, and blue don’t necessarily correspond to eachother across the scope images.

It’s a 120 degree sensor arrangement, just like it’s supposed to be. The square waves lead/lag eachother by 1/3rd of an electrical cycle.
There are such things as 60 degree sensor placements, in which the “cascade” is much steeper because the waves are separated in time by half the amount. 120 degree makes for a fully symmetrical motor, so I’m lucky to have hit upon the correct type. The two can be transformed into eachother by inverting the signal from the “middle” channel – B, 2, beta, Y, V, whatever.
This is where I can plug the state machine in. Focusing in on one full cycle of the channel 1 signal,

Whoa, that’s MAD TYTE DAWG. If we take the hall sensors to be binary digits, Sensor 1 as the LSB, we obtain a numeric “firing order” of states!
Which meant that all I had to do to convert the SVM kernel to use Hall sensors was rewire the logic gates.

So what’s going on here now?
The connections coming from each NOR output gate has not changed. They all still go two gates each. All that has changed is the output order of the 74LS138.
- Output Y0 moves to Y3. The new Y0 is an invalid state.
- Output Y1 remains unchanged
- Output Y2 moves to Y5
- Output Y3 moves to Y4
- Output Y4 moves to Y6
- Output Y5 moves to Y2.
- Output Y7 is an invalid state.
I obtained these connections by examining Microchip Appnote 857, which showes a 120 degree sensored motor’s BEMF and Hall sensor readings, along with their respective states. I didn’t have 6 channels of measurement available to find out.
Well that was easy. But does it work?

This is what I call a “leap of faith”. In the class, you are provided materials to make a 3 phase leg PCB using a power MOSFET and independent gate drive circuitry for each channel. So the power stage was taken care of already. FVM is constructed on the breadboard.
Does it work?!!?

HEEEEEEEEEEEYOOOOOOOOO
It actually took three tries to get the sensor-to-phase relationship correct. The normal way you’d do this is to scope one phase midpoint and one sensor at a time and find which ones line up when the motor is turning. So the peak of phase A should occur at the same time that the square wave of sensor A is high.
If it doesn’t work – well, you leverage the fact that motors are round and 120 degree phase spacing is symmetrical, and swap two leads at a time until it does work. “Does” is a bit subjective, because there are two connections out of six possible combinations that result in a motor that kind of runs but has very little torque. These states were interpreted in the HDD motor as the motor trying to run, but failing because the disks’ inertia. A proper connection means the motor speeds up very quickly.
Here’s a video of Face Vector Modulation running for the first time! In the background, Channel A and Channel B of the sensors can be seen. The MITERS public scope only has 2 channels and is old and analog, so no pretty screencaps.

How fast is the motor going? The frequency counter says that state 1 rolls around 266 times every second.

When the 74LS138 selects an output, it briefly dips that pin to logical low. So I counted how many times the pin drops for every motor revolution. Most motors have more poles than the basic 3/2 model. A 3/2 motor will cycle through the six states for every 1 mechanical revolution.
Motors with more poles multiply the number of electrical revolutions per mechanical one. A 4 pole motor needs to cycle through the SVM states twice to accomplish 1 mechanical revolution. My HDD turned out to be a 4 pole motor, because by manually rotating the platter, state 1 was selected twice in one revolution.
That means the motor is actually turning half of 266Hz, or 133. This is around 8000 RPM, which is reasonable for a hard drive motor normally running in the 5400-7200 range but is speed regulated and carefully watched…. versus me flooring the PWM knob.
Back to the 6.131 lab where they have nice scopes to take a picture of the motor phase voltages…

HOLY CRAP IT’S REAL
I thought they put those trapezoidal commutation pictures in textbooks just to fuck around with me! It’s real! Motors are real! Soylent Green IS PEOPLE!!!!
The PWM rate in this image is about 30,000Hz. This is generated independently of motor state – the motor is most definitely not turning 15,000 times a second.
Seeing something that I’ve only read and theorized about up until t his point made me all giddy and happy and bouncy like a 7 year old schoolgirl. A 3 phase one, mind you. I’m not sure what that means, but let’s move on.
I wasn’t satisfied yet. I wanted reverse on the motor. Since the phases are symmetrical, you could just swap two wires and two sensor connections and the motor will happily run backwards. But BLDC motors are easily reversible by stepping backwards through the state machine. To do this in the most naive fashion possible, all 3 sensor inputs can be inverted. 101 becomes 010, 001 becomes 100.
What happens then is the controller tries to apply the opposite polarity field to the rotor. The rotor moves backwards. This moves the motor one state back, and the cycle continues.

For instance, if the motor is in state 101, the inverted pattern is 010. The controller moves the motor back into state 001, which is inverted to become 110. Conveniently, this is one state back from 010, so the commutation can continue backwards.
So how do I controllably invert all 3 signals on command without suppressing any?

The XOR (exclusive OR) function can be used as a “controlled inversion“. One input to the gate is the hall sensor, and another is a logical HIGH or LOW. When the second input is HIGH, the output is the opposite value of the first input.
In comes the 74LS136, the quad XOR chip. I stuck this in the signal path from sensor to state machine, and added a sconnection common to 3 of the gates that could be toggled high or low (read: loose wire plugged into 5v or GND).

Here’s an overview of FVM 1.0, now with the LS136 controlling motor direction.
Check out the video! The HDD motor takes a while to change speed because the disks weigh so much. All I did was suddenly toggle the “reverse switch”, which means the motor is being active forced to change directions by the controller. It’s probably not healthy for either one.
I scoped the motor BEMF on an unpowered spindown to see if the trapezoidal profile was still there. Imagine my surprise when I got this:

What the hell? It looks like it’s TRYING HARD to be trapezoidal, but is getting cut off at the ends abruptly. But the PWM is at 0% – nothing should be switching. Right?
…right?
Nope, turns out that even if the PWM is at 0%, meaning the high side switches are always suppressed, the state machine is still “running” the motor. The state machine was periodically switching on the bottom side, letting the motor current build up and circulate, then cutting it off. It was making a passive attempt at braking that only happened every half cycle because MOSFETs cannot block conduction in one direction.
When I disabled the state machine by yanking its power connection, the BEMF returned to the familiar trapezoid.

Interesting.
But wait. If that is a coast-down in the correct direction, what happens if I coast down the motor (no PWM applied) but have the reverse activated? I was curious. Would the weird untrapezoid flip across the horizontal axis?
Well, the first thing that happened was the power supply crowbarring. The lab power supply has an overcurrent and overvoltage shutdown feature. Maybe I shouldn’t do this from top speed. I spun the motor to a relatively modest RPM and tried it again.

COOOOOOL
The power supply’s voltage reading jumped up to 21 volts and drifted slowly back down to 12 volts as the motor slowed down.
Have I accidentally found the “regenerative braking” mode?
3 phase regen braking is still a topic that I’m fuzzy on. I’ve become comfortable enough with DC motor regeneration to try and apply it to LOLrioKart in the future, and I figure that 3ph isn’t that different, just more things to keep track of.
I repeated the experiment a few times. The power supply voltage always spiked above its setting of 12 volts whenever I did the “zero power reverse”, and fell with the motor speed. This is definitely a regen mode of some sort, which makes the win even more epic.
Conclusion
FVM demonstrated that it can commutate a 120 degree sensored brushless DC motor in both directions, at variable speed, and with a possible brake mode that can feed the stored energy in the motor back into the power source.It accomplishes this with no proprietary or dedicated motor control ICs, nor with programmable logic such as FLASH microcontrollers or FPGAs. It uses only universally manufactured 7400 series ICs, op amps, and comparators.
Future directions for FVM include packaging the whole breadboarded mess onto a more permanent (maybe protoboard?) substrate and creating a basic motor controller for one of the vehicles in my flock. I intend to investigate the braking mode more to learn about 3 phase bidirectional drives.
Additionally, anyone else is welcome to build one and verify the work. Since much of this is done as an exploration by me, with limited EE intuition and knowledge, having others sanity check and confirm my observations is beneficial.
Here’s the current schematic for FVM.
Works Cited
I can’t take credit for all of it. In fact, I can take barely any credit, since the foundation of FVM is built upon material presented in MIT’s course 6.131, Power Electronics Laboratory, instructed by Professors Steven B. Leeb and James Kirtley. 6.131 is one of the most productive classes I’ve been in yet. I hope to gain the ability to unleash myself permanently from commercial controllers in the future.
 So what does it do?

