Good ol’ Susquehanna Boxcar.
What started as a quick-build meme using whatever I had dug out of my (then, in late 2021, still not yet unpacked) totes full of motors turned into… something that just kept evolving and getting funnier. After doing suspiciously well at Motorama 2022 using only surplus inkjet printer head motors for drive, it got switched to brushless power in 2023 and then kept on doing suspiciously well at Dragon Con.

Always having been a hacked-together build, by 2024 the thing was really showing its technical debt. It was tacky to service, which cost me fights at both of those events. Much like old Uberclocker builds of yore, I didn’t really care how it went together as long as it did. And so, after burning out 2 of the drive motors at Dragon Con 2024, I decided you know what? It’s time to SPEND MONEY on it. (I mean, ignore the fact that I spent money on it from the start even though I said I wasn’t going to, as if the first thing I did after declaring I wasn’t going to spend money on it was ordering a bunch of UHMW strips from McMaster)
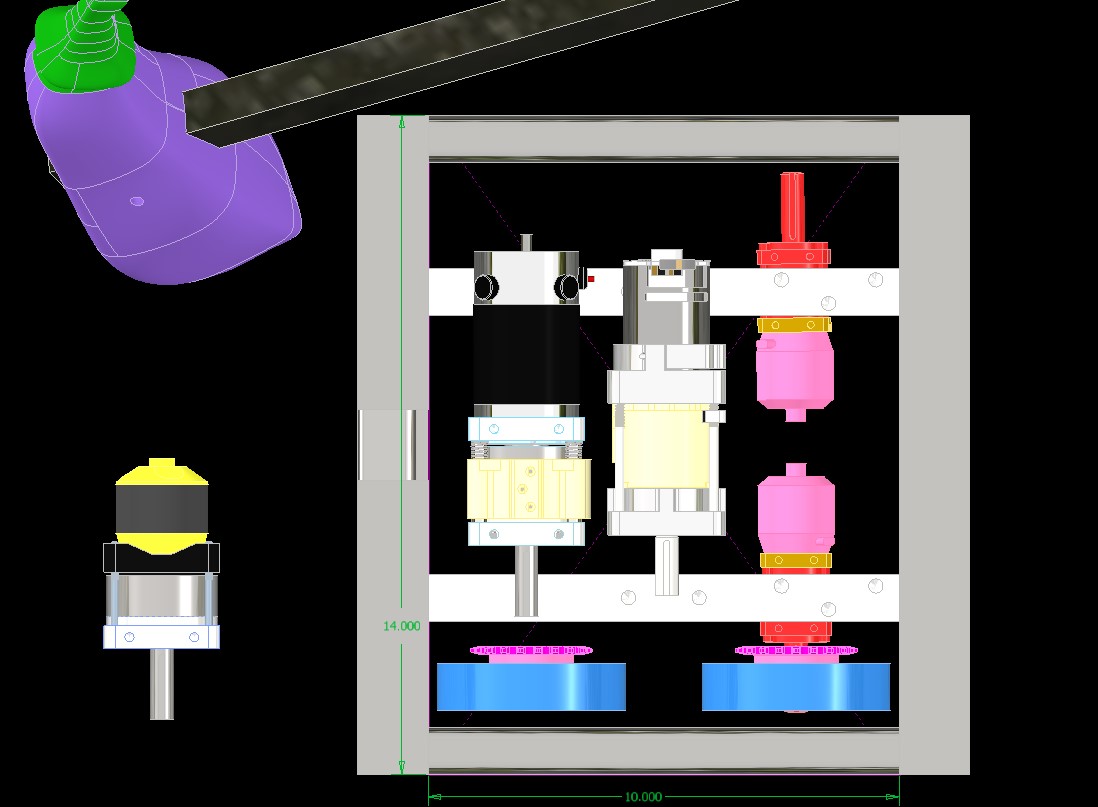
First order of business is to throw a bunch of random motors into CAD. The idea was to reuse parts I already own from 30Haul – I’ve owned a tote of the last 30haul’s wreckage ever since its final NHRL event in 2021. I sold the chassis parts and some drive parts to various people – some of whom have even managed to vaguely rebuild and remix it. I retained much of the intact drivetrain consisting of 42mm HobbyKing SK3 motors zipped to P61 gearboxes, as well as the gears and sprocketry that made up the lifter.
A couple of other wildcard motors also made it into this bucket of brain pressure washing grime. One thing I wanted to do was upgrade the hammer/lifter/eggplanter motor. The bot used a Harbor Freight 18V drill gearbox that I hot-modded (“Harbor Freight 68239 LS Swapped.iam”) with a 3536 size outrunner motor. While it “worked”, it had durability issues from the much greater torque input the motor was capable of; primarily, the age-old robot community drill motor hack to secure the drill’s clutch ring kept blowing out because the casing would actually flex too much.
So there’s some surprising motors from the past in there. One of them was sizing up a BaneBots P80 – that model I put together for old 30Haul ages ago. Another one is Overhaul 2’s never-implemented Banebots P80 based shifter gearbox, a design I ripped off from the DeWalt 3-speed gearbox next to it that forms the foundation of the DeWut motor. All three are of the same size class, 2.5 inch across size, and it was more of a matter of what actually fits lengthwise.
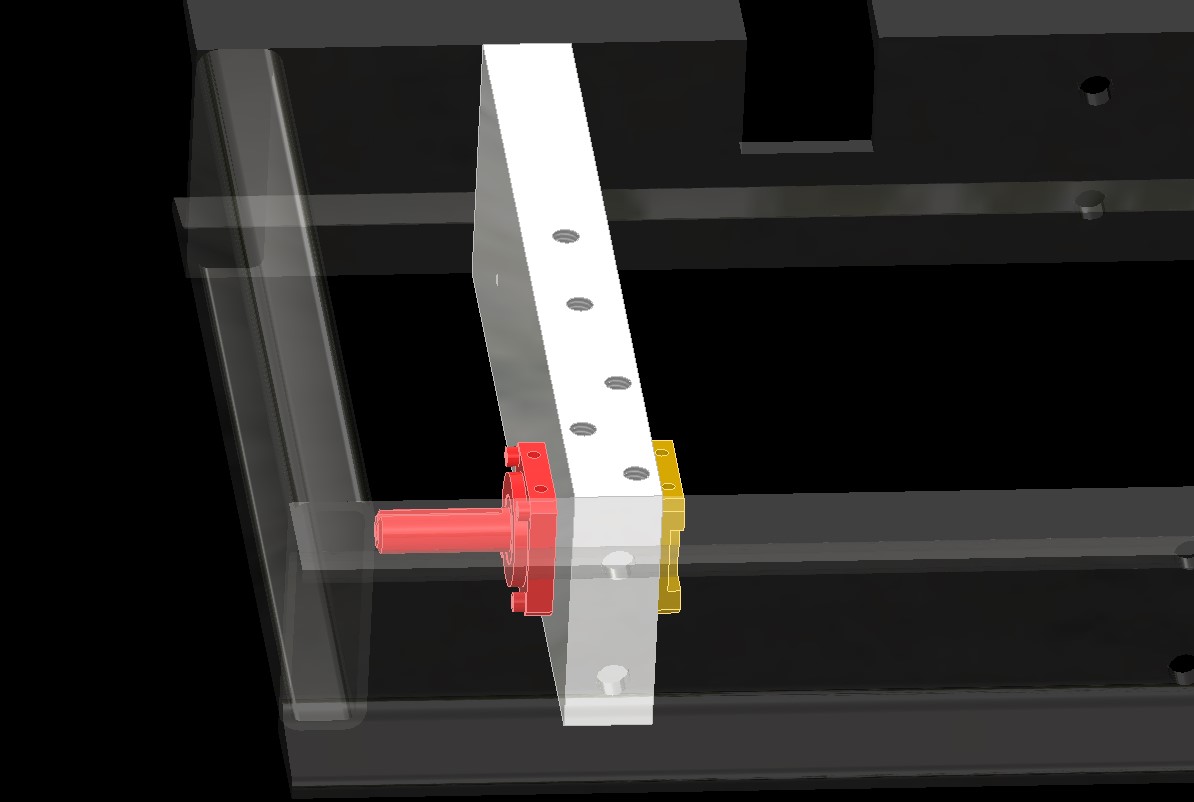
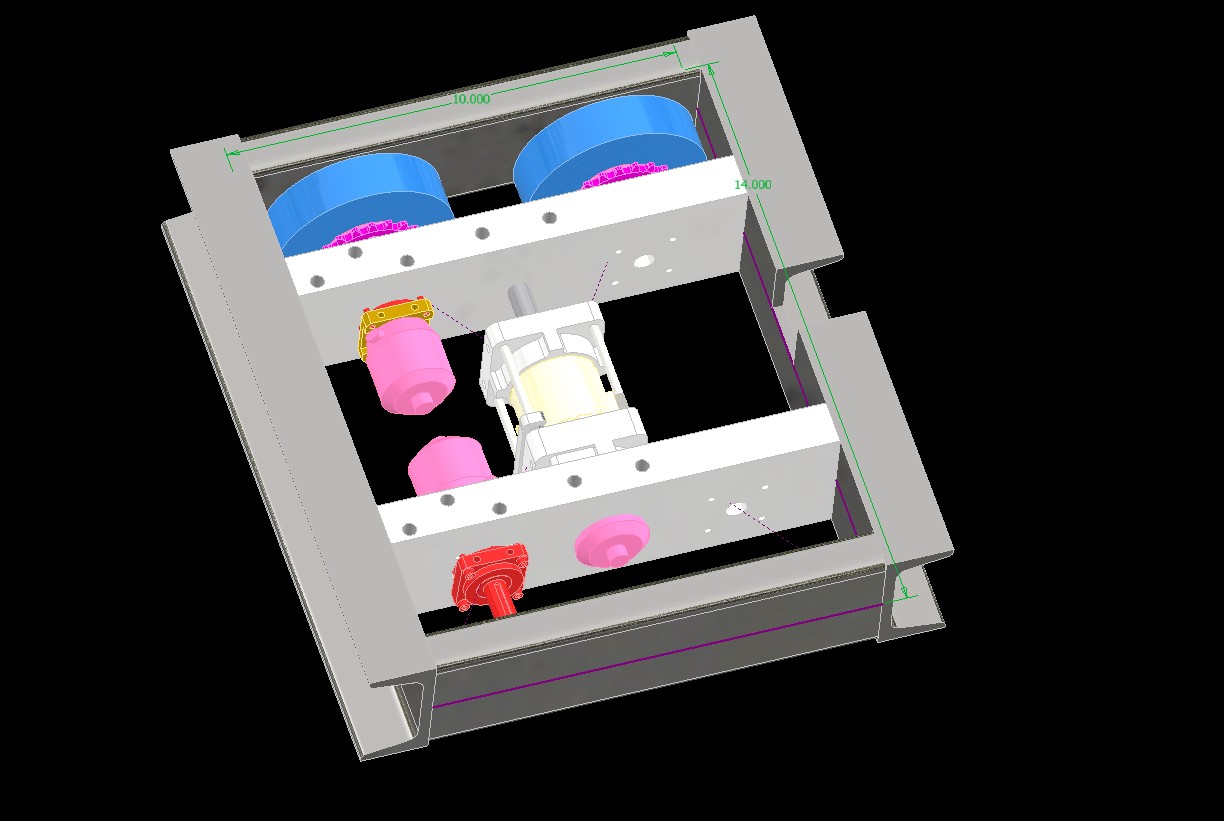
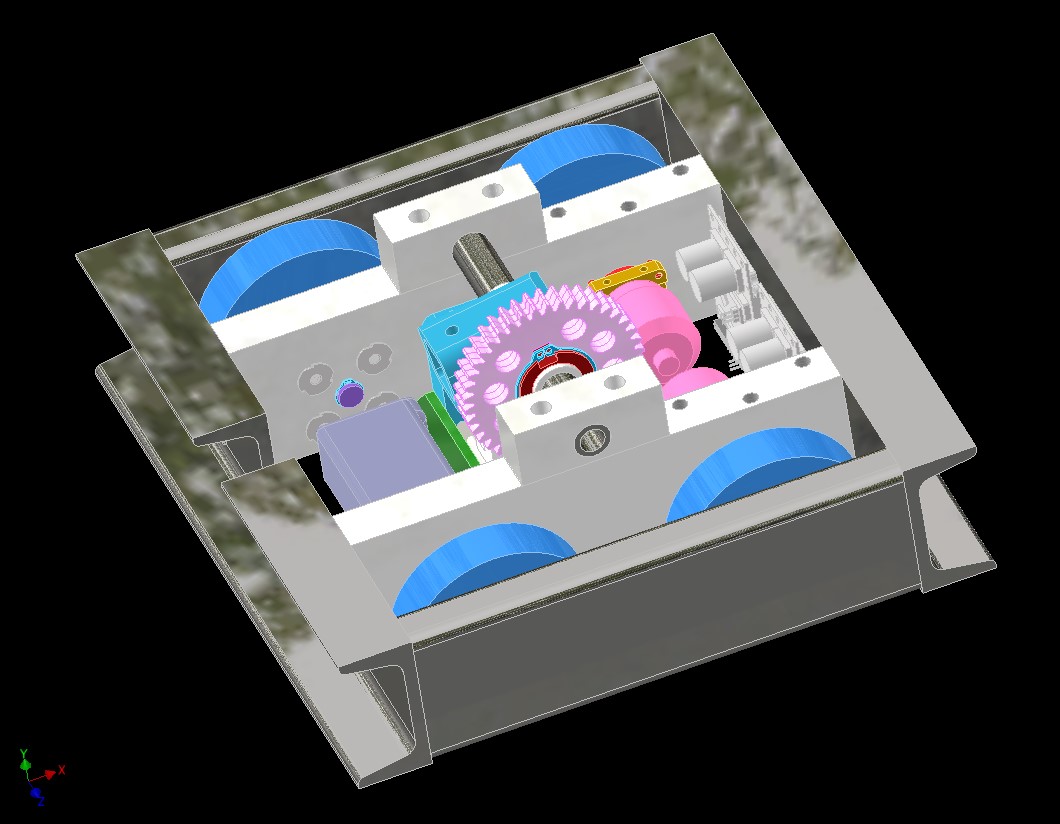
One thing that was pretty decisive was the drive motors, which I decided will be 30haul’s drive gearboxes. So while I was still mullling the lifter/hammer motor decision, I did some starting detail design on the drive. The layout will no longer be a motor geared to each wheel, but just a pretty regular direct drive rear and chain drive front.
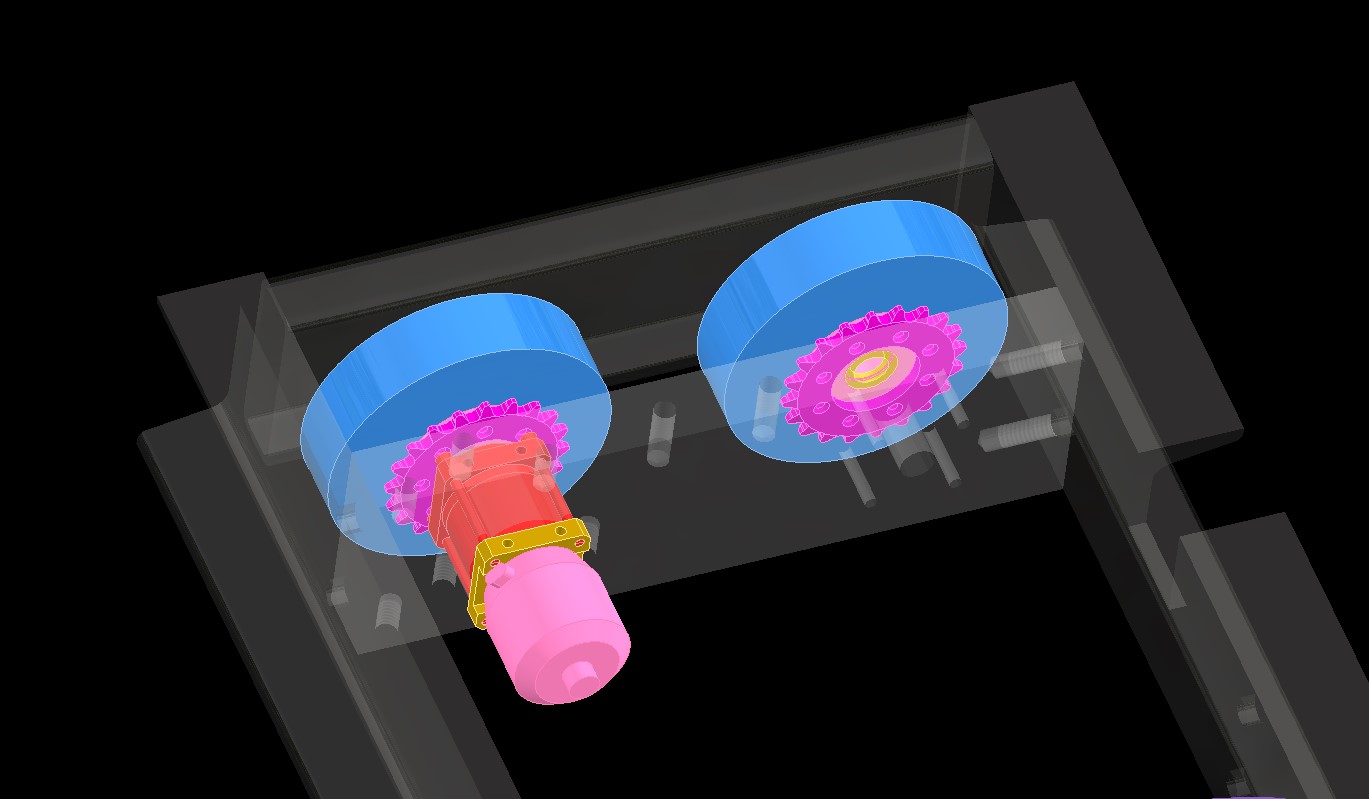
The real innovation here is just that I am copying some homework from NHRL bots that have done it this way, and fully embedding the drive gearbox into the thick UHMW frame rail. It’s just drilling a big center hole and four tie rod thru-holes and trapping the gearbox inside. For the front, I’m making a “fake P61” block that uses the same bolt pattern so I can recycle the drilling template.
The wheels modeled are basically the same cut up gum rubber foam I’ve come to favor, on 3D printed hubs, to which plate-cut sprockets are attached. It’s a divergence from the “gearhubs” of the previous iteration, but not by much.
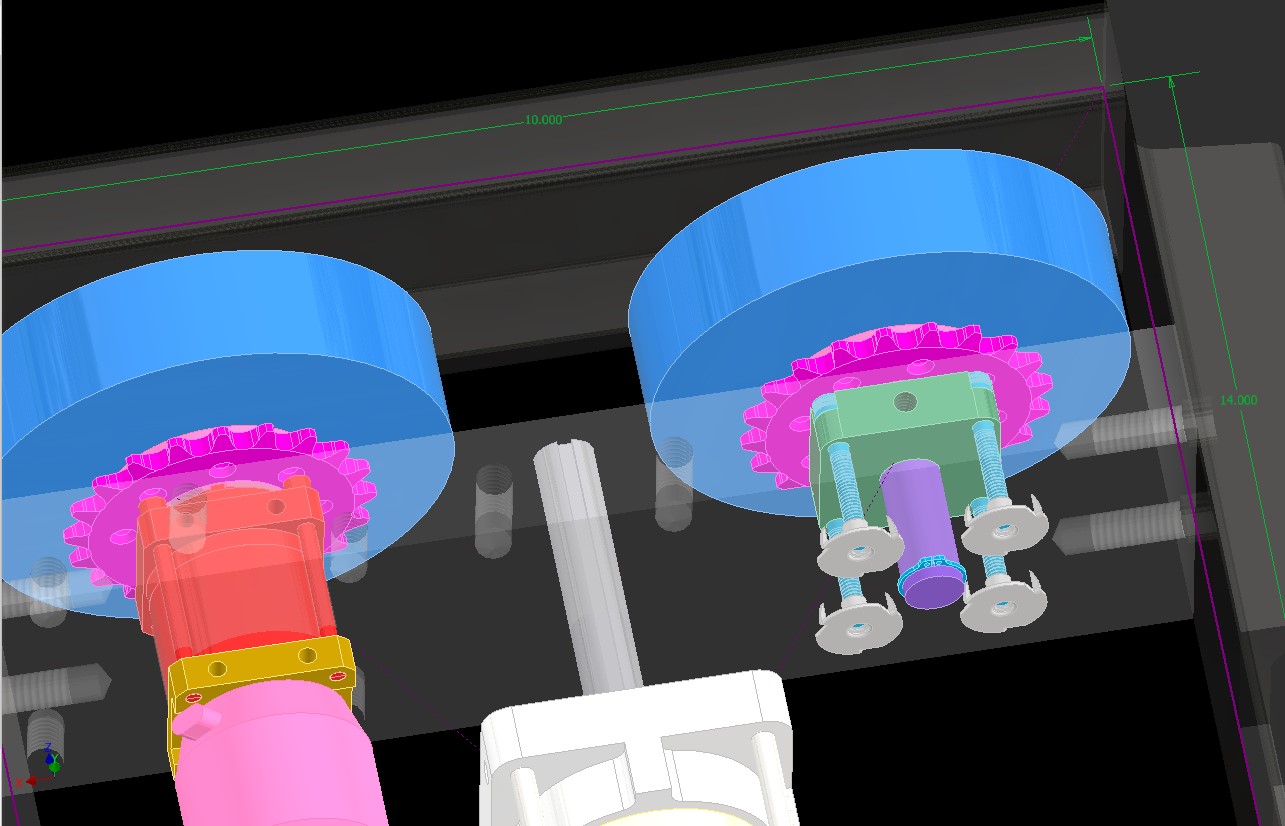
The fake P60 will be tied to the frame with some tee nuts for wood, another bit of a throwback for me. UHMW is easily shaped by woodworking tools, so it was one of my favorite (and only) robot materials back in the day.
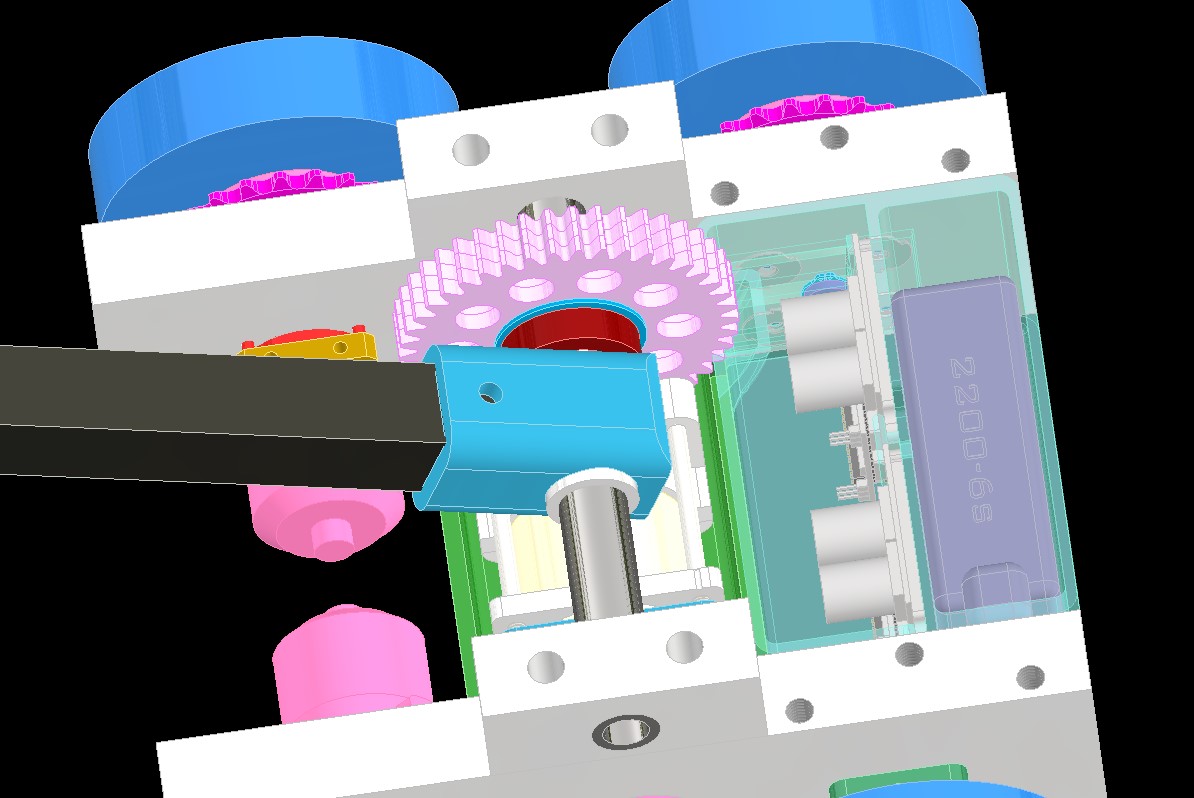
Around this time was when the real innovation started. Namely, I decided to give a brushless DeWut swap a try. Most because this was the only way I could fit it, and also because I wanted a quick and easy to switch between “hammer” (fast gear ratio) and “lifter” (slow gear ratio).
If you’ve been in my circle for a long time, you’ve probably heard “Brushless DeWut” thrown around forever now. With modern cordless drills all having become “unibody” i.e. there’s just no more separate gearbox and motor combo inside the plastic shell, making a drive motor conversion is a lot more involved. And with the robot drive market having moved towards bespoke solutions instead of repurposing industrial and commercial motors (*shakes cane*) there was simply no market-based incentive. I’ve bought 4-5 models of brushless drill over the past few years and they all follow similar thought patterns.
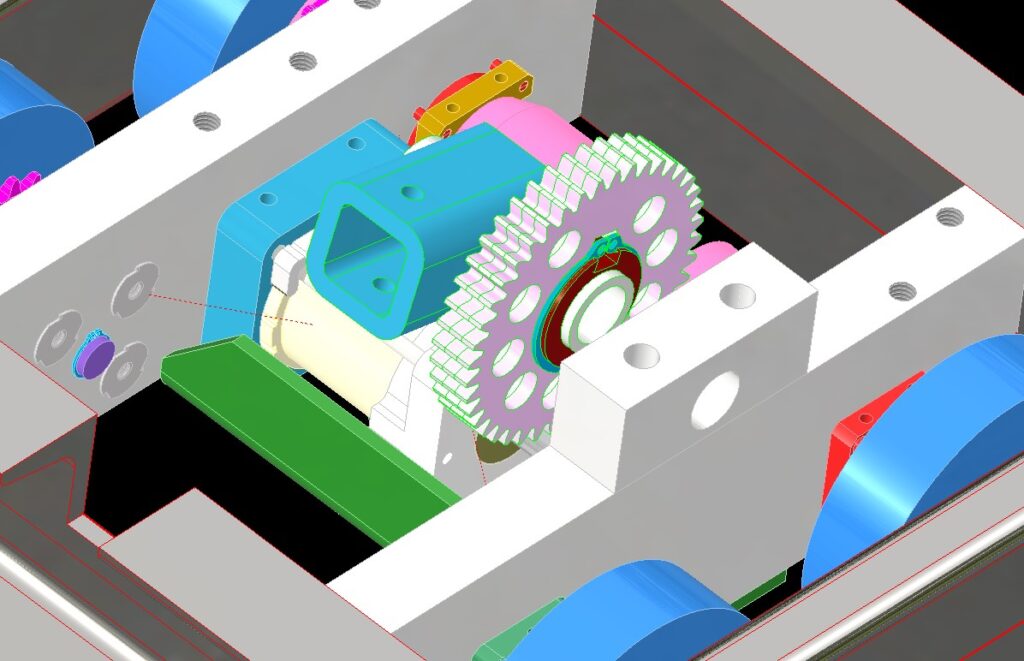
All this entails, though, is stuffing a 42mm outrunner motor into the back side of the existing DeWut conversion.
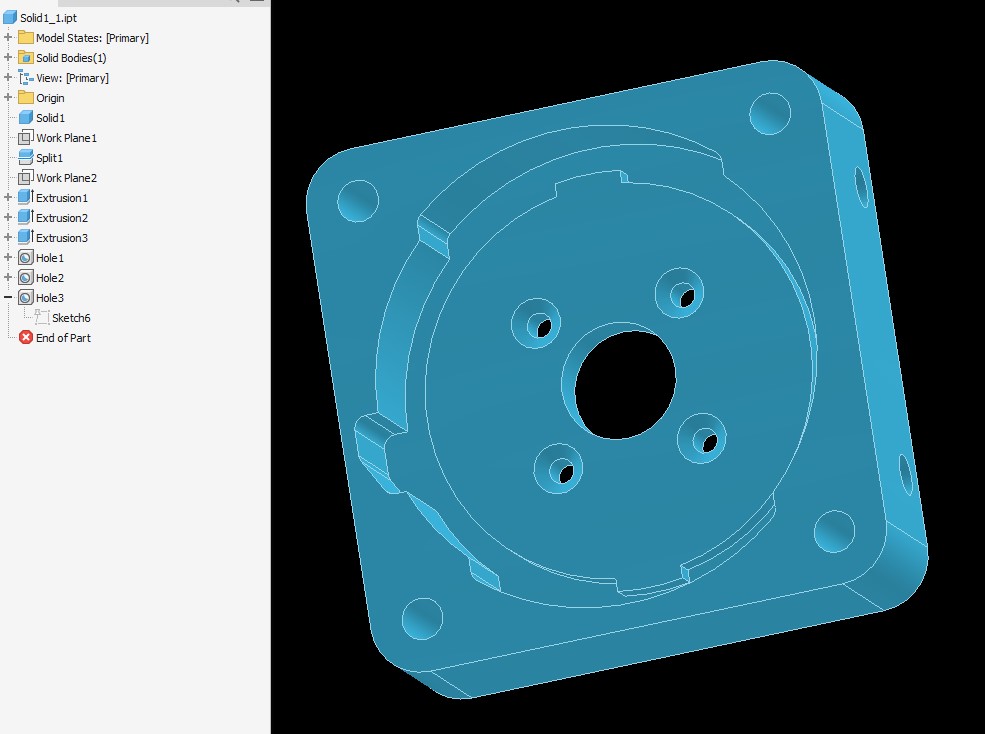
Nothing substantially exciting to be seen! I took the original DeWut model from 2011 or something and just cut the back of it off, then made a motor mounting face. The whole thing will be a 3D print using carbon fiber filled nylon, probably with a few laps of carbon fiber thrown in using my Markforged machines, to keep it rigid in the barrel section.
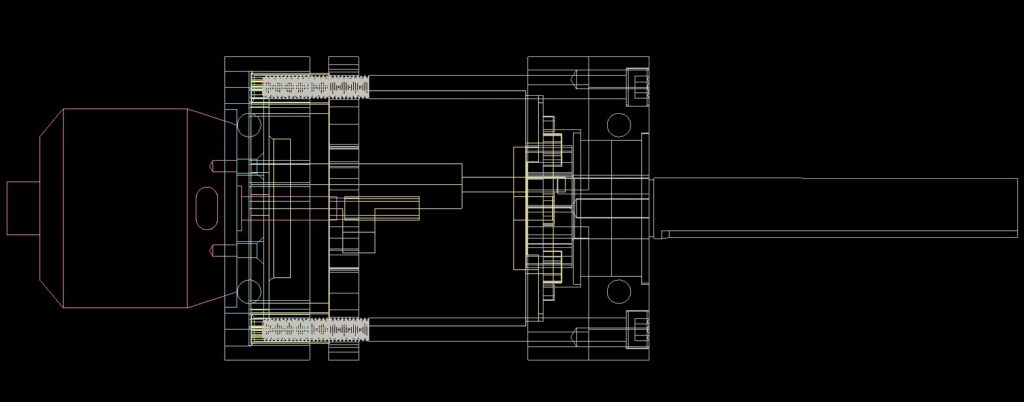
Here’s a cross section look through the assembly. A 42mm size motor has a 5mm shaft just like the DeWalt motors did, with a pressed pinion. I didn’t want to have to cut or modify the motor shaft, so the depth of the motor mounting face was set by measuring where the motor shaft reached the gearbox first stage, plus a bit of clearance.
From here, the design cooked pretty fast. I wanted the weapon motor to be serviceable without taking the entirety of everything apart like last time, so I decided on a bottom-drop sheet metal bracket. By “Sheet Metal” I really mean 3/16″ thick aluminum. At this point in time, with the likes of SendCutSend and OSHCut offering express and precise sheet metal service (This message brought to you by neither of them, by the way, I just prolifically use both) there’s just no more excuses.
Historically I’ve been turned off by sheet metal assembly techniques because the Chinese guy running the press or brake machine was me. Very rarely could I actually manage two parallel bends or get anything to line up, much less get the bend radius right (Ever notice that your average cheap sheet metal combo machine has all sharp dies instead of radiused, and assume you’re working with gauges thin enough where that just about doesn’t matter?)
But I’ve made plenty of assemblies for other people now where a half dozen large bent and formed parts come together with almost dowel-pin precision. It was time to make some for myself for once!
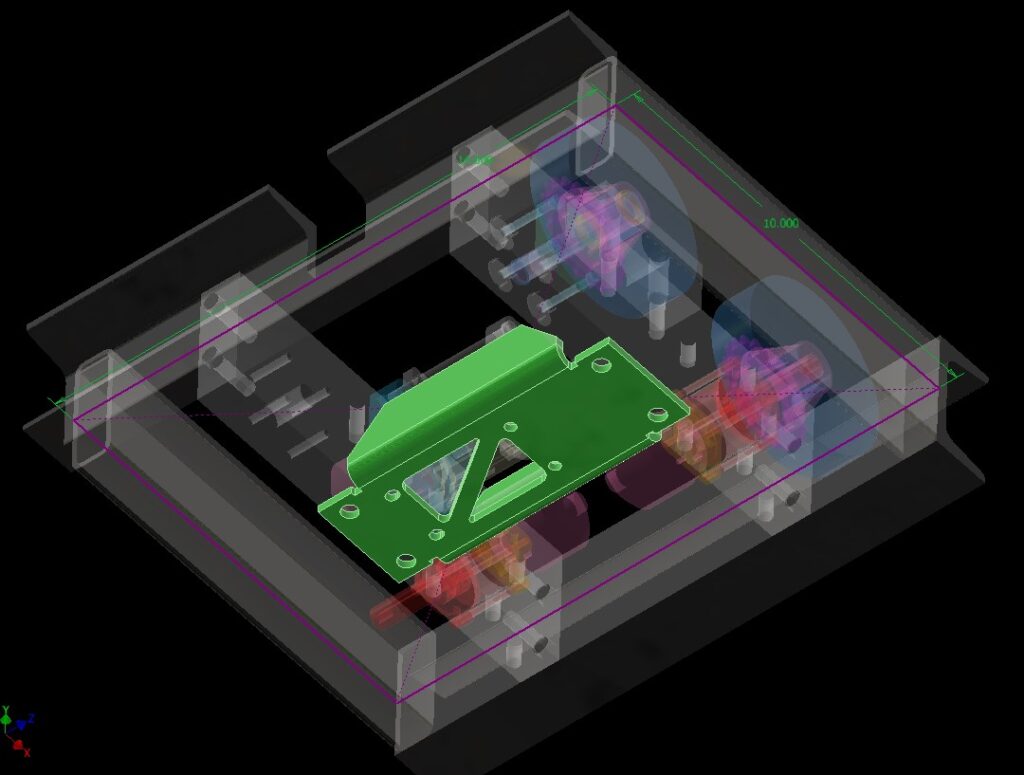
“Draw the rest of the fucking bracket” happened, but really all that is is adding the mounting features of the DeWut.
To allow for a bottom drop while providing support for the distal end of the motor output shaft, I just made a quick “pillow block” that will live with the bracket and holds two flanged ball bearings.
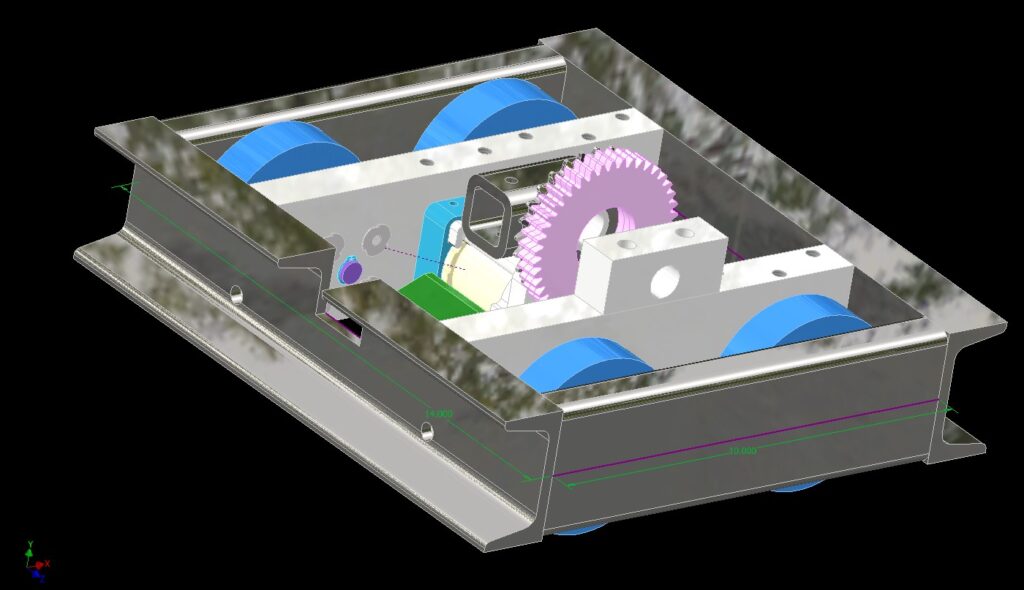
The quick drop service basically implied moving to a gear drive instead of chain drive. I whipped up another set of 12 DP spur gears, much like what I’d use in Uberclocker and 30Hauls of yore. The difference is this time, I’m doing them “laminated” style from the same 3/16″ aluminum that will form the motor bracket! This saves some cost using those online services since there’s fewer material setups.
To compensate for the slightly weaker nature of a bunch of thinner gears in a trenchcoat (with their unfinished sides and irregular contact patterns) I’m just letting the assembly be wider than a typical 30Haul gear. I’ve typically used 1/2″ thick material in 6061 or 7075, but I made space for up to 4 wide in this thickness (3/4″ thick).
To couple the gears to the, uhh.. end effector of choice, I’ll be making another welded hub. This time, it’s a 1.5″ diameter thick-walled steel tube welded to the socket. The outer diameter of the tube will have a keyway machined, basically turning it into a big keyed shaft. The gear segments slide on and are retained by a snap ring, my former worst enemy but now favorite nation. I’ve also backed down to three gear slices for now since I was very much running out of horizontal space.
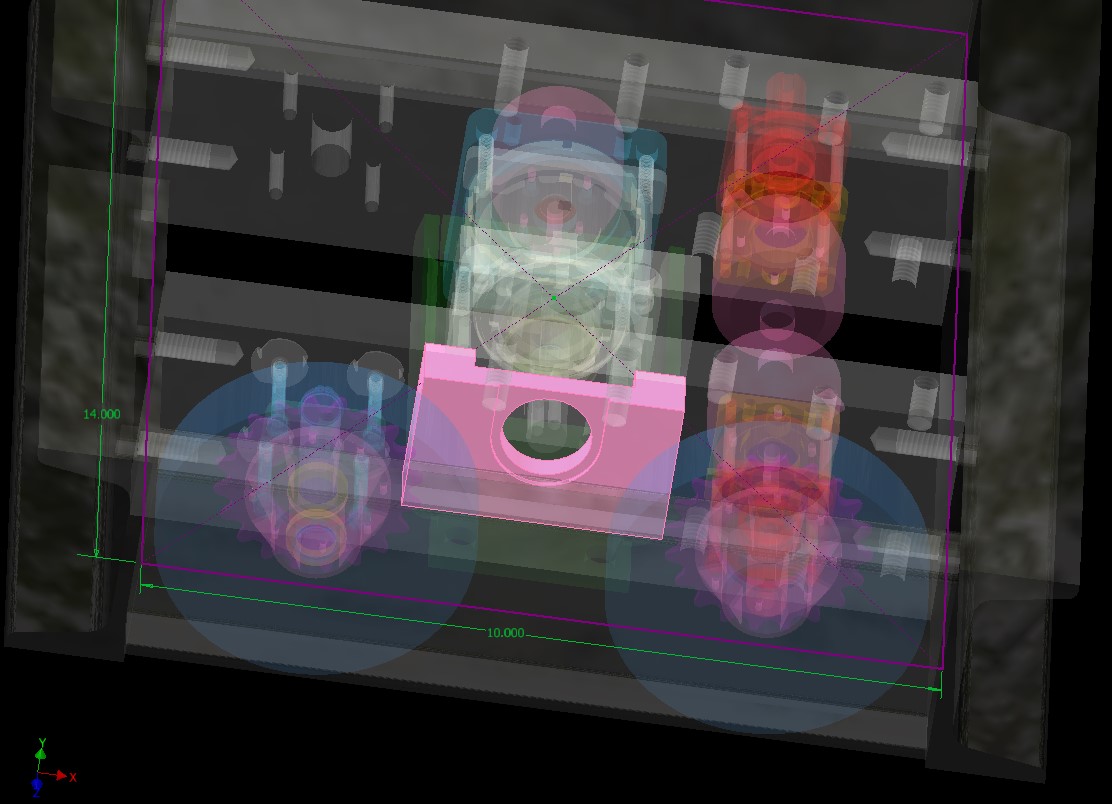
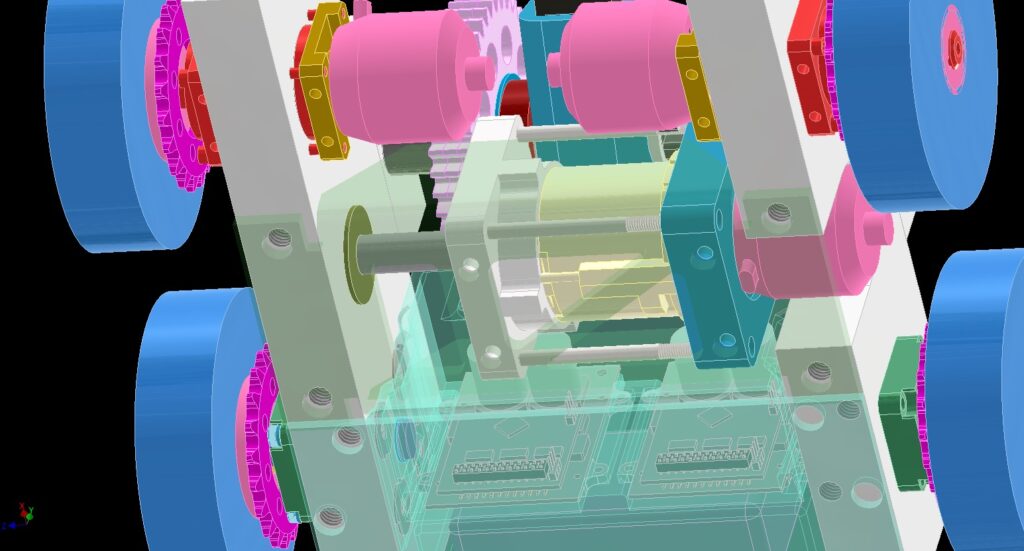
In another episode of “Move onto something else while I haven’t finished the first thing yet”, I began thinking ahead to where to put the internal parts. With the two larger motors now occupying space on one side, an even bigger motor now occupying the central section, and the need for clearance to swing the Eggplanter, I faced a challenge of where to put things like motor controllers and batteries.
Also it didn’t help that the Brushless Rage is the size of a bus compared to modern BLHeli and AM32 enabled ESCs, but… already have several.
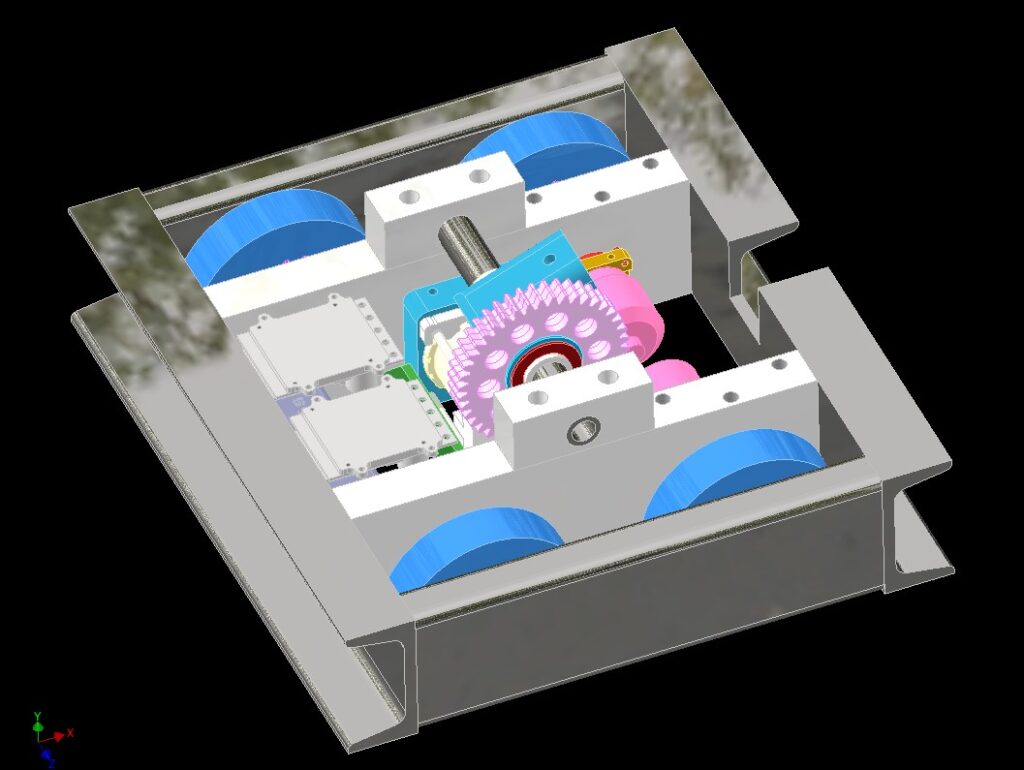
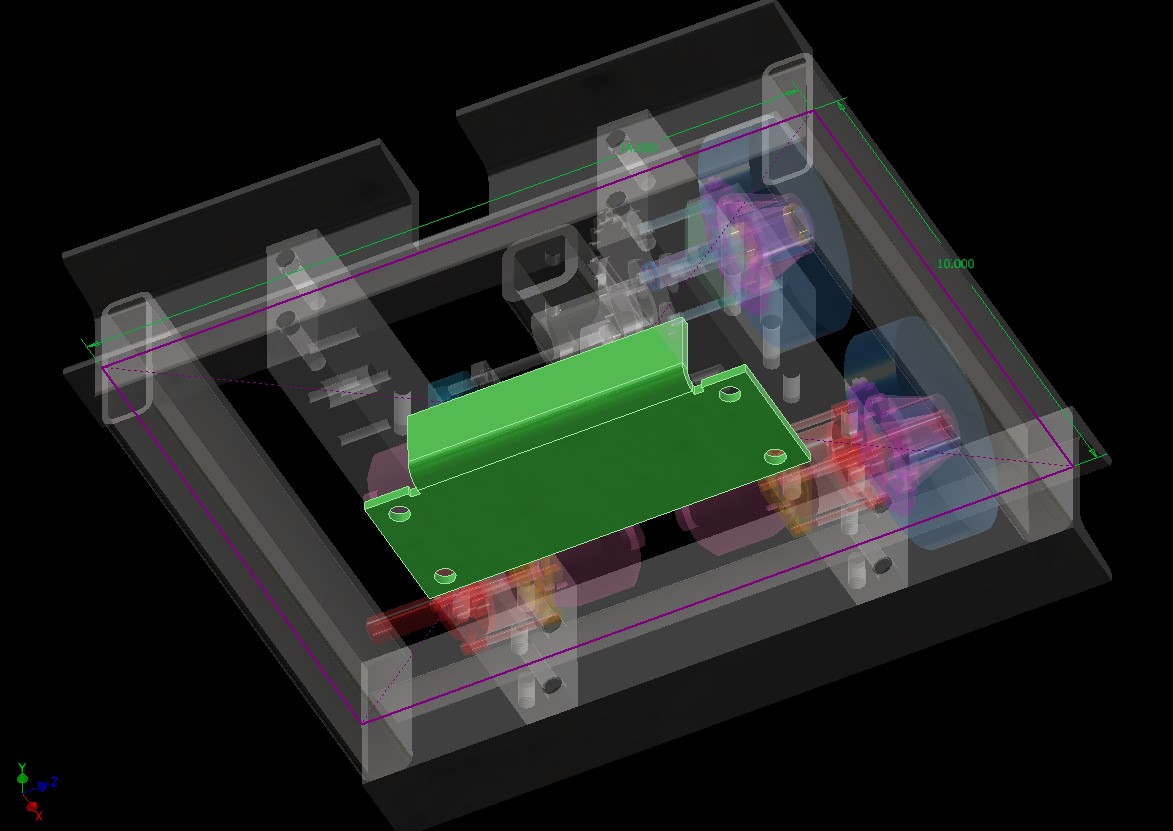
The solution? Turn the damn assembly around! There was now no longer a reason to try to keep everything next to the drive motors. The motors create a convenient gap in the middle for something stick shaped, so let’s make them the “front”. I’ll just make a bottom armor plate and probably a 3D printed dust cover for them. This freed up a contiguous volume to arrange my bus parking lot!
I began “flowing the bracket” around all the parts. This configuration of Brushless Rage and battery offered the most remaining volume to pack wiring as well as a 3rd ESC for the weapon motor. For that one, I was going to use one of my surplus SimonK swap ESCs (specifically the old Spider ZTW 80 amp, of which I had a bundle). Is this robot just a means to dispose of dieselpunk-era parts?!
I also dispensed with the separate bearing holder bracket. The DeWut motor shaft will be supported by a bearing in a pocket in the frame rail. This approach has a better load path because of the forces not having to first travel through the weakest part of the aluminum bracket. However, it does turn the “drop out service” into a “slide then drop” because the motor shaft will need to scoot out of the bearing first.
That’s why I said I was running out of horizontal space above – the DeWut had to now be positioned slightly away from the other frame rail so I can slide it back around 1/4″ after removing the screws.
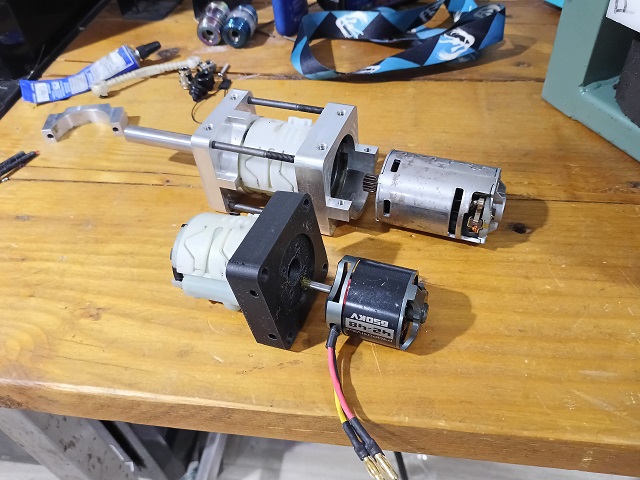
It was time to get building! First off, I started off with testing the fitment of the DeWut conversion. Stay tuned for more Susquehanna Boxcar adventures at Dragon Con and Motorama!