Mikuvan and the Broken Windows Fallacy

Continuing on the trend of “Charles writes about stuff that actually happened like 2 weeks ago”, this is the tale of how not to follow service manual instructions, and then how not to do bodywork. But I’m glad to say all is actually well, and it’s not as bad as I make it out to be in that sentence… though I am still out about $350 total for a new rear hatch window.

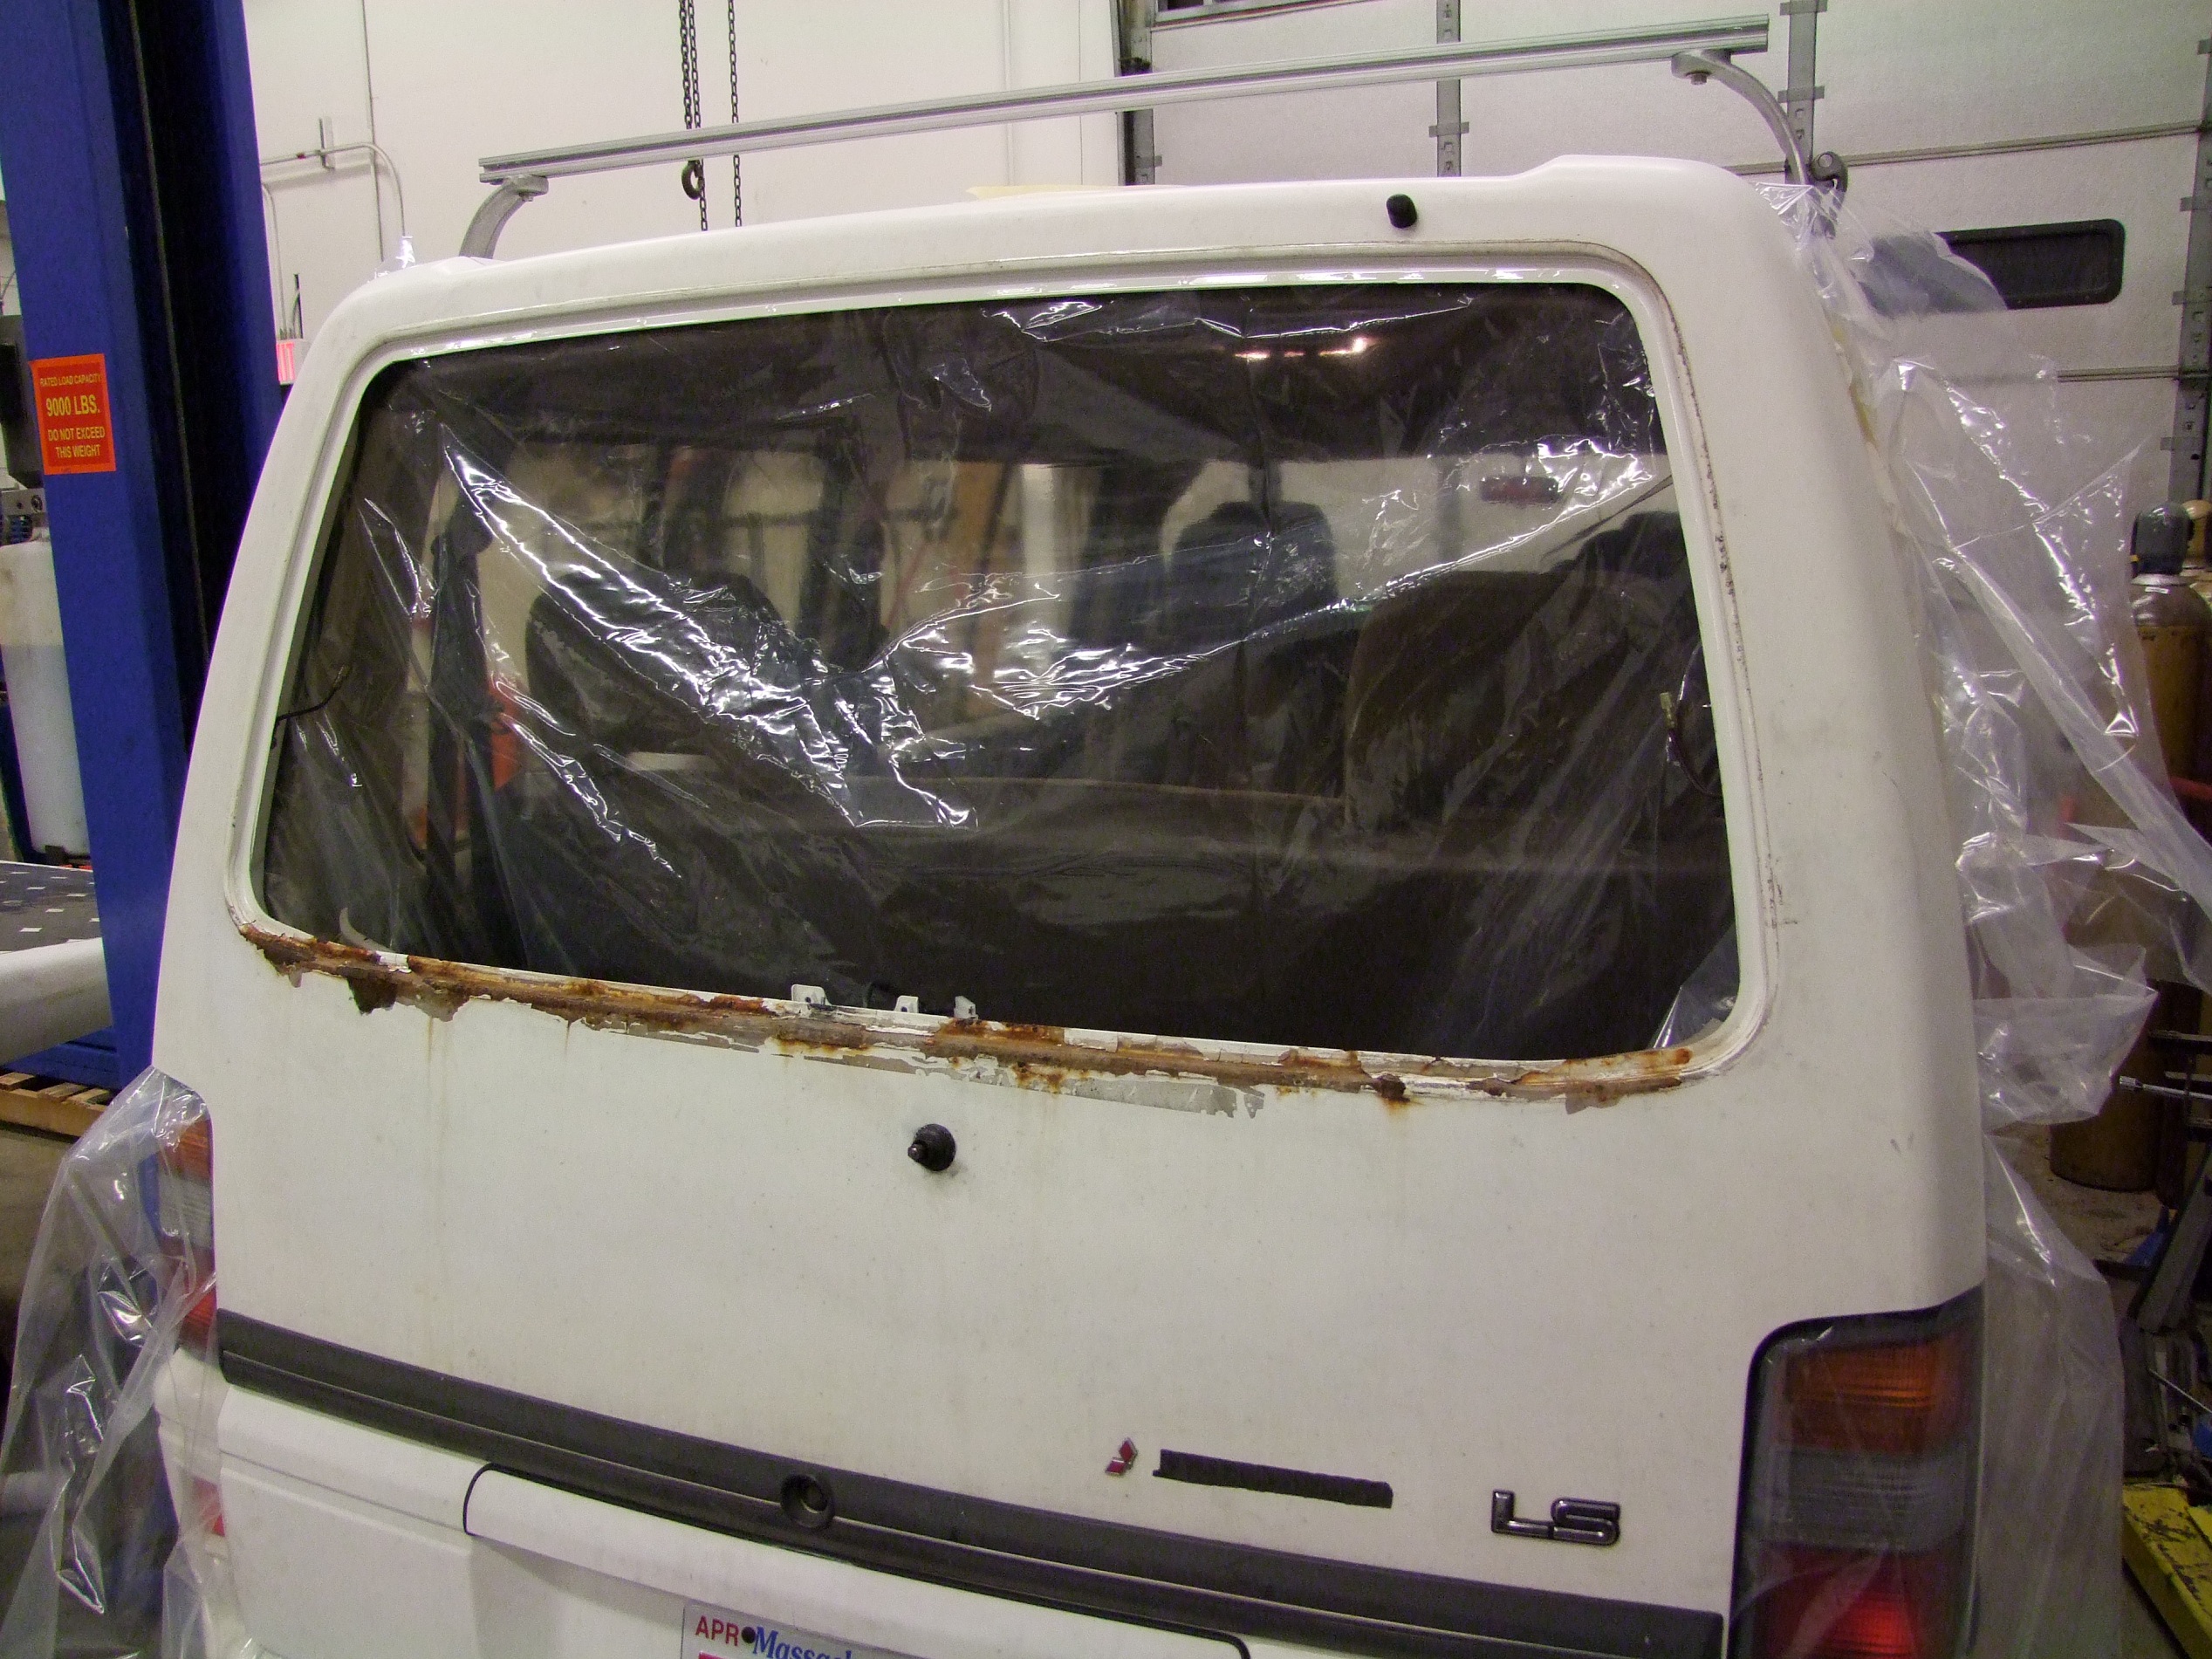
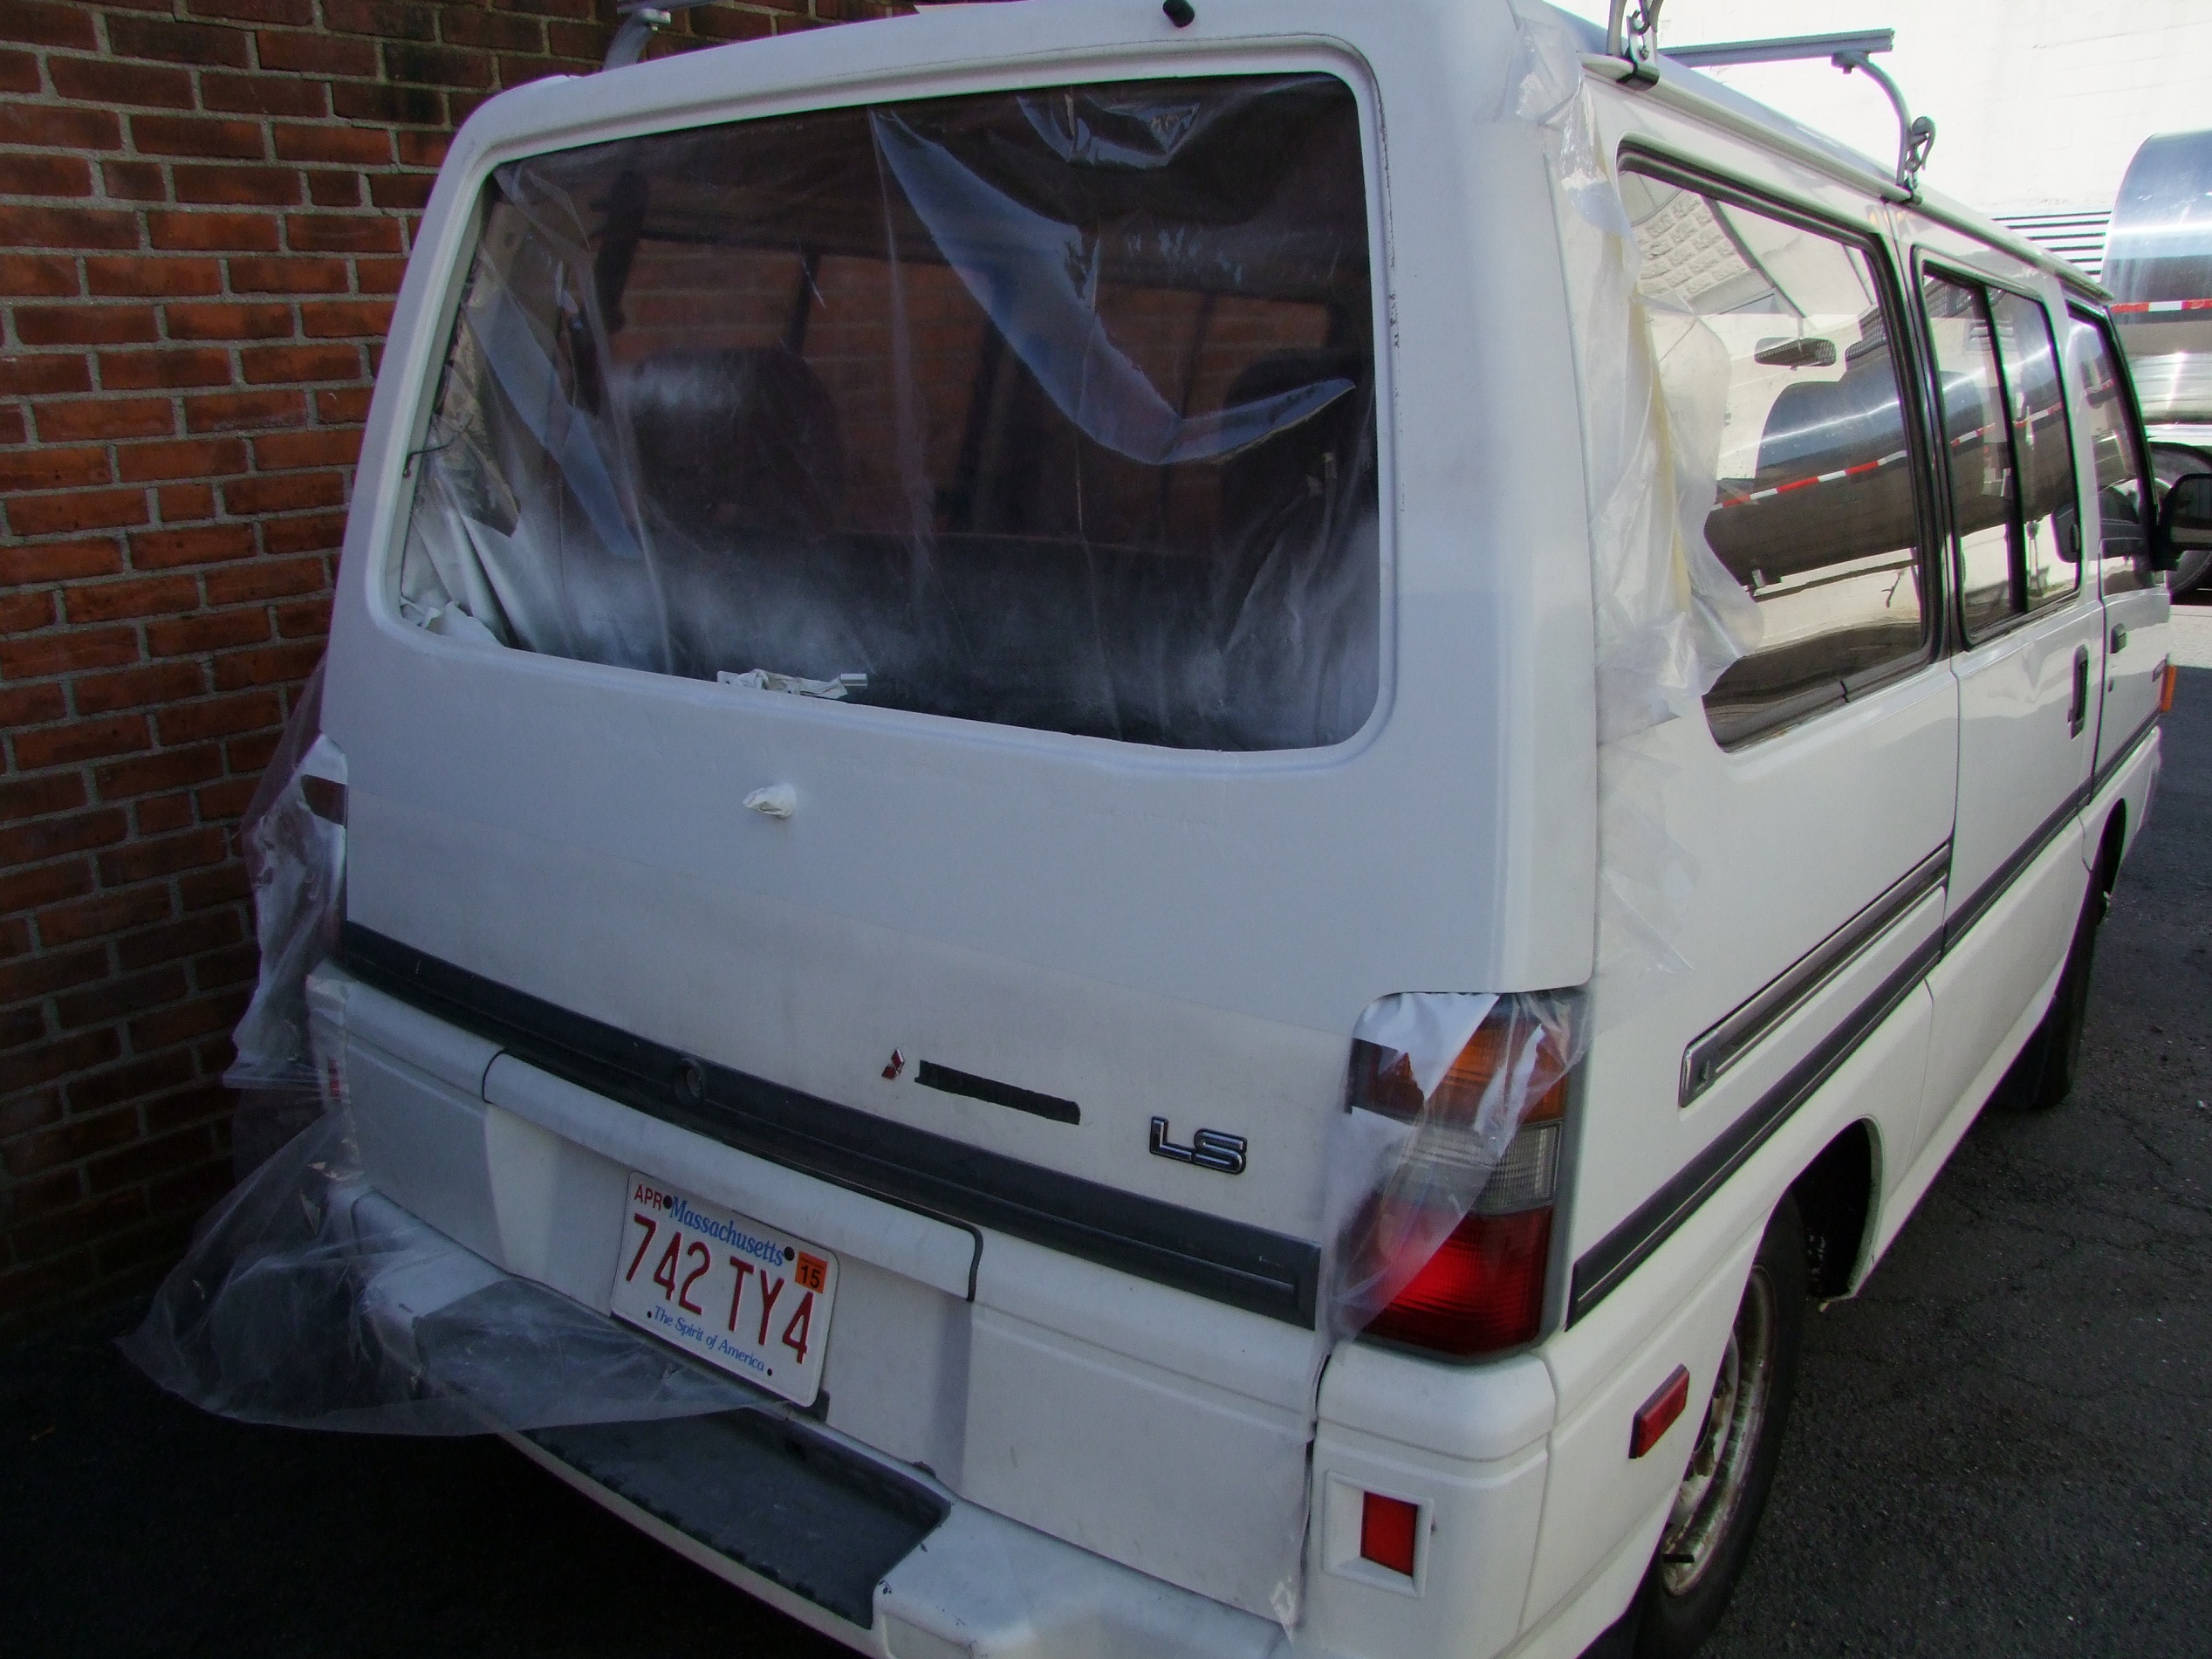
Immediately post-Dragon*Con, I was planning on taking the early fall lull in activity (read: I don’t want to do anything useful for a like a month after Dragon*Con) to get some pressing bodywork done on Mikuvan. I bought the vehicle originally with a line of rust and bubbly paint on the rear hatch window’s bottom sill, a telltale sign of some bad or shady window repair work that damaged the paint or something a while back:

It had only been deteriorating since April, with the bubbles slowly flaking off and the rust stains spreading. I decided that it was now or never in order to tackle it, since soon the weather here would be getting too cold and wet – the only real venue I have to do this kind of stuff is outside. Some time the week after D*C, I decided to try and remove the rear window to assess the damage in detail.

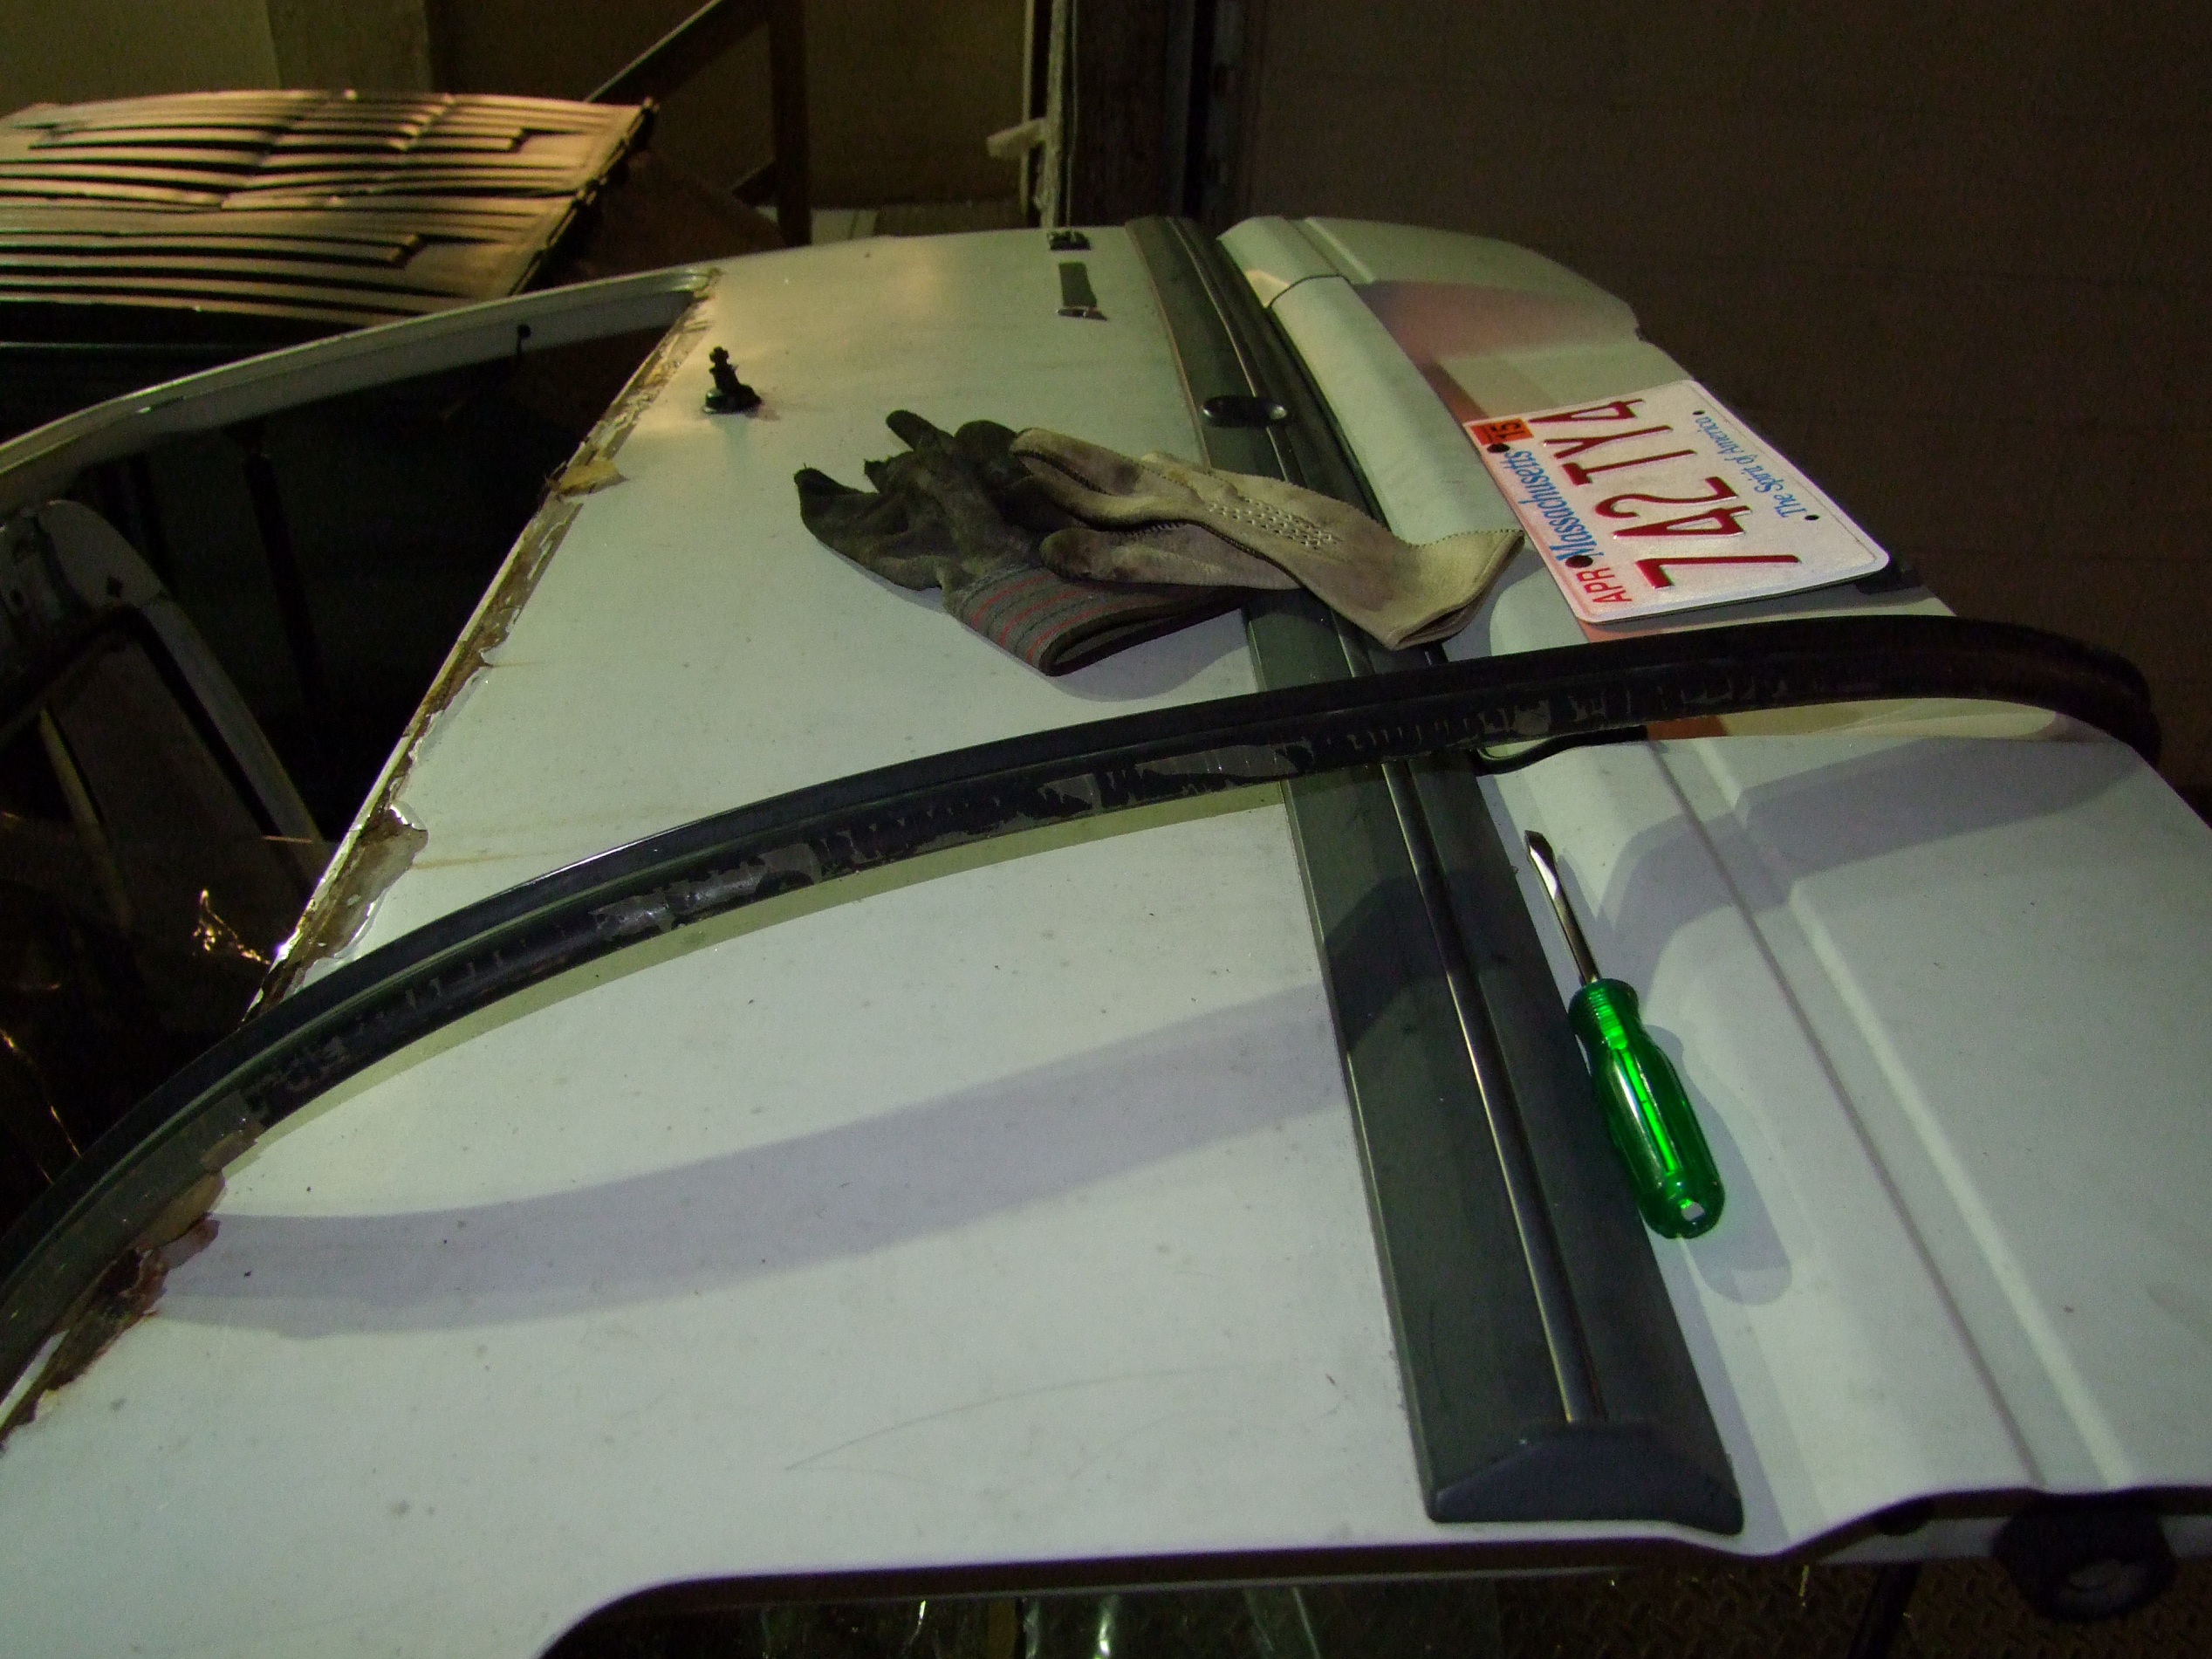
The rear window is retained by a thick rubber gasket that’s S shaped. One ‘fjord’ of the S envelopes the outer edge of the glass, and the other one grips the inside of the hatch, slung across a perimeter ‘pinch weld’. I had heard of various tricks involving a greased string wrapped around the outside to work the gasket out of the frame, but that sounded a bit kinky to me, so I consulted the manual:

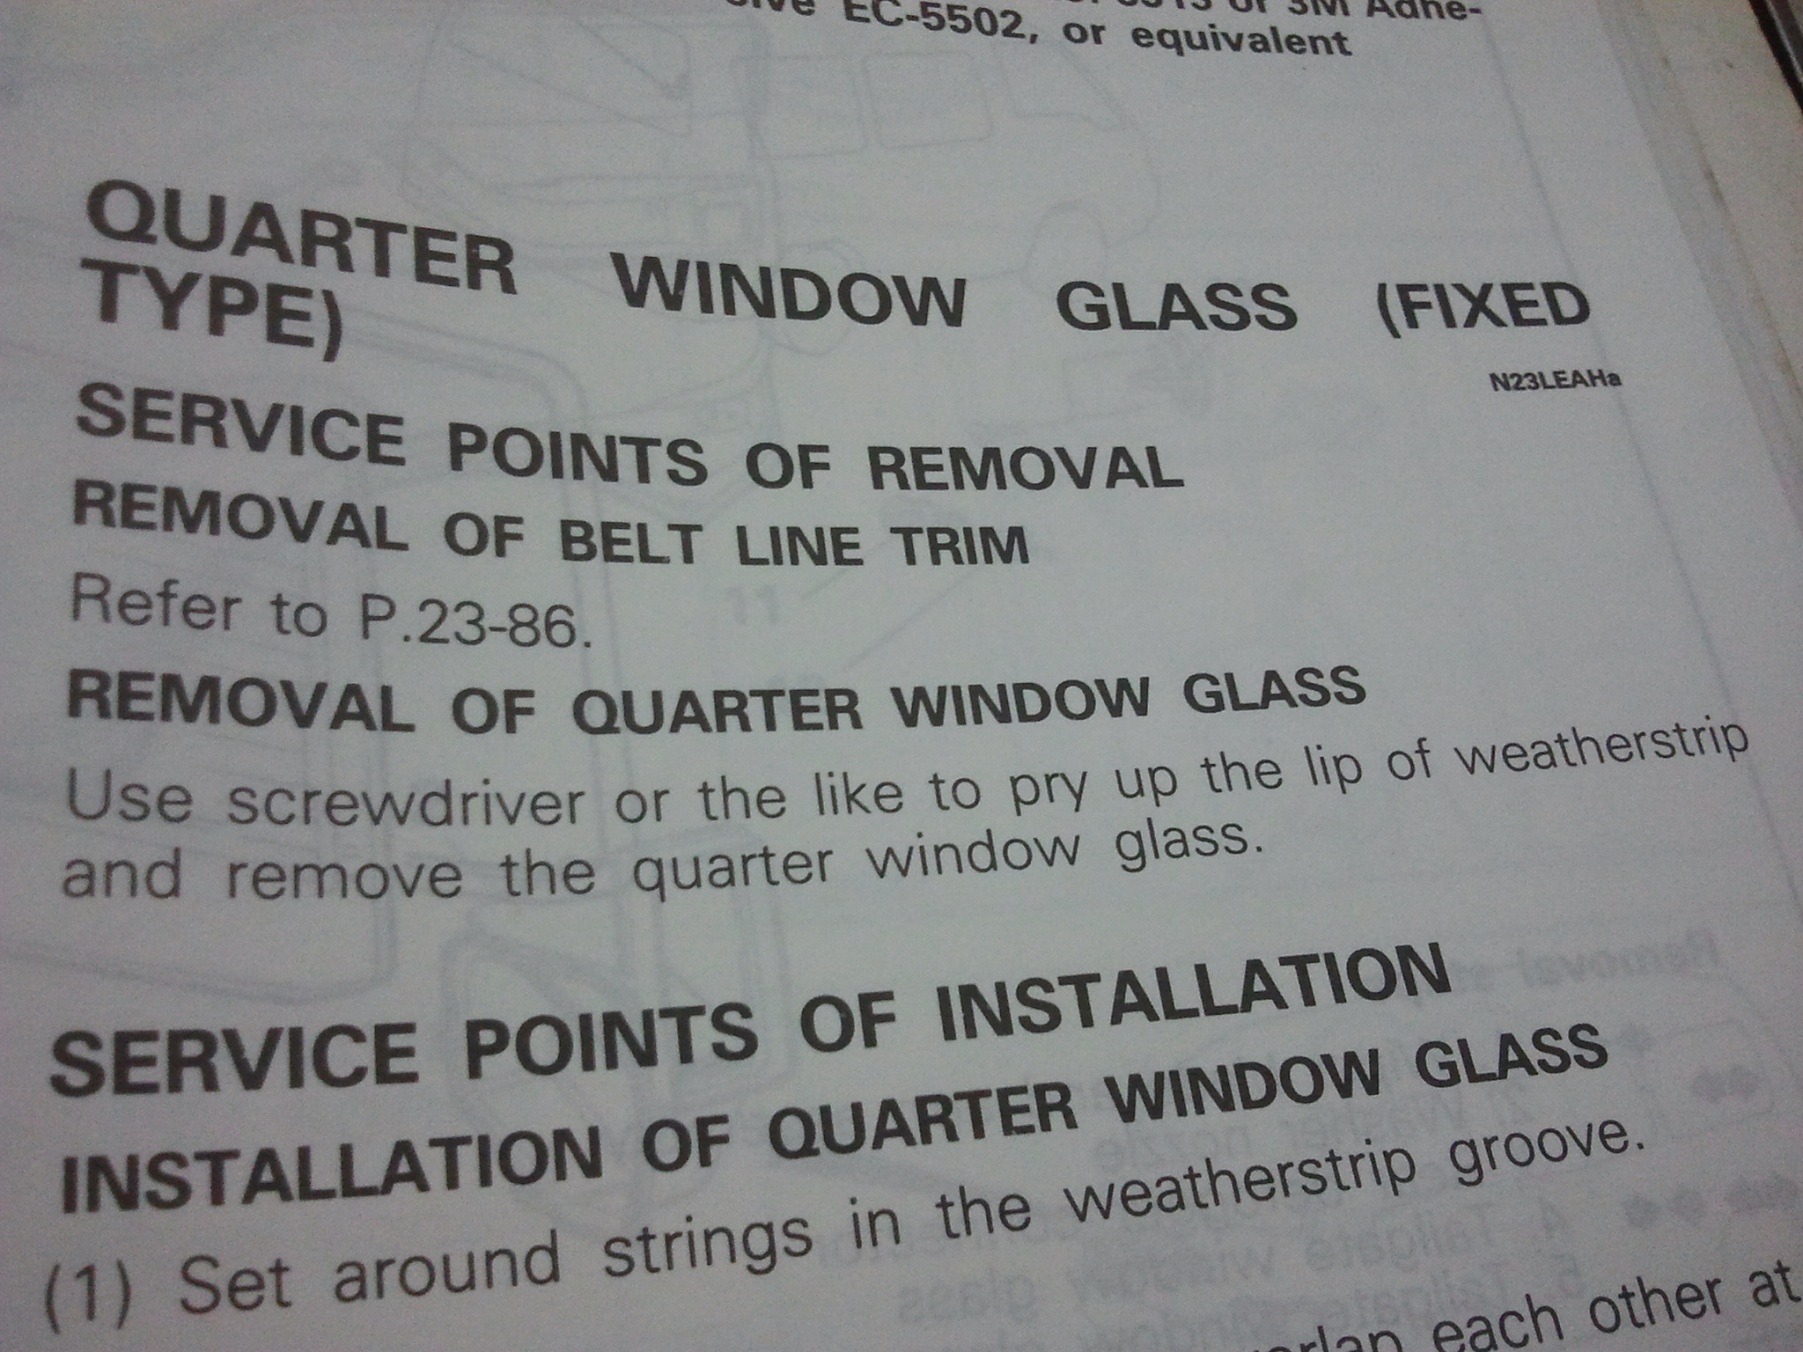
..okay then? Here goes nothing…
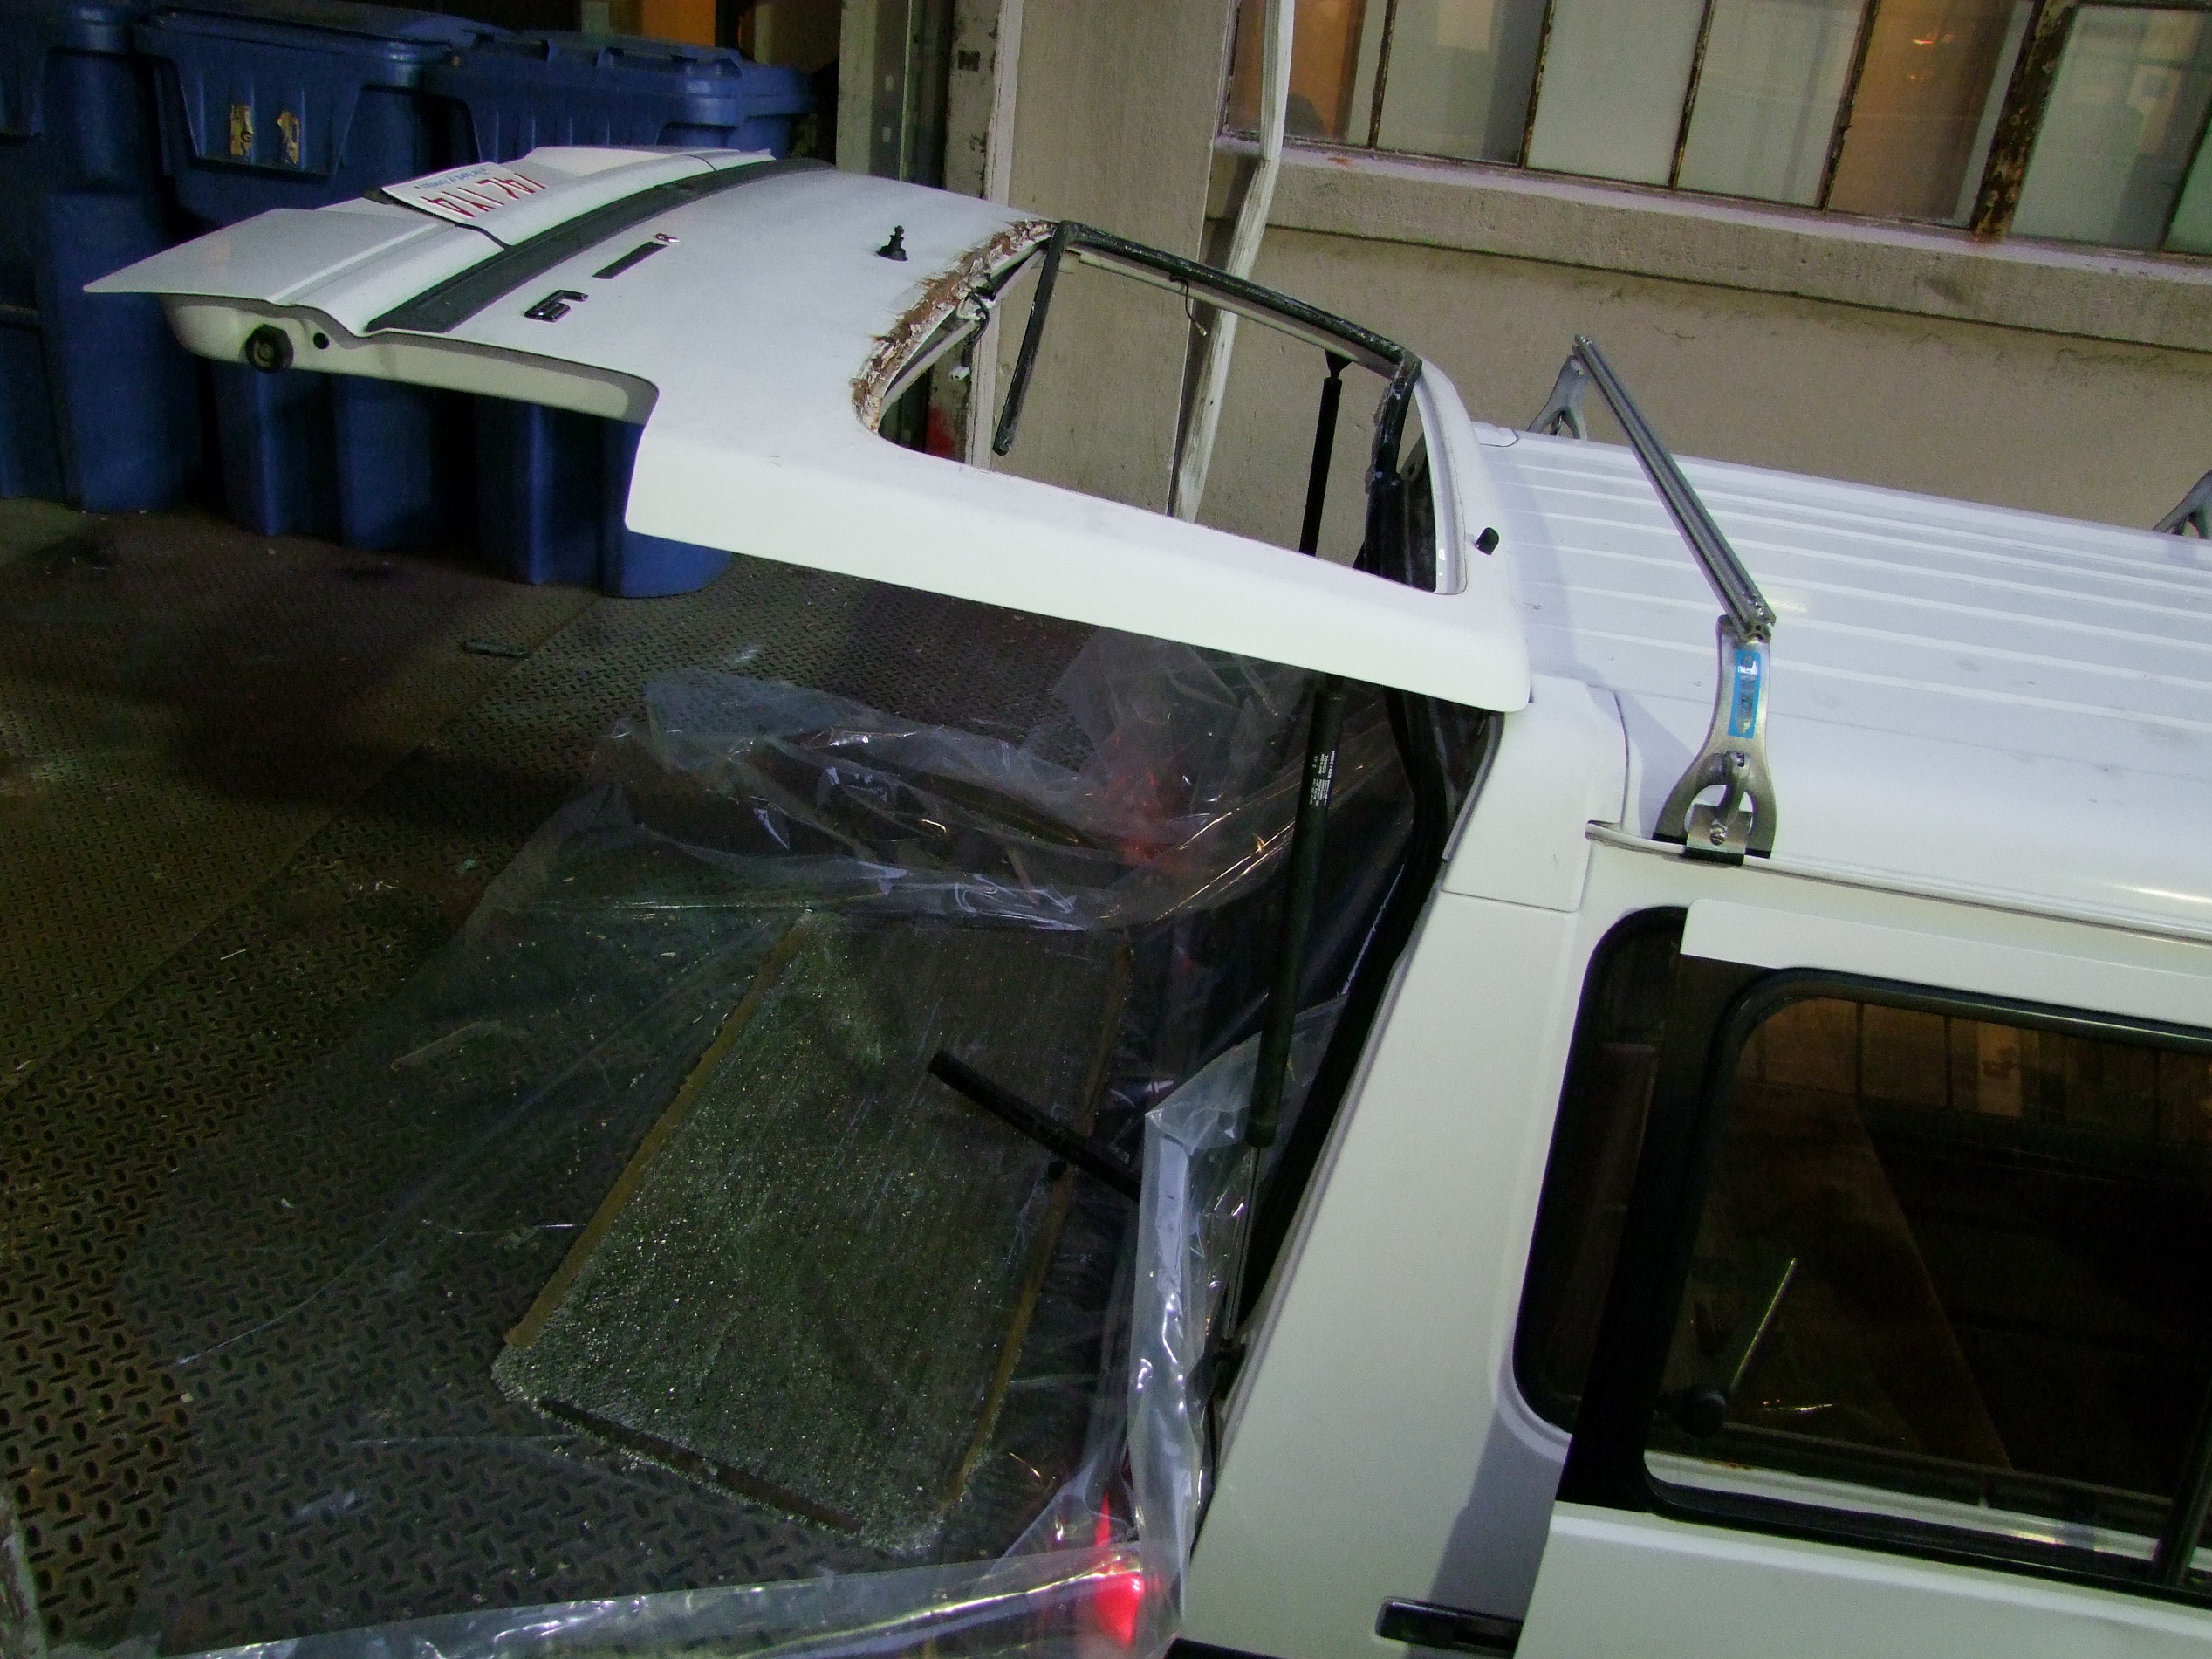
Well shit.

I’m guessing this was another one of those situations where “Pry with screwdriver” means something different to a mechanic or auto body specialist than, say, me. I got about 3 inches of the gasket out from the inside before seemingly prying incorrectly or something – as you can see above, the fracture started from the end of the right side of the seal. The sound was best described as “polyphonic gunshot” as the propagation of fracture caused the sound to be spread over a few hundredths of a second. It took me a few seconds to realize this was going to be expensive.

More importantly, I was worried about finding a replacement glass at all. It’s one thing to get glass for a GM econobox, but there weren’t many of these vans sold in the U.S. in the first place, and most of them surely have dissolved long ago. I was ready to start scouting the Canadian Delica forums for someone with a parts car.

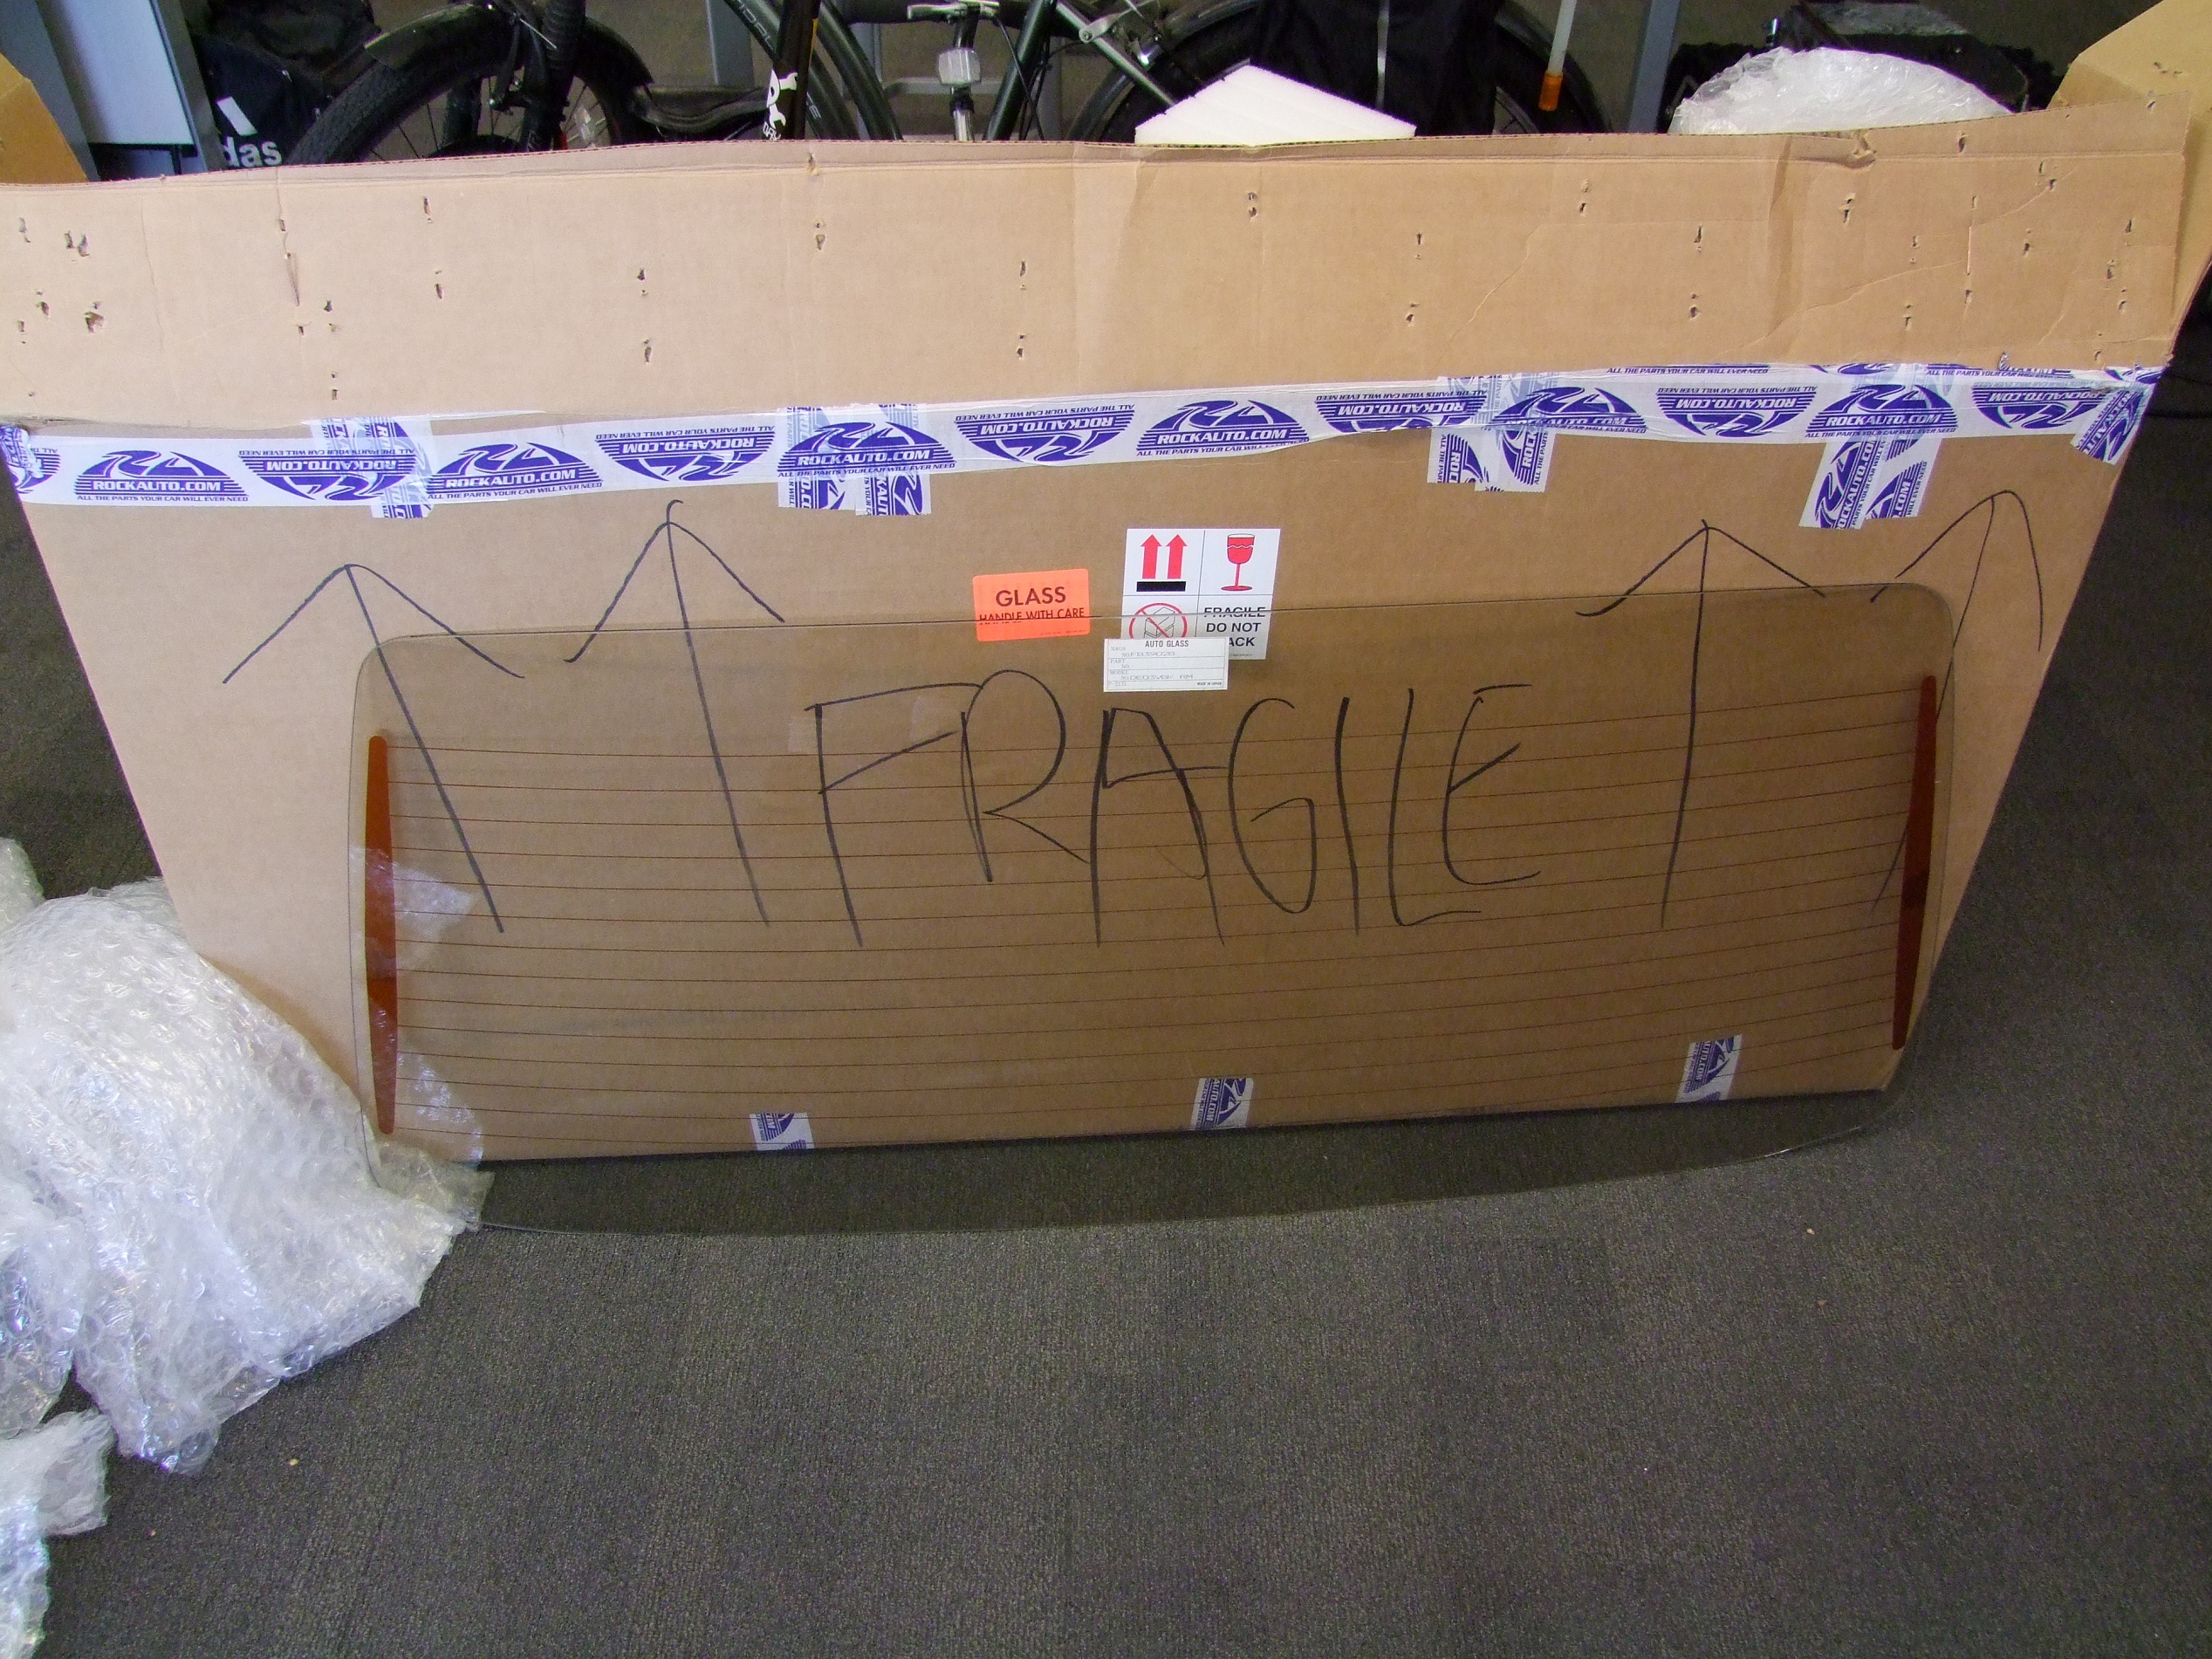
But I seemingly got lucky. I first hopped on Rock Auto, my favorite parts house, and they somehow had 1 item in stock for “Rear Window Glass”. Figuring that they couldn’t be too wrong, I decided to give it a shot.

In the mean time, I consulted a few area auto body shops to get estimates on glass replacement, including my favorite in the area, Chicken & Shakes:

Sadly, they did not do glass work. What I learned is that most reputable glass shops won’t take customer-provided glass – they had to source it for you. Something about warranties, I wasn’t sure. Whatever the case, enough asking around got me a contact with Jose and Jesús, who will pop my new window in for $80. I’m convinced that this is how things actually get done in the world – you keep digging until you find some dudes who just don’t care about The System who’ll take care of you in like 10 minutes. Kind of like how I run my shop.

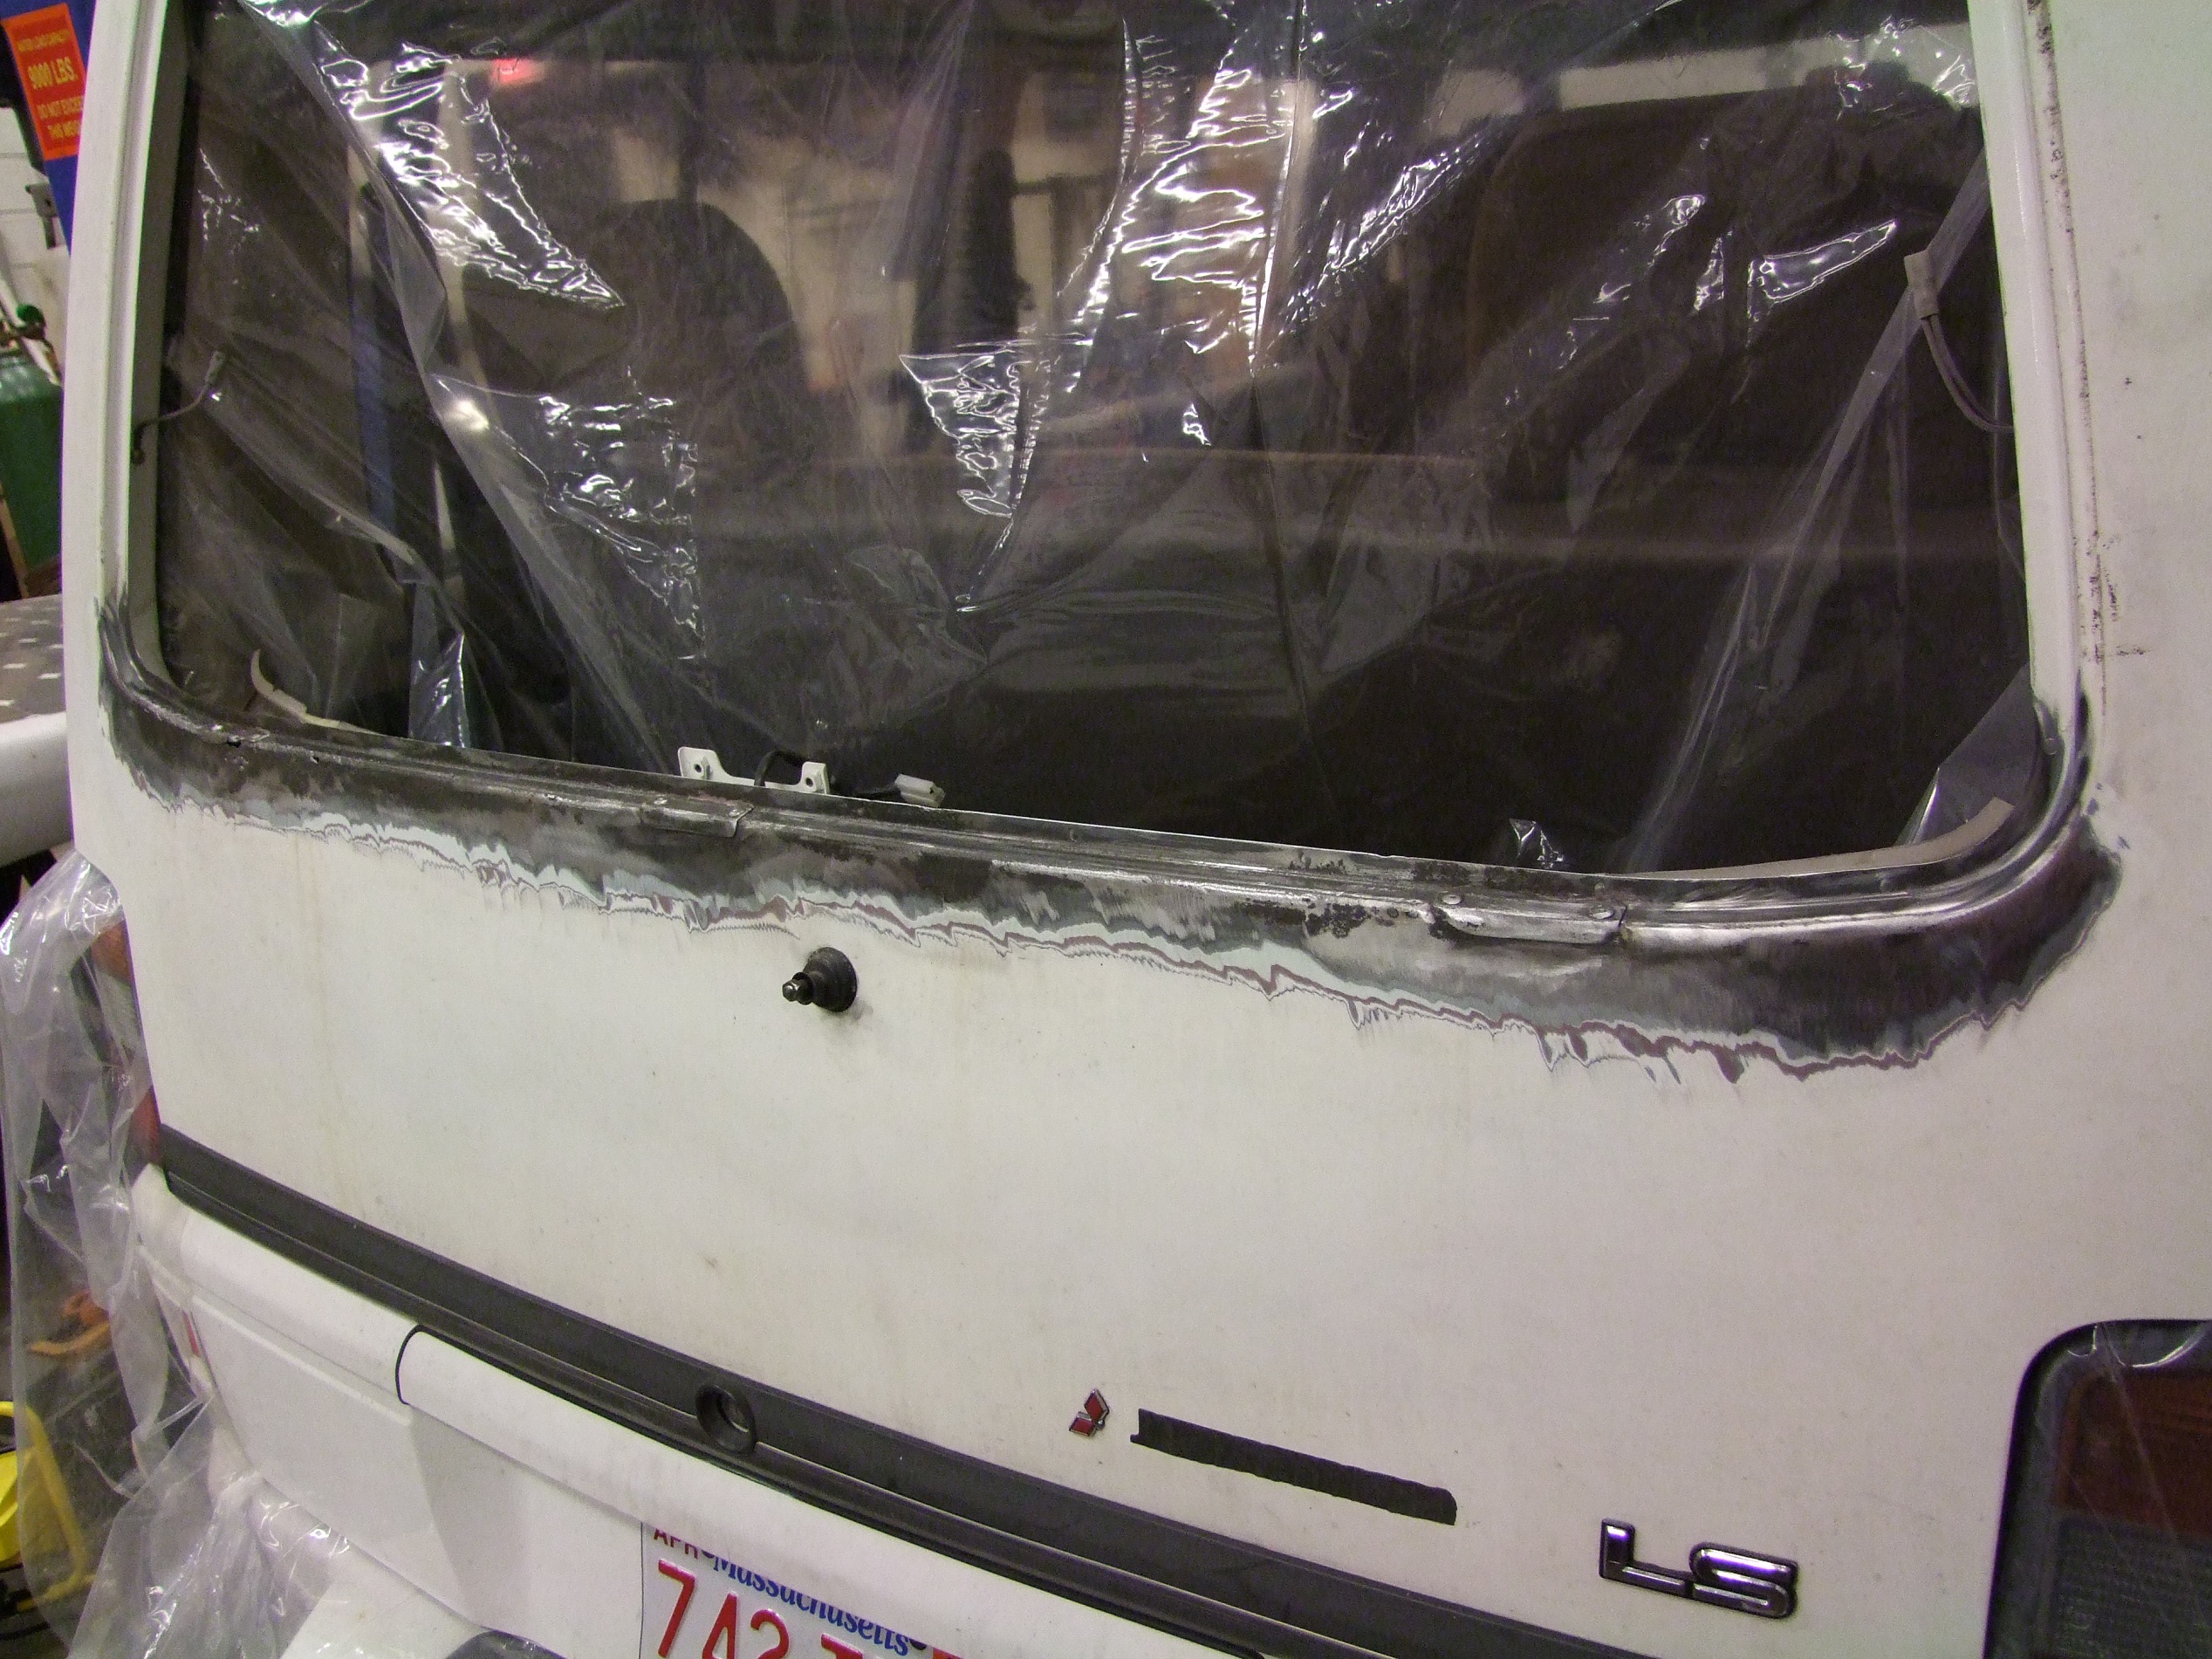
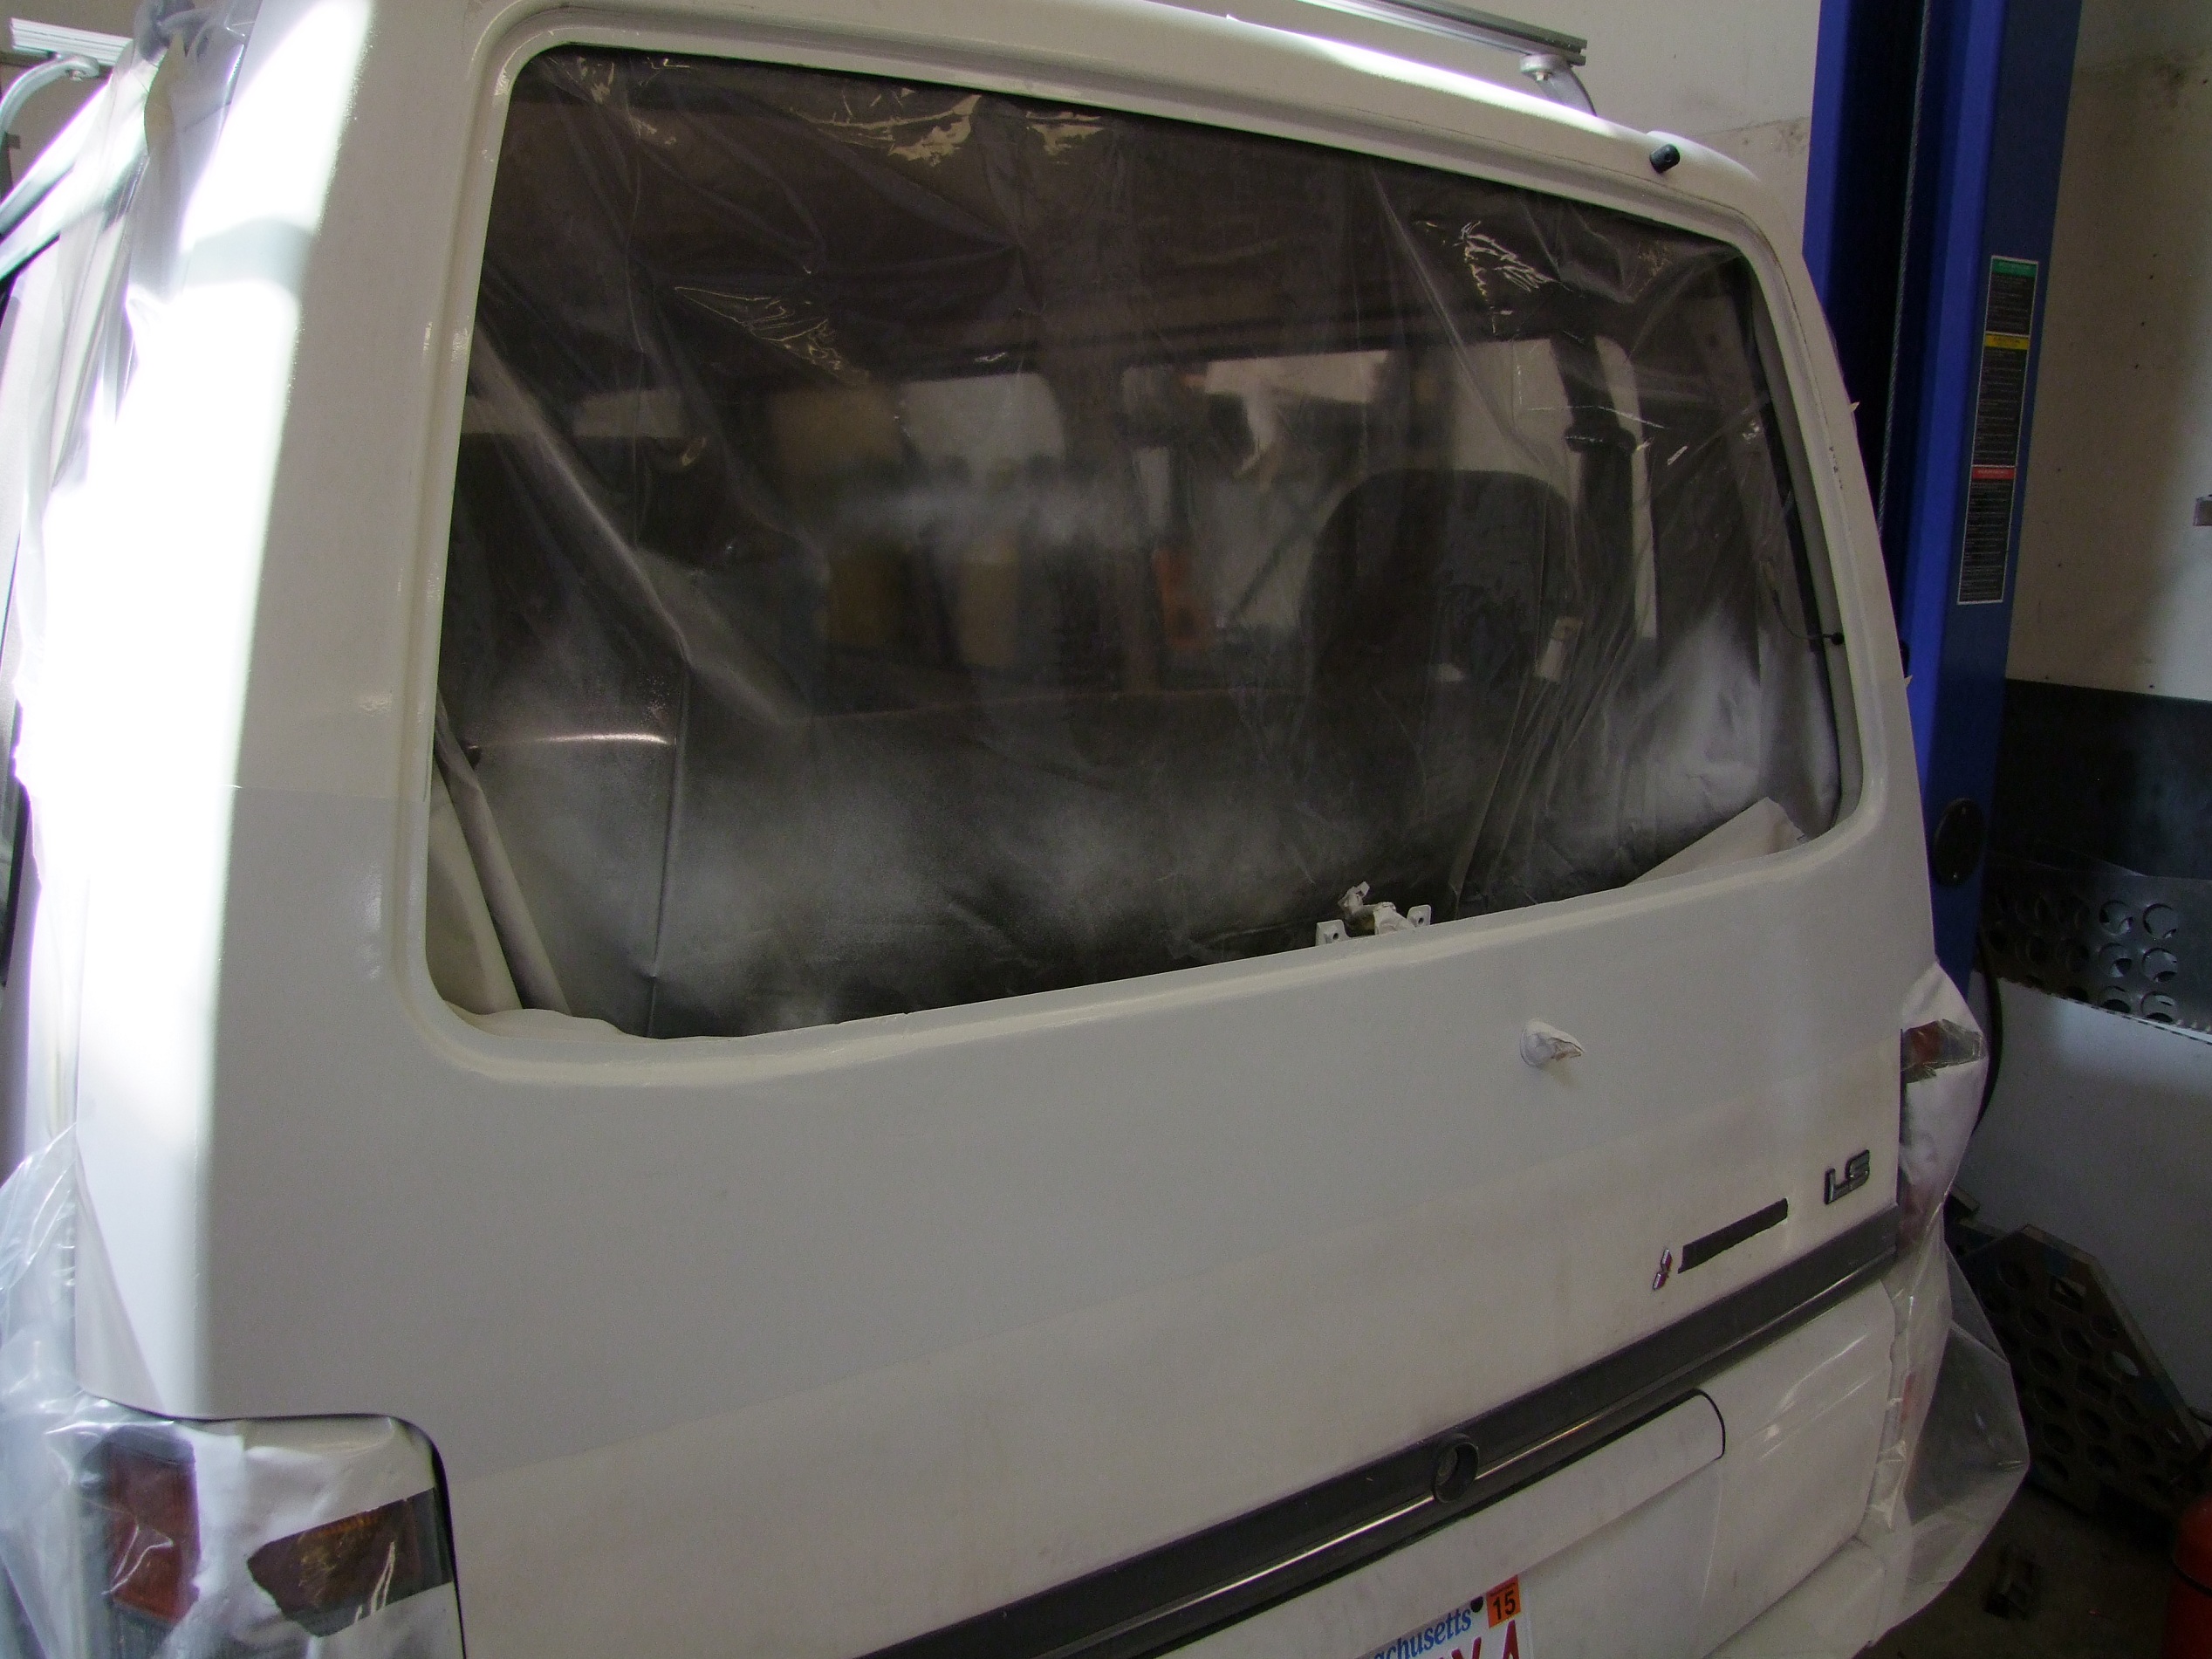
Now that I got an estimate for the installation, it was up to me to strip away the rust and seal the window frame before my glass came. The first step was to amputate the remains of the window:

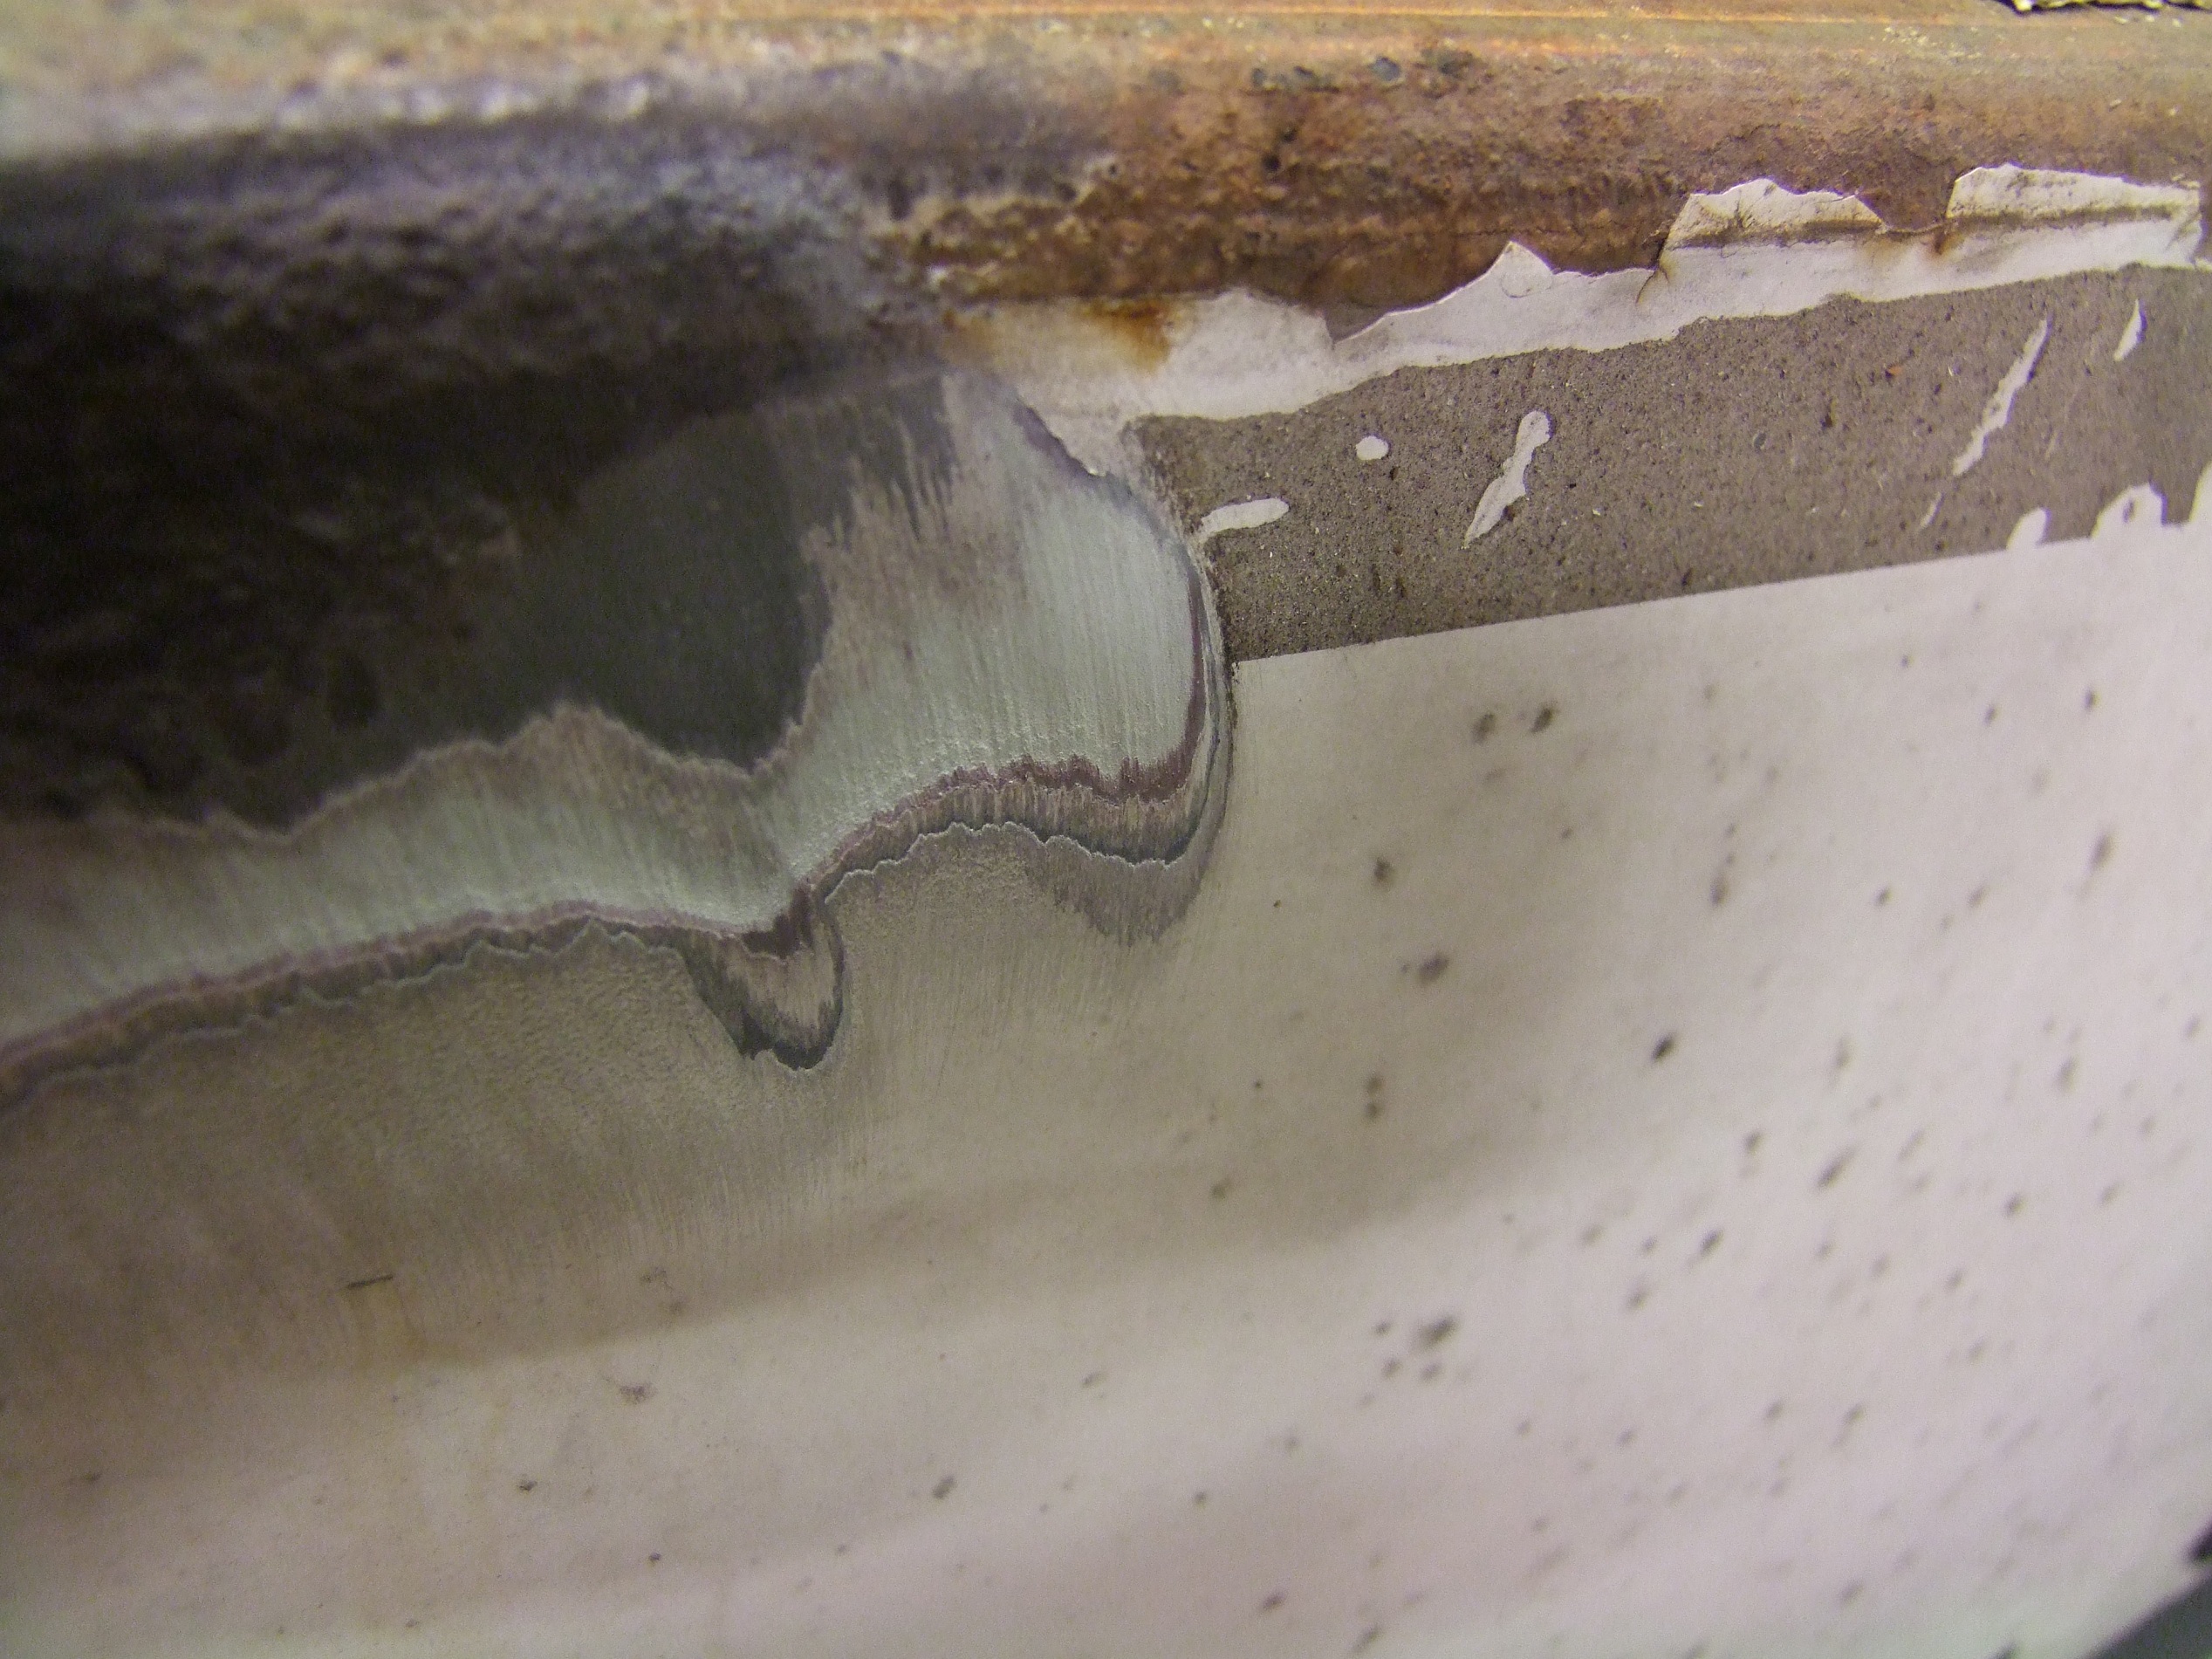
I set up a plastic drop sheet that went over the rear seats and extended a few feet on each side, then I ripped out the clear packing tape that I had paved the window over in order to hold it together for the time being. Then, some selective hammerwork freed the crunchy window and it all fell out in roughly one piece. You can already see some of the cancer that the gasket was hiding.

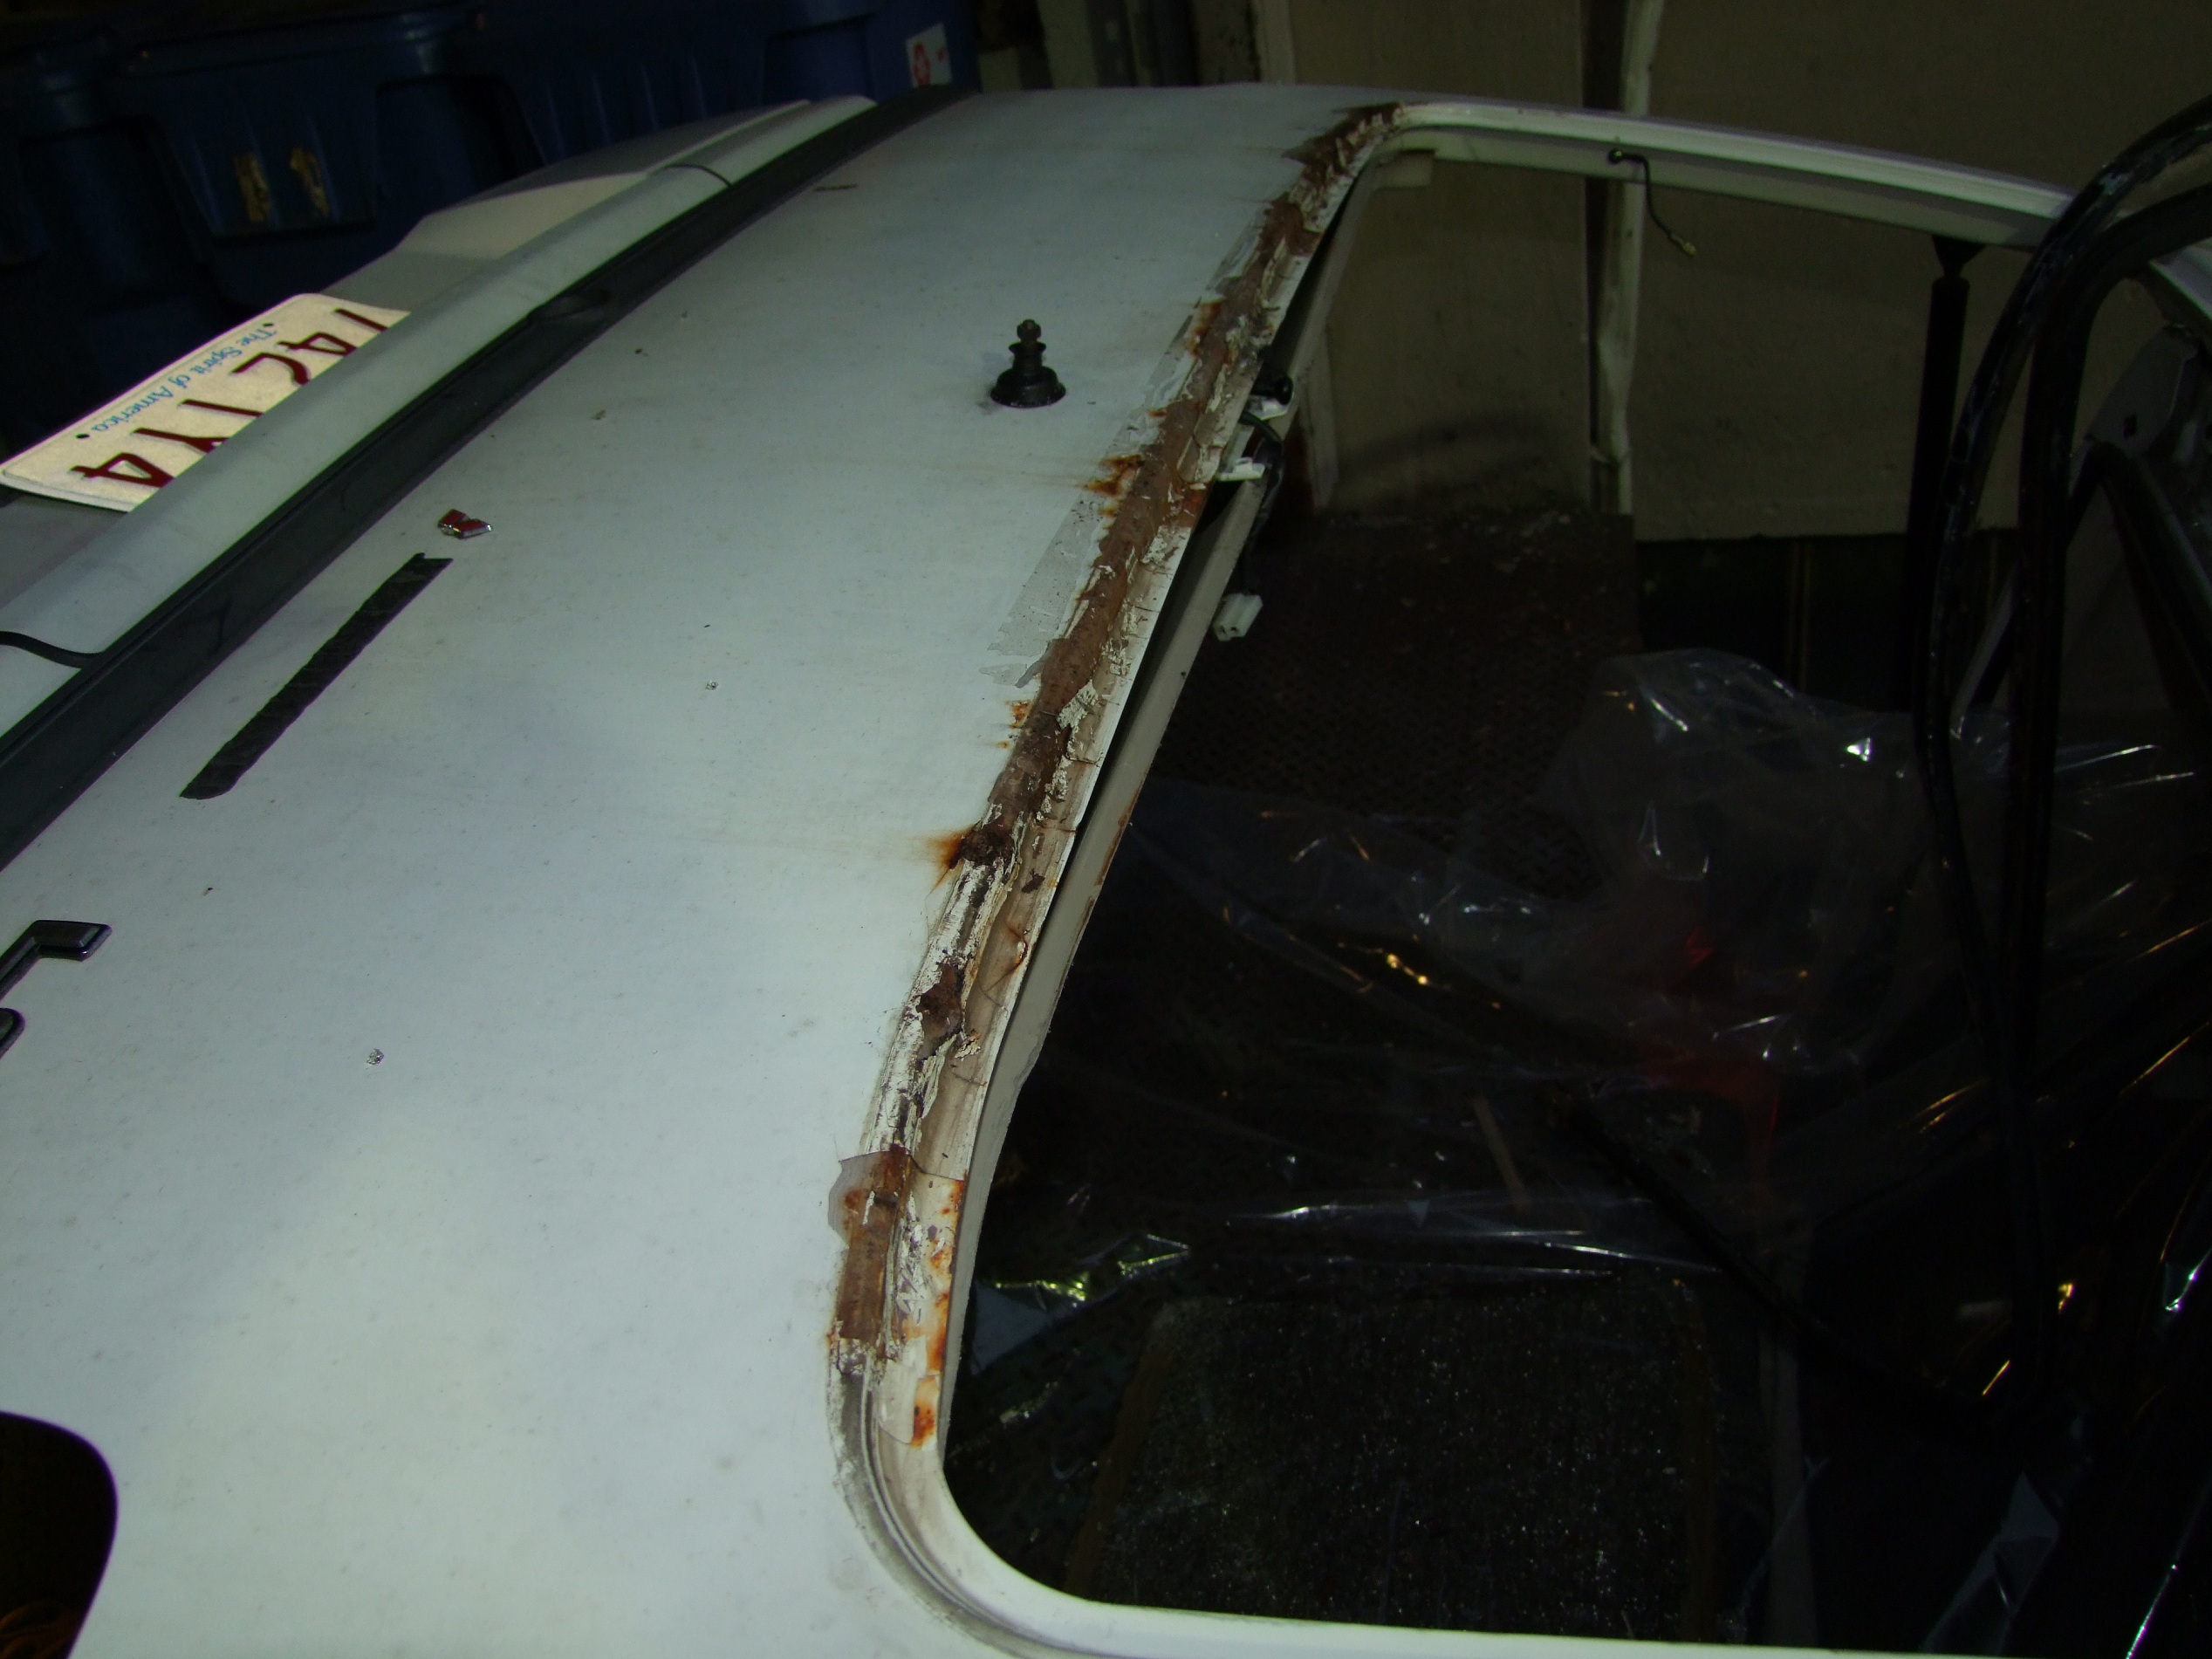
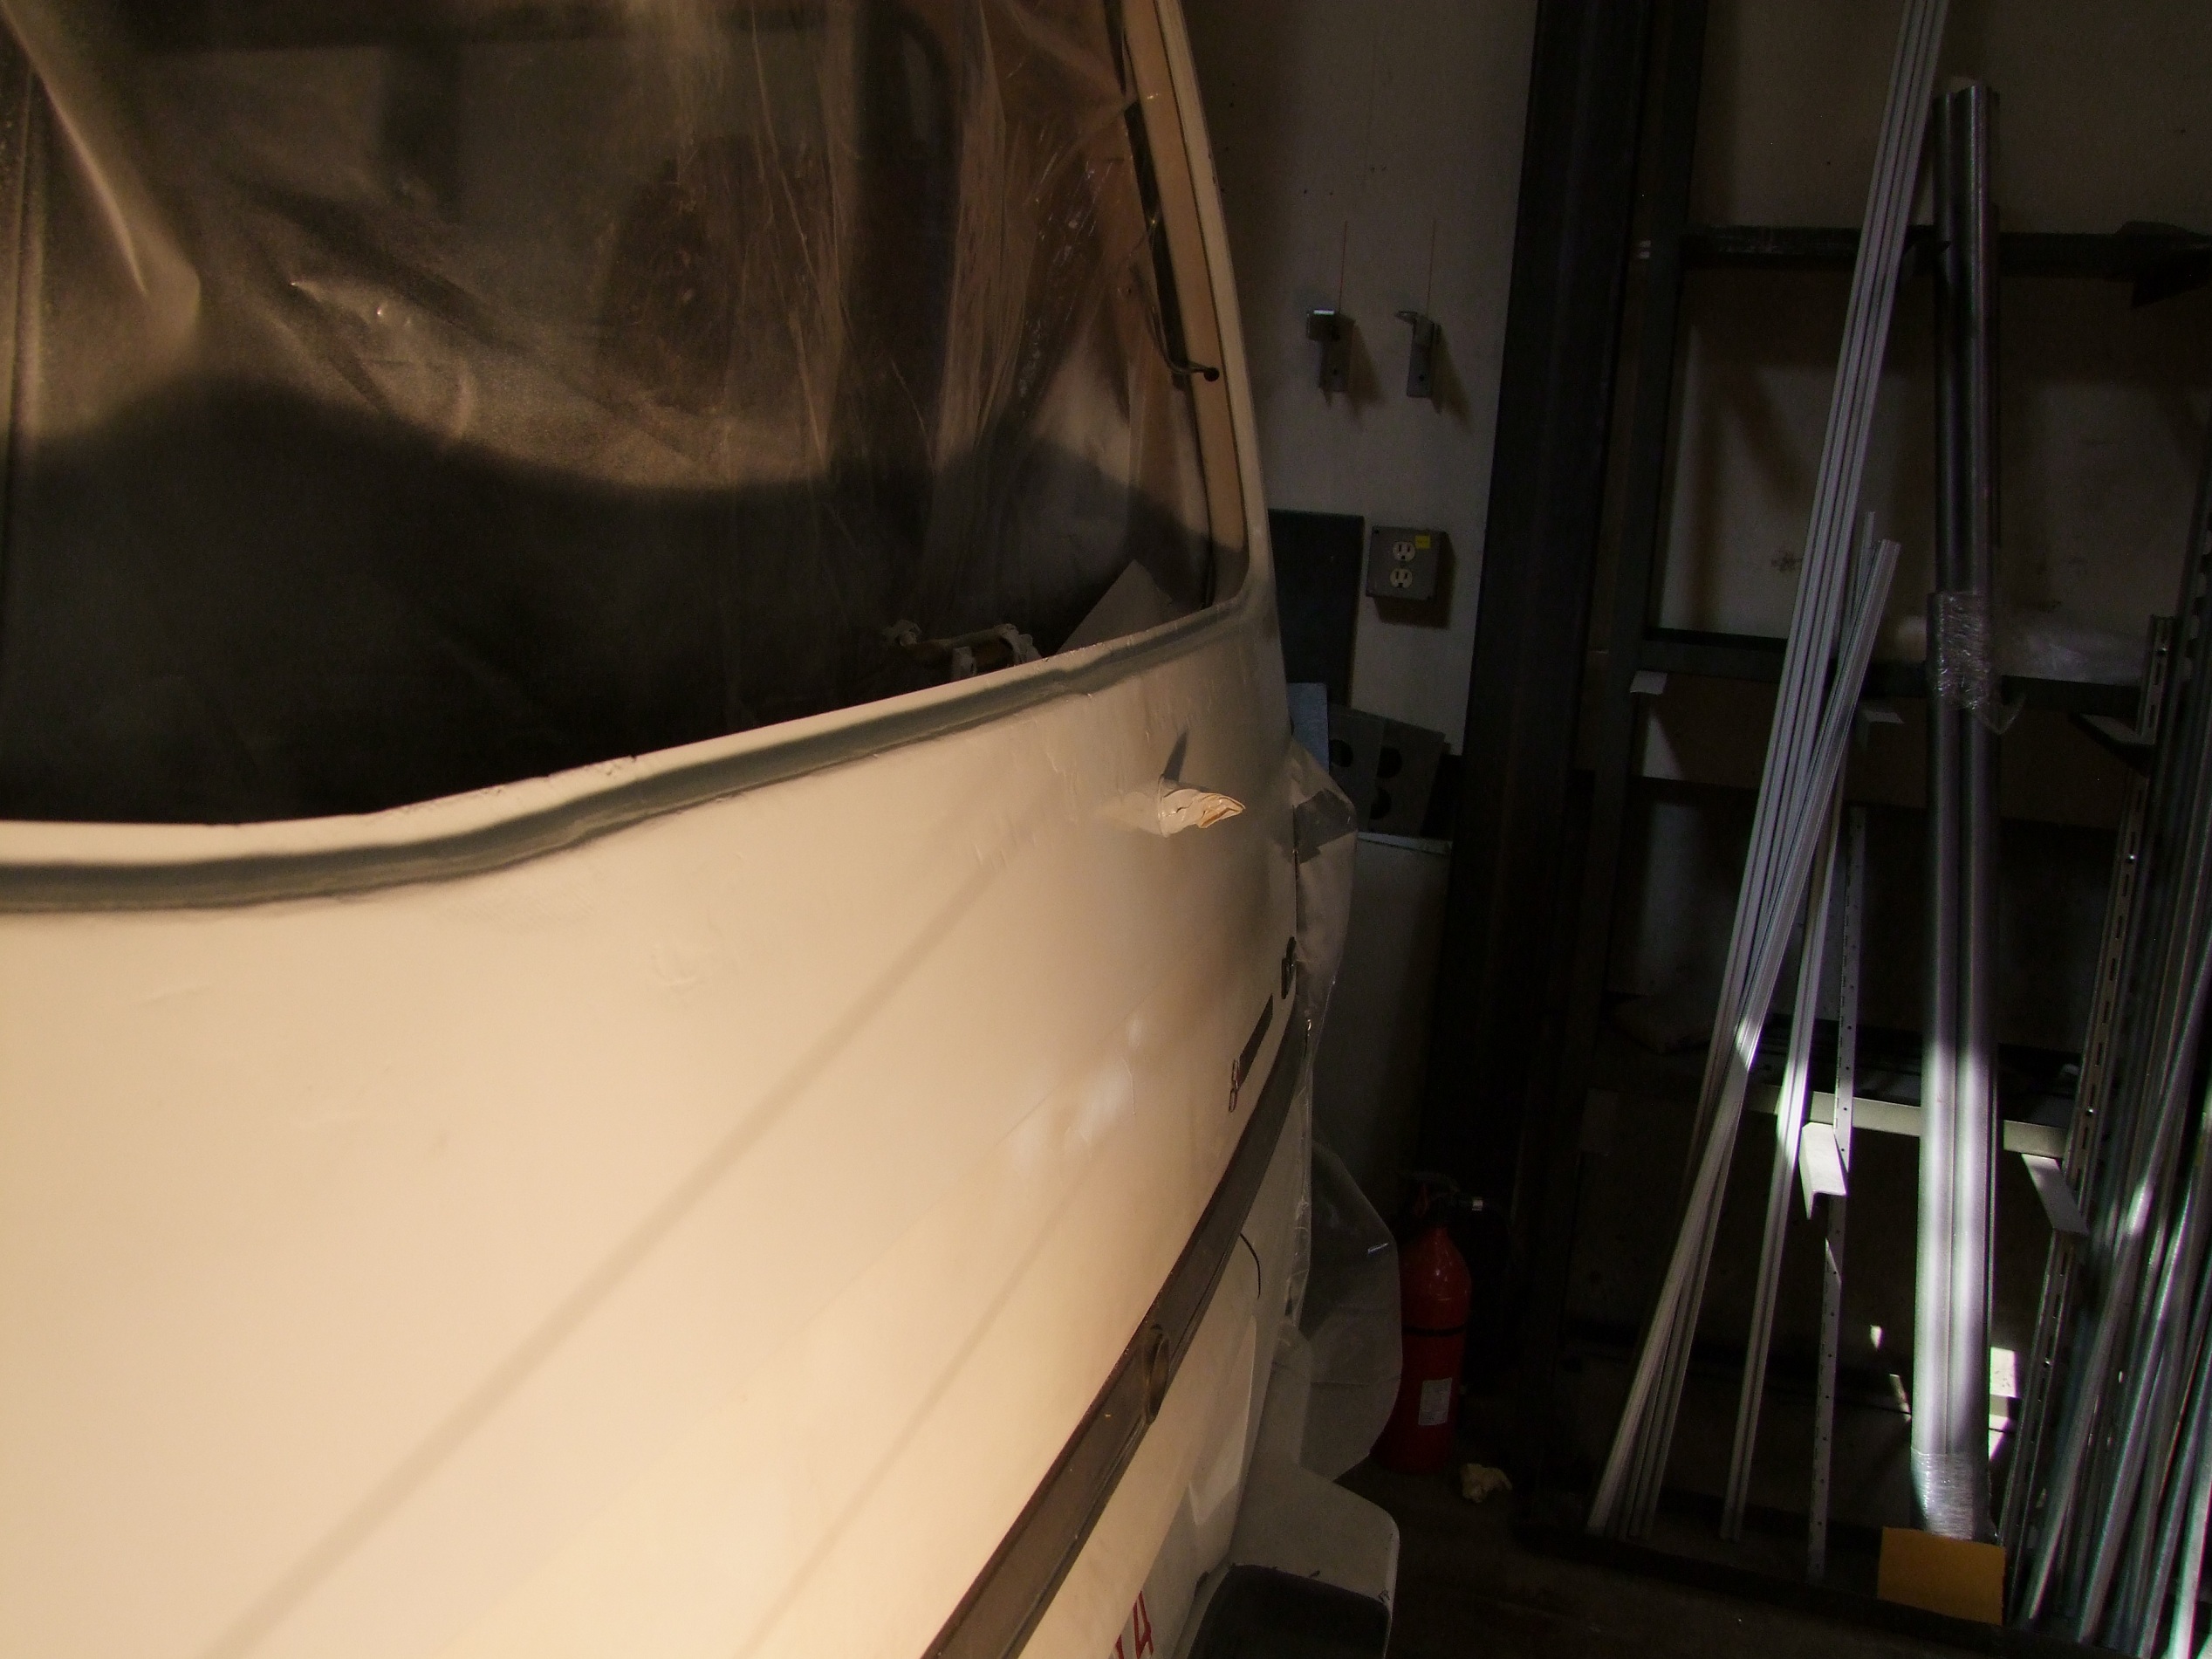
Oh boy, this was going to get interesting. I was really, really hoping for just some bubbled paint and rust spots I could wire brush out, but this one looked like it had depth.

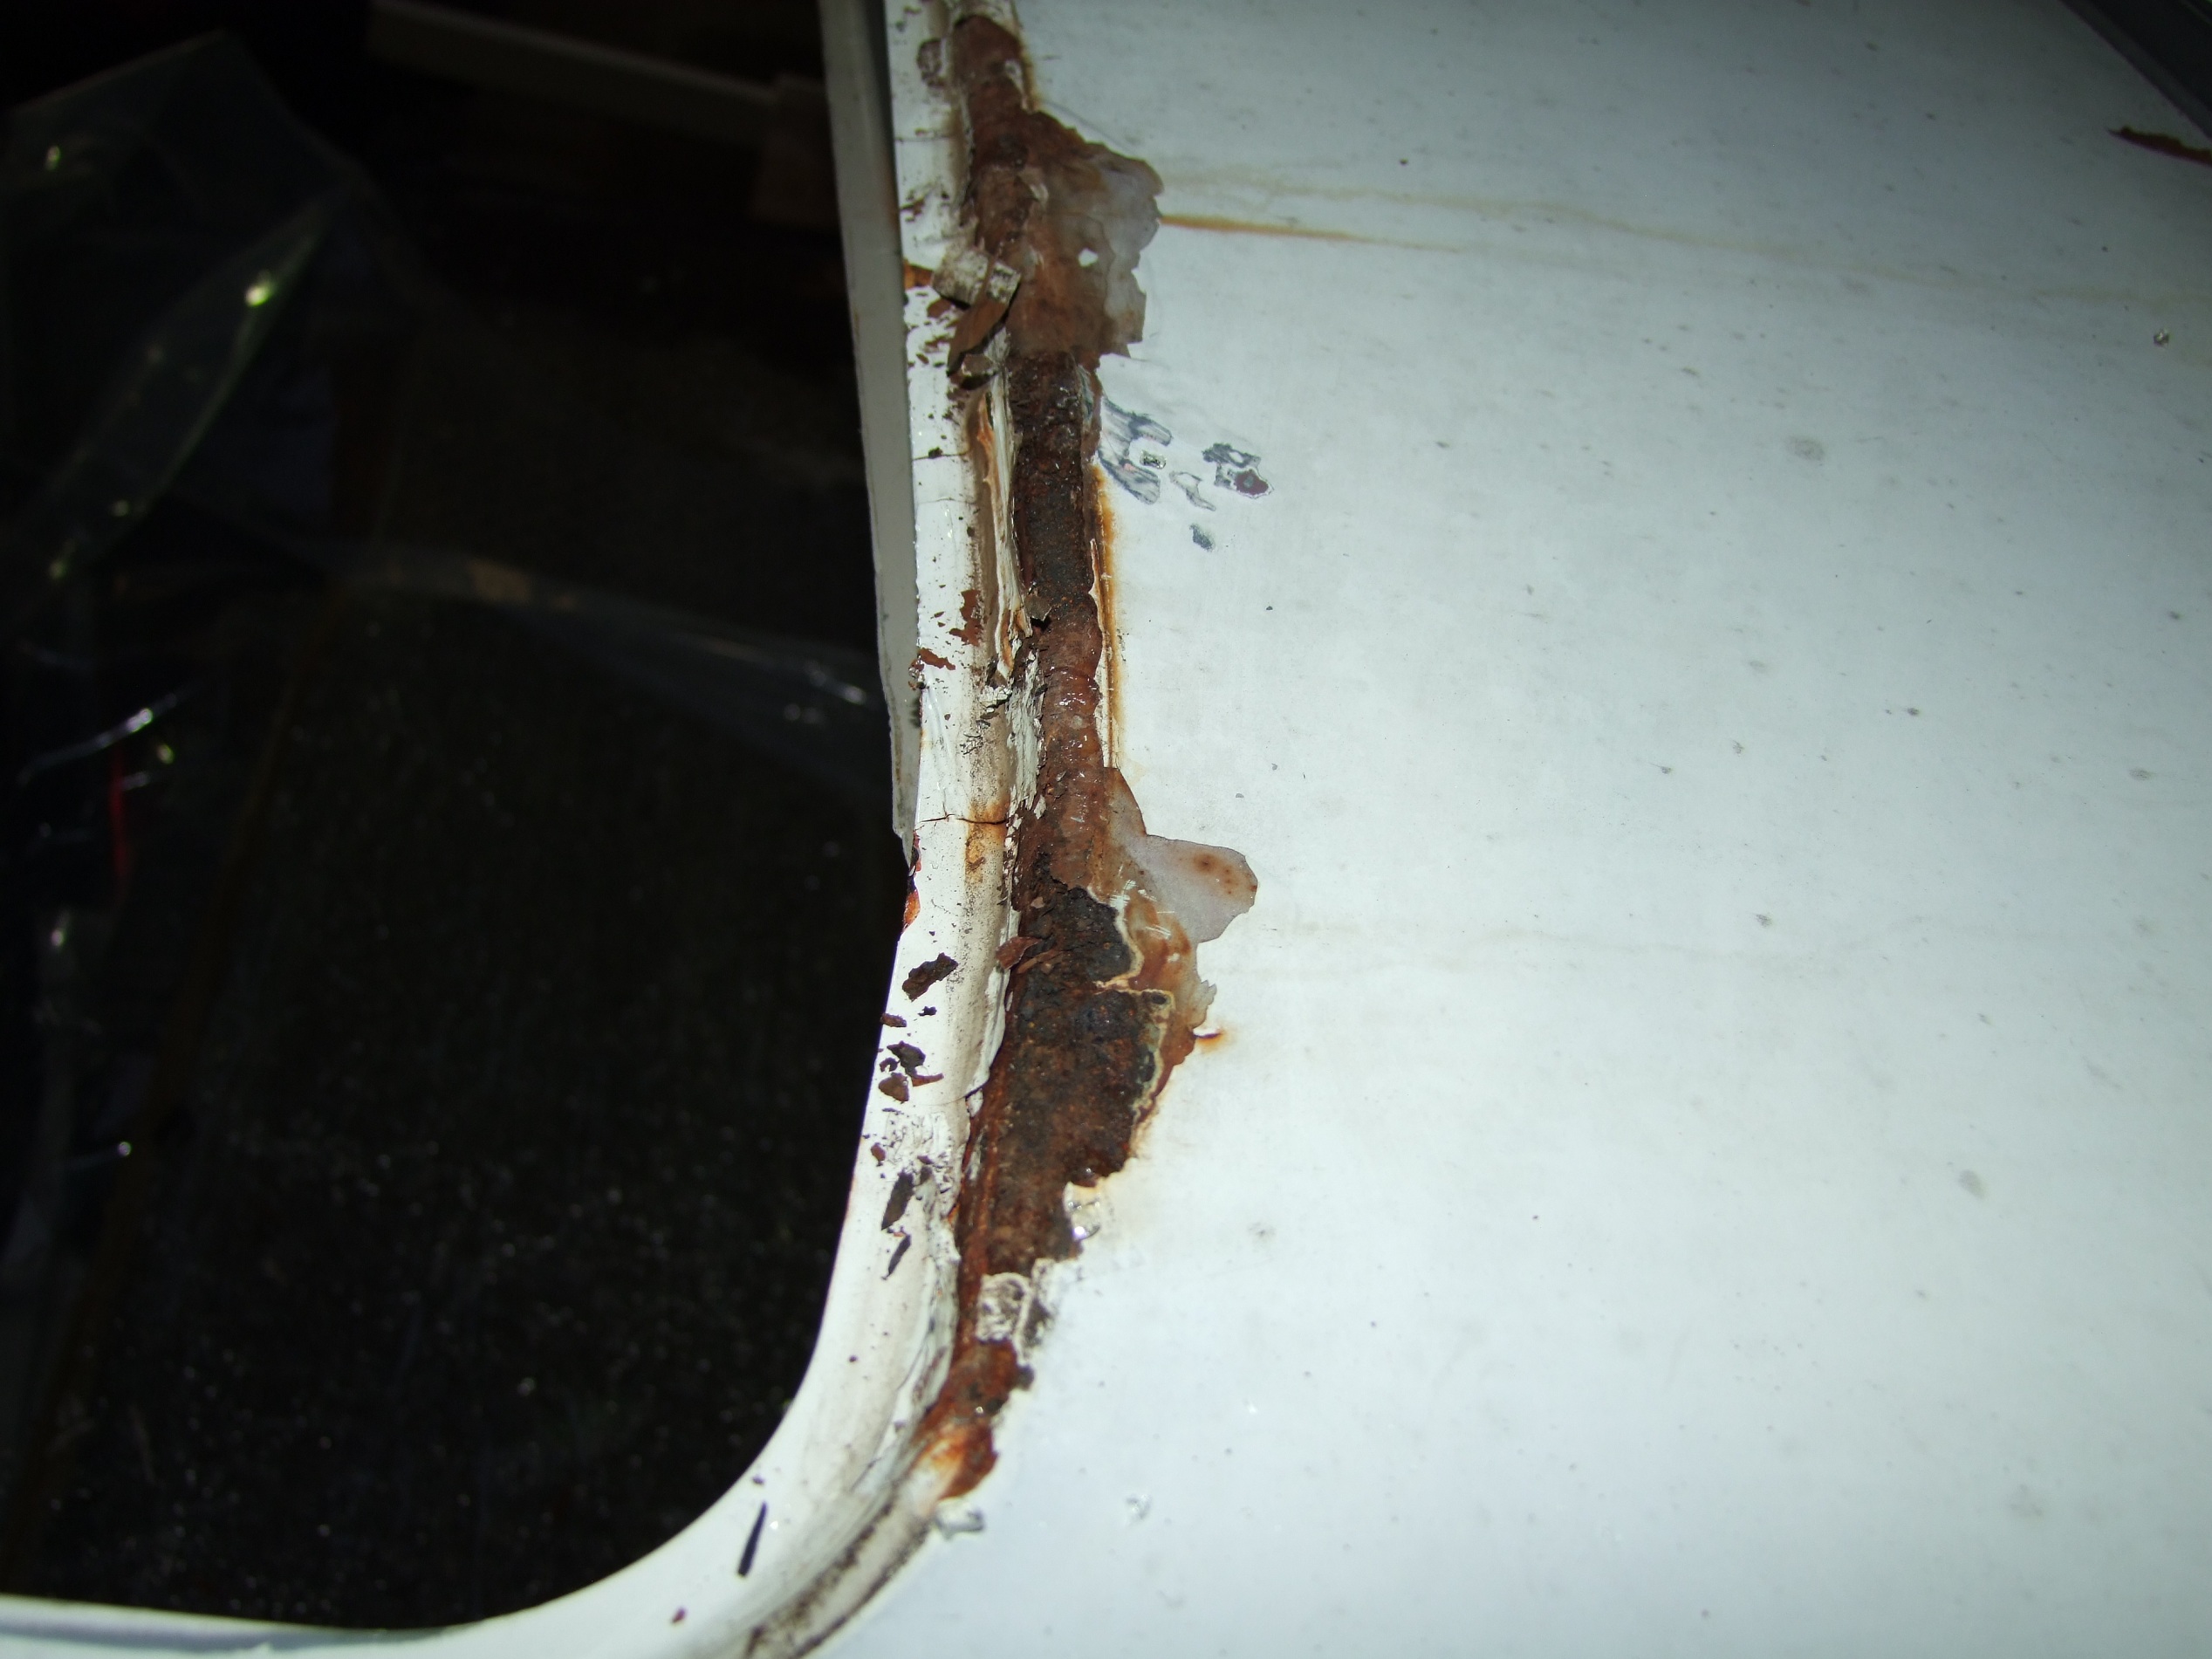
A lot of depth. In fact, I think I started chipping off about 5 different peoples’ Bondo jobs. I was suspecting that most of this rear hatch was made of Bondo, but it still sounded metallic when struck, so I figured it wasn’t too bad. But Bondo is moisture-passive, so the steel had begun rusting out again underneath it, presumably from a single crack in the repair.

Cleaning out the gasket of broken glass bits while I formulated an attack plan.

I had hoped to take the intervening week between the glass order and when it arrived (and when I’d have to call Jose after he got off work at his real auto glass shop) to make all these repairs, but the Media Lab class and other shop-herding commitments meant I neglected to do this. Next thing I knew, my Rock Auto order had arrived.

Well damn, it actually is the same glass! It carried an original manufacturer’s sticker, so I was probably looking at a piece of glass older than I was.

It was the Wednesday before Maker Faire New York, I had promised to carry six MITERS frosh (and non-frosh) to New York, and I was not going to do it while missing a rear window. This shit had to go down now. What follows occurred from roughly 10PM Wednesday evening until 4 or 5 PM Thursday afternoon…

Oh, and I now need to add the NYMF to the list of things to report on ex post facto

Because the evenings around here were now in the mid-50s and high 40s, it was too cold to paint or use any crosslinking compound (e.g. polyester resin based Bondo). I pulled into the auto shop, carefully nudging the EVT Porsche and Solar Car out of the way, closing the garage door with about 3 inches to spare. Some more plastic sheeting was set up to enclose the rear hatch area.

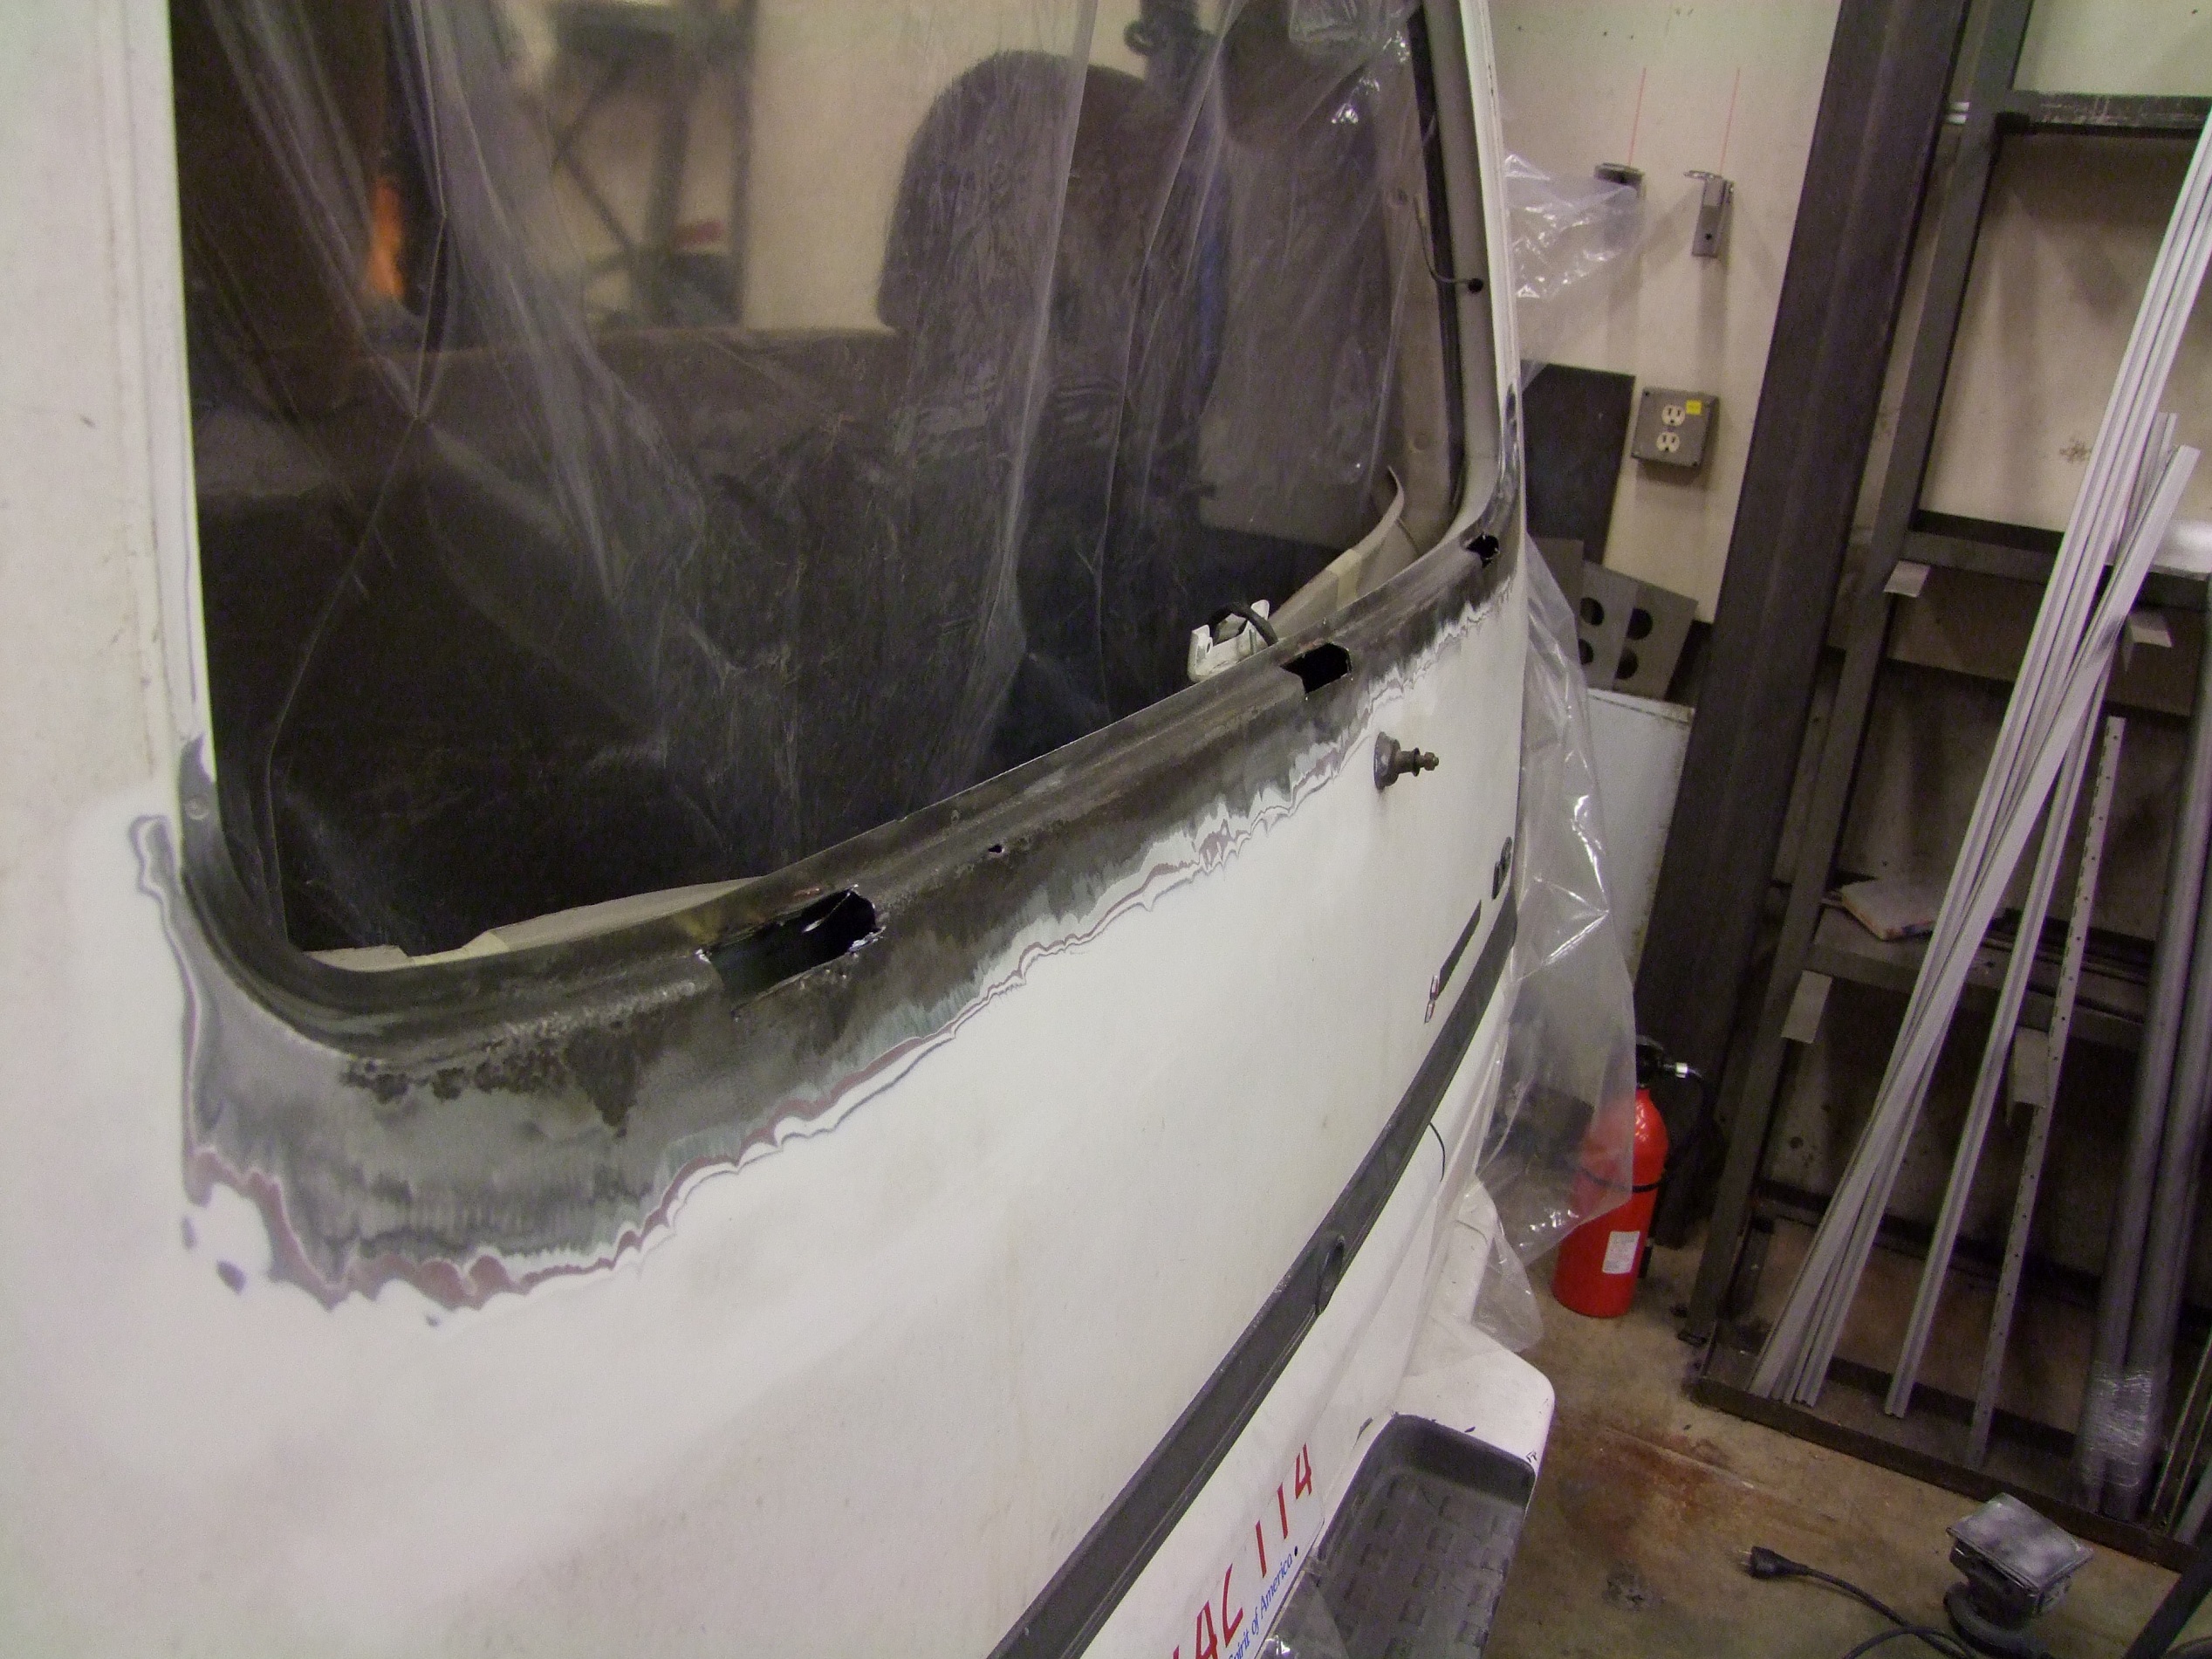
The plan was to grind and wire brush as far down as possible to expose metal first. Then,size up the situation and decide if hammering in some replacement sheet metal or laying up fiberglass was a more viable option.

I used a crimped coarse wire brush first to knock away most of the loose material, then switch to a flap disc to do the more heavy duty removal. I returned to the wire brush to hit the corners since it was more flexible.

This thing was like a fuckling Jawbreaker candy with its layers of filler and paint. Check out those strata that geologists would murder for.

I went into this with no intention of restoring the previous repairs’ contour, because the stuff was around 2mm thick in places. I was basically out to get the repair well-sealed and the area somewhat smoothed just so it didn’t look like total shit. Patient hand-sander I am not. I’m rolling with the assumption that there will be a day when I have enough money to get this thing fully resprayed and repaired by a professional shop, and my mission is to preserve it until then.

The open-pit mine has been expanded as far as I felt was adequate to start on the fix itself.

HI THERE.

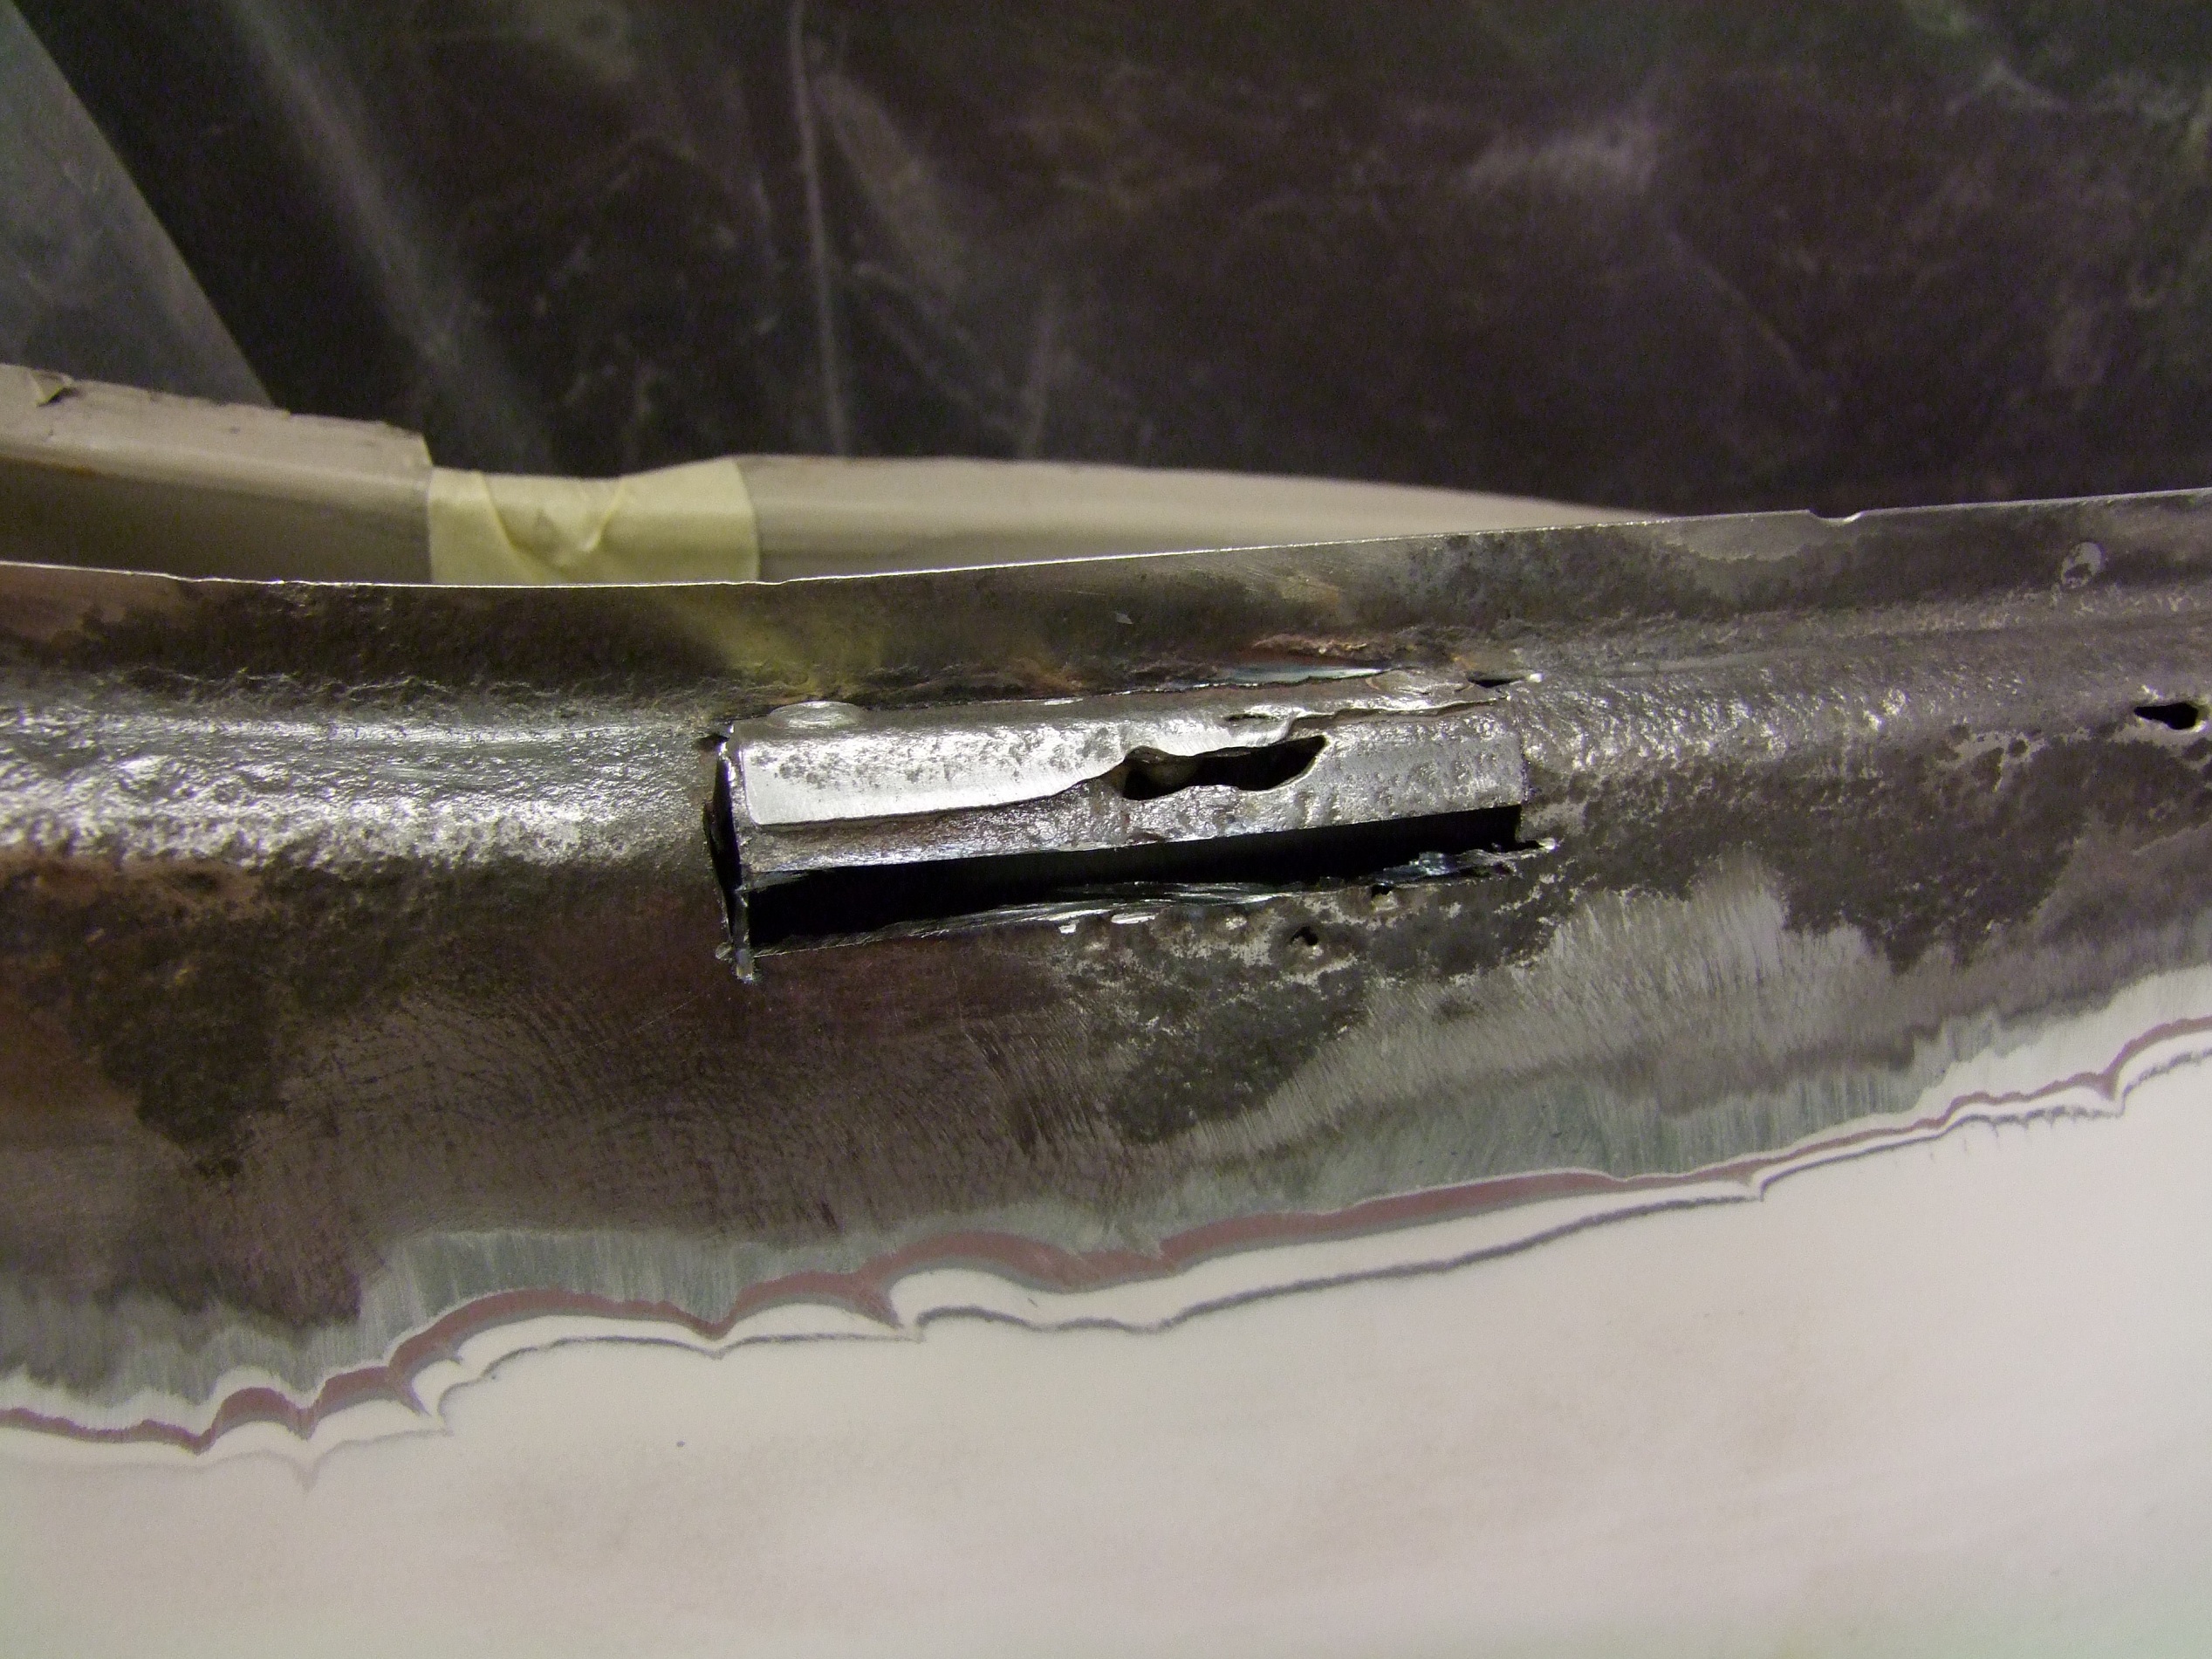
I found three of these riveted patches on the rear window seat, suspiciously equally spaced. A bit of research led me to the discovery that these areas originally had small drainage channels to collect water that got behind the gasket, but they could become blocked easily and hence trapped water instead. This would explain why they rusted out and were repaired first.

That’s one hell of a shoddy repair job. It’s two rivets, one of which was totally hollow, so there was no way it could have been waterproof. The rest of the patches were the same.

By now, I had formulated the battle strategy – cut out the steel patches and go over the gap in fiberglass. I had, after all, invaded Solar Car territory, and at my disposal were rolls of fiberglass cloth, fiberglass and epoxy resin, and semi-infinite Bondo.

I used a metal cutting wheel in my trusty $14 Harbor Freight angle grinder (yes, all this work has been done with a $14 Harbor Freight angle grinder – yes, I’d recommend it to anyone) to slice out the steel patches.

I kept the one with the little rust monster, by the way. It was too cute to throw out.

Now I had 3 roughly equidistant holes in the hatch.

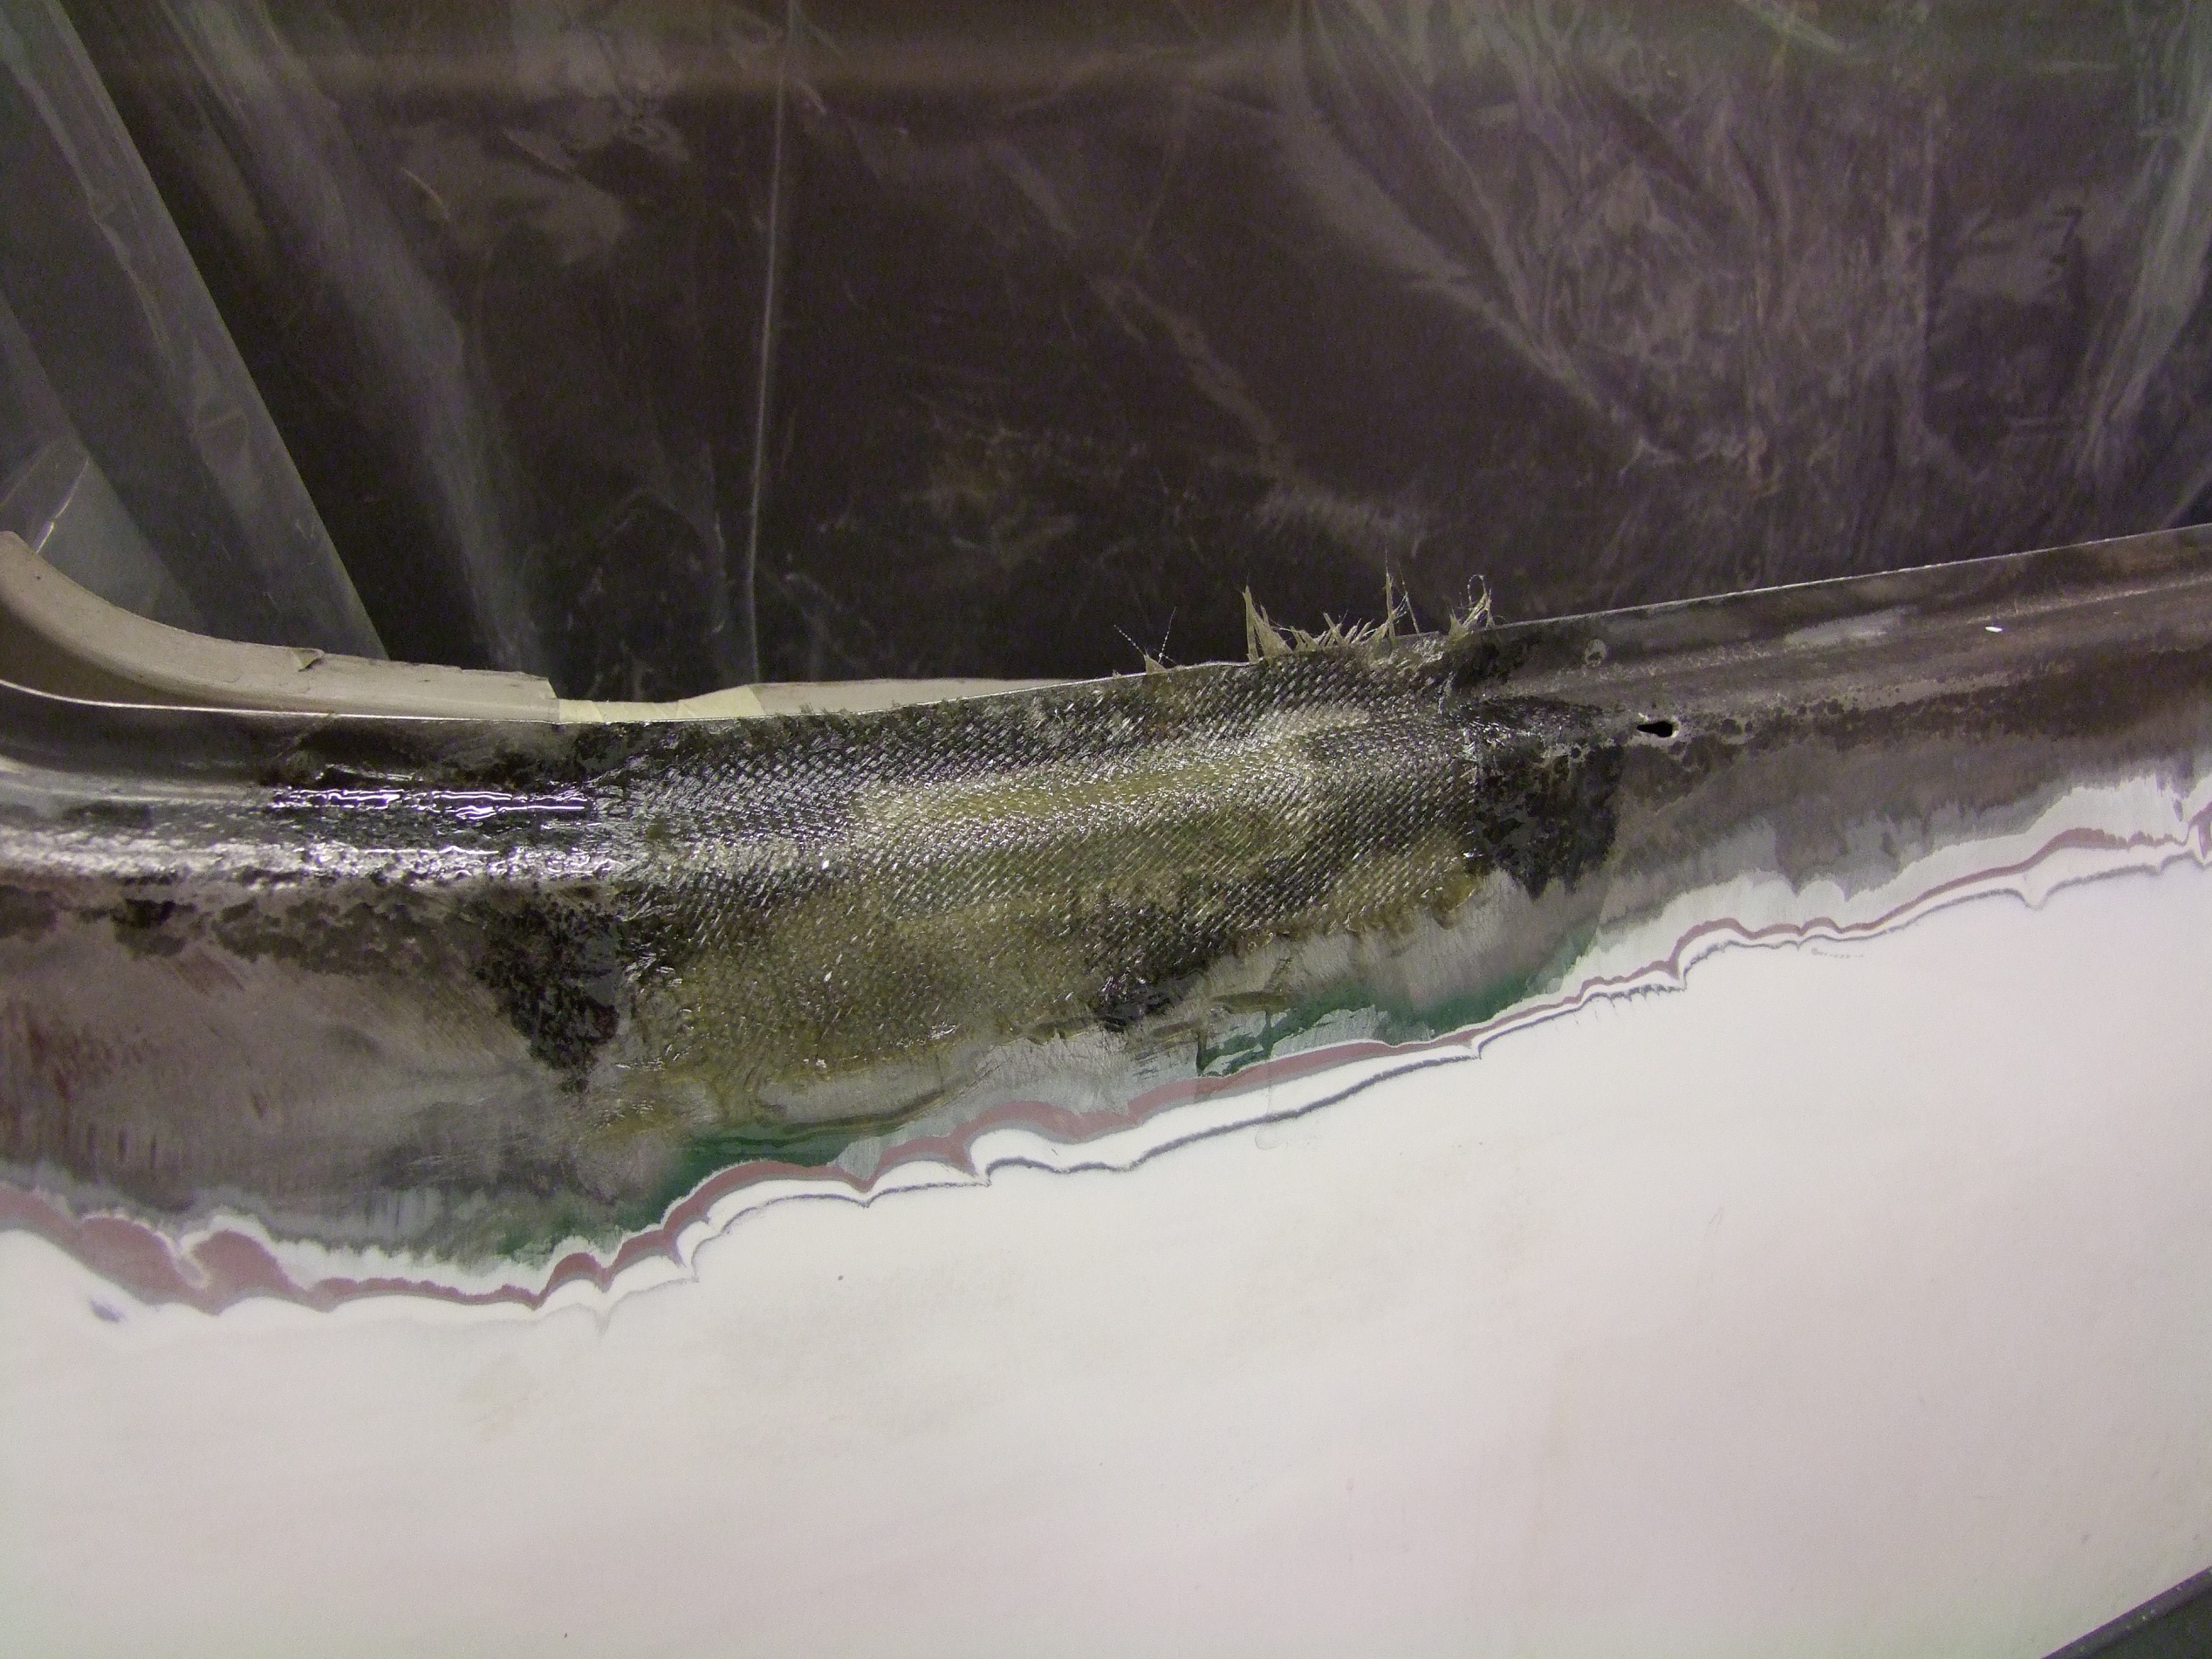
The fiberglass cloth went on in 3 layers, one after the other. I first coarse-sanded the area for better adhesion, then painted the resin around the area to be patched. The cloth was laid down and manually pushed into roughly the right shape. More resin was “poked” into the cloth with the application brush in order to saturate it, and then a larger amount was painted on for the next layer.

When all 3 layers were applied, I began pushing the cloth into shape by poking it with the brush again. As it turns out, this seems to be the easiest way to maneuver the cloth into shape by small amounts. Then, it was left to set while I worked on the next one.

By the way, I’d never done any composites layup of any type before this. I made this up completely on the fly after watching a few Youtube videos.

(The big air bubble on the right side was tamped down right after taking this picture…)

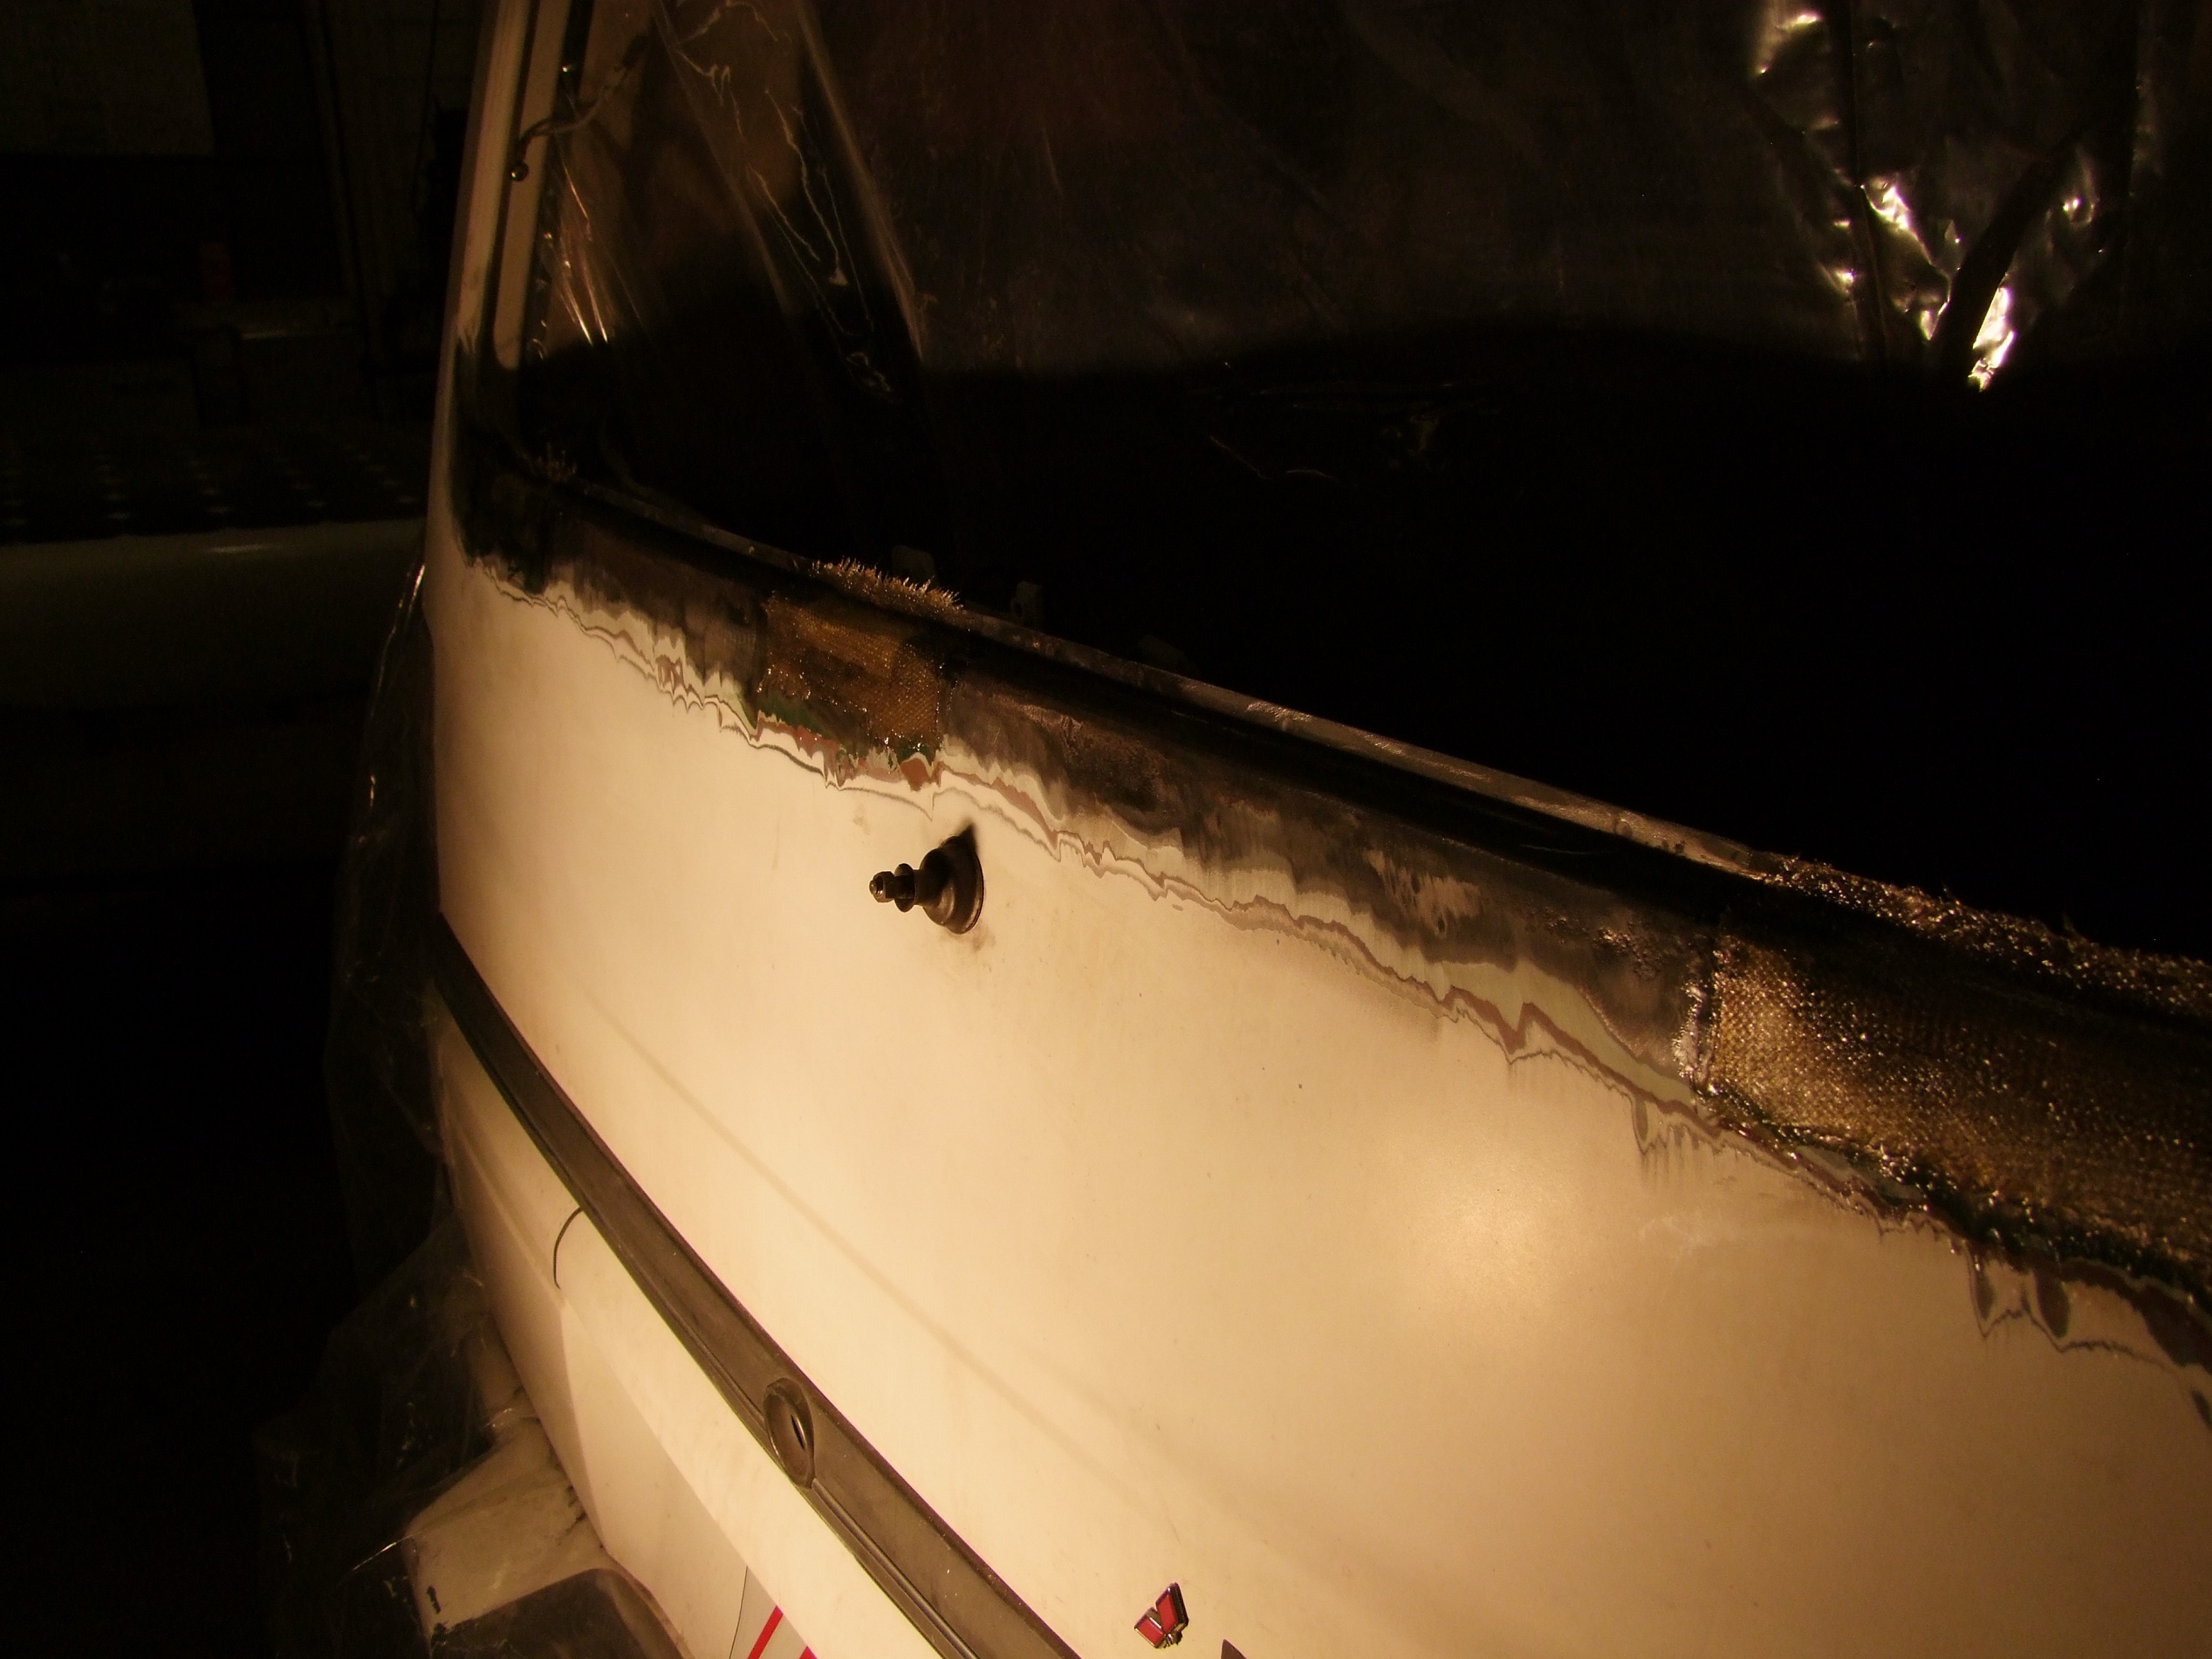
The time: About 3am on Thursday, and all 3 patches have been. applied. These were left to cure for several hours while I jumped in and took a nap. The light source is a 500W halogen work light that I pointed at the area from a few feet away in order to keep the metal a little warmer. The shop is not very well insulated, so it tends to follow the weather.

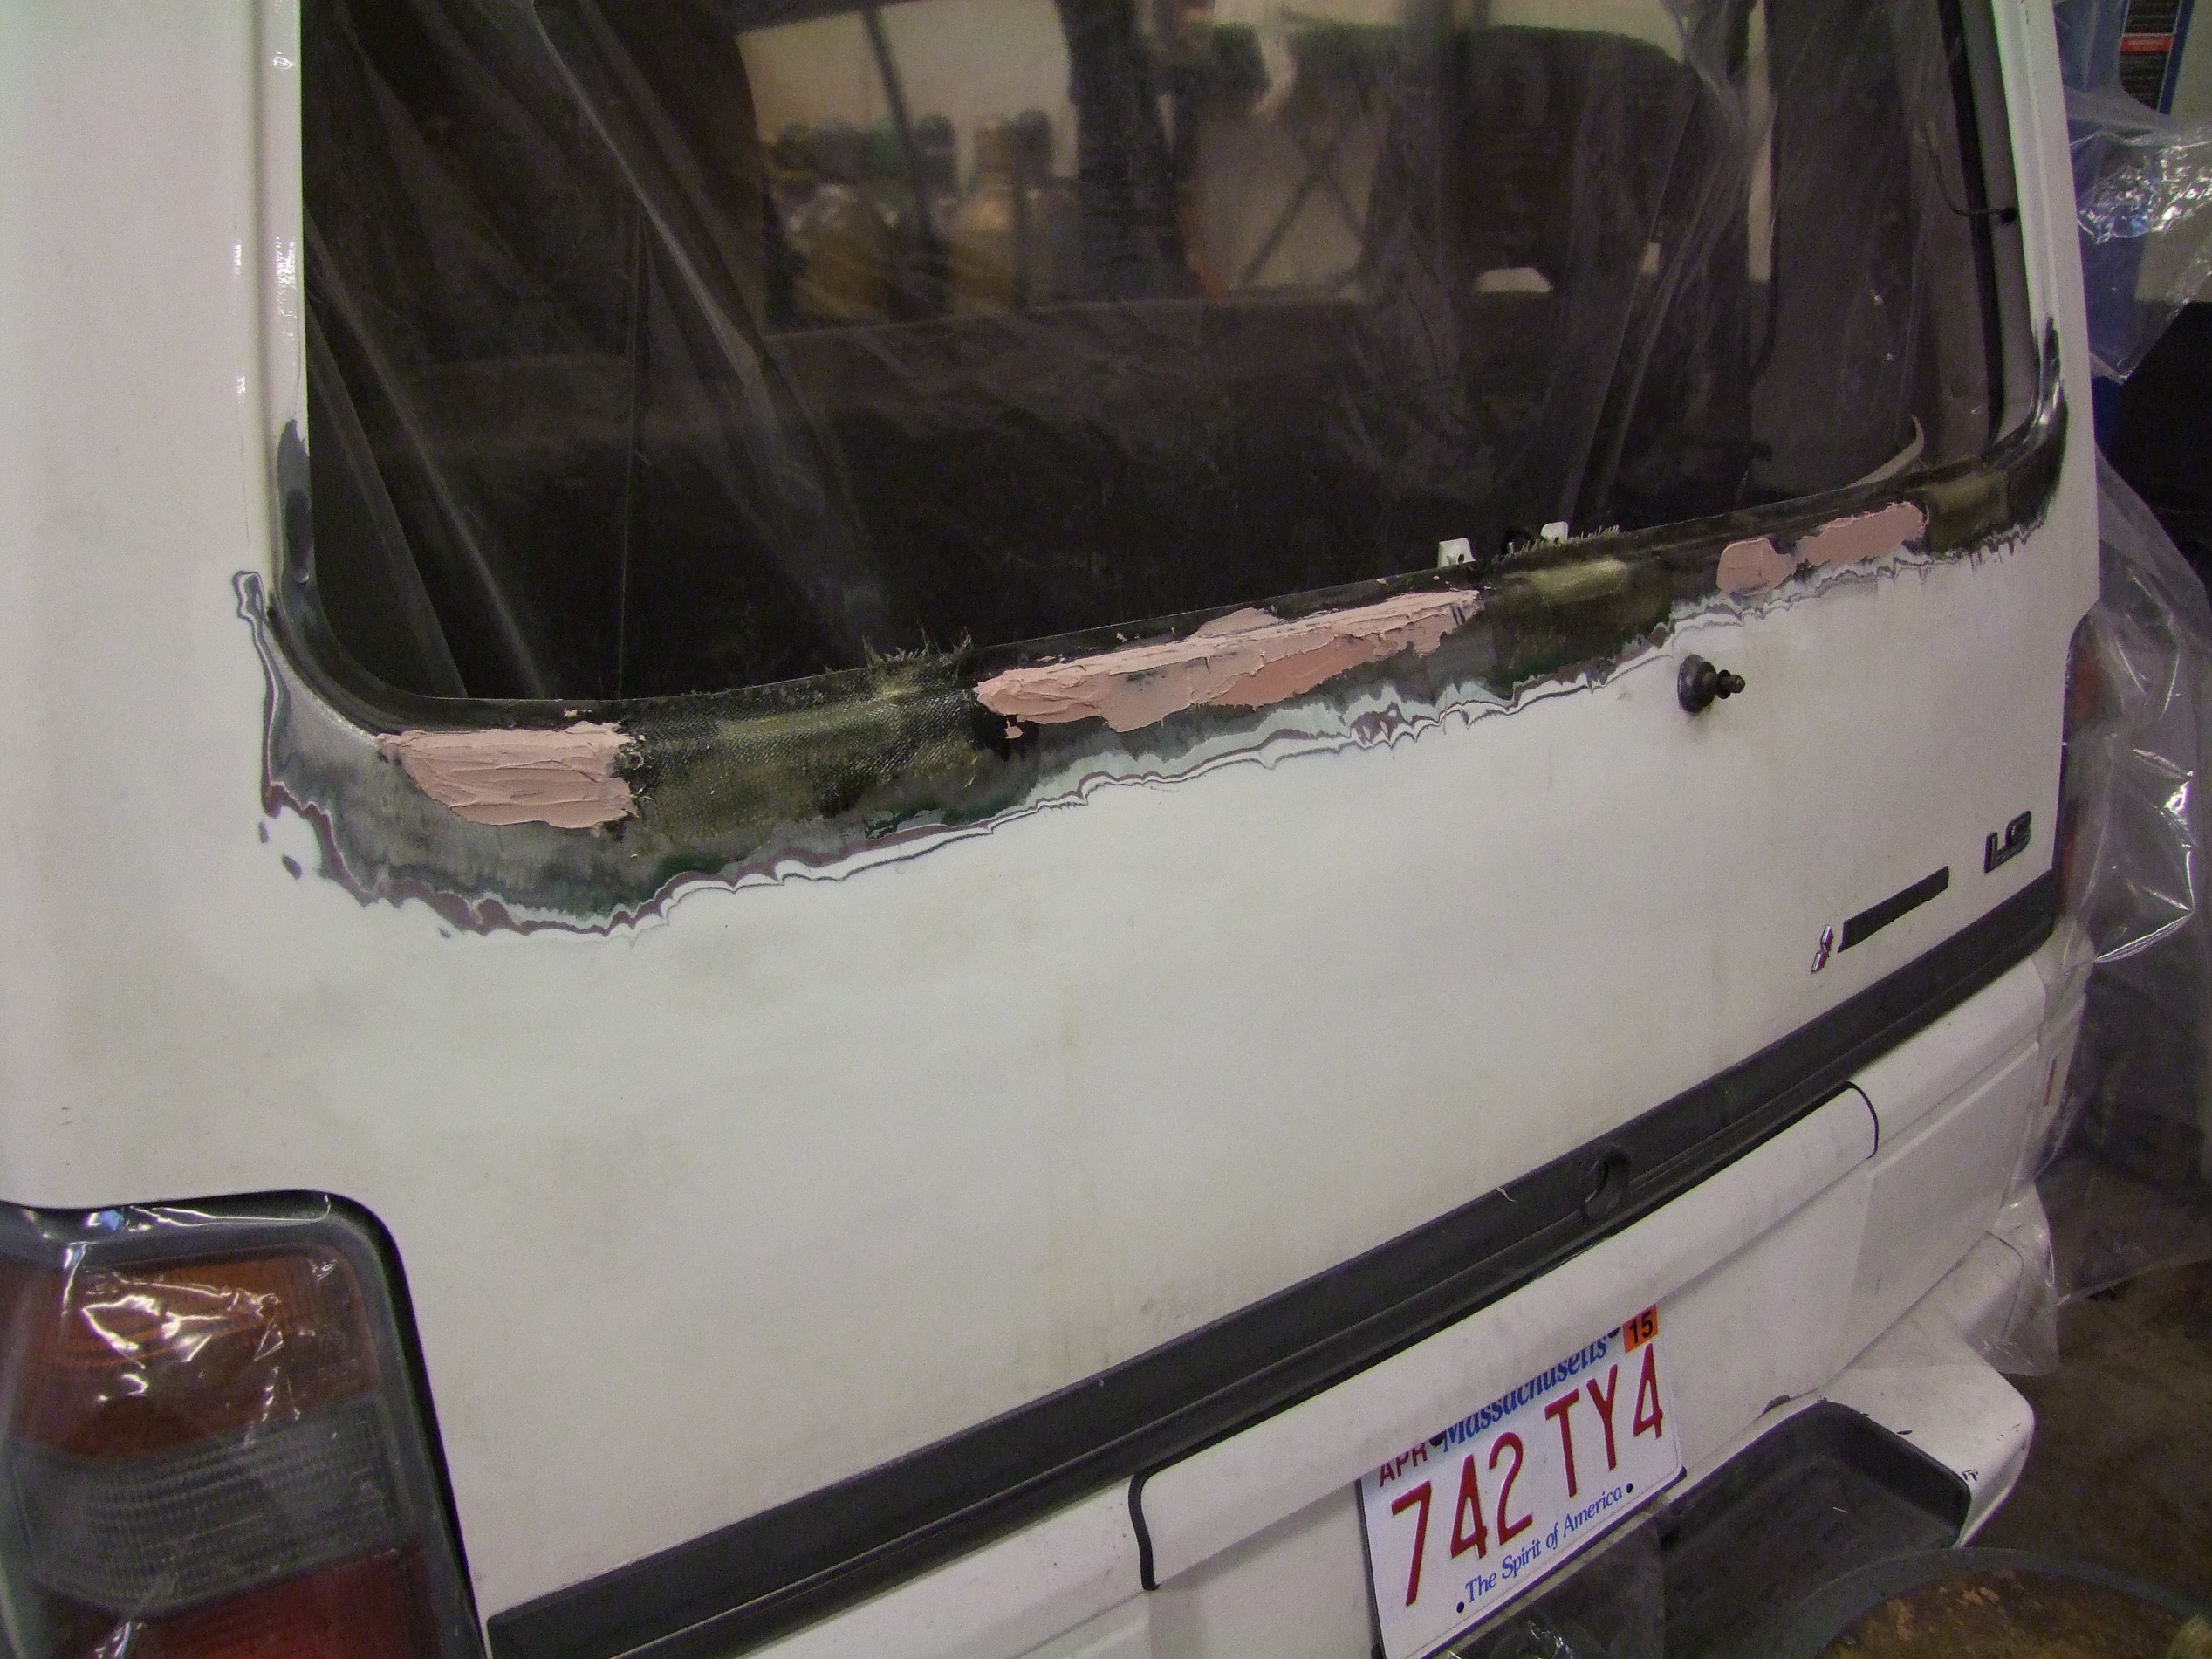
The time: About 6:30AM Thursday. Woken up by a contractor crew barging into the building, I began applying Bondo in small amounts in order to soften the edges of the fiberglass. I was not going to mash enough on to restore the original contour. Bondo says it needs only an hour to cure before sanding, but I found it was still a little flexible after that, so I gave it two hours. Notice the slightly different colors indicating different passes.

The time: About 9am Thursday. Enough was enough, it was time to start painting. No, the contour is not perfect at all and I’m sure you’ll be able to see it from a mile away…

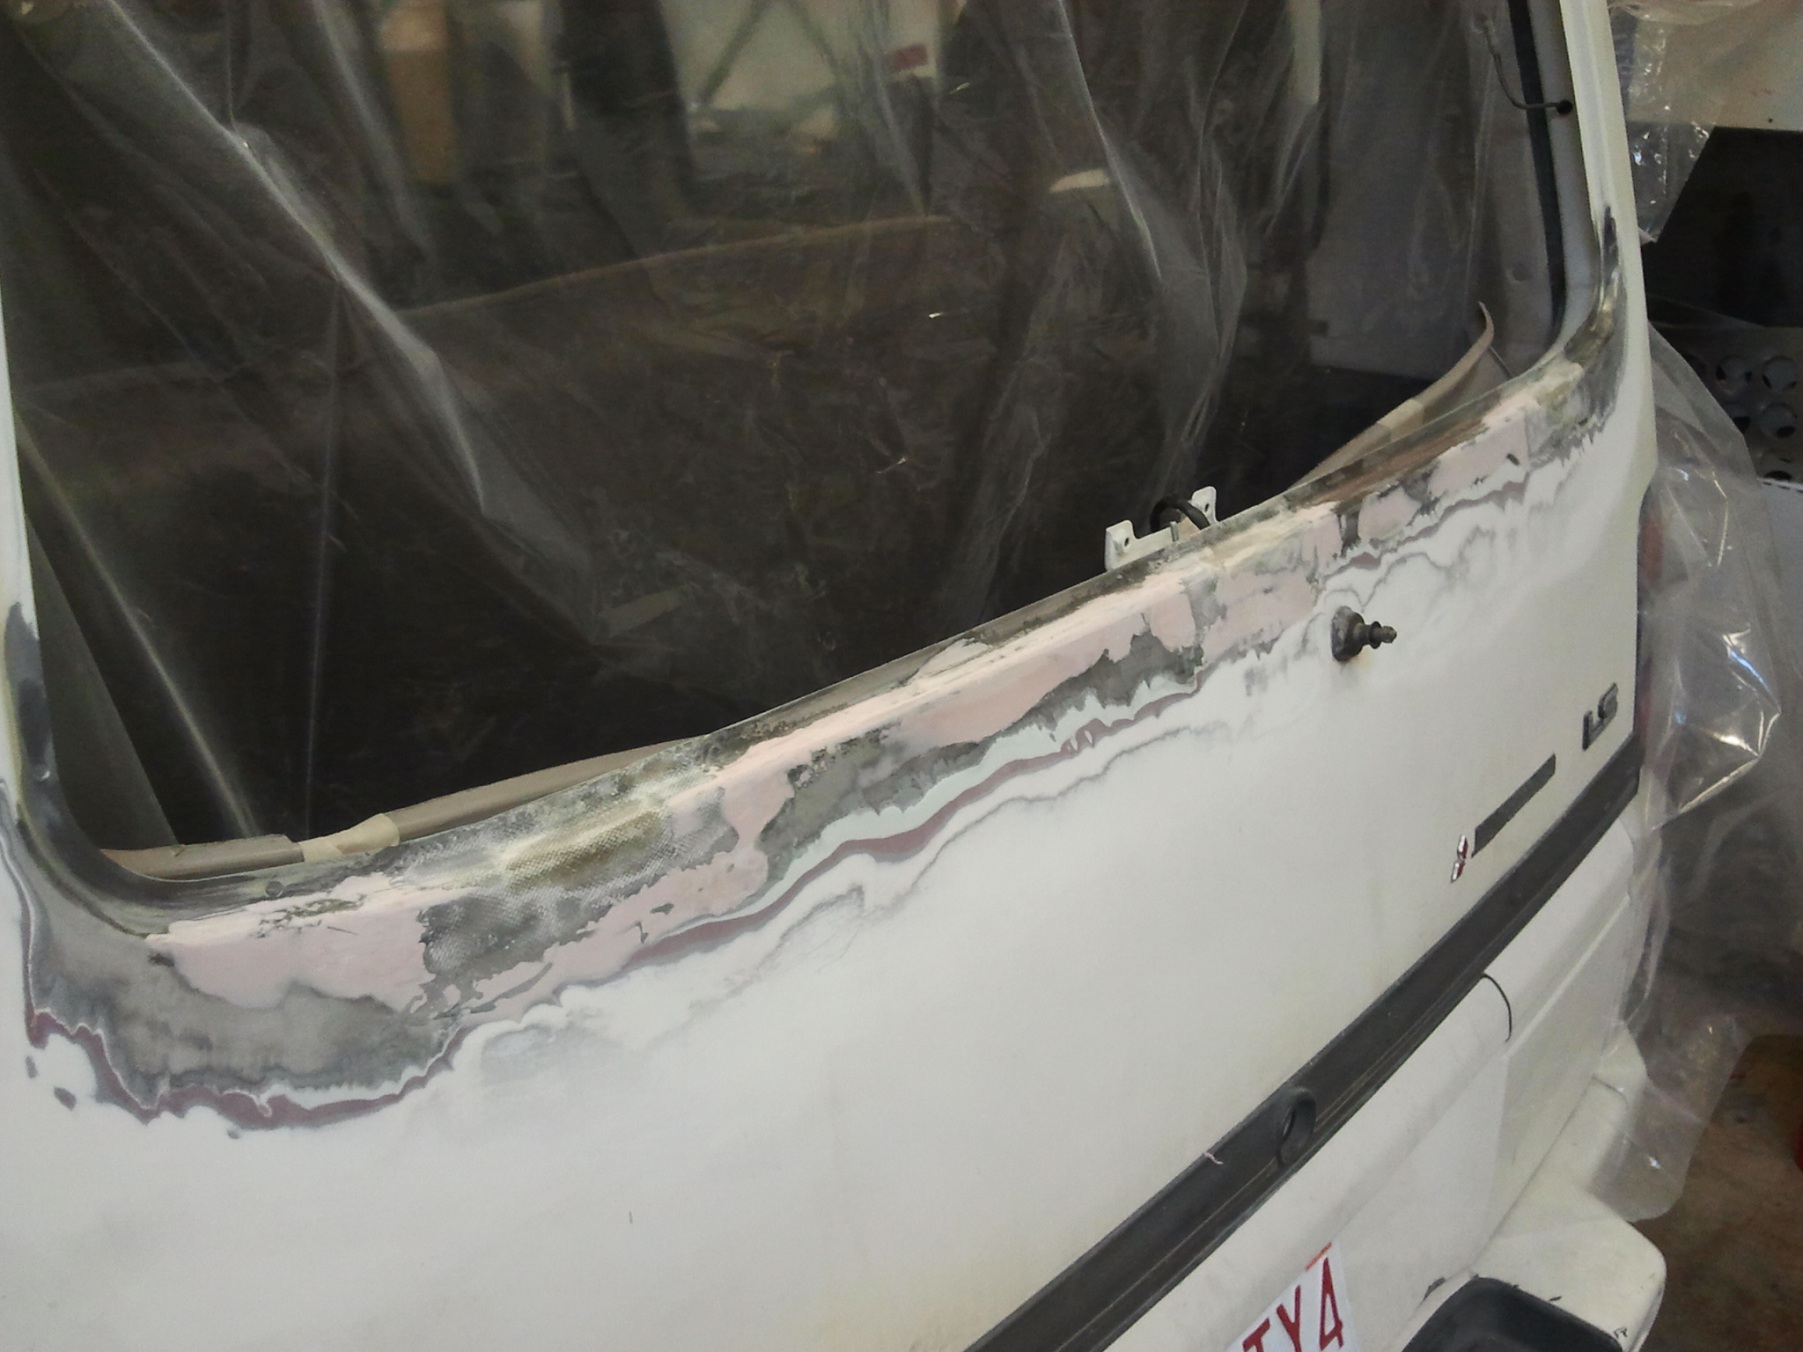
I used 60 grit sandpaper on a power sander to blast the peaks and valleys down to a more smooth condition – notice the “bondo strata” becoming wider. I ran a finishing pass with 220 grit which I also used to rough up the surrounding area for better paint adhesion.

I used more plastic drop sheet to mask off the areas that I wasn’t going to repaint. There’s going to be a curiously new looking band of white across the back of this thing. I only had (read: The two surrounding Advance Auto Parts only had) enough of the specific shade of Chrysler white I half-assedly matched to the existing body color, so I couldn’t redo the entire rear hatch.

Picking the color was a bit of research work. None of the generic Ford or GM or Toyota colors offered were good visual matches, but then I remembered that Chrysler was basically Mitsubishi (and vice versa) in the 1980s and 1990s, and a bit of Intergoogling confirmed that some people were using Chrysler colors to repaint old Mitsubishi cars. Lo and behold – Dupli-color’s Chrysler “Bright White” was a near perfect substitute.

It’s about 9:30, and the first layer of primer has gone on above. I took the advice of the primer can and laid it out in four thinner coats, waiting about 15 minutes between each, and one hour after the last one.

Essentially noon now, and I’ve done the first layer of white (what the hell is this called anyway – base coat?)

The can of touch-up paint wasn’t enough to finish the 4th and last layer, so I ran off to the local Advance Auto again, which thankfully had 1 more can in stock, making it back in time to throw the last one on before giving it an hour to cure in order to prepare for the clearcoat. The time was about 2PM.

For the clearcoat, I removed the plastic dropcloth from the outside of the tailgate and gave the surrounding area a very find sanding with 360 grit. This was to ensure overlap of the clear coat so I didn’t have a bunch of exposed paint seams. To apply the clearcoat, I just aimed more carefully so it didn’t get everywhere, but contoured over the new and old interface.

Looking down the width of the new repaired area, you can definitely see the low spots in the fiberglass, and some of the ripples in the Bondowork. Whatever. Maybe those low spots will simulate the rain channels of yore.

I rolled out of the shop around 4:30PM Thursday. Overall assessment of the repair? Whatever, I did it in 18 hours and didn’t pay anyone money for it. Not that I would have accepted a repair of this visual caliber from anyone else but myself.

If I had taken just one extra day, then I could have done a much better sculpt of the rear hatch contour so Bondo lines weren’t visible all over the place. But this is a valuable lesson for next time – none of this was as hard and weird as I originally thought. I just really want some little rental car damage inspection stickers so I can make a note to myself which areas are made of solar car goo instead of steel.

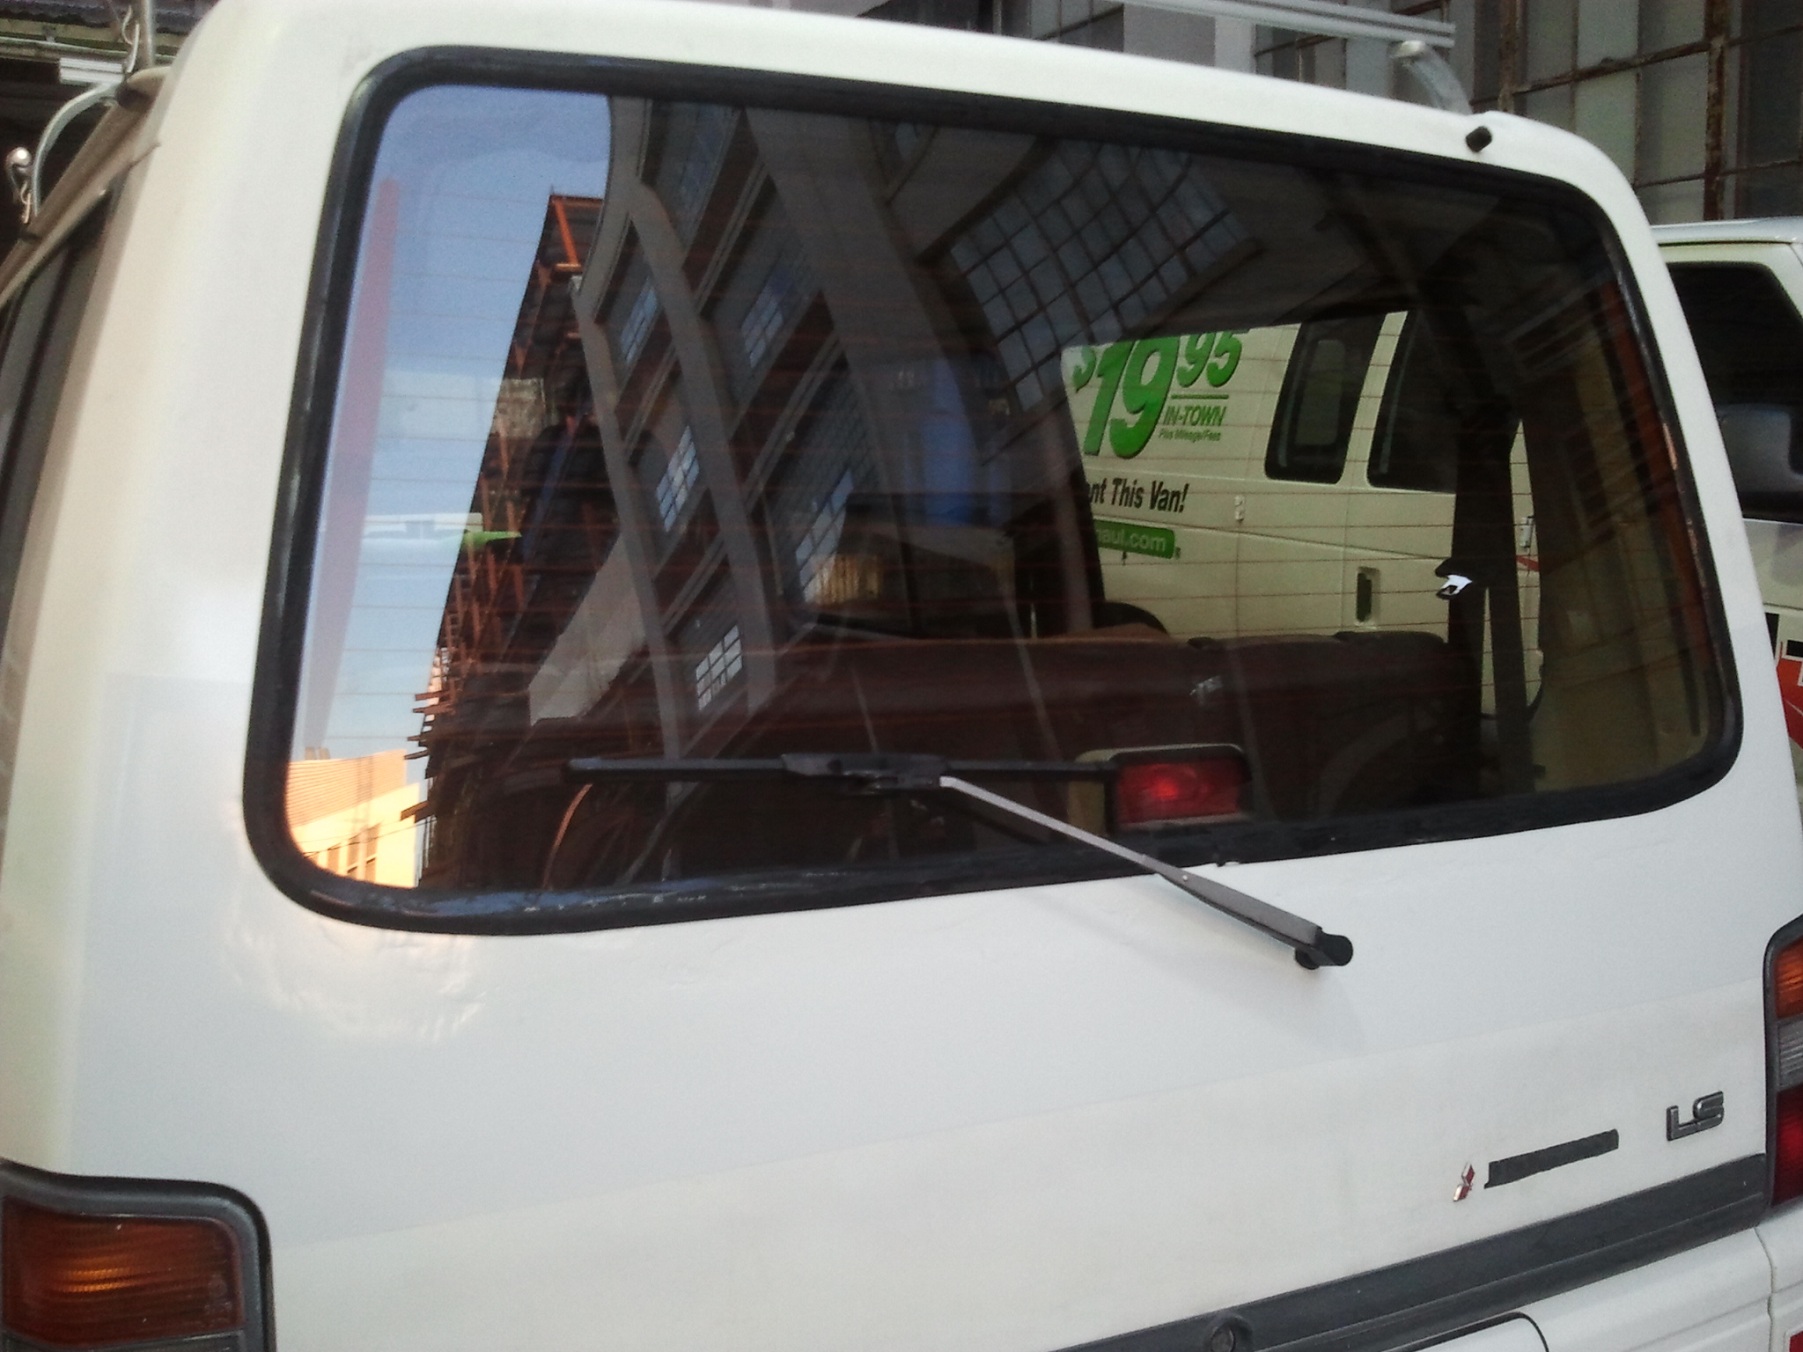
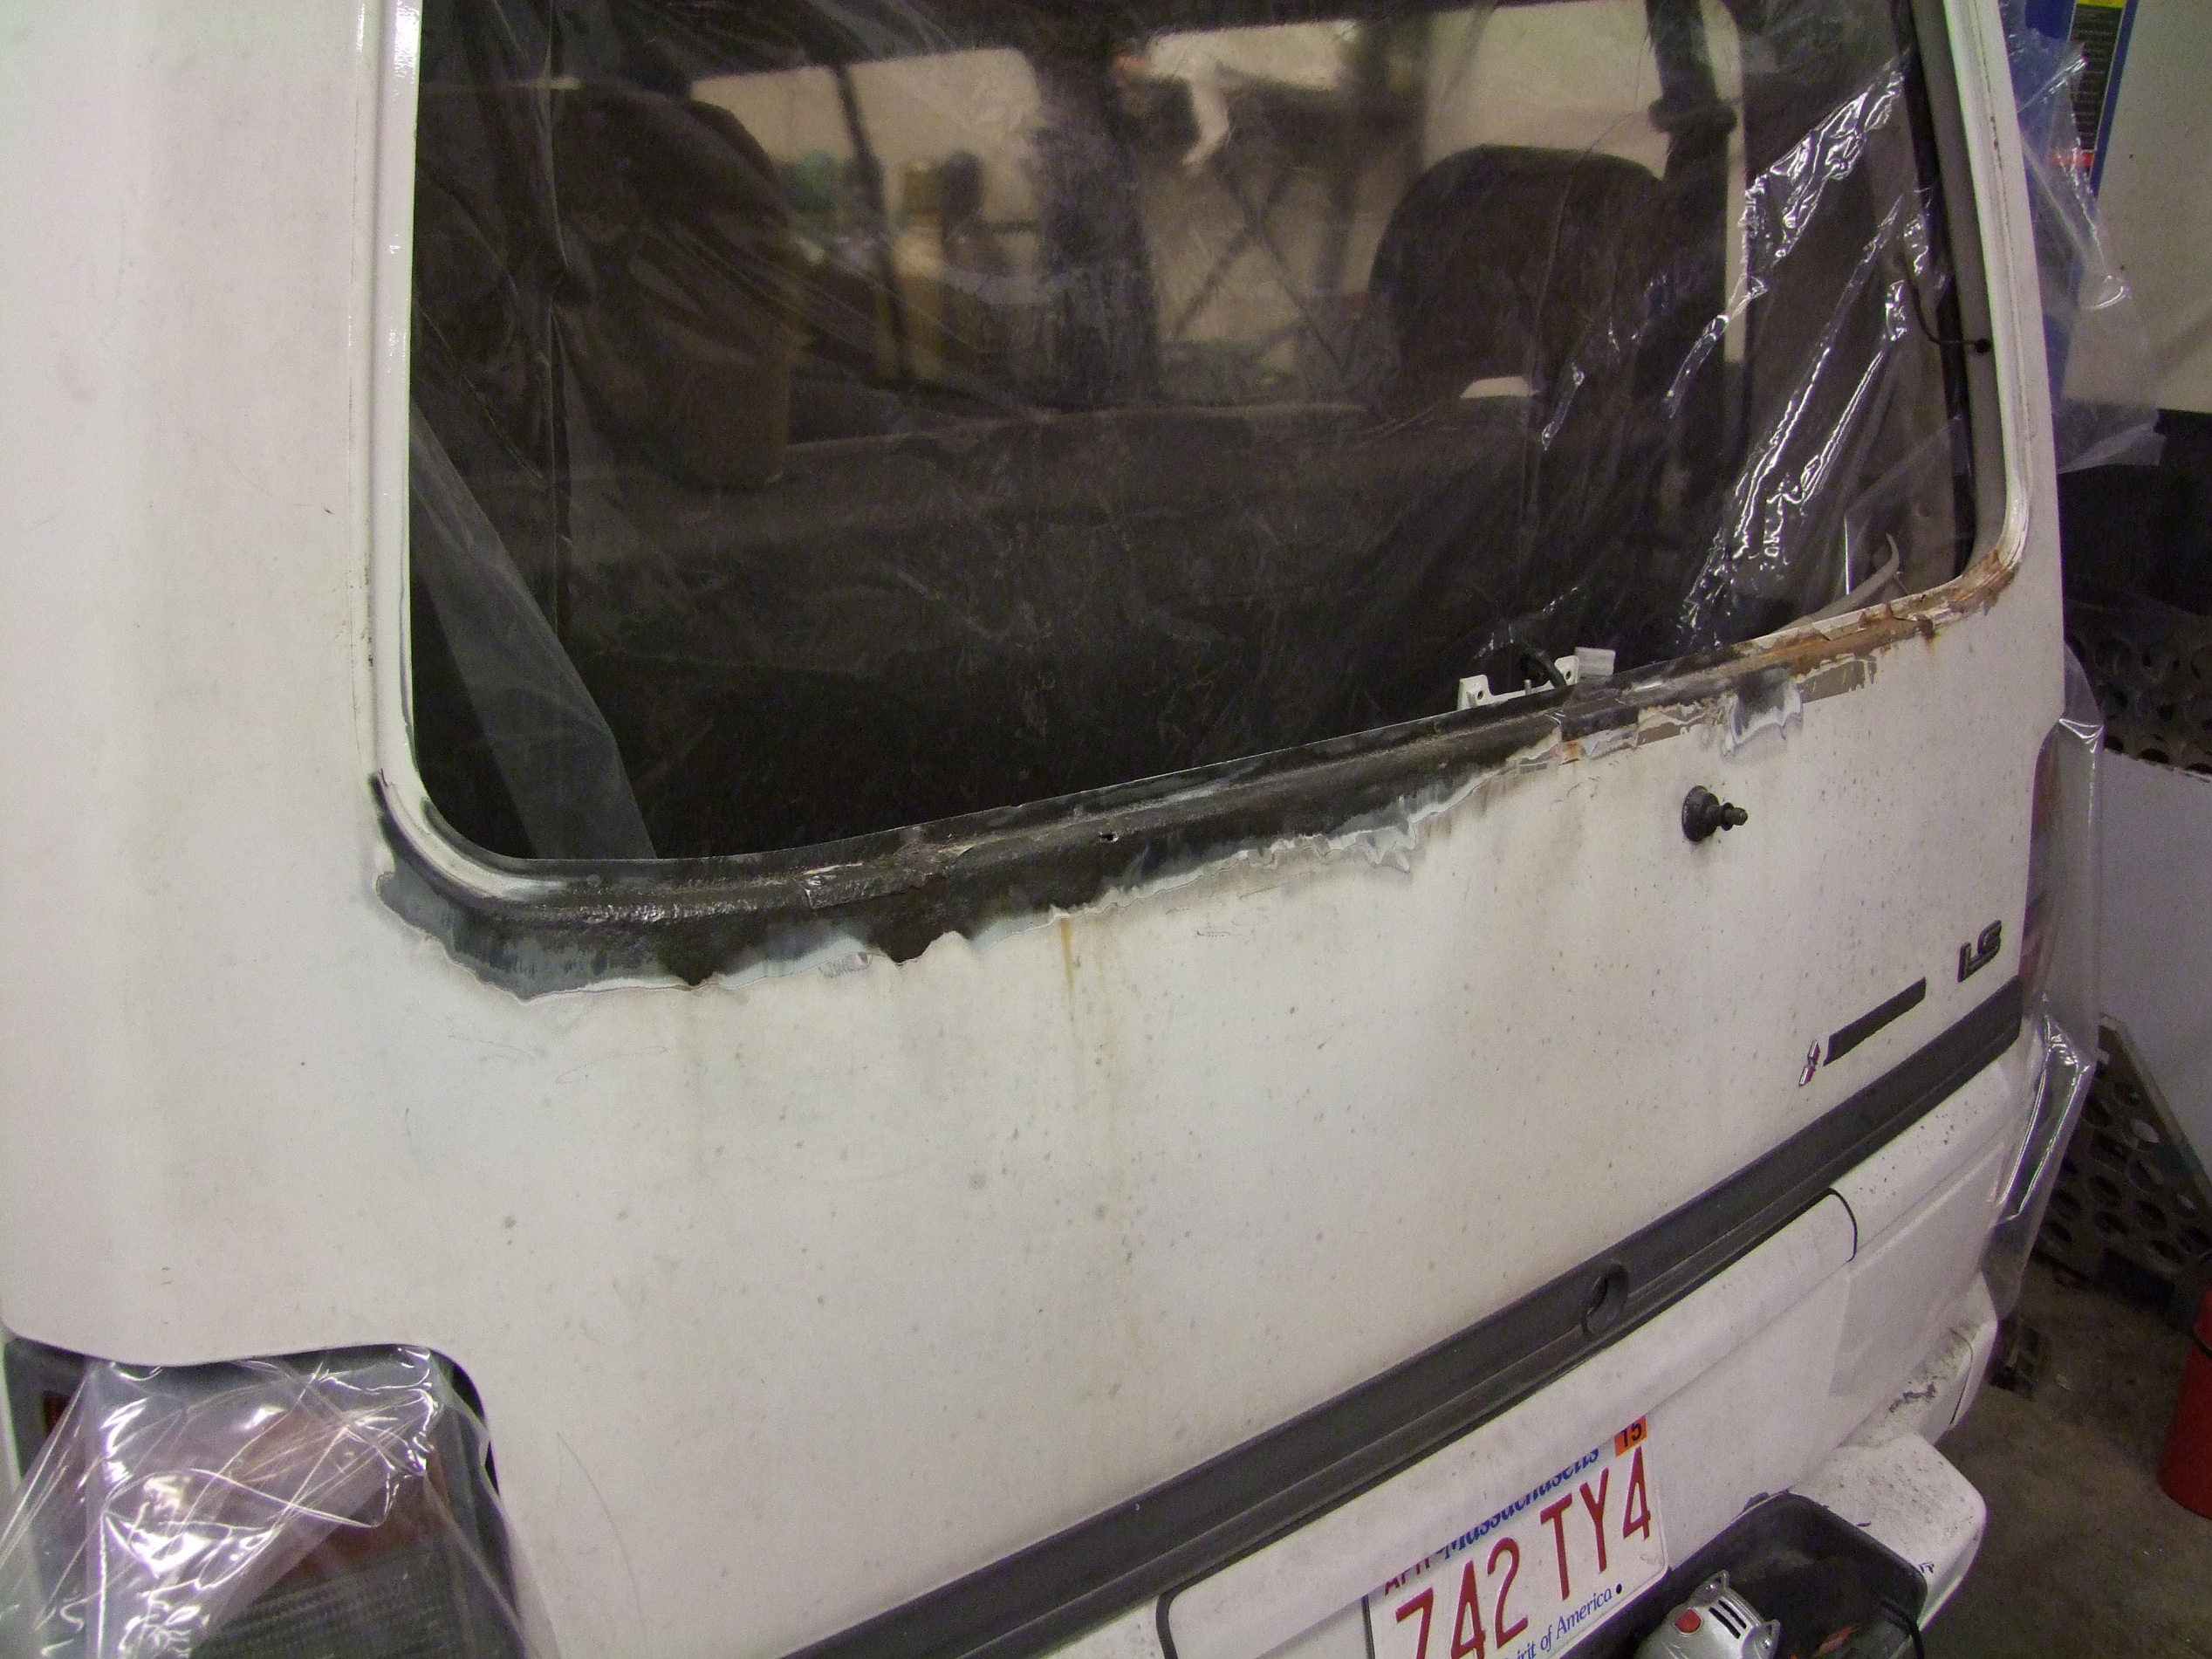
Friday afternoon, I bumbled into Jose’s shop with the new glass, and watched firsthand as he and Jesús slung the window on in a minute flat, using the Inverse Greasy String Method (after some minutes of prep work, I mean, like wrapping the gasket back around the glass). They then filled the gap in the gasket with polyurethane sealant and a section of generic weatherstripping.

The hell. Professionals, man. They didn’t even grease their string! Seriously!

Look closely on the left side and some of my “handiwork” is easily visible. From a distance, you can’t really tell – only up close and if you are looking for it. Or if someone runs their hands along that section under the window, but if someone else is feeling up my van, I would probably take issue with it anyhow.

There it is – how I dove head-first into bodywork and learned definitively that it’s a thing which takes time and patience and those other virtues I don’t have, but isn’t that mysterious and fearsome either. The “Death Race 3000” school of automotive repair is looking more attractive now!


The Dragon*Con 2013 Complete Roundup, Part II: Event Recap and Maker Resources

So here we go – now that Part 1 has had some time to sink in, and now that my shop is looking remotely functional again, it’s time for some part two. In this section will be the two new ‘sections’ (carried over from part 1):

  1. Operation GIVE ME A BRAKE: Brake system and inspection all-around on Mikuvan!
  2. Pad Thai Doodle Ninja, an Antweight 4-bar pushybot I designed and built in like 72 hours!
  3. The trip down, the con, and how the bots did at the event!
  4. The links and documents associated with my two panels at  Dragon*Con.

This semester, the two fabrication labs I oversee in the MIT-SUTD Collaboration is once again playing host to How to Make a Mess out of Almost Anything:

Yeah, it’s going down about like that. Unlike the last two academic terms (January – August, basically), I’m not “running” a class this term, so it’s going to be way more chill. I’m not sure if I will want to run back-to-back design classes again like the consecutive 2.00gokart and “2.00GLP”, since the overall level of intensity and chaos is extremely high. I see how the department can go through design class professors rapid-fire now.

Anyways, back to the trip. It’s Tuesday night! Time to load up robots.

Dragon*Con 2013

…but first, I need to get my 200 pounds of tools, accessories, and spare parts out of the back. I left a spare tire, van-specific tool box (like my robot-specific toolbox, but everything is bigger!), and spare fluids. The floor jack was removed since there is a bottle jack for tire changes in a rear compartment. Basically I was purposefully blocking myself from doing any roadside extensive work – I think I’ve gotten everything mechanically to the point where a failure necessitating deep dissection is practically going to be catastrophic in nature and not something I’m going to do in a parking lot.

Replace all the van kibbles with robot kibbles. I guess I could have kept the van kibbles in the back anyway, since I was initially expecting more bots and parts. This stuffing was, consequently, not as epic as the Motorama Stuffing or the Last Dragon*Con Stuffing (though those vehicle did have less hatch space to begin with). The ship-out time was essentially midnight.

Around 4, we reach Flushing, New York, where Xo Has Joined Your Party. This is where the trip got a little more interesting.

In 2007, before I was a wee bunny at MIT, my parents and I drove up to visit the place. We took I-95 in all of it’s forms through DC, Baltimore, Philadelphia, Newark & New York City, then up through New Haven and through Rhode Island. My only memories of the trip are of how I-95 was utterly depressing in every way, from tolls to traffic to construction, and the general level of suck the Northeast urban cluster exhibited.

Six years later, I was meandering up the Bruckner Expressway in the wrong direction when I hazily decided that maybe I-95 wasn’t as bad as I remembered. Plus there was like an exit for it right there and if we kept going semi-lost I’d end up back in Connecticut. So, down 95 we went, across the George Washington Bridge (slowly, because construction and late night truck traffic), and down the New Jersey Turnpike, the fancy Delaware Bridge thing, then down onto Baltimore and onwards.

I’m glad to say that 95 is every bit as depressing and repulsive as I remember it and that nobody venturing out of the Northeast to anywhere should ever drive on it for any reason.

All together, I think between Queens and Baltimore I busted $35 on tolls alone, not even including the relatively minor tolls in Massachusetts. Every bridge or turnpike had its own toll authority.

I thought the Interstates were supposed to be full of FREEEEEEEEDOOOOOOOOOOOM.

In the Baltimore-Washington area, I stopped at my favorite IHOP in College Park, MD. This has been the focal point of several Otakon trips. South of Baltimore, we hit what I like to call “Facebook traffic”, where congestion is so bad and traffic is so stop-and-go that everyone is on Facebook complaining about it. This took about 2 hours to sit through because we came in at the exact time to hit traffic in both metro areas. How are you actually supposed to get to work?

We hit Atlanta around 10PM, for a trip duration of essentially 22 hours, many of which were spent fucking around with the abomination that is 95 in the Northeast Corridor. For instance, it took about 45 minutes to even get out of New York. Then factor in the fact that the cruising speed of my lovely pallet of cinder blocks was about 65 to 70mph.

The next day, it was off to the Invention Studio to get the band back together. Here’s the vansnexttothings.tumblr.com shot of the trip:

We journeyed a little off campus to get lunch, and in the parking lot of the local small sketchy college restaurant cluster was an Audi R8. Like most expensive cars, it was parked “haphazardly”.

This year, since I brought actual working robots, and because Pad Thai Doodle Ninja was completed the evening before the con really kicked off, and because I wasn’t trying to speedball an entire new bot in 3 days,I got a lot more wandering and people-watching time. I was especially tuned to try and find people with costumes that looked like they required some amount of mechanical construction or engineering (see my brief on this last year).

That, and giant Totoros.

Here’s a good example. This funky gun-like prop had a ton of lovely CNC aluminum work. The wielder, though, wasn’t the builder.

I spy a little of waterjetting on some of those interior parts!

The thing I’ve historically liked the most about Dragon*Con over other gatherings is that there’s no particular theme. The con covers about every niche of culture, up to and including robots. You’re not even going to find that at PAX or Comic-Con. This enables people to mash together different story universes and characters with much more impunity, for the amusement of all… such as Portalmau5 up there.

I’ll be honest – this is pretty much the only reason I went to the actual con for, besides my own panels. No, not just any group of girls in costume (that’s so last year), but specifically one series. The latest thing I’ve been fanning over is Monty Oum’s RWBY, also known as “Charles has to build shit that Monty designs with ill regard to constant-volume systems”. Most of the characters are Action Girls with giant mechanical transforming weaponry – what’s not to love? The thing that hooked me at the beginning was the RED preview.

The series so far has really pinged my “defer judgement” sense, since to me it seems a little hurried plot-wise and is seemingly laundry-listing TVTropes (site left unlinked because I don’t want to sink everyone’s productivity for the next 11 days) on purpose. But I’m proud of my ability to cherrypick favorites very specifically, so I’m still into the series for the giant mechanical transforming weaponry.

The series is so new that I wasn’t sure if anyone was into it enough to plan costumes, and I wanted to get a sense of what is already out there in terms of mechanically actuated versions. Conclusion? Zero. On the internet, and in real life at the con.

That’s where I come in.

…not right now, though. With Saturday winding down and the Robot Microbattles just around the corner, it was time to intensively practice driving. This was the remains of a laser-cut quadrotor frame that everyone’s 1lbers and 3lbers were beating on throughout the evening. I also repaired Colsonbot by printing a new motor mount carrier and replacing a stripped drive motor.

This year, Microbattles got the entirety of the International ballroom at the Hyatt Regency Atlanta. In past years, the event has only gotten half the space, and the audience had to be capped every time. The event size is now on par with the main Robot Battles, with even more entries.

So many, in fact, that single elimination had to be used for the tournaments again, and we still ran overtime. The event has been running against its time limits (and beyond them shamelessly) for the past 2 years, and this year was no different. Hopefully the D*C planning committees finally recognize this.

The Atlanta arena returns! This year, an actual 12″ sanding disc was mounted on the spinning turntable. I’m glad to see that my contraption is still functional. During the event, it produced quite a few light shows from bots being stuck in the hole, and reduced the diameter of a few wheels.

The usual suspects were in attendance. Here’s the table of G3 Robotics & Variable Constant & Guy Who Never Updates His Website.

This is a reasonable approximation of the audience during the day. The added seats and projection screens helped crowding immensely. Because the arena has a pretty high bumper rail (3″ or so), and it’s up on a stage, you can’t actually see the bots from the audience unless something exciting happens, so it’s entirely dependent on the video crew!

microbattles results

Because the Antweight tournament was single elimination, sadly Pad Thai Doodle Ninja only got one match in, against the veteran Segs (pic from years past, to the left). Cynthia put up a valiant driving effort, but the lack of “lifter lip” on the arm meant it had a hard time getting under Segs, and the bot was twice as slow as originally planned.  Near Chaos Robotics, filmer of events, recorded the match in two halves: Part 1, Part 2.

In the rumble, PTDN got into the thick of it and pushed a few people around, then got pinged a few times by DDT. The lifter arm was bent up,  but the bot otherwise had no permanent damage and still drives.

Showing why extending the front armor to the floor might be a bad idea – check out the crimps on the left side. After the DDT damage, the bot had trouble maneuvering on the floor.

Rear view of the damage. Because DDT pinged the arm while it was partially up, the force ripped the rear link out of the arm. That part was extremely thin-walled to begin with and should have been thickened, but I was afraid of it interfering with the robots’ self-righting. Turns out that wasn’t a problem.

I do want to fix up PTDN and upgrade the drives to the original 10:1 spark motors I had intended, and redo the front armor. The lifter servos will either be consolidated into one higher torque metal gear servo, or two digital servos for better range matching.

Colsonbot, sadly, was unable to colson much because of the unrepaired damage from Bot Blast. The “duallie” O-ring wheels were beginning to come apart, and the O-rings tended to slip off and get caught between the shell and the bot. It survived the event pretty much unscathed, however, and I don’t intend on making any big changes to it save for remaking the wheels into single-o-ring affairs that have more ‘stretch’ on the rings themselves to prevent them from twisting out. Colsonbot got in one match against Radiobox, and also the Beetleweight rumble where it was mostly a stationary arena hazard.

big bots

Back in the Invention Studio on Sunday night, preparing for some final tuning and drive testing. Null Hypothesis had to have a drill motor replaced, but otherwise, I didn’t have to do anything to the bots for once.

At the event, while I was testing Null Hypothesis on the stage, it randomly blipped and stopped moving. The cause was traced to the controller completely losing its gate drive power supply for some reason. Whatever the case, it necessitated an in-field replacement, which Adam is handling.

Most of the builders are seasoned & flavored veterans, but there were some rookie builders this year. It’s good to see the sport grow organically, if not somewhat slowly. This bot is an alleged 12lber – according to the builder, it weighed 14 pounds when finished. Oops! And hence, it was named. It ran without any top armor at all – something which ended up causing it to lose to 12 O’Clocker.

Omegaforce returns, with more unique wedge attachments. The outer and inner wedgelets are linked together in such a way that the outer set lifting upwards for any reason causes the inner set to drop down to the ground. The upper wedges can swing all the way backwards. So it’s a multi-tiered defense system against oncoming opponents. The actual functionality was a bit spotty.

Non-rookie builder (I met Miles at Motorama 2013) but first Robot Battles event. The center of this bot was supposed to be a lifter, but some things didn’t happen in time. And yes, it’s entirely made of wood. I was hoping to face this with Überclocker, but didn’t get that chance.

Another rookie bot that was supposed to have an attachment in the middle (in this case, a hammer) but Stuff Didn’t Happen.

Überclocker 30 charging before matches began.

12 O’clocker after its first match, which I won. I learned that the springy legs worked well, but they were not well constrained downwards and could get pushed to the point where the front wheels of the bot were propped off the ground. The contact point they make with the front axle standoff should probably be modified to capture the leg in either direction – up or down.

This is probably the most quintessential robot even picture I’ve ever taken. Equipment all over the table, Mountain Dew everywhere, and “beasting food” as I like to call it strewn about.


I try to post audience pictures of Robot Battles every year, because it really is a phenomenal show. I think the audience averages 5 or 600 people and can peak near a thousand. In quite a few years that I remember, the hotel had to deny people entrance because it became standing-room only and exceeded the allowed occupation of the room. Here’s the right half of the audience…

The center…

And the left half.

Oh, this was before matches started.

results

I’m extremely proud of the bots’ performance and reliability this year, as well as the show they put on. For my 10th (!) Robot Battles it’s quite refreshing to have things that worked. The robots ended up losing only due to my own mistakes, or my tendency to favor a good show over winning at this event. I actually can’t bring myself to just drop someone off the edge cleanly with the Clocker pair, and this did bring about my own downfall a few times…

Regardless, Überclocker 30 got 2nd place in the 30lb class, fighting Null Hypothesis (oops…), Overthruster , Null Hypothesis yet again, Jaws – probably my most favorite Clocker match ever, Overthruster for the nth time, and finally losing again to my eternal nemesis Nyx. Overall record of 4/2. There were sure lots of reruns this time around. Clocker was a crowd favorite in the past, and now even more so since it works pretty reliably. At the very end, during the rumble, I did lose the drivetrain completely, most likely due to the solder joints breaking off the motors – this has been a weakness of the bot since Motorama ’13 that I forgot about until now.

12 O’Clocker finished what essentially is 3rd place, since the winners’ bracket finals loser and the losers’ bracket finals winner were the same bot. In the final match, I just got plain outpushed by a more powerful and faster opponent. 12 O’Clocker was also a crowd favorite, possibly more so than Überclocker itself, if I could judge the audience well, and went 3/2.  12 O’Clocker’s match videos: Tetanus Shot 1, Oops, Omegaforce, Apollyon, Tetanus Shot 2

So what’s next for the robots? Besides the odd demo or sparring match, it’s time to make the upgrades for Motorama 2014 next February. Überclocker’s current form debuted this past February at Moto ’13, and I don’t anticipate making any changes to it at all (except for actually using the Quick Disconnect style terminals on the Dewalt motors, maybe…). The new actuator on Überclocker’s clamp worked as I expected – I could grab and hoist up opponents very quickly, and the multistart leadscrew eliminated the binding it was prone to perviously so I no longer had to be gentle with the stick – RageBridge took care of the “endstops” by entering current limiting mode. On 12 O’clocker, I want to better secure the front legs, but otherwise, the bot incurred no damage from this event.

the way up

I decided to be intelligent and finally take a route which I’d been eyeing for years, but never dared try for some reason until now:

In my opinion, this is the most direct possible shot through to New England without going near any metropolitan agglomerations. The plan was to detour north at Charlotte, NC. and follow I-81 all the way up to Motorama Harrisburg, from whence my general solution has been to go east and up-around New York City through 287, then cutting north out of CT on I-91 and I-84. The upper half of this has been tried and verified many times.

I think this was a good decision. Not only was it smooth all the way, but the western VA and NC scenery subtracted from the boredom greatly. We passed through, and stopped in, a few small towns and villages nestled in the Appalachians, places that I’m sure high flying urban folks around here don’t give a shit about. It was, in my view, a more authentic American experience.

Stopping for a fuel and breakfast somewhere north of Roanoke, VA.

daily van bro

I saw something which looked out of place across the street at a convenience store. Turns out it’s a Greenbrier, one of the original American compact vans built to compete with the VW bus! These are rear-engined, just like the VW bus, but the Ford Econoline of the same era was mid-engined and rear wheel drive, and the layout was directly ported and evolved by the Japanese. So, really this is an evolutionary ancestor to Mikuvan.

It was also on sale. I called up the seller, but sadly the price asked was out of what I had in my pocket at the time. If I were into these things, though, it would be a very fair price for a vehicle in as good visual condition, and as good running condition as the seller described.

Compared to almost all modern cars, I’m pretty damned small, but the Greenbrier was somehow even smaller. And it had 3 rows of bench seats.

The rest of the trip up through Harrisburg and beyond was pretty standard. We arrived back in around 1:30 AM (that is, 0130EDT Wednesday 9/4). And so that concludes Dragon*Con 2013. A pretty delightful adventure filled with working robots and now-most-definitely-working vans.

Well, okay, I did have to rebuild my A/C blower motor again, in the Georgia Tech parking lot. Remember those brushes I installed? They were backwards, and they ate through the copper bus wire after a few thousand miles. A random 200W scooter motor turned out to have the exact same size brushes, and saved the day.

Maker Panel 2013

Here’s where I (finally) post the presentation from the 2013 Maker Resources panel, and some related links, in one place! The panel happened on Friday evening at 7PM, and I had a pretty full house for most of it. Unfortunately I once again neglected to bring my video camera to the event, but I did notice quite a few folks taking video. If you have some high quality video of the panel, I’d like to include it here.

The panel was broader in scope than just “where to buy stuff” which I did in 2012. It put more emphasis on CAD software and transferring designs to parts using digital fabrication techniques (waterjets, lasers, etc.), and in general how to design better things. I tried to include some CAD program demos of stuff like Sketchup, freeCAD, and Solidworks/Inventor, but I actually ran so far over time that the director had to step in and cut me off (Sorry Val!). Maybe next year.

Also included as part of side discussion were the slides from last year with general parts & resources.

Here’s the list of stuff I said I’d put up like two weeks ago: