The Post Where I Update Everything Ever, Part III: What’s Smaller Than Tinycopter?

Chibicopter!

The game is on. I’m out to build a quadrotor smaller than Tinycopter – way smaller. This isn’t anything that new or groundbreaking – it’s been done before, and even smaller than my 2.5 or 2″ prop size, but this is my project, dammit! I have never thought of anything on the scale of where fractions of grams will matter, or where the control bandwidth is potentially far above the maximum refresh rate of R/C based controllers. Either way, this is going to be one hell of a challenge.

And furthermore, I’m doing it for the Design for DIY Manufacturing course (MAS.963) at the Media Lab. So, once again, a chance to pimp all of those rapid prototyping tools I have come to love so much. Now, there’s some issues with the whole “Charles builds something for class” thing which historically have caused problems, such as me focusing way too much on the build and not enough on the class, but I think it will work out in the end.

This project has actually been running for about a month now. I started in February by designing the airframe:

That cutout in the middle is an XBEE. That’s how small this thing is. The airframe is designed to be one piece SLS 3d printed in nylon – this is not a technology that is available here, so I have to farm it out. No matter – I can’t get the frame light enough while still adhering to the minimum feature size requirements of FDM printing. The frame weighs only 8 grams in this image, but later on I reduced some dimensions and wall thicknesses and got it down to 7.1. It’s still a bit “chunky” looking, and I’m sure with MOAR SCIENCE I can improve the rigidity of the arms even further and make them even narrower, but unlike some MechE designers who insist on characterizing and justifying every single aspect of the design by analysis and simulation (Deterministic Design™), never actually getting around to building the damn thing, I strongly favor just forging onwards with something that looks good and later on analyzing why it worked or didn’t work.

The underside is essentially all hollow – a single board will be mounted in the middle which will carry the XBee, an embedded ATmega328 microcontroller with required peripherals (since I can’t stuff any kind of Arduino module on this), and four 1S, 3A ESCs from Hobbyking which will be partially embedded on board by virtue of hanging off via headers. A Pololu miniIMU will also be mounted on the board. The all-up weight of this thing ought to be under 50 grams. The motors were selected to be 2 gram outrunners from Hobbyking, and I also bought a few 240mAh and 160mAh single Lipoly cells for the battery, which will probably just be parked on top of the Xbee.

Now, let’s fast forward 2 weeks after Shapeways finished producing the frame in their magic SLS printer (probably an EOS Formiga or similar). The airframe only cost $13 to print, by the way, because the material use is so little.
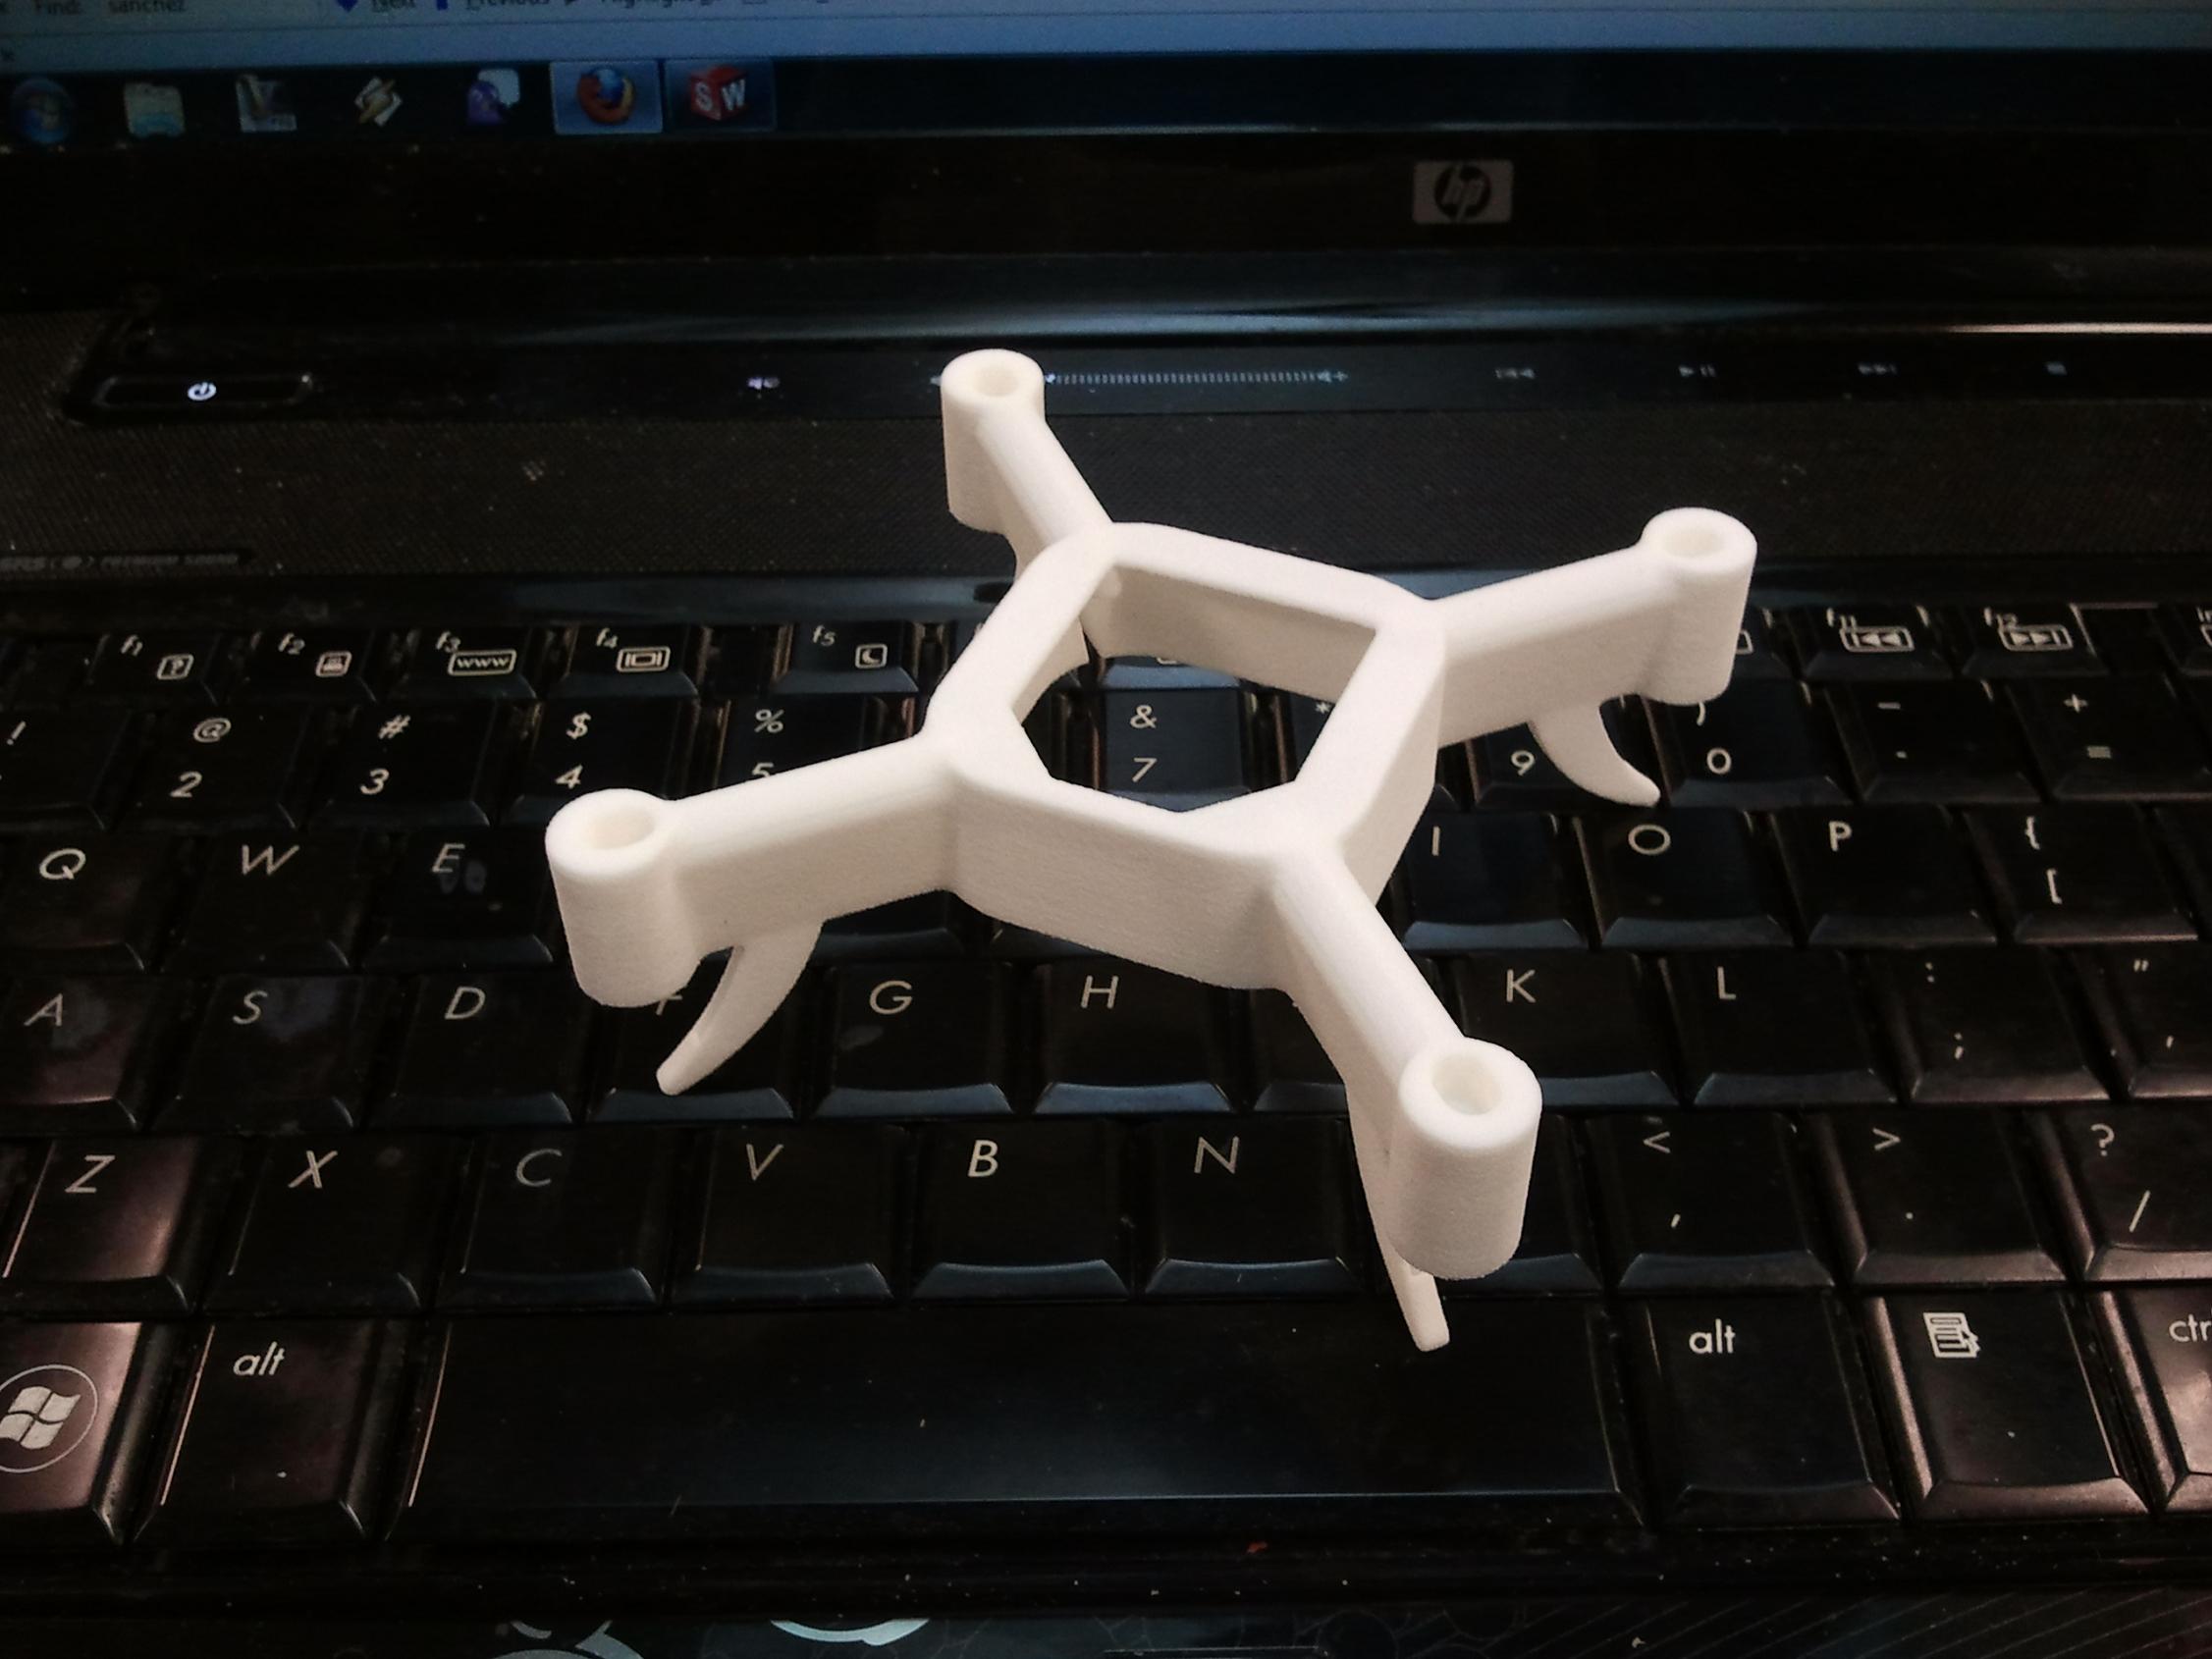
GUYS THIS IS THE CUTEST THING I HAVE EVER DESIGNED LOOK IT’S SO ADORABLE AND TINY AND SUPER KAWAII MOE MOE DESU AND STUFF

Wow, this is smaller than I imagined. Also, the frame really is kind of flexible – they weren’t kidding when they said white, strong, and flexible. Part of the flex comes from the completely open bottom and non-closed arms – I was originally intending to route wire inside the airfoil-like arms, but I really didn’t need to make them all the way open on the bottom. That was a slight design derp, but while the frame is bendy by hand, my hand also exerts far more force than it will ever see on its own.

It’s also fixable with a chunk of balsa wood and some super glue.
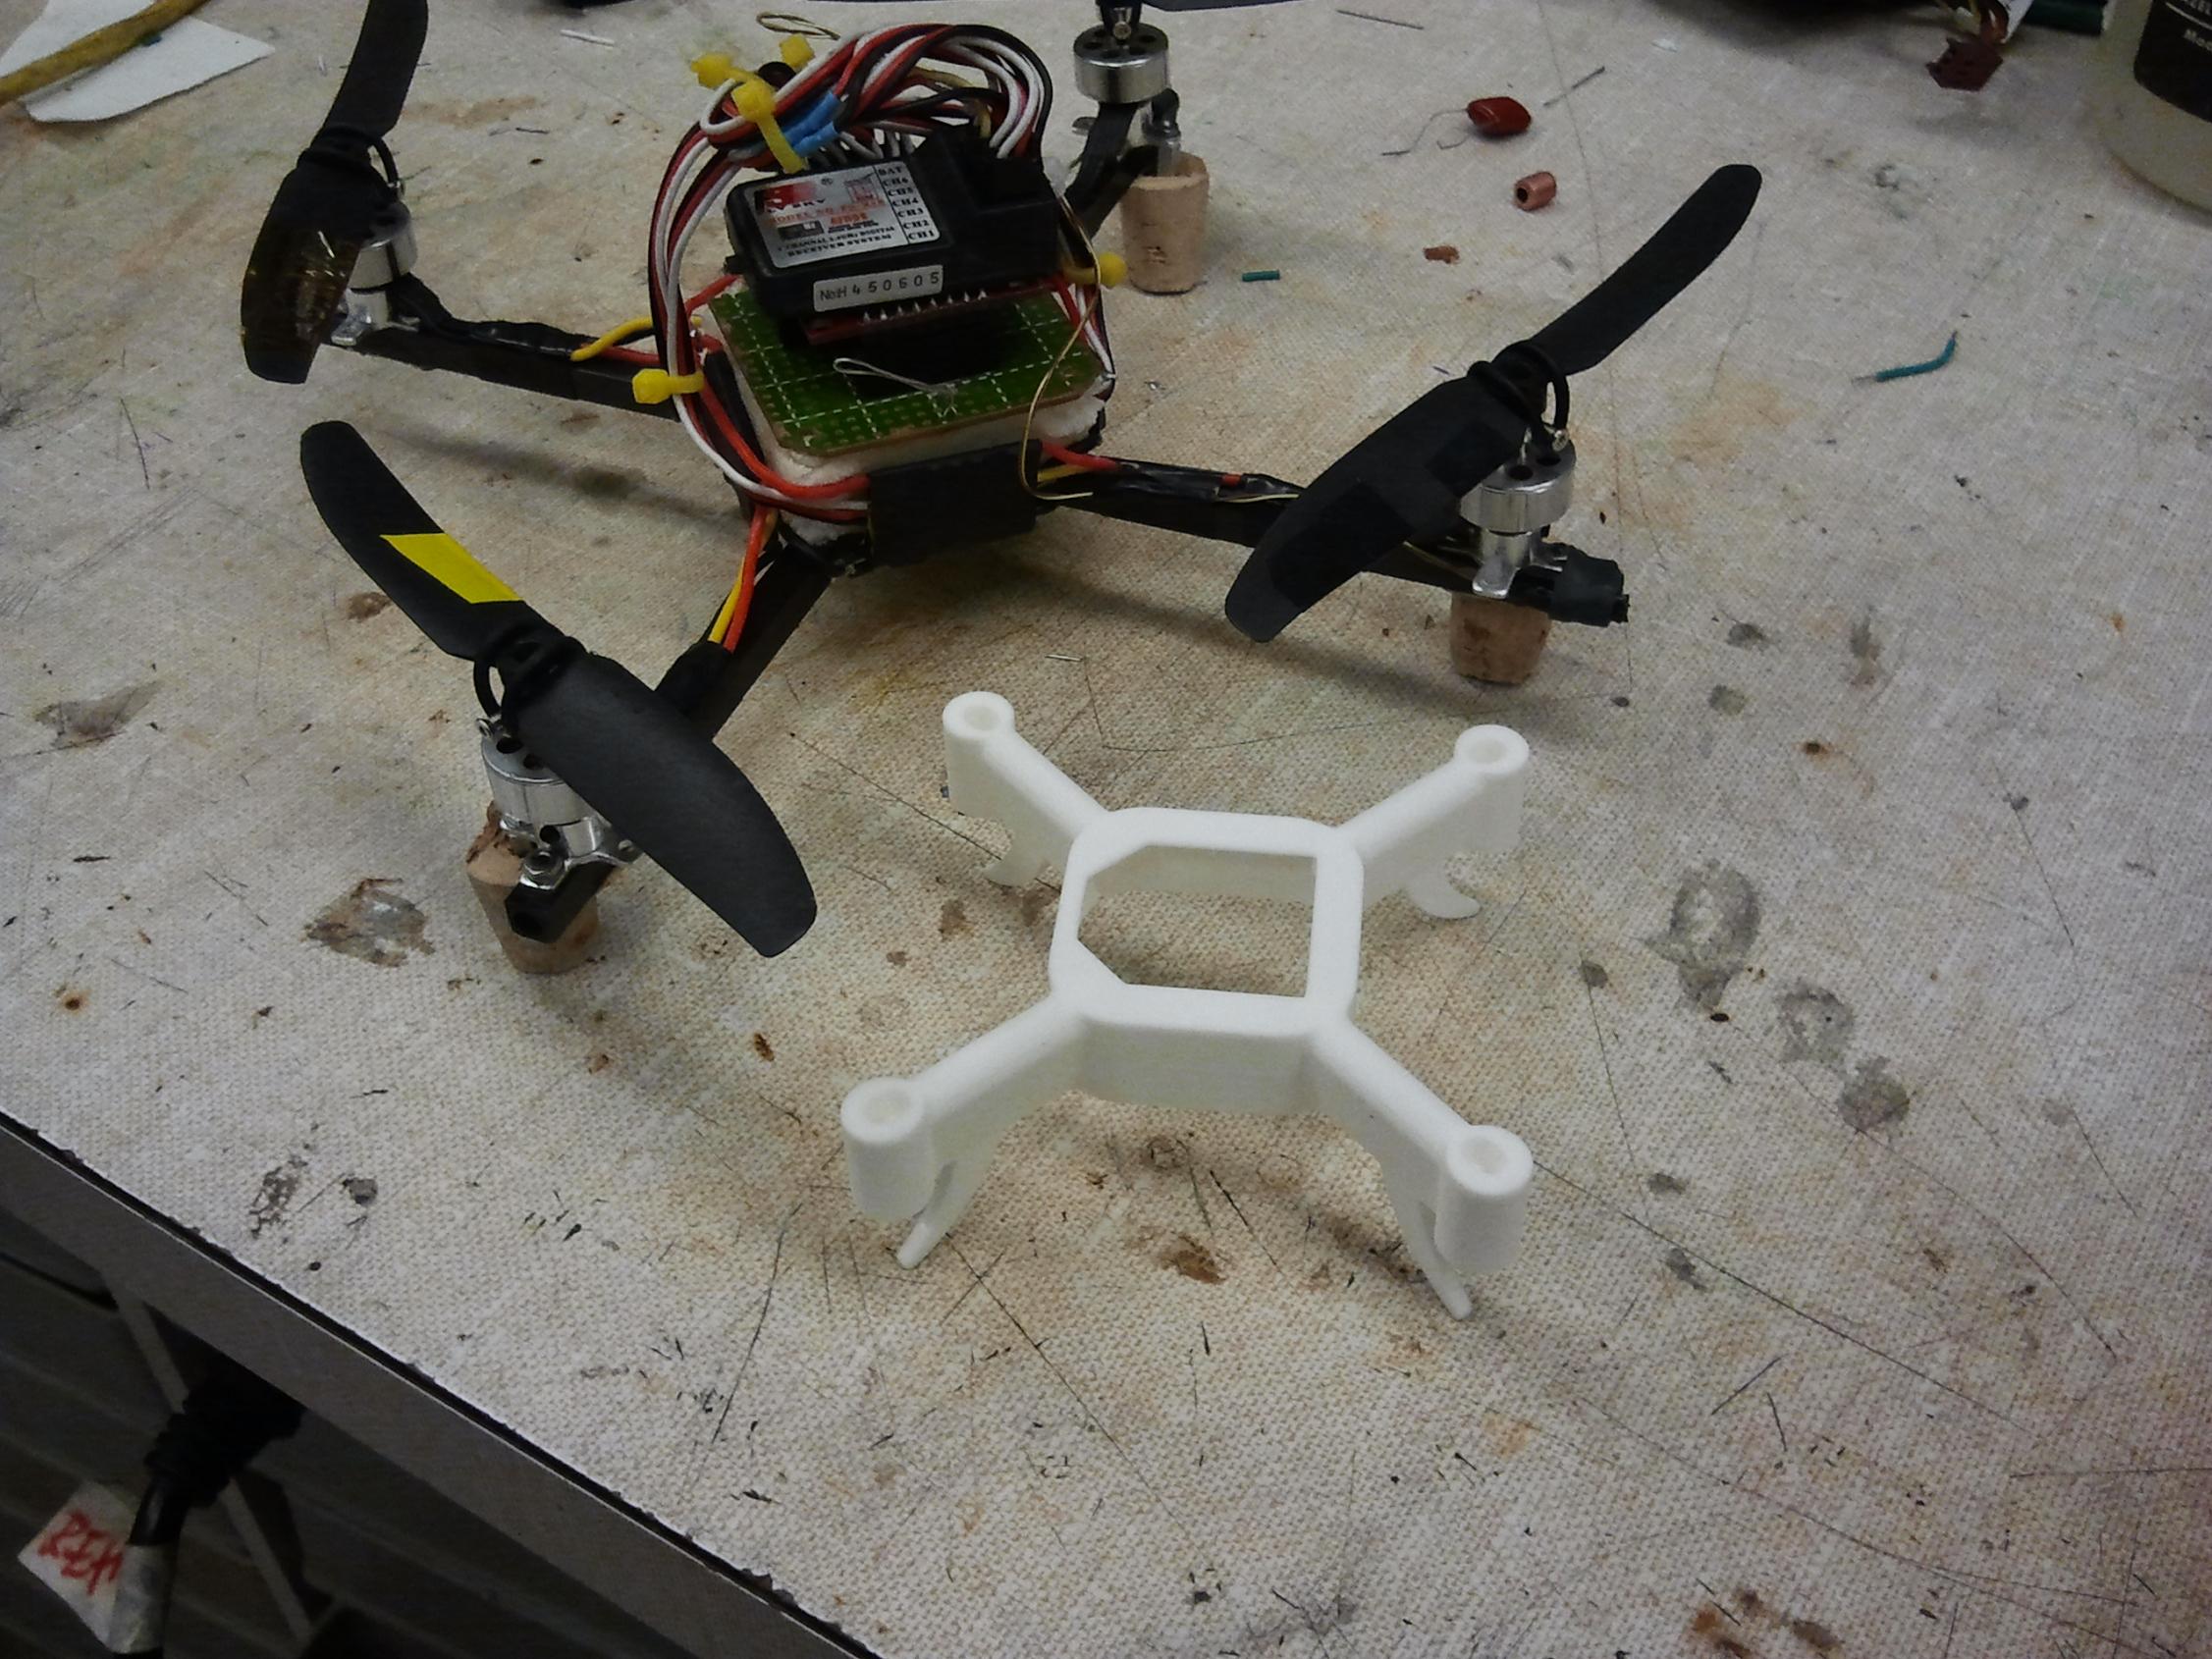
OH MY SWEET ROBOT JESUS IT’S EVEN CUTER WHEN IT’S NEXT TO TINYCOPTER I THINK I’M ACTUALLY GOING TO SQUEE OUT LOUD GUYS

Yeah. Also, in other news, Tinycopter still exists – it gave a full day of flying demos at the MIT Museum recently, which surprised me since 1. it worked the whole time and 2. I flew it the whole time, somehow.
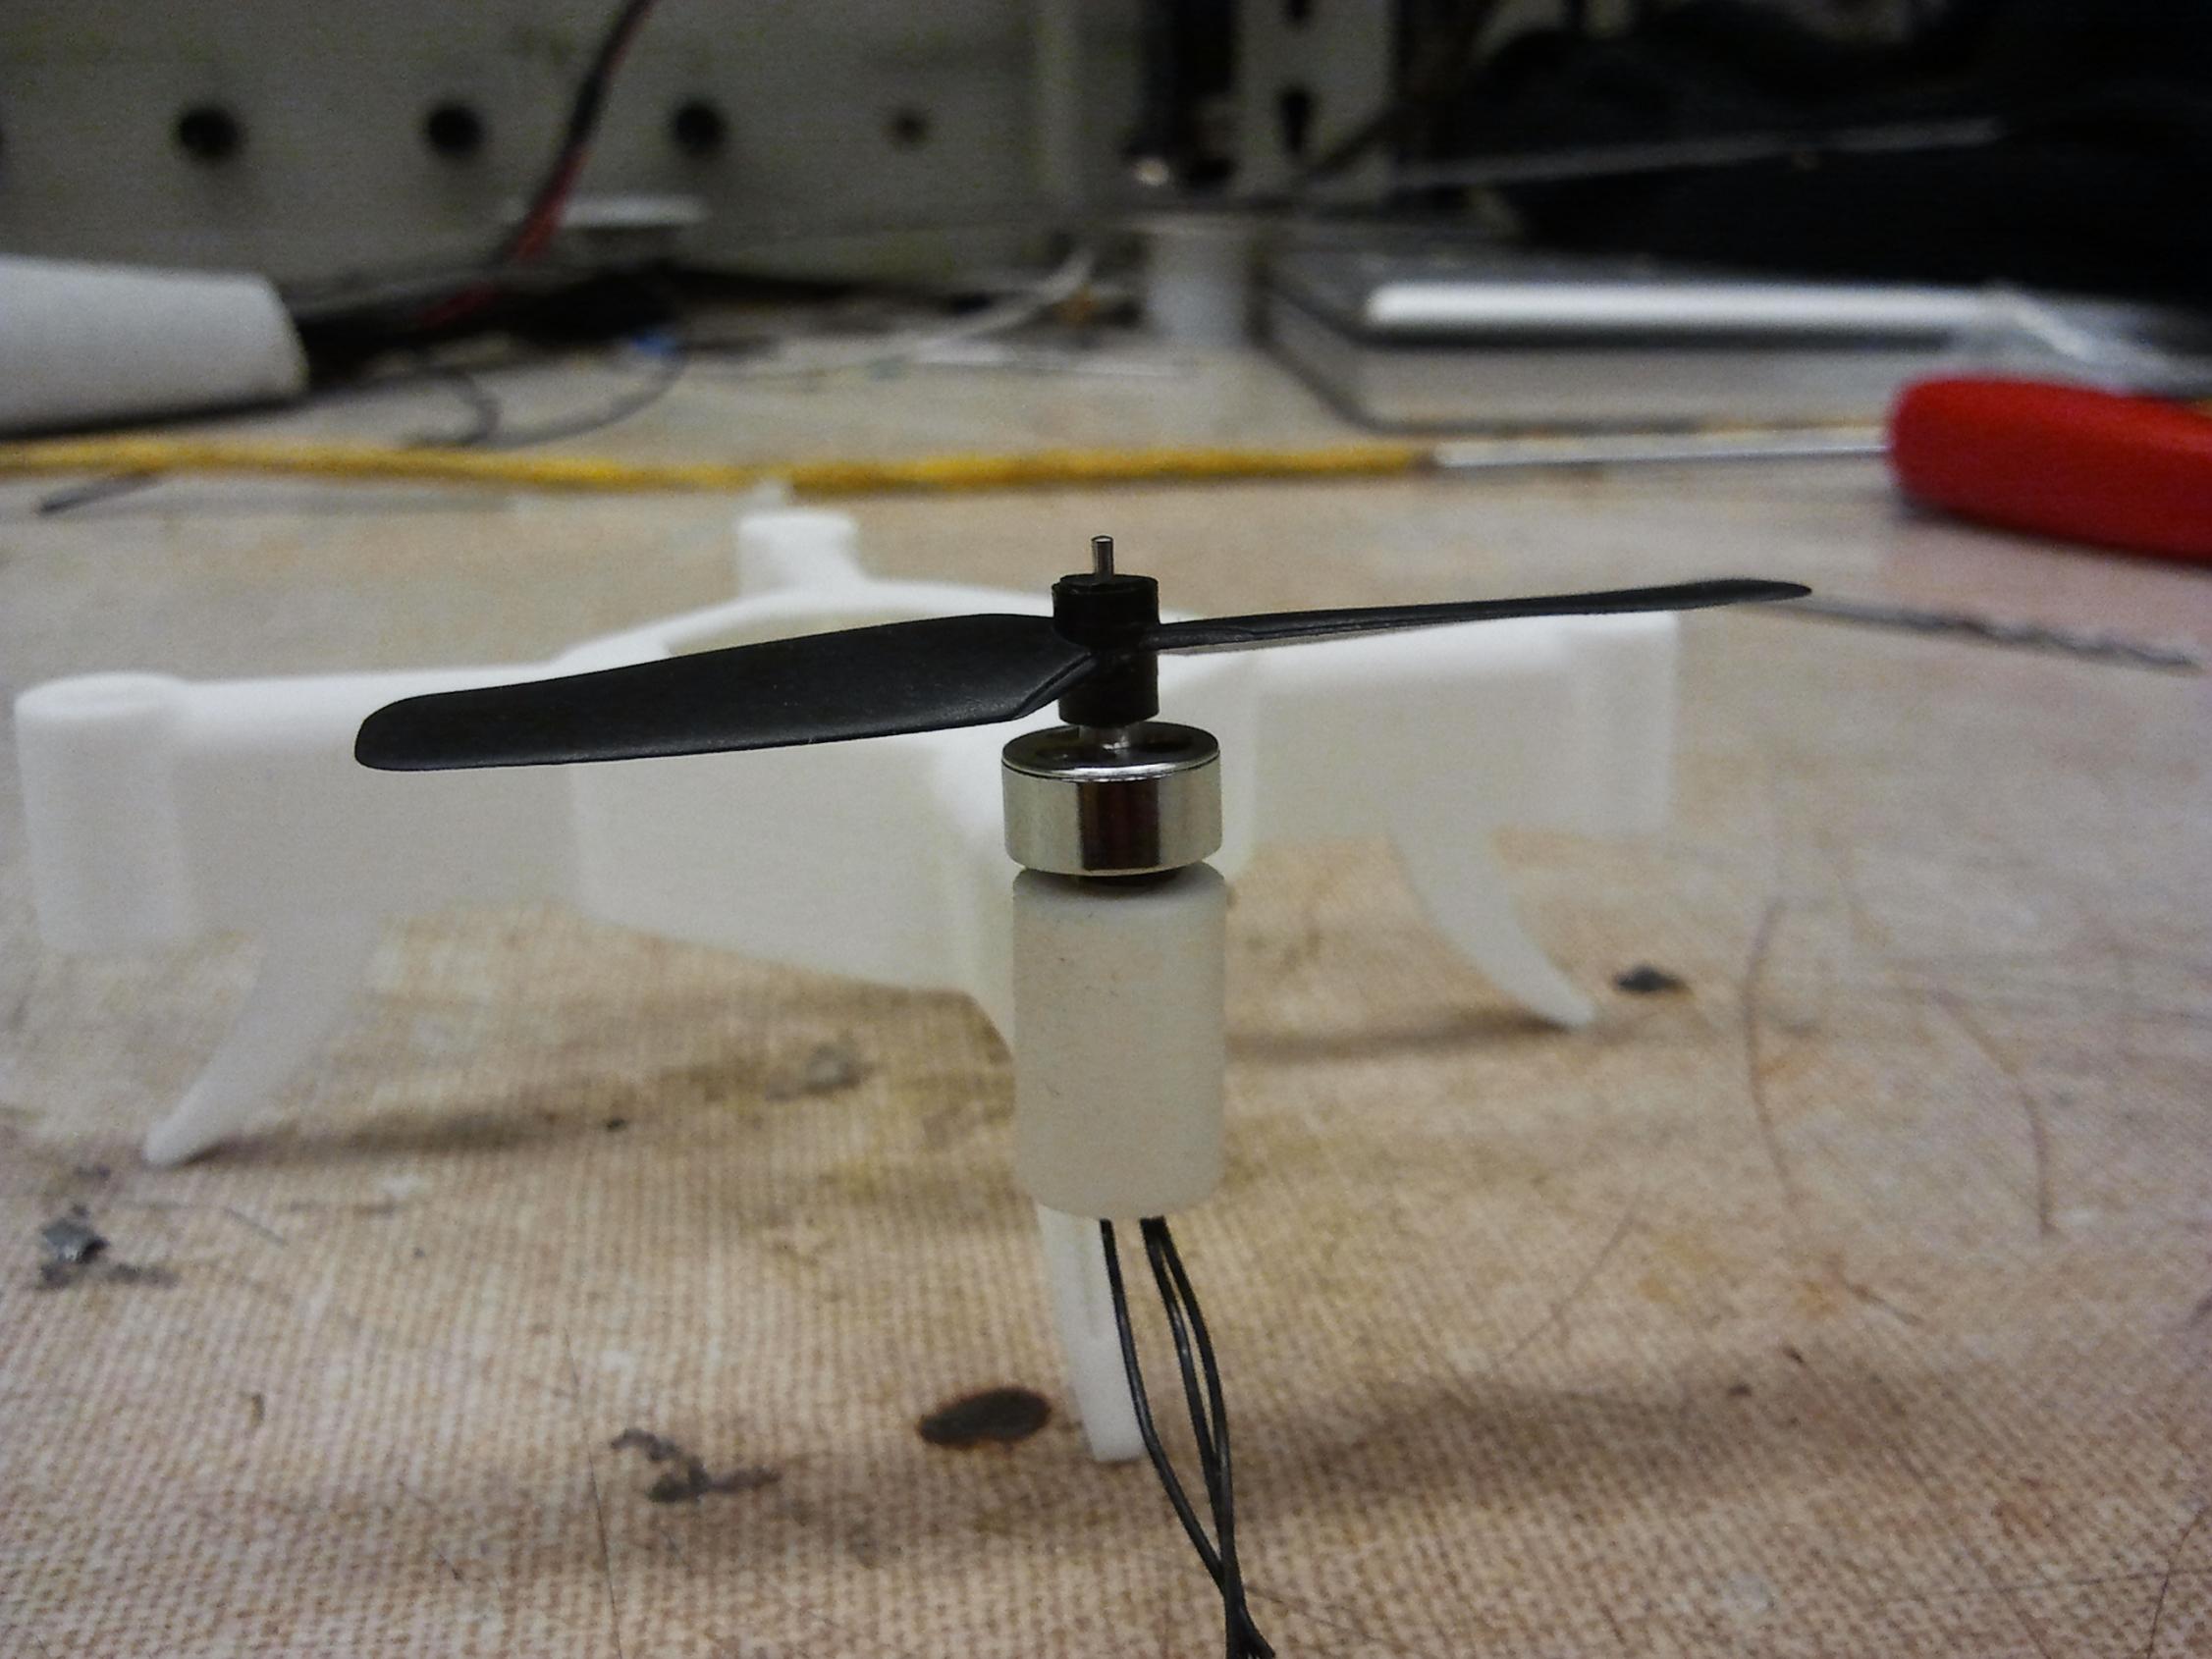
I got the outrunners and other parts just the other day. This thing is just going to be a ball of cute. The outrunners are 8mm in diameter, and the stator is like, no more than 5. How the hell do you even put that together? The 2510 props just press right onto the 1mm shaft. No prop collets or savers or anything.
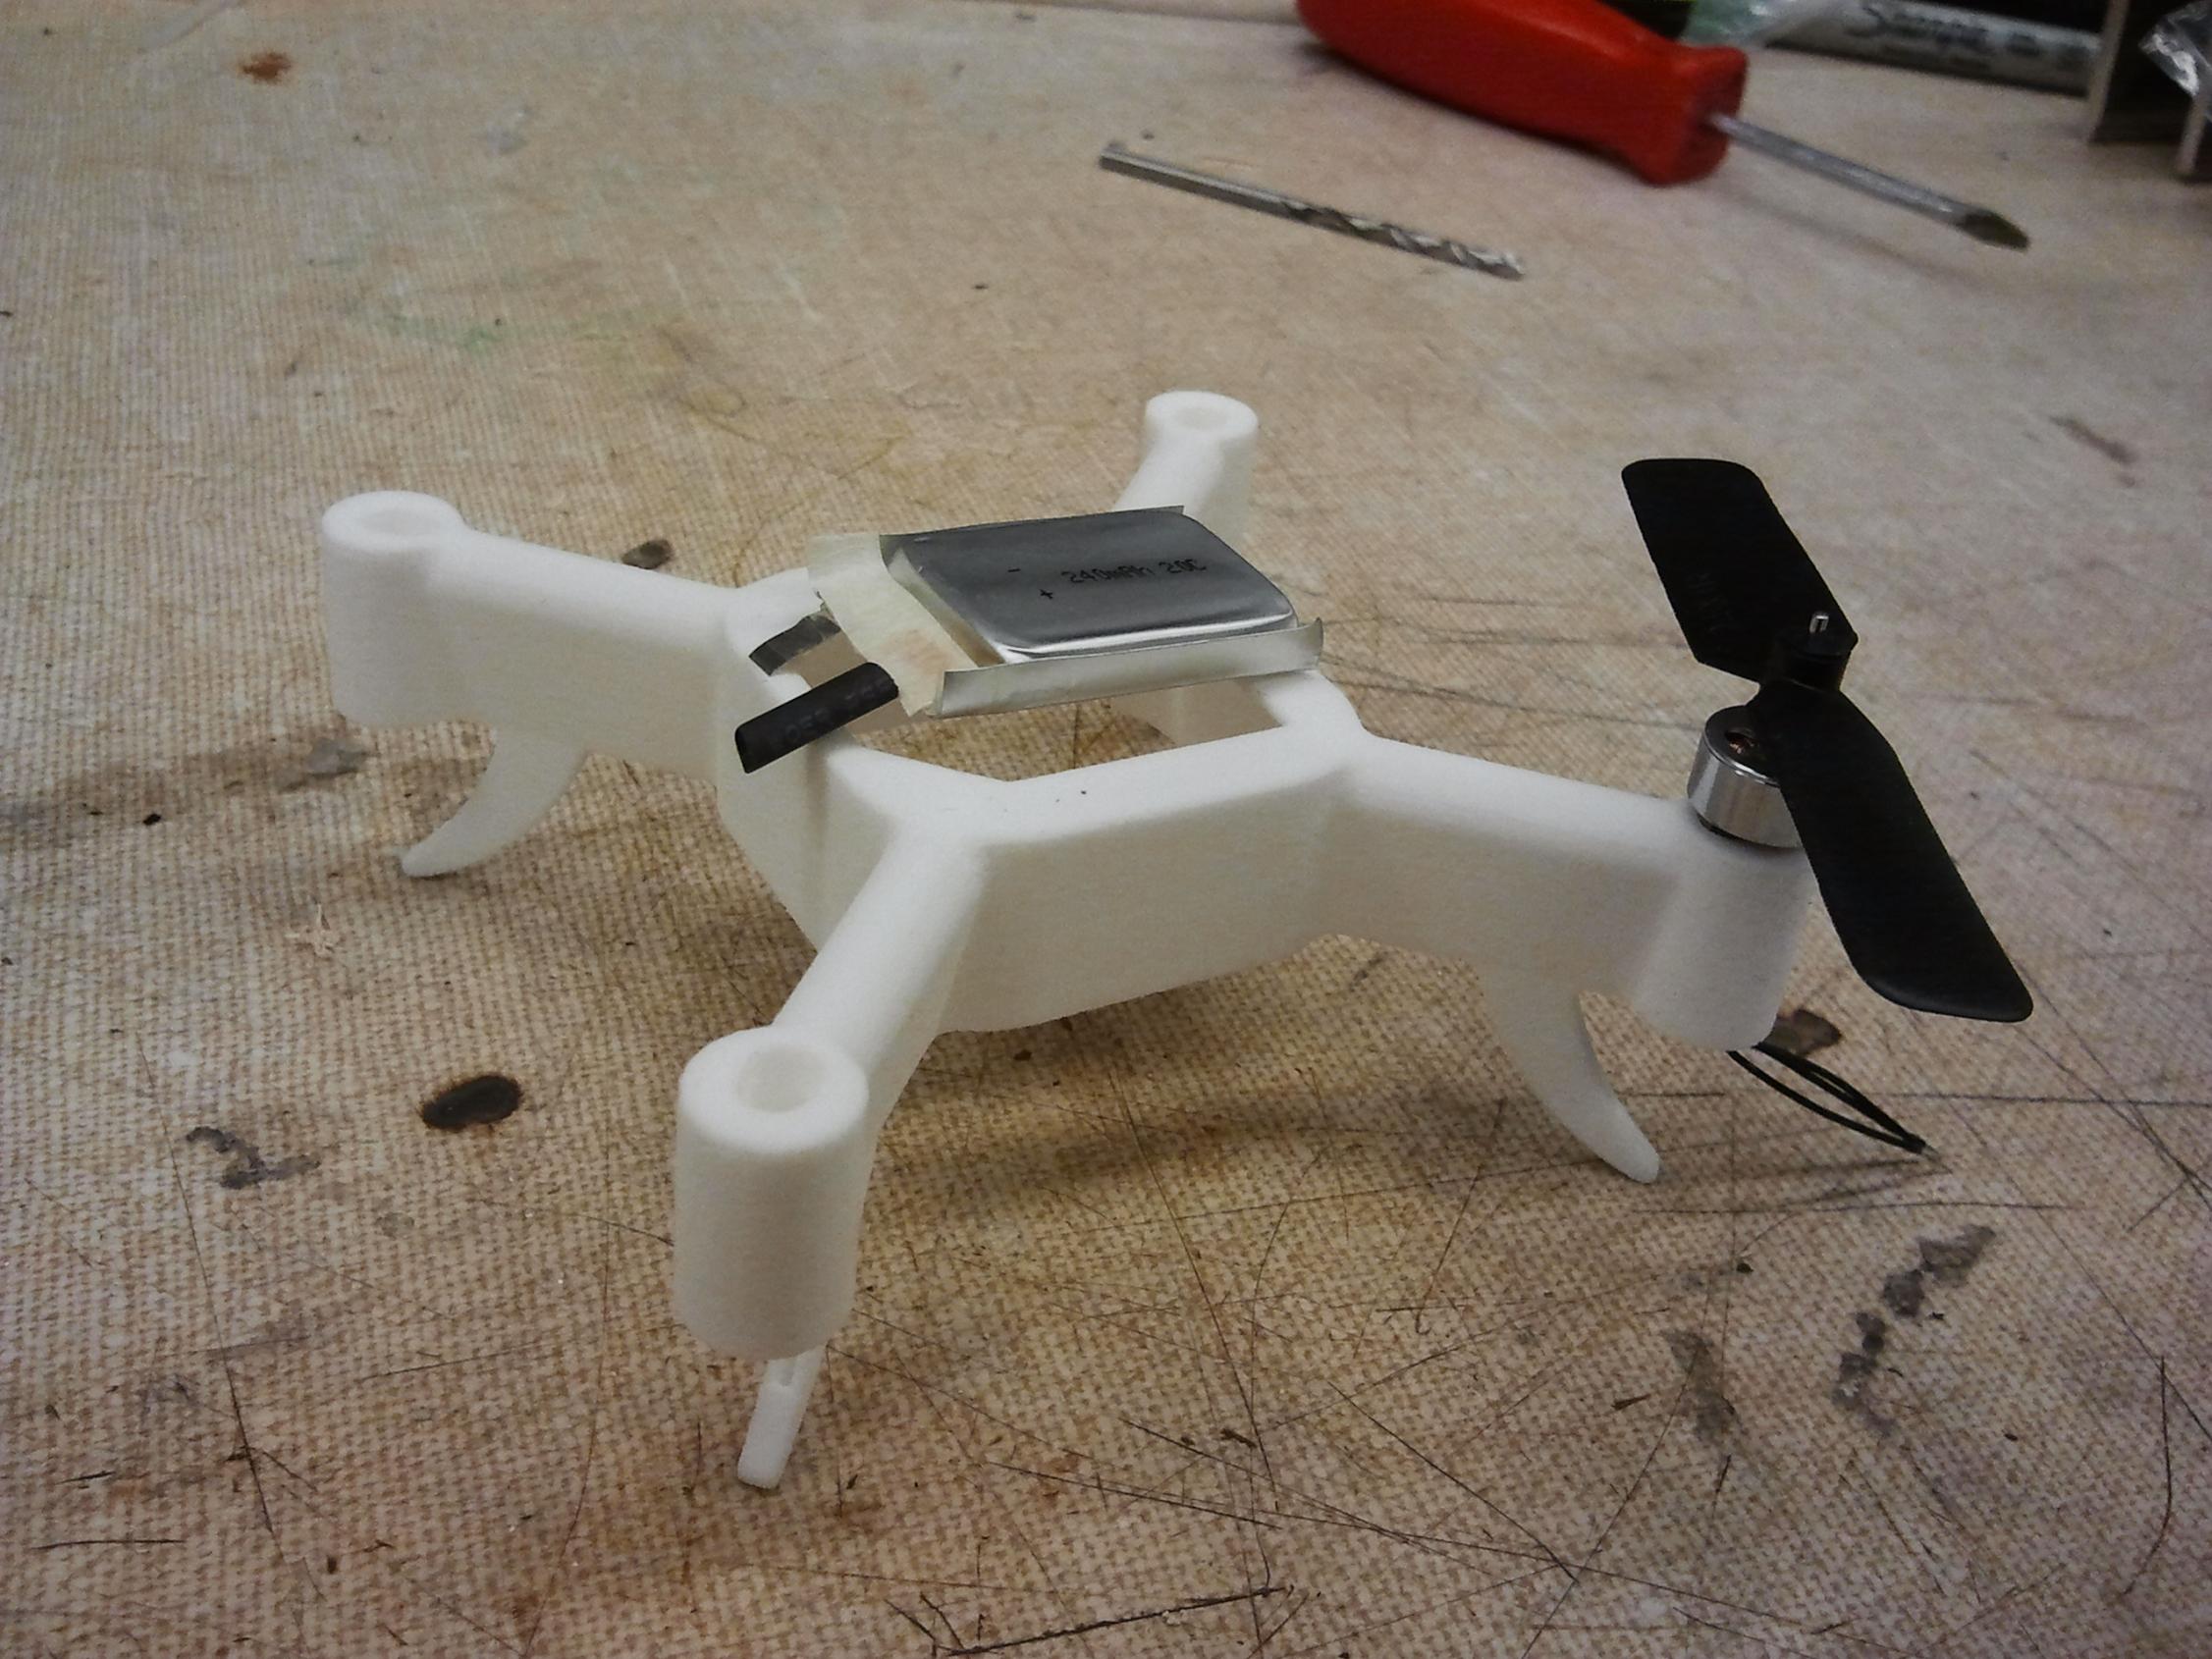
Here’s a 240mAh cell. I might downgrade to the 160 if weight presents a problem, but the 240 is nice because it fits within an XBee’s footprint. I’ll probably just end up patching a JST-ZH or similar miniature terminal onto the end of this thing.

The next step is to whip up the single board and have it fabbed ASAP – I’m running quickly into the “midterm” project demo due to everything else that’s going on.

Tinycopter Returns… Again!

It’s back!

Once again!

Part of the full-documentation project logging process is that everyone sees the painful and some times expensive vacillations between working and not working that a project goes through during its lifetime. This has happened with pretty much everything I’ve built and which is on this site. Usually it’s some kind of motor controller. But the most learning opportunities arise from the drift of a project about the boundary of dysfunctionality, so that’s why I still like this format over a finished and polished portfolio site.

Anyways, back to Tinycopter.

The first step of reconstruction was making the frame again – this was a relatively easy process since I still had square carbon fiber tube material remaining. The center joint was once again CA glued together. This time, I also left a little more material beyond the motors so the tube didn’t tend to split when the mounting screws were tightened.

While rummaging for hardware in a stockroom, I discovered a bin of glassware corks that I decided to turn into landing gear. I think this will work quite well – cork is pretty elastic but also very light, and not just squishy like something I’d find out of foam rubber in a similar size.

I obtained this big brick of memory foam from a disused mechanical engineering class (2.75) project. I’m going to just slap the entire electronics deck on top of a little brick of the stuff this time around. My experience with silicone tubing standoffs was less than satisfying since the tubing just tended to crack and shear with impact. Not trying to build Battlecopters here, but I’m definitely going to crash this thing infinity times, so a big surface of foam was still more advantageous.

To extract a small 2″ square memory foam block from it, I finally got a chance to legitimately use my hot-wire cutter that I built last year when I thought I was manly enough to work with pink styrofoam to build Chuckranoplan (sorry Ryan, I’m still afraid of making foamy things). The side effect of this is that now I have an asston of filet de mousse à mémoire, so if anyone else at MITERS feels like building an n-copter, it is available.

I bought a few 10A controllers from Hobbyking a few weeks ago in anticipation of eventually using them on a fresh build of Tinycopter. These things are pretty small and functional (having practically no settable parameters, not even throttle range calibration). Having flown Tinycopter using them, I also can’t recommend them too highly because their throttle appears to be nonlinear.  However, 6 dollars.

One thing I didn’t like, and which would have interfered with my mounting plans, was the big electrolytic cap that hangs off them and makes neither side very flat. This was a small ESC, and I had 1206 package 16v, 22uF ceramic capacitors left from Tinytroller work (remember that?). The electrolytic was only 100uf, so I elected to replace it with 3 SMT capacitors, making the end result very flat and clean. Maybe I could have used more, but I didn’t think the ripple currents of such tiny motors was enough to warrant it – and what I lose in capacitance I probably gained back in lower ESR since ceramic caps tend to be inherently low resistance.

So this is the plan. Superglue board to foam brick, then superglue foam brick to frame.

That’s seriously it.

I repacked the ESCs in heat shrink tubing, then superglued them to the foam brick. Ryan, is this how you build foamy planes?!!?

The tangentially located ESCs on this version allowed the wiring to be very clean and simple. It’s not nearly as big of a tangled ball as previous version, and the battery is now slung underneath the frame for easy access. Yeah yeah, pendulum effect, etc…. but on this scale, I have a feeling it doesn’t matter much at all.

And that’s it.

I ended up borrowing 2-56 standoffs from Shane again and impaled the corks upon them. The corks themselves weren’t structurally sound enough to just glue to the CF frame, so the standoffs provide a metal substrate which is directly mounted to the spare motor ears.

The Hobbyking 10A ESCs required alot of additional tuning of the controller before I got it to fly reliably. Their throttle seems to be quite nonlinear, and they are “punchier” at the beginning than the previous Turnigy Plush 18A controllers. This necessitated dropping the P and D gains down to 1.2 and 0.2 respectively, from their former values of 2.2 and 0.6! The difference between ‘slowly sinking’ and ‘slowly rising’ altitude is pretty much two left-stick ratchet clicks, which means it’s much harder to hold altitude.

All said, after some more loop tuning and poking, Tinycopter flies once more.