Alright! So before I can go about my snail farming, I had to address a pressing issue with Snekvan: That the oil cooler assembly was causing engine oil to enter the coolant circuit any time it was running.

This manifests as blobs of engine oil floating on top of the coolant. The amount of grunge built up indicated it has been leaking for a long time, and was just neglected.
I drained the terrible soup into a large under-bed storage bin, upon which I had to invent a method of disposing of it that didn’t involve the storm drain. Then I refilled the system with clean water, idled it, and watched the open radiator cap as more oil blobs began surfacing. No matter what, I wasn’t out to gauge the severity or mediate it, since once it happens, it’ll keep happening. It was time to remove the oil cooler and do some surgery!
But first, I spent a good hour just cleaning and scrubbing the front row of this thing because it felt disgusting just getting in. I blew out or vacuumed up a lot of biological detritus, including dozens (or hundreds) of stinkbug husks from under the dashboard, and bleach scrubbed all the surfaces to get rid of the mold and… stains.
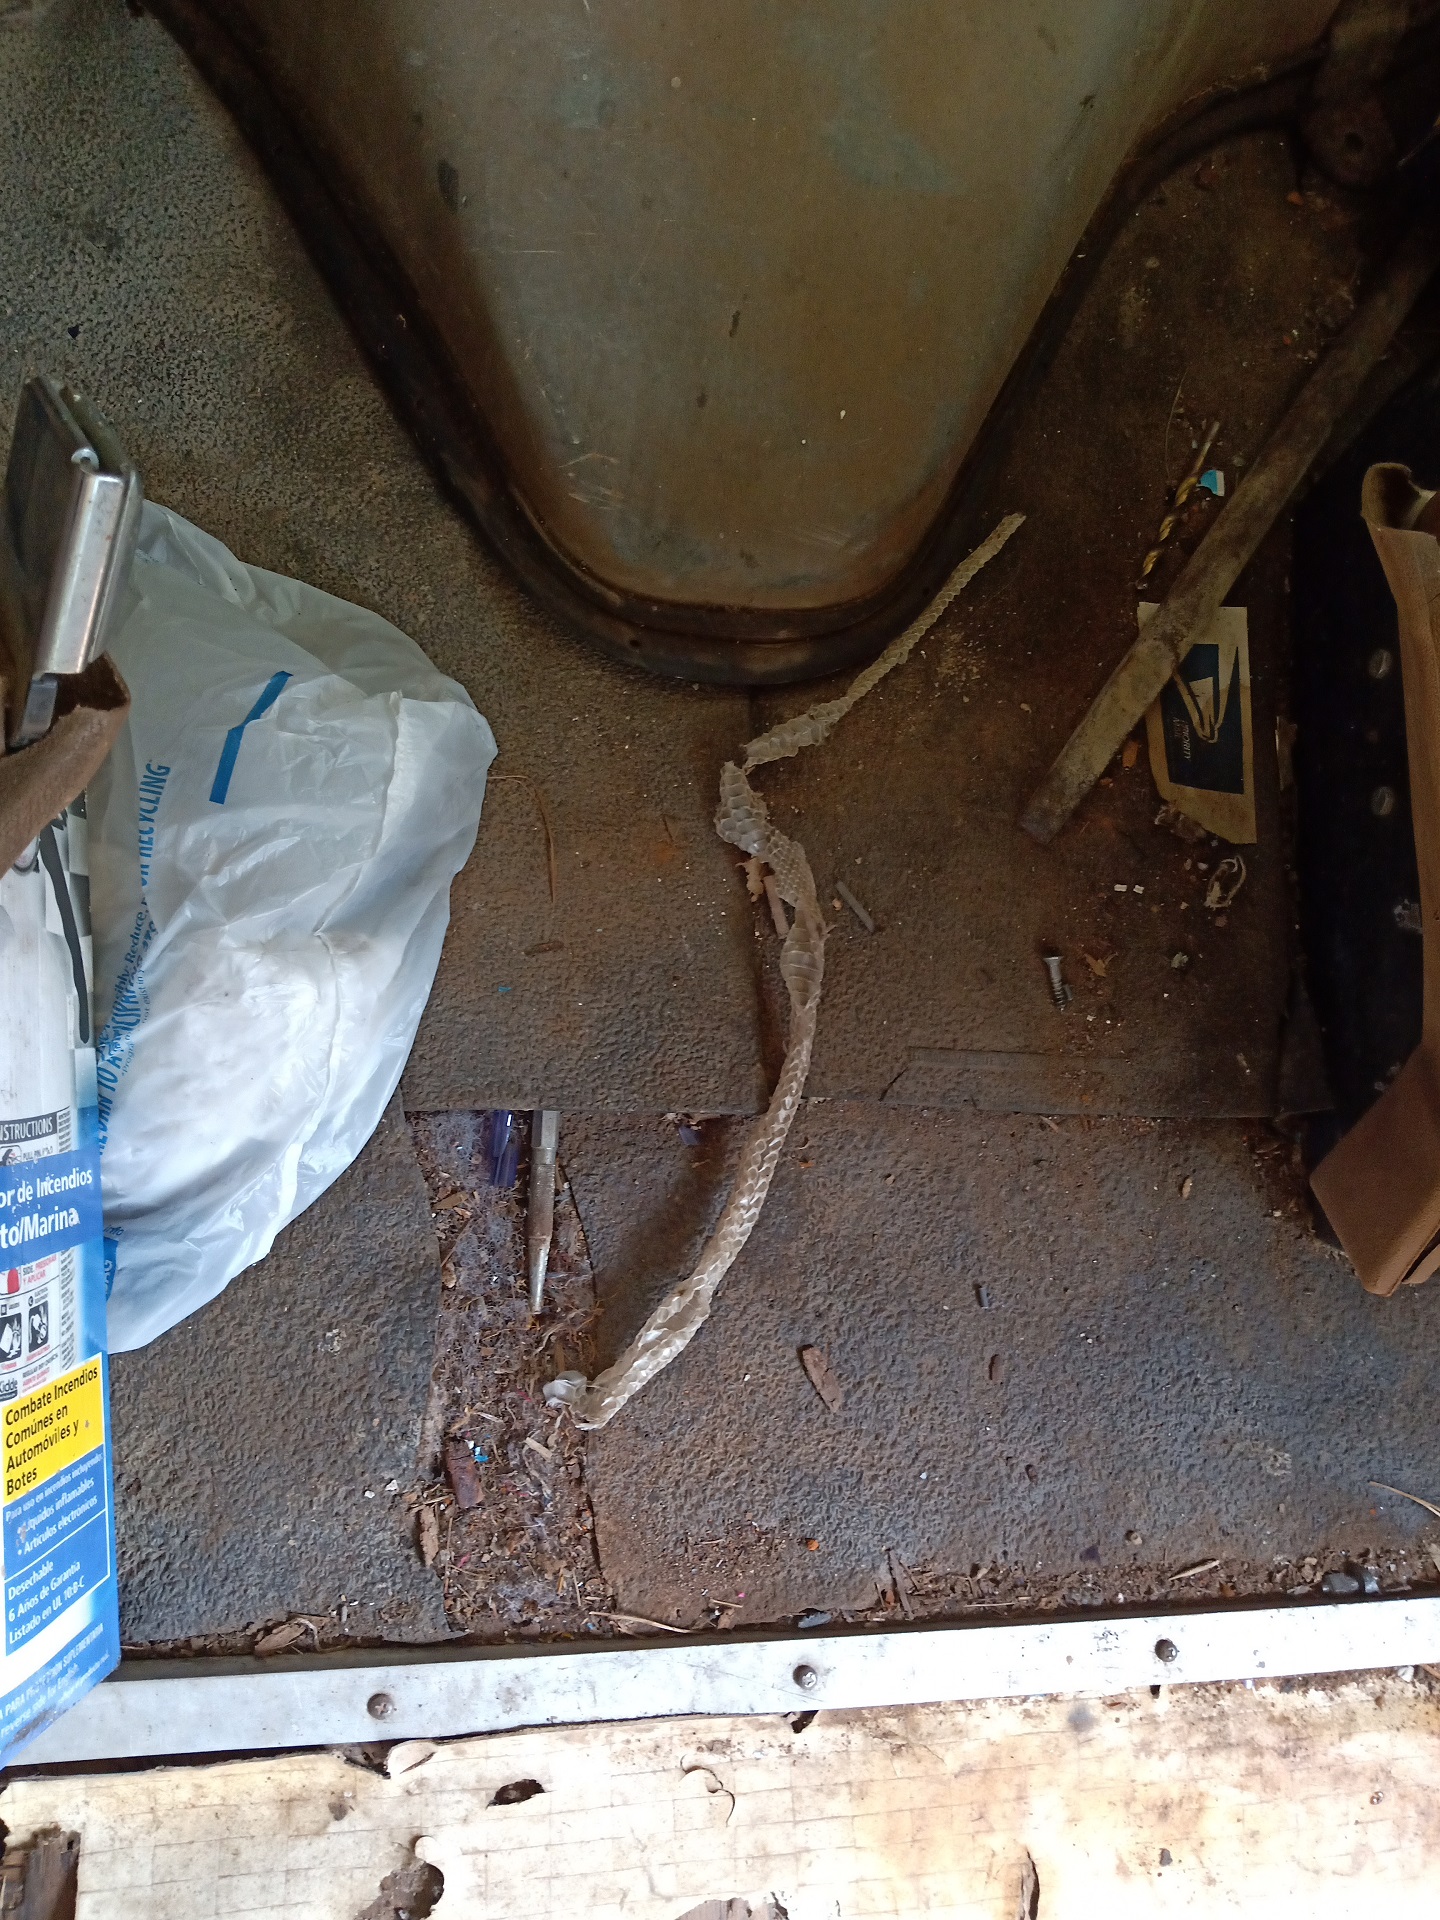
In this process, it spawned yet another snake skin. Certainly living up to its name!
As I have harped on so many times as of late, such as the Crabmower post, I’m happy that other people on the internet also document their arcane machine-enhancing adventures in static and searchable ways still, despite the ease of social media ecosystems. In a way, I feel like this is the karmic energy balance shifting back towards me after documenting all of my asshattery here going back years, and fielding a ton of questions from other makers. Now, I’m following the directions of van wizards, and I’ll be happy to act as a second-source as well; the “Well I did it this way and it STILL worked… somehow” followup act. Almost this entire “build” will freebase knowledge from Nick Pisca’s IDIOnline website, beginning with this oil cooler repair.

So let’s begin. The oil cooler here is actually the oil filter head as well, so the filter has to come off. The exhaust downpipe is also in the way. Since I was going to have to re-engineer the exhaust system anyway, I decided to take this opportunity to just remove it wholesale.
Luckily, Snekvan didn’t serve time in the Salt Belt (it has practically no rust of meaning) and so the manifold flange nuts released without resorting to drastic measures.

I did end up cutting off the pipe right at the muffler joint, so there wasn’t a way to get it out otherwise. The entire OEM exhaust is installed in the chassis as one peice.

Surprisingly, all of the bolts holding the oil cooler headers on are reachable with only a regular 3/8″ drive short extension. The front bolts are 5/16″-18 threaded with 3/8″ 12-point heads, and the rear bolts are a 5/16″-18 hex head with 1/2″ hex drive.
As soon as the gasket are cracked, remnant oil and coolant will drain everywhere, so I made sure to apply the forces with the good ol’ Drain Bedpan underneath. There is no need to drain all the oil, as a good amount will remain in the cooler tube, but the coolant must be drained to below the level of the assembly (or it’ll keep coming out anyway)

I did discover that the oil cooler assembly was on the verge of being able to escape, but barely could not due to the presence of one of these exhaust studs. I mated a crow’s foot wrench to a breaker bar and extension (to clear the adjacent engine cradle crossmember from the bottom) and broke it loose, and then a deep 5/8″ socket to drive the stud out.

The whole assembly comes out “upside down”, so to speak. It has to be rolled about 180 degrees to clear the front header.

Better make sure you have a bucket to land it in, since the remnant coolant and oil in the tube assembly is now going to pour all over you. No matter what, this is an oily operation.

The weakness of these is the internal O-rings that harden over time. The problem is, there’s no good way to pull these apart. The prybar tabs that are provided are very weak and soft, probably meant for use with a cooler assembly that isn’t 30 years old and “cured” in place.
When the header sections are exposed like this, I used some wooden paint stirring paddles as the pressure applicator to avoid scraping up the O-ring land surface. Once it gets here, it’s easy to pull off the rest of the way.

This other side, though. The tab broke off almost instantly, so I just resourced to chucking the header in the vise and giving it a good ol’ twist-and-pull, wiggling the whole thing out little by little.

Check out these delicious aged-to-perfection O-rings. The small one seals coolant from oil, the large one seals oil from The Environment™. These both tore and cracked in some way as I removed them.

Overview of the entire removed and disintegrated oil cooler unit. The only thing that really needs “fixing” is these O-rings! What a series of unfortunate events to get here.

I decided to go ahead and deep-clean the assembly as I’ll need to do it eventually anyhow, so why not – iIt’s Already Taken Apart. There are two large fittings on the rear (oil filter head) header which have NPT threaded plugs. I suppose if later on I need to take high-pressure out of somewhere, for something, I can do so here.
One comes off with a 3/8″ square drive, the other is just a hex head.

Alright, this is absolutely terrible. I began by using a wire brush and terrifying chemicals to scrape and brush the grunge off. But it was absolutely baked on, there was a lot of it, and I’m positive the Chemical Romance was impacting my future genetic makeup.

So I gave in and decided to acquire( ) a wash basin from Facebook Marketplace. First one I saw nearby, offer 60% stated value in cash, and off we went.

I put in a gallon of Purple Colored Degreaser and a few gallons of water to make this delicious raspberry flavored van tea.

Within an hour, the raspberry van tea had turned into cold van chocolate. AND IT ONLY GOT WORSE FROM THERE.
From end to end, I let the parts marinate for 2 days, periodically turning them around or pointing the nozzle at different trouble spots.

Huh…. so that is the color you’re supposed to be. I suppose I could paint these now, but cleanliness at the moment was enough.
I also had the small pipe fittings and the tubular assembly itself in the same bath – I positioned the tubes right in front of the pump intake, so it would be forced to pull Van Chocolate through the cavity.

So here is where I ran into some shenanigans. Rock Auto lists like 7 different part numbers for the oil cooler gaskets:

Some of these are wrong. I have no idea what the upper set of gaskets I received even are for, but guess who had to run back and order another kit once he found out. I ended up getting the cheaper Victor Reinz parts since chances are this will have to come off at some point soon anyway.
Big O-ring go first onto the large flanged seat (the “inner” flange, as I call it), then the little O-ring on the “outer” flange. I made sure to gently grease all the O-rings to avoid rubbing/tearing when installing them; any petroleum-based grease will eventually get dissolved into the oil once things are in place.
The next challenge was reassembling the oil cooler, which involves pressing the whole thing back together once the O-rings are slid on.
Now, Nick used a tall shop press to do this, but I didn’t have one, just a smaller 3-ton arbor press with not nearly the height needed. Well, then I remembered: The Trap House came with a random log splitter in the basement.

Whatever, it’s a hydraulic jack on a stick.
I lined up an aluminum bar chunk on the “splitter” end so I don’t “split” anything accidentally, and very carefully advanced the jack. What was handy was having a coarse fast-travel pump on this jack, so I was limited in the amount of force I could actually apply. The point is not to actually PRESS it on, but just slide the O-rings onto the lands. There should be practically no actual force applied, and I would periodically nudge the headers to stay in alignment with the tube.
Once it’s popped in, the headers can rotate on the tube, so they can be leveled off with a bench top or long straight surface.

Cleanliness is key for the gaskets, so I used brake cleaner and a 3D printer scraper to fully clean off the mating surfaces on the engine block.
I don’t have photos of this process in entirety, but I followed Nick’s advice of pasting the gaskets onto the mating surface with silicone sealant (applied in a thin noodle around all the bolt holes and on top of all the passage outlines), squeezing it down just a little, but then letting it cure slightly – still flexible, but keeping everything in place.
This ensures that I didn’t have to jiggle 2 gaskets and a (not very light) oil cooler assembly….

…while still having to rotate it 180 degrees back into position.
I fed through one bolt on each side while holding it up, and let it hang there while I inserted the other ones.
The procedure here was to gently snug every bolt a little (watching the silicone mush out some), then walk away and come back the next morning to do the final torque.

And then I decided to REALLY amp up the Full Send by pouring another gallon of Purple Colored Degreaser into the radiator and chasing it all with water as the engine warmed up. This will now become its “coolant” for the remainder of the build. At some point the future, I’ll drain it and repeat the process again, and hopefully the cooling system will be de-grunged enough.
Now that this repair is complete, and I could boot up the thing any time without potentially causing more damage, the fun part can begin: Sizing the turbos, and doing placement testing.