I was wrong.
The metal didn’t come “that week“. Or, for that matter, the next, when I was in Singapore and therefore couldn’t do anything about it anyways. After it all finished, my metal was delayed by a solid month. What was the vendor’s excuse?
I looked up your order and it seems yours and a
couple other orders that were supposed to get
shipped fedex never got printed out and therefore
didn’t get shipped out.
Right. Just like that. After an email asking for an update on the order (to no reply), and 2 more asking for a refund with the last being a ship-it-express-or-negative-feedback ultimatum (still to no response), the metal for LBS finally showed up on the 20th of January, of course shipped ground the week before. I’m sorry, you’re not gaining back the negative feedback point. For future reference, never, ever buy from this guy on eBay. The prices are low, but I could have ordered from Speedy Metals three and a half times over in the same period. Or got it made straight through Simon like 5 times, and not had to deal with excuses and silence. Next time I get anything from eBay, I’m staying on the seller’s ass so hard it’ll cost me the point.
So that’s why there’s not a Melontank at the moment. With IAP having ended, I’m faced with less time to hammer away on it as a whole. Luckily, the 8 miles or snow or so that’s on the ground shouldn’t melt until… I don’t know, July at this rate, so maybe I’ll get to climb a little hill or something soon. Assuming I pick up the pace and actually design the hands-free control – who knows, the first run might be me holding a R/C transmitter.
Alright, so here goes. This is roughly the span of the last week or so, which is when I had to play the wake-up-during-the-daytime game to get things cut.

As usual, we begin with the waterjet puzzle.
Wait – there’s actually more of a story to this. I had to rush-order another plate of 1/4″ aluminum from Speedy Metals (who lived up their name) because I wrote off an entire plate after trusting the OMAX autorouter more than I should. I’ll take this moment to complain some more – namely the autorouter software is the least intelligent thing I’ve ever had the joy of experiencing. I’m not sure what’s so hard about finishing one part before moving onto another, but it seems to revel in making cross-stock express runs right over previously cut features. So, no matter how closely you watch it, inevitably it runs into itself and bumps the piece. As a result, the entire coordinate system of the part becomes shifted mid-cut, and pretty much everything is ruined.
After losing that plate, I taught myself how to manually route files pretty much on the spot. The backup plate was cut without incident as I removed completed parts out of the tank one after another.
Come on OMAX, stop making your interns write the path software already. One closed external profile at a time.
Now that I’ve complained and bitched enough, here’s an elaborate waterjet-cut box.
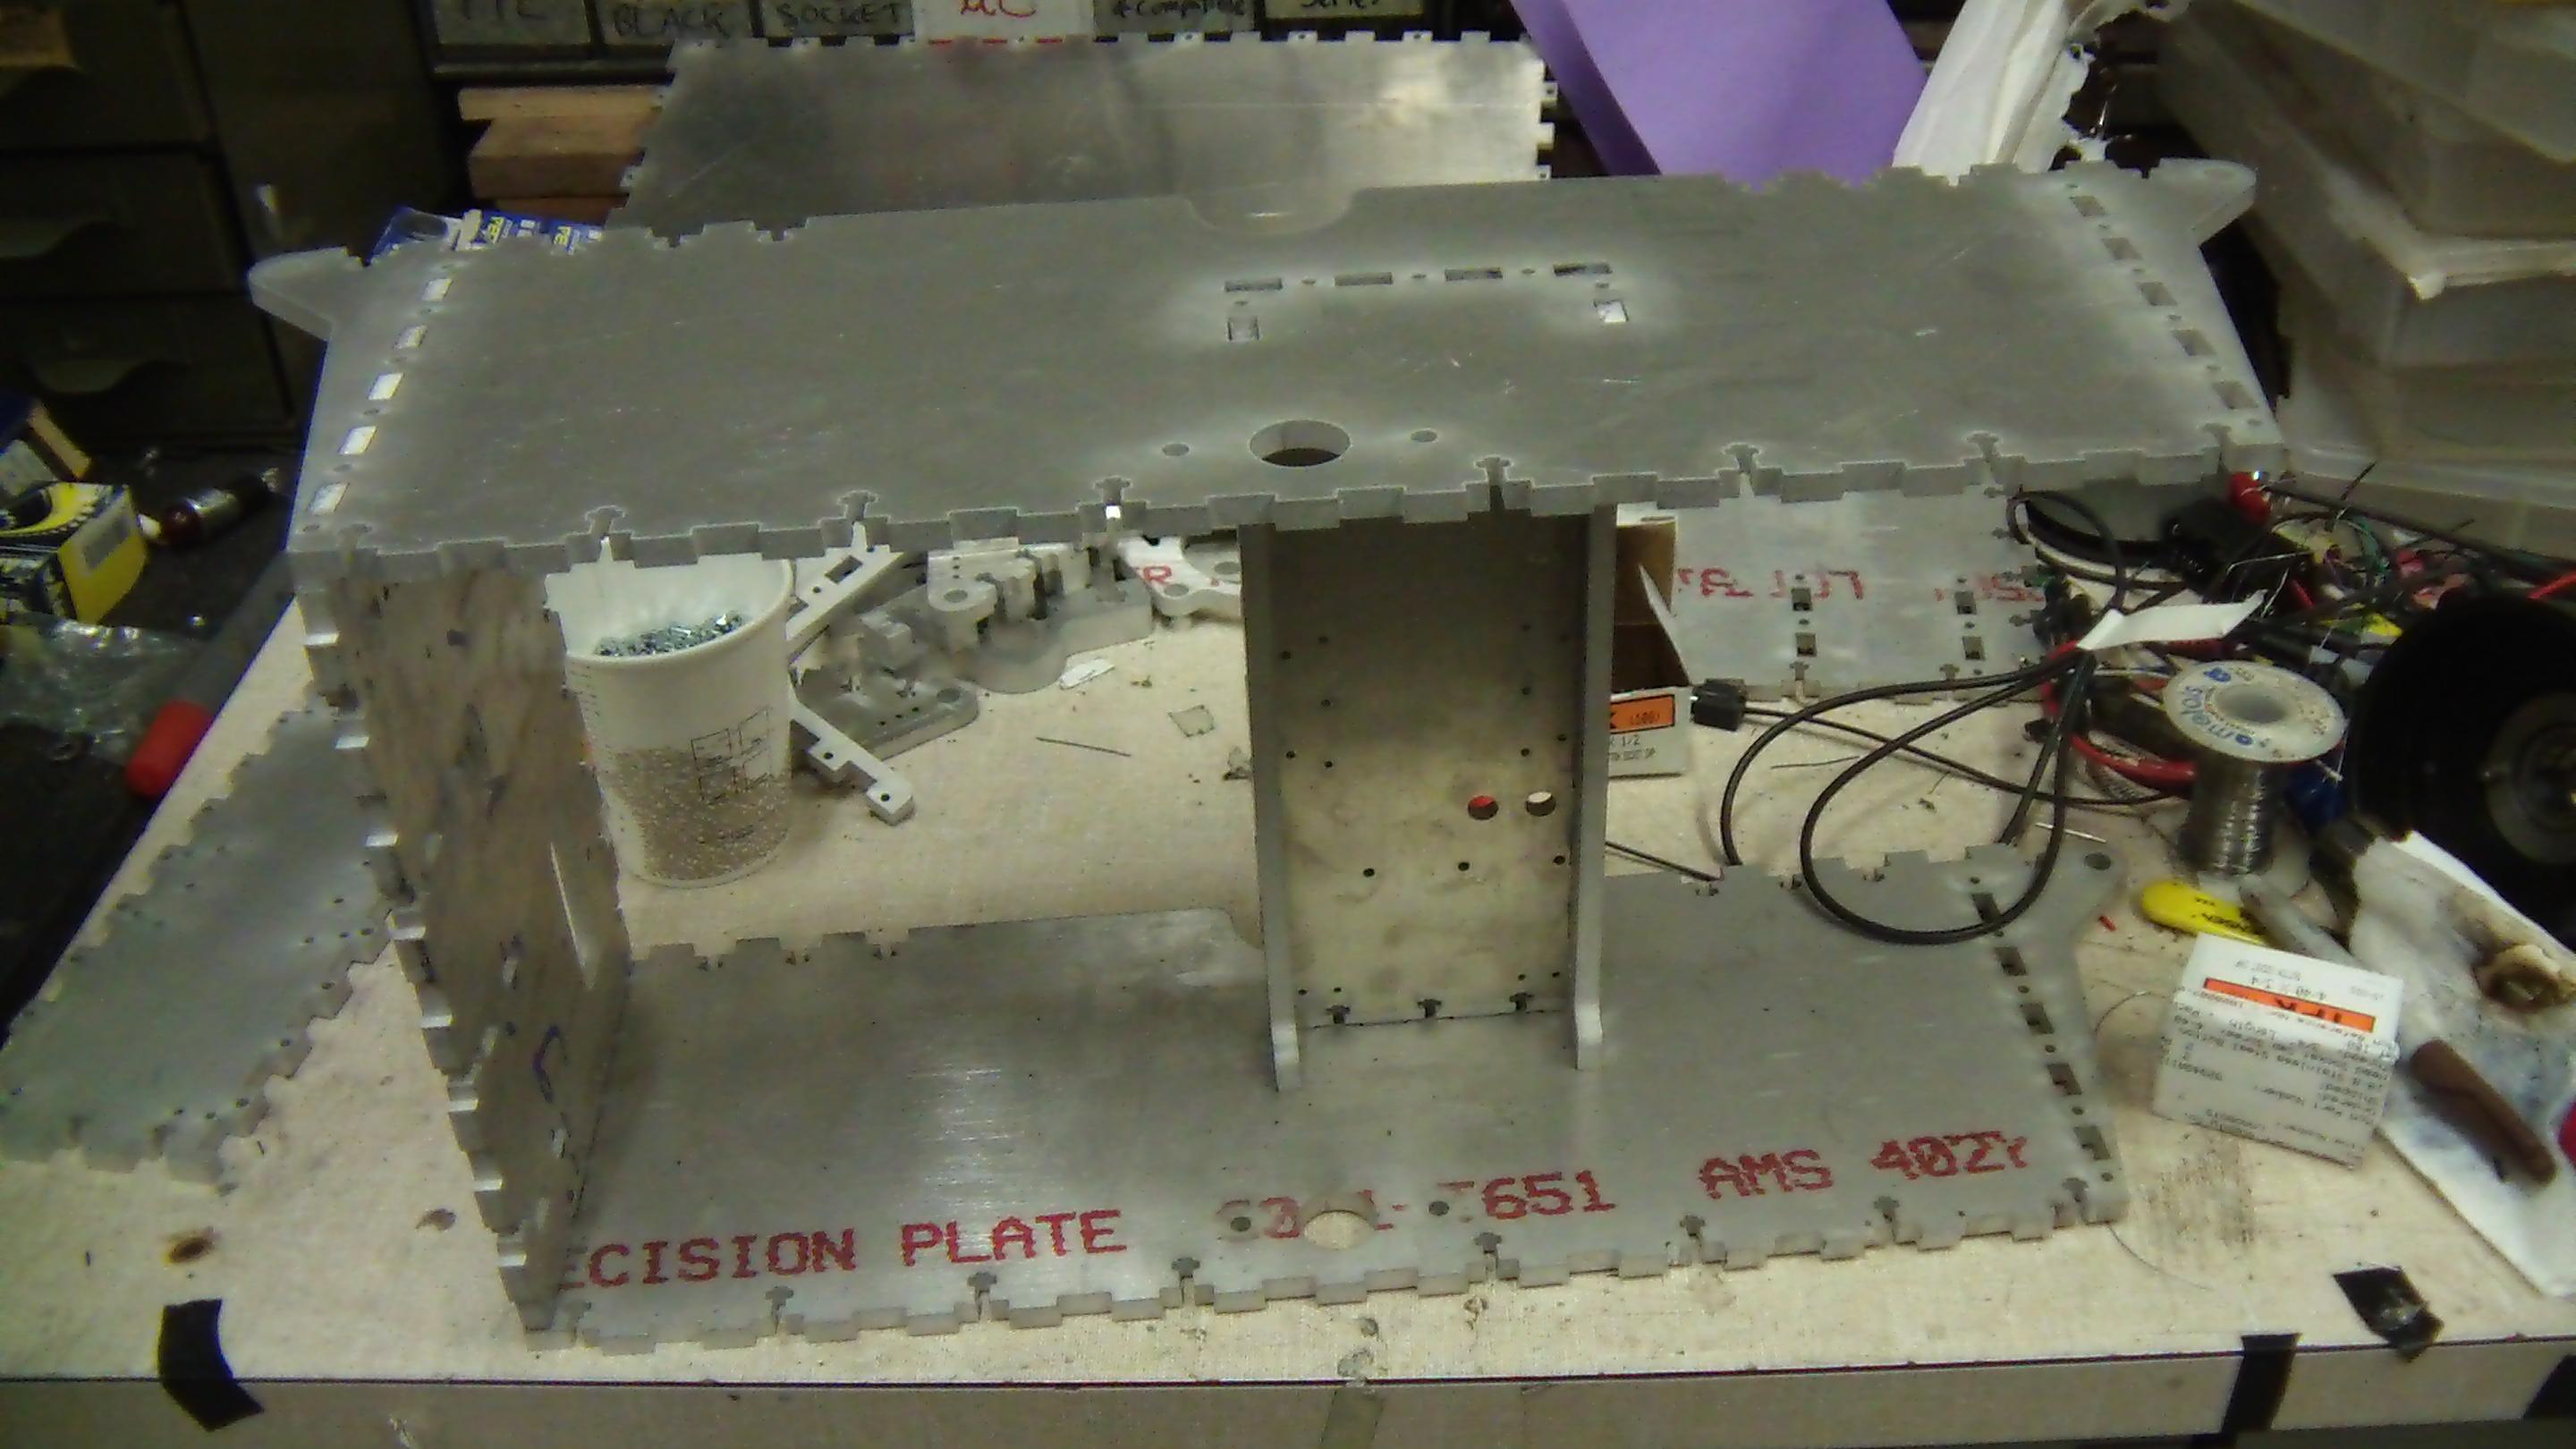
The plates were cut with a .003″ closer offset distance such that most of the tabs and slots just fell together. However, I seem to have neglected to do that on the first plate (before I destroyed everything), so the bottom side panel in this picture is a really stiff hammer fit.
If you’re also intending to make things fit together on the waterjet, I’d recommend either reducing the tool offset a few thousandths or making your slots a few thousandths bigger and tabs a few thousands smaller, just so they slide together easily. For 1/4″ aluminum, 0.003″ inwards (i.e. total width of any kerf is actually 0.006″ larger) seems to be great.
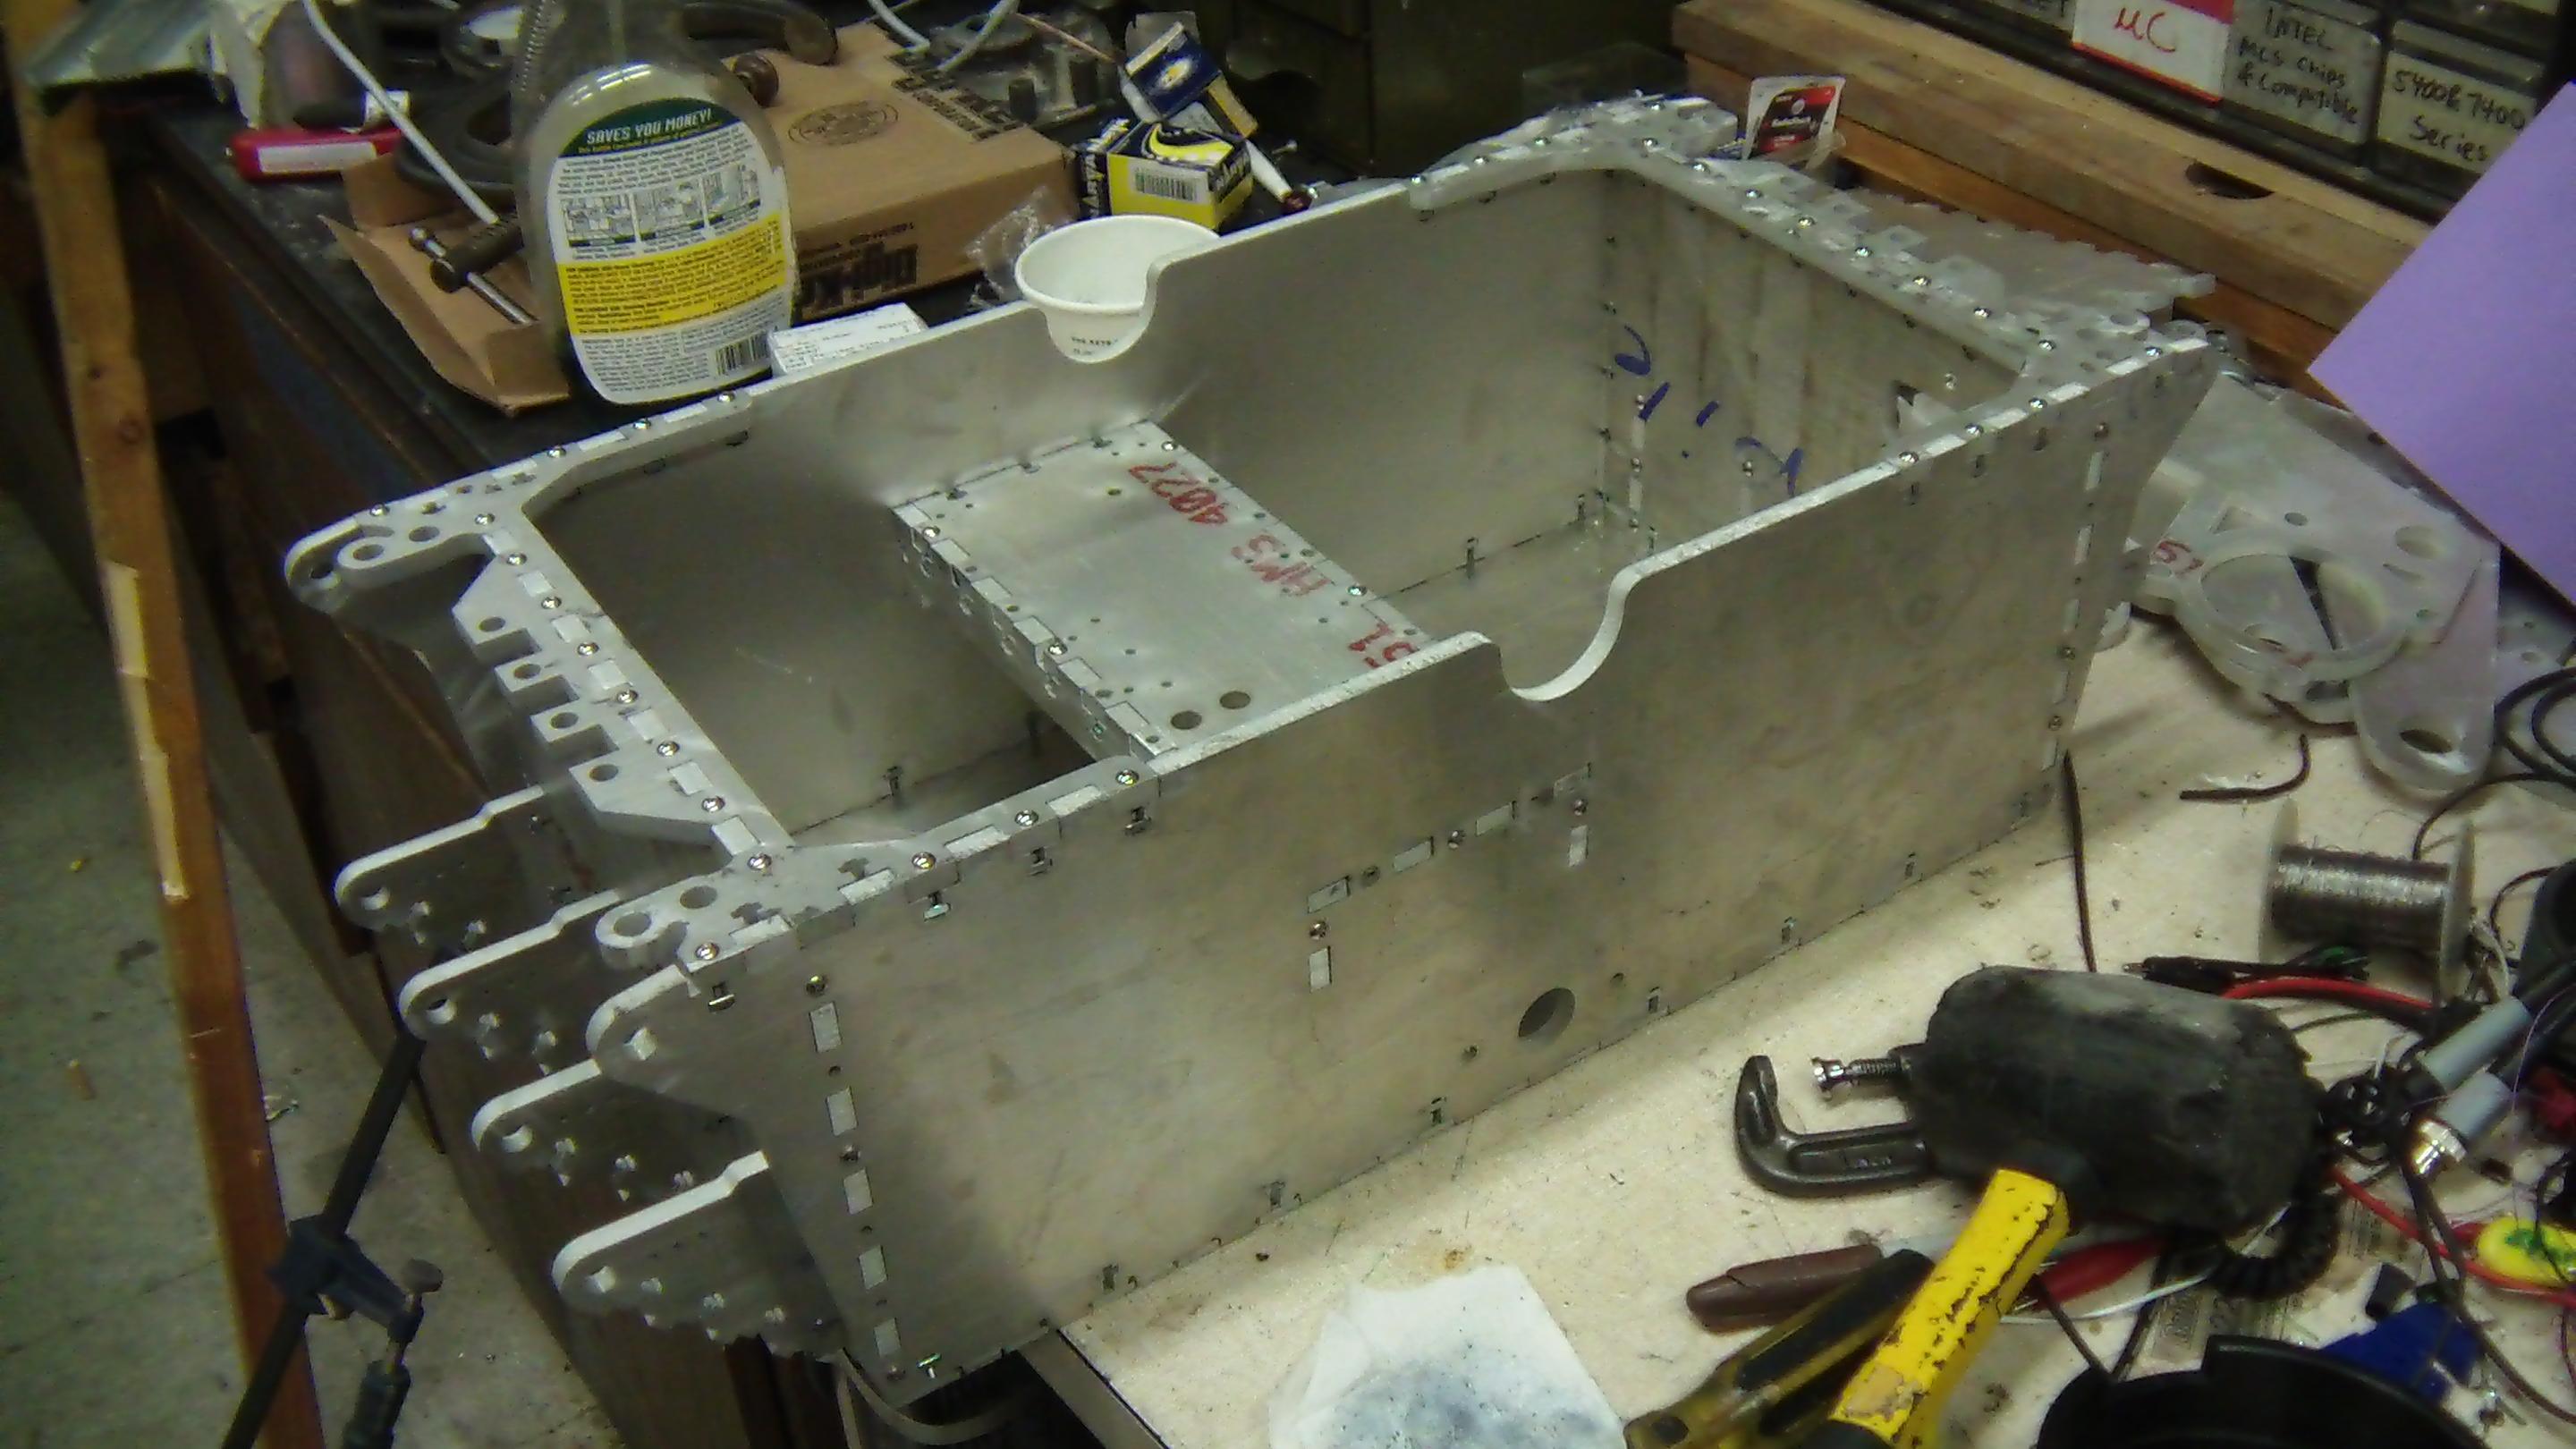
The box is complete.
Well, minus a whole ton of hardware. I ran out of 4-40 button-head screws, so for now, this will have to do. I also seem to have physically lost the 1/8″ plates I cut out for the triangular things at the end between last week and now.
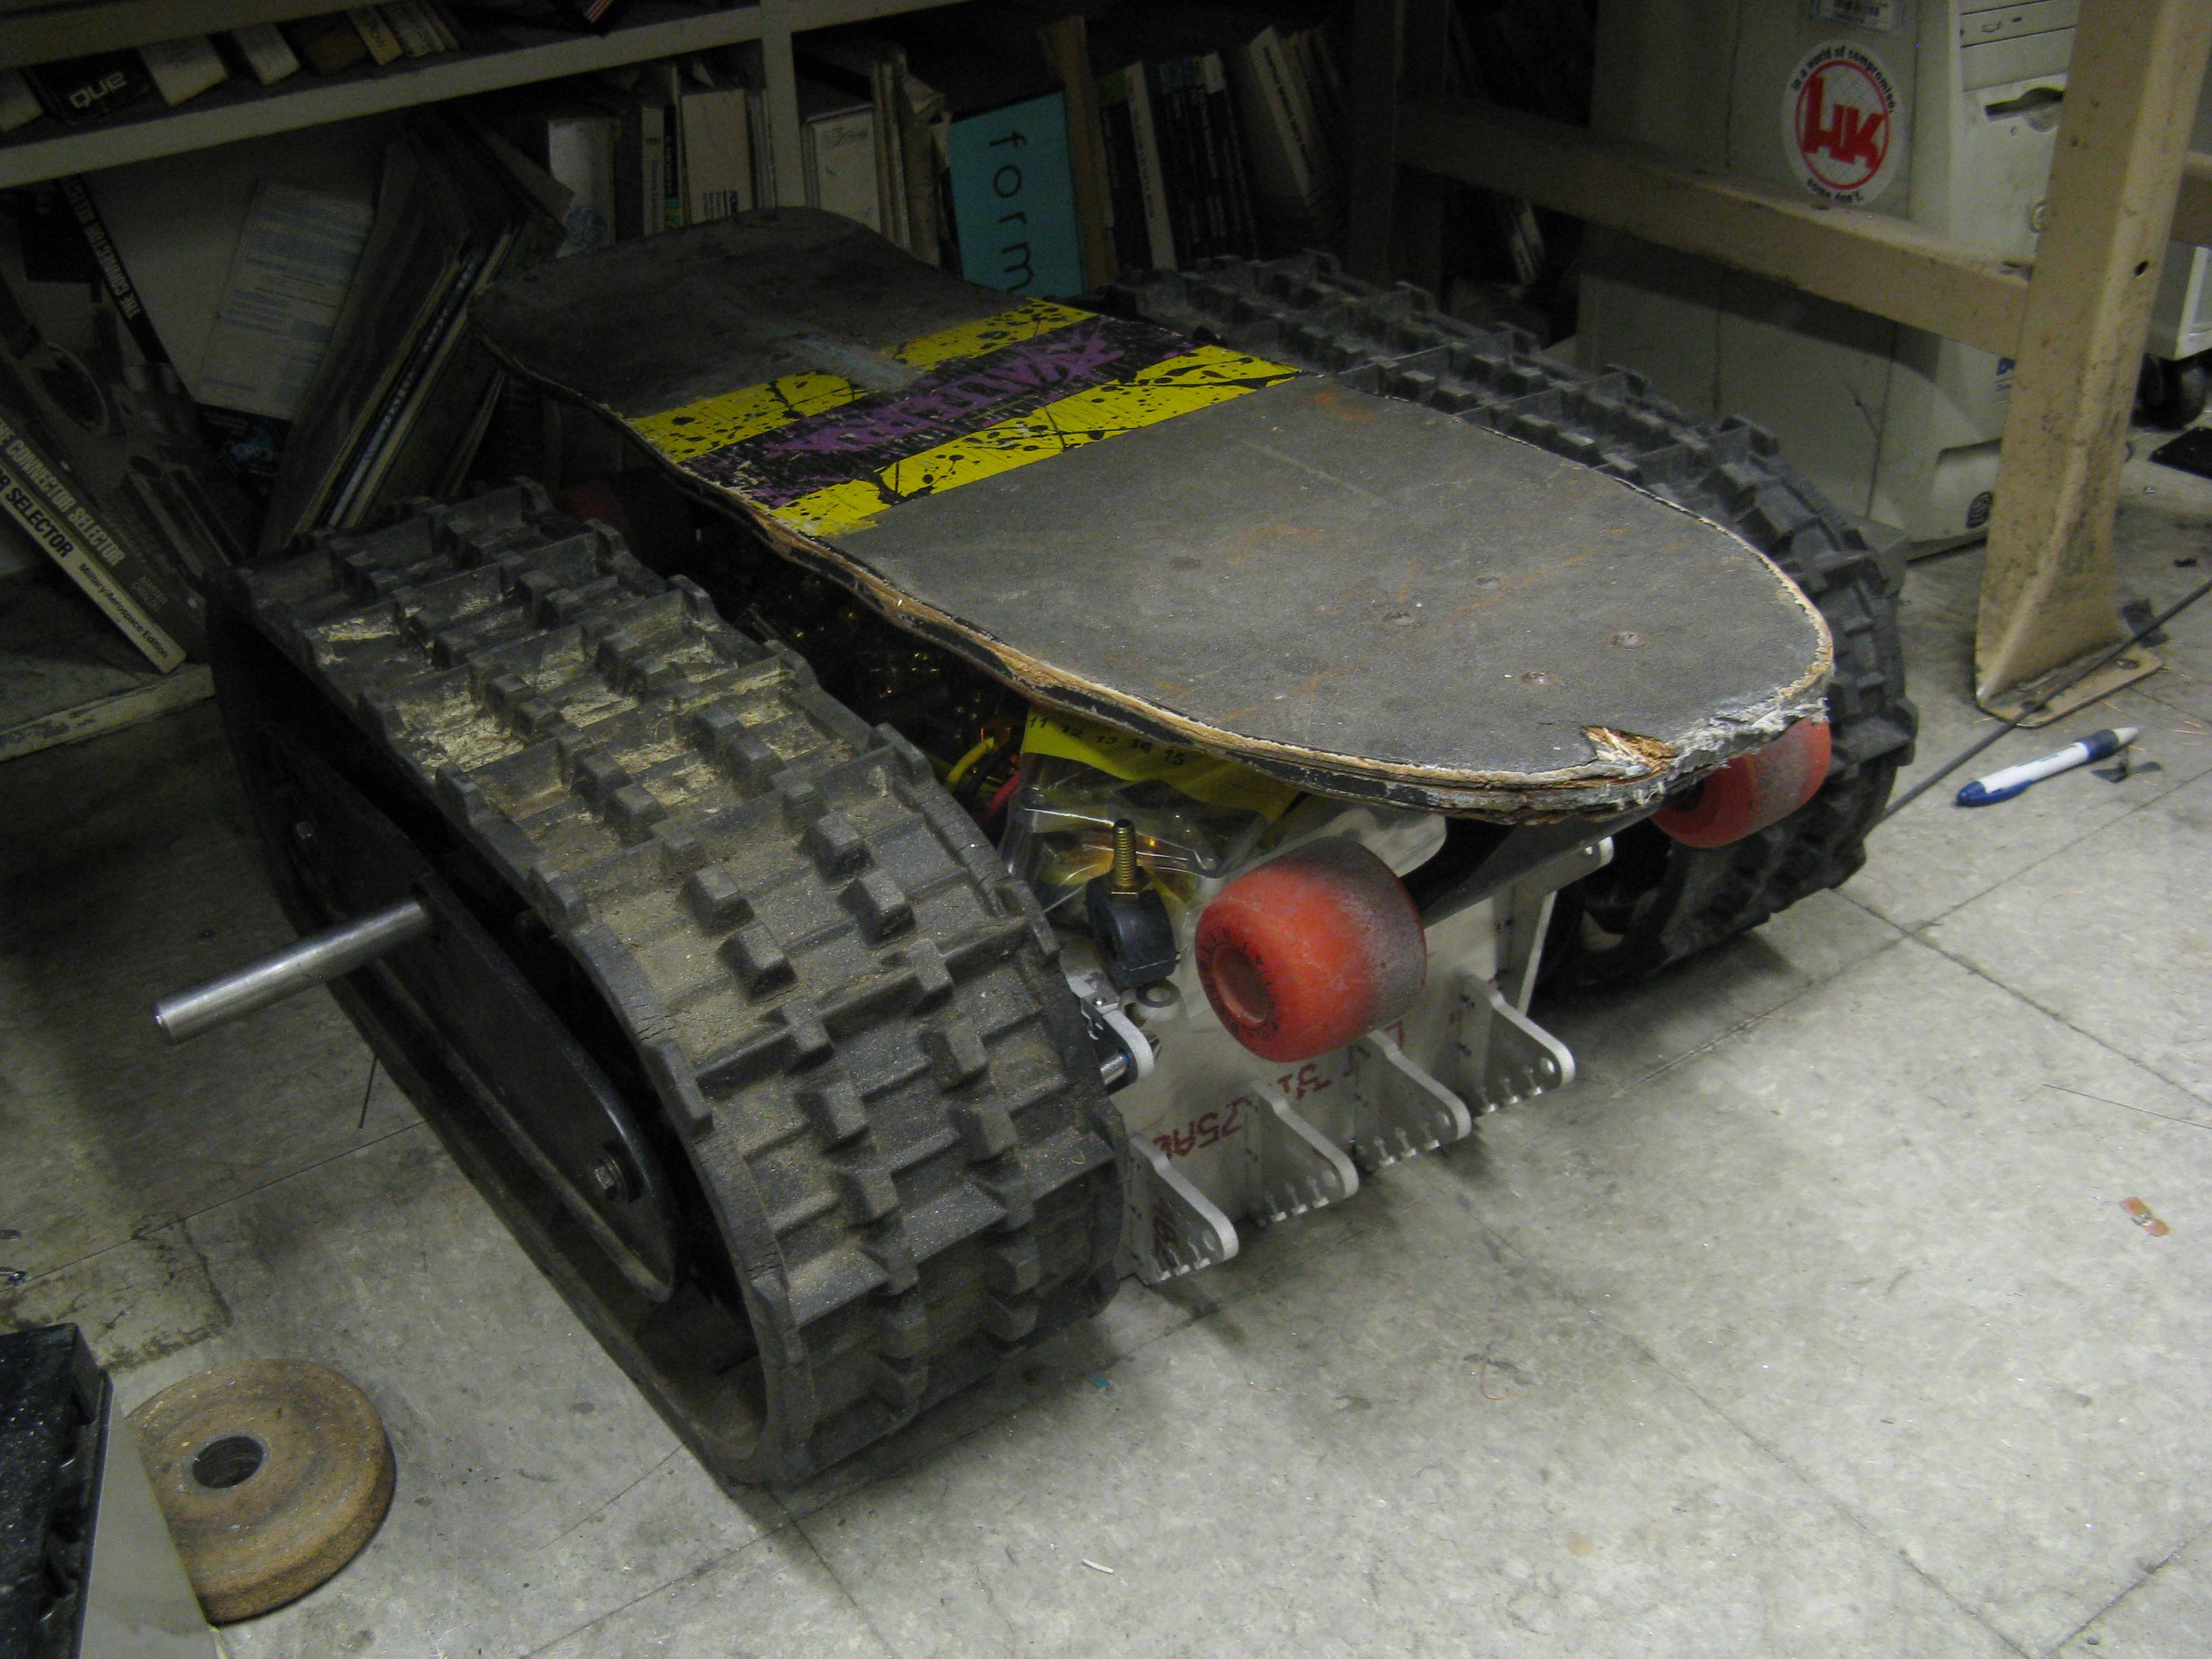
Since this project has gotten to the point where it can hold its own parts (hey, it is a box), I threw together this poser-shot. I think it’s pretty reflective of what the final vehicle will look like.
course 6
None of my excessively dangerous vehicles are complete without some kind of controls headache, and Melonsharktankbeargryllspigweek is no different.
In updates prior, I clearly showed the Melontrollers being mounted on the control deck. The fact of the matter is, I don’t think they’ll actually make it into version 1. Melontroller is not yet stable enough for me to put it on anything less benign than RazEr…which has already seemingly ate one controller. For once, it wasn’t in a fiery explosion, but the Arduino Mini just…. died. My guess is that a transient made it past the regulator somehow and killed it. It was also never really running a motor that smoothly, nor did I have the current sensors even mounted on the board. There’s also a ton of changes I want to make to the design to make it more noise-tolerant and robust… including ditching the chopped and screwed linear regulator feeding the logic supply.
Pursuant to the delay of Melontroller, I’m probably going to end up using some mini-Kellys and a custom signal interface board. You know, some electronics I can actually handle. There’s several obsolete KBS36051 units hanging out in the Media Lab ever since we switched the model Citycar to DEC boards.
While they’re advertised as “50 amps”, they really limit the phase current to about 20 amps continuously. On a stock 80xx “melon” winding, which is like 2 and a half turns of 4/0 copper busbar, that does absolutely nothing. Even if LBS was able to get up to speed, the motors are just too fast to work well with the current speed reduction – 5:1 on a motor that’s rated for 170 RPM/V and running at 42 volts still gets me over 35mph.
I don’t particularly feel like dying that badly, so I’m electing to rewind the two Melons to something more reasonable. Like, say, 18 turns of double #20 wire, Y-terminated, instead of the stock 8 turns of…. something… that’s Delta terminated.
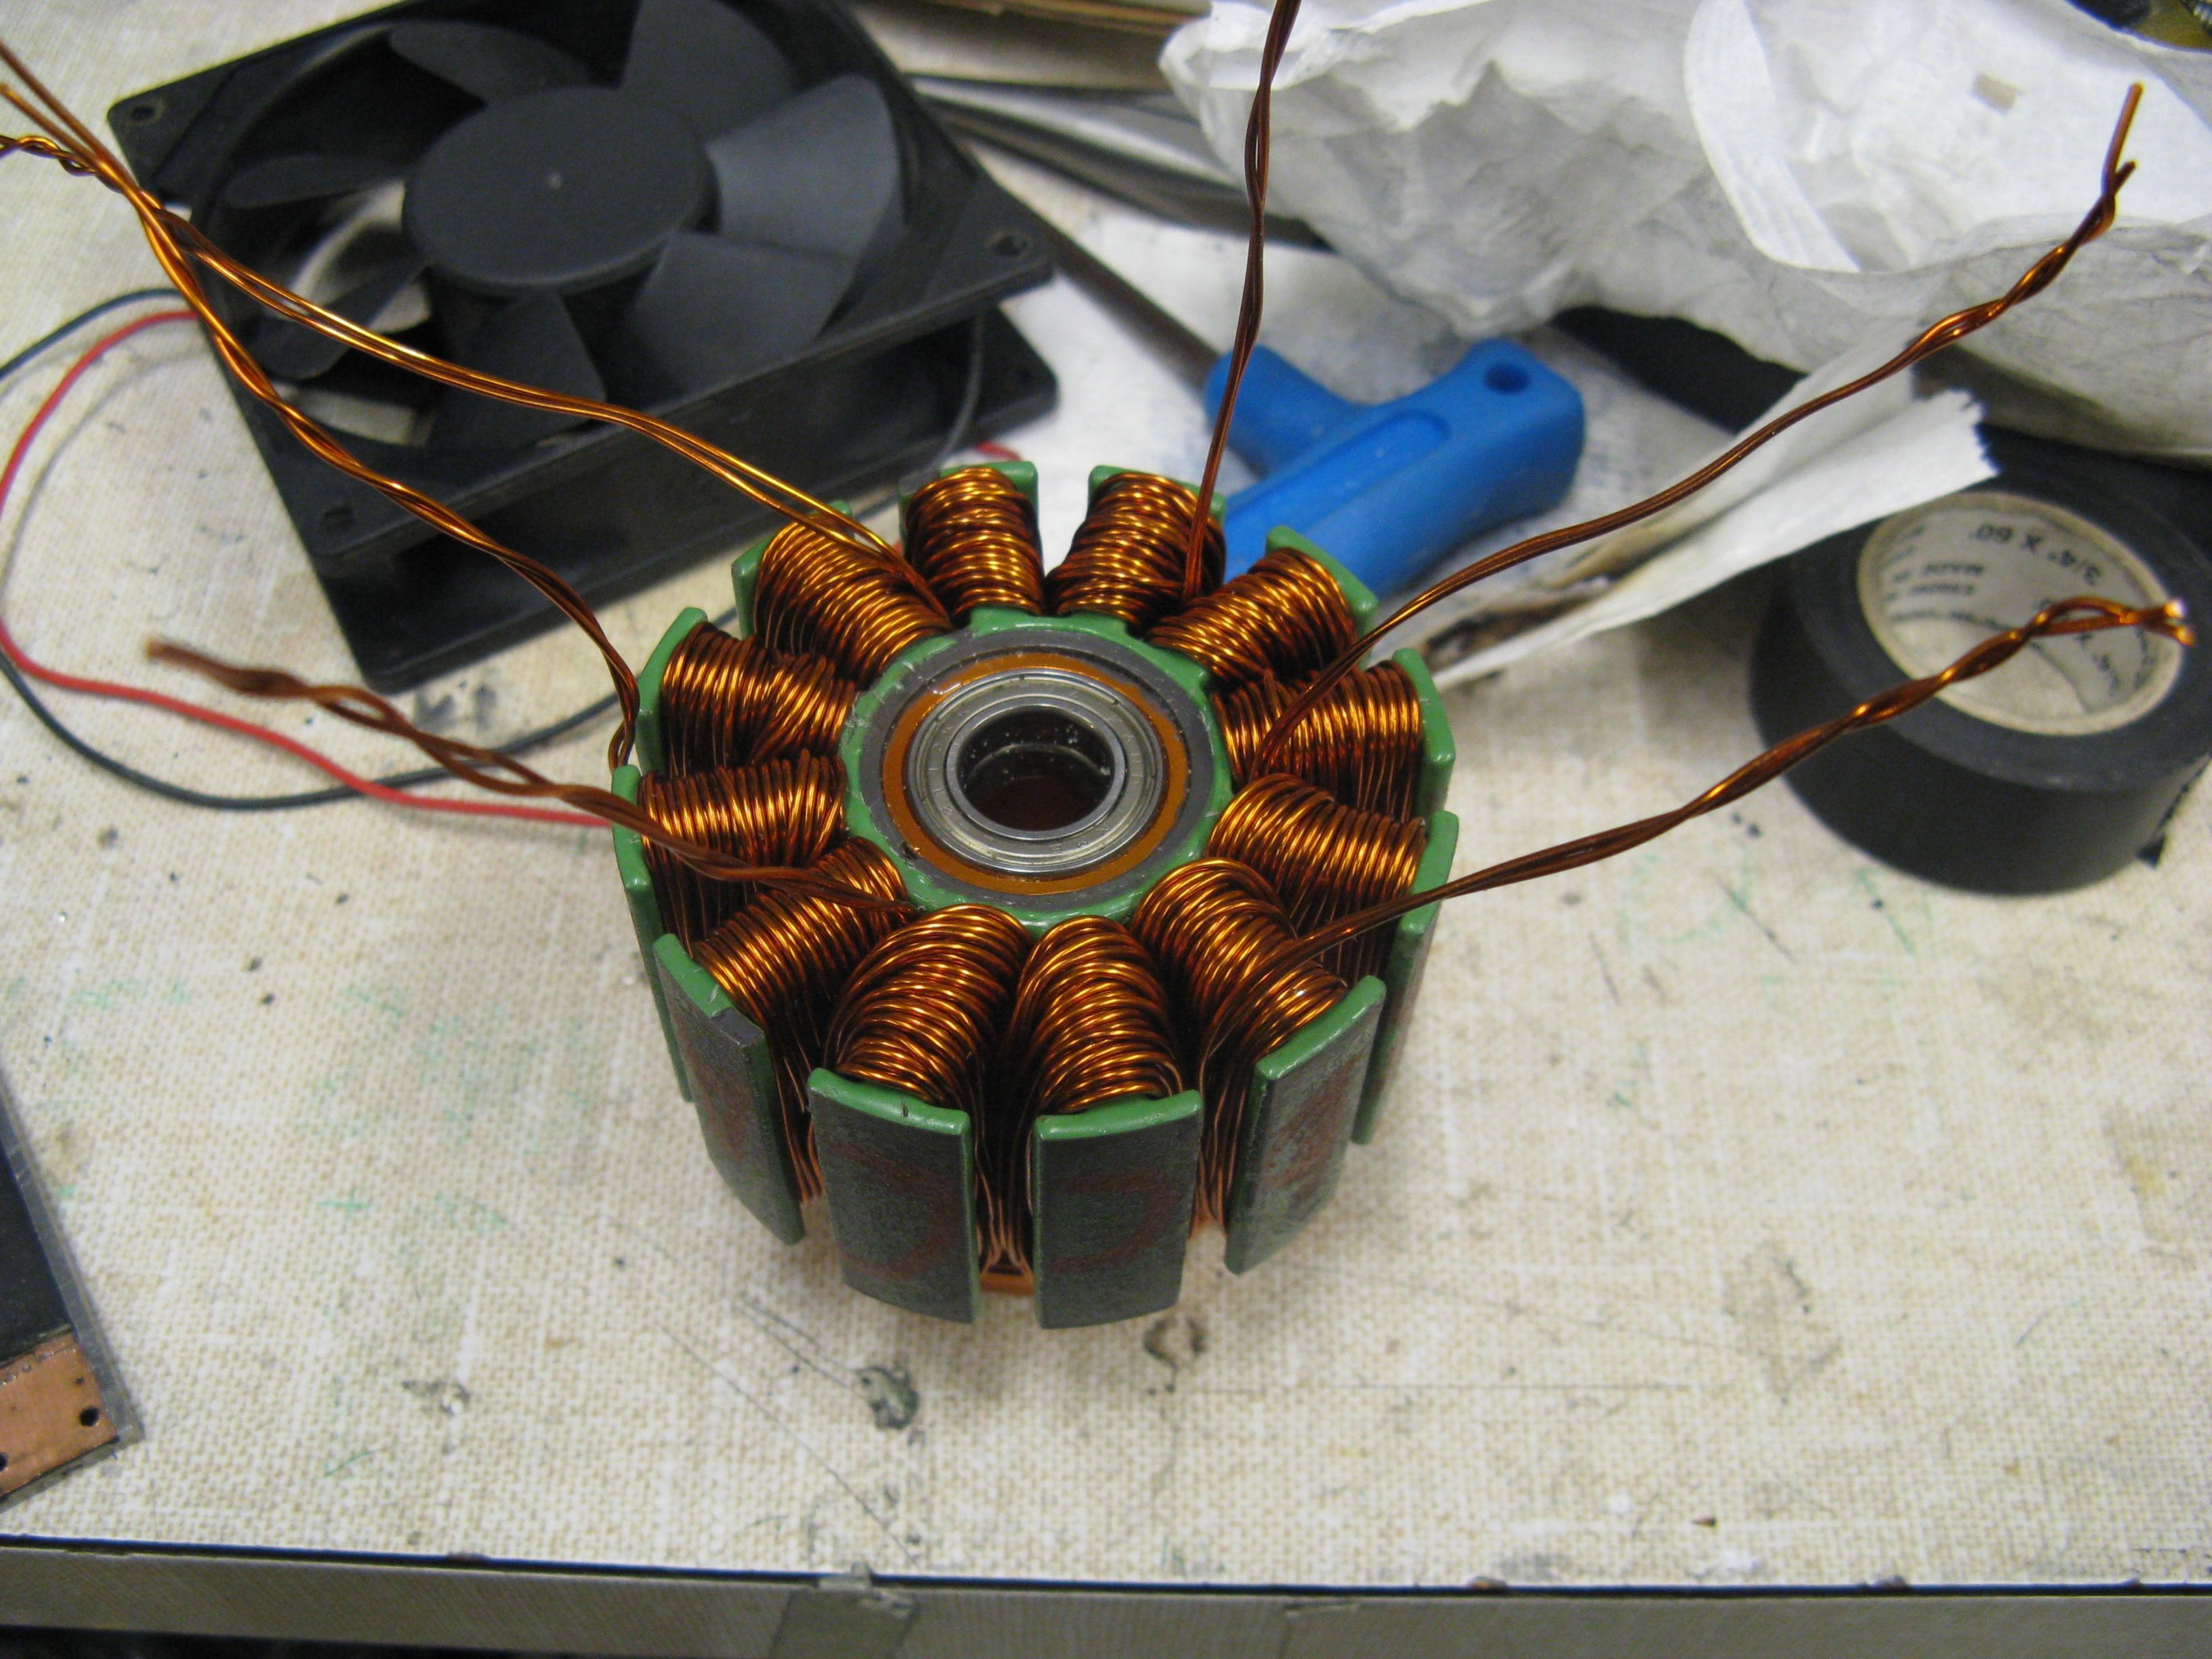
By some crafty math, this should get me a motor with a RPM/V rating of about 40 (actual math: 170 original Kv * ((8 / 18) turns ratio / sqrt(3) Y-termination factor) ) With the as-designed 5:1 gearing, this will actually be quite tame at 15 miles per hour. The gearing can then be fiddled with. With the Y-termination and higher turn count resulting in increased phase inductance, the Kellys ought to freak out alot less than they did when I tried to run Melonscooter with them.
All that’s left for me to do is to design the interface to toggle the Kelly throttle, reverse, and brake inputs remotely. This will, again, probably be accomplished using some flavor of Arduino.


