Alright! So before I can go about my snail farming, I had to address a pressing issue with Snekvan: That the oil cooler assembly was causing engine oil to enter the coolant circuit any time it was running.
This manifests as blobs of engine oil floating on top of the coolant. The amount of grunge built up indicated it has been leaking for a long time, and was just neglected.
I drained the terrible soup into a large under-bed storage bin, upon which I had to invent a method of disposing of it that didn’t involve the storm drain. Then I refilled the system with clean water, idled it, and watched the open radiator cap as more oil blobs began surfacing. No matter what, I wasn’t out to gauge the severity or mediate it, since once it happens, it’ll keep happening. It was time to remove the oil cooler and do some surgery!
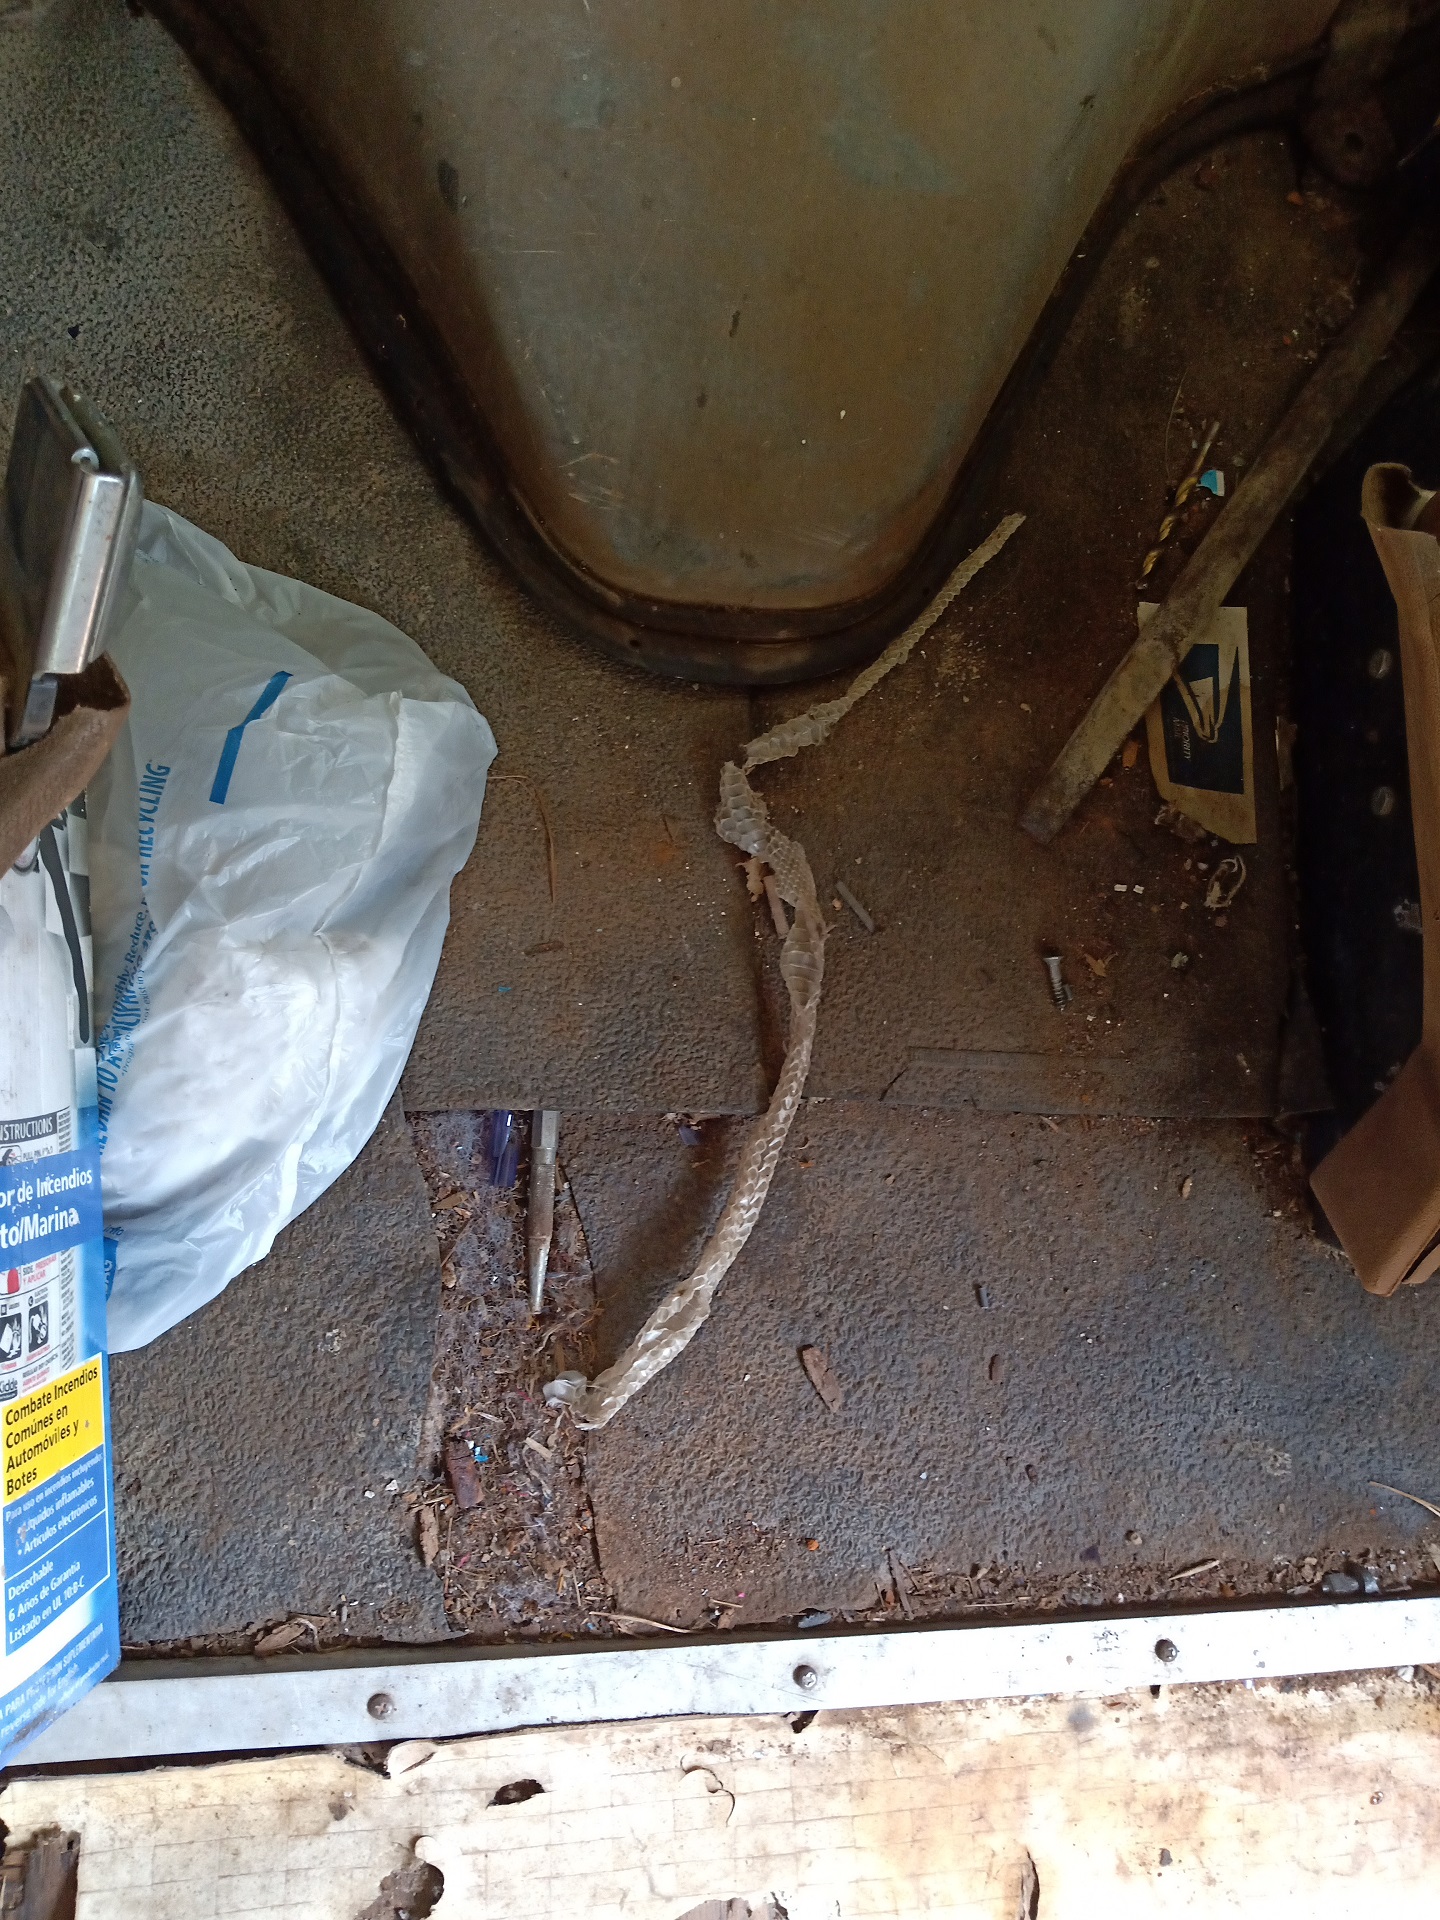
But first, I spent a good hour just cleaning and scrubbing the front row of this thing because it felt disgusting just getting in. I blew out or vacuumed up a lot of biological detritus, including dozens (or hundreds) of stinkbug husks from under the dashboard, and bleach scrubbed all the surfaces to get rid of the mold and… stains.
In this process, it spawned yet another snake skin. Certainly living up to its name!
As I have harped on so many times as of late, such as the Crabmower post, I’m happy that other people on the internet also document their arcane machine-enhancing adventures in static and searchable ways still, despite the ease of social media ecosystems. In a way, I feel like this is the karmic energy balance shifting back towards me after documenting all of my asshattery here going back years, and fielding a ton of questions from other makers. Now, I’m following the directions of van wizards, and I’ll be happy to act as a second-source as well; the “Well I did it this way and it STILL worked… somehow” followup act. Almost this entire “build” will freebase knowledge from Nick Pisca’s IDIOnline website, beginning with this oil cooler repair.
So let’s begin. The oil cooler here is actually the oil filter head as well, so the filter has to come off. The exhaust downpipe is also in the way. Since I was going to have to re-engineer the exhaust system anyway, I decided to take this opportunity to just remove it wholesale.
Luckily, Snekvan didn’t serve time in the Salt Belt (it has practically no rust of meaning) and so the manifold flange nuts released without resorting to drastic measures.
I did end up cutting off the pipe right at the muffler joint, so there wasn’t a way to get it out otherwise. The entire OEM exhaust is installed in the chassis as one peice.
Surprisingly, all of the bolts holding the oil cooler headers on are reachable with only a regular 3/8″ drive short extension. The front bolts are 5/16″-18 threaded with 3/8″ 12-point heads, and the rear bolts are a 5/16″-18 hex head with 1/2″ hex drive.
As soon as the gasket are cracked, remnant oil and coolant will drain everywhere, so I made sure to apply the forces with the good ol’ Drain Bedpan underneath. There is no need to drain all the oil, as a good amount will remain in the cooler tube, but the coolant must be drained to below the level of the assembly (or it’ll keep coming out anyway)
I did discover that the oil cooler assembly was on the verge of being able to escape, but barely could not due to the presence of one of these exhaust studs. I mated a crow’s foot wrench to a breaker bar and extension (to clear the adjacent engine cradle crossmember from the bottom) and broke it loose, and then a deep 5/8″ socket to drive the stud out.
The whole assembly comes out “upside down”, so to speak. It has to be rolled about 180 degrees to clear the front header.
Better make sure you have a bucket to land it in, since the remnant coolant and oil in the tube assembly is now going to pour all over you. No matter what, this is an oily operation.
The weakness of these is the internal O-rings that harden over time. The problem is, there’s no good way to pull these apart. The prybar tabs that are provided are very weak and soft, probably meant for use with a cooler assembly that isn’t 30 years old and “cured” in place.
When the header sections are exposed like this, I used some wooden paint stirring paddles as the pressure applicator to avoid scraping up the O-ring land surface. Once it gets here, it’s easy to pull off the rest of the way.
This other side, though. The tab broke off almost instantly, so I just resourced to chucking the header in the vise and giving it a good ol’ twist-and-pull, wiggling the whole thing out little by little.
Check out these delicious aged-to-perfection O-rings. The small one seals coolant from oil, the large one seals oil from The Environment™. These both tore and cracked in some way as I removed them.
Overview of the entire removed and disintegrated oil cooler unit. The only thing that really needs “fixing” is these O-rings! What a series of unfortunate events to get here.
I decided to go ahead and deep-clean the assembly as I’ll need to do it eventually anyhow, so why not – iIt’s Already Taken Apart. There are two large fittings on the rear (oil filter head) header which have NPT threaded plugs. I suppose if later on I need to take high-pressure out of somewhere, for something, I can do so here.
One comes off with a 3/8″ square drive, the other is just a hex head.
Alright, this is absolutely terrible. I began by using a wire brush and terrifying chemicals to scrape and brush the grunge off. But it was absolutely baked on, there was a lot of it, and I’m positive the Chemical Romance was impacting my future genetic makeup.
So I gave in and decided to acquire( ) a wash basin from Facebook Marketplace. First one I saw nearby, offer 60% stated value in cash, and off we went.
I put in a gallon of Purple Colored Degreaser and a few gallons of water to make this delicious raspberry flavored van tea.
Within an hour, the raspberry van tea had turned into cold van chocolate. AND IT ONLY GOT WORSE FROM THERE.
From end to end, I let the parts marinate for 2 days, periodically turning them around or pointing the nozzle at different trouble spots.
So I actually put these in my dishwasher for the final rinse…. with my dishes
Huh…. so that is the color you’re supposed to be. I suppose I could paint these now, but cleanliness at the moment was enough.
I also had the small pipe fittings and the tubular assembly itself in the same bath – I positioned the tubes right in front of the pump intake, so it would be forced to pull Van Chocolate through the cavity.
So here is where I ran into some shenanigans. Rock Auto lists like 7 different part numbers for the oil cooler gaskets:
Some of these are wrong. I have no idea what the upper set of gaskets I received even are for, but guess who had to run back and order another kit once he found out. I ended up getting the cheaper Victor Reinz parts since chances are this will have to come off at some point soon anyway.
Big O-ring go first onto the large flanged seat (the “inner” flange, as I call it), then the little O-ring on the “outer” flange. I made sure to gently grease all the O-rings to avoid rubbing/tearing when installing them; any petroleum-based grease will eventually get dissolved into the oil once things are in place.
The next challenge was reassembling the oil cooler, which involves pressing the whole thing back together once the O-rings are slid on.
Now, Nick used a tall shop press to do this, but I didn’t have one, just a smaller 3-ton arbor press with not nearly the height needed. Well, then I remembered: The Trap House came with a random log splitter in the basement.
Whatever, it’s a hydraulic jack on a stick.
I lined up an aluminum bar chunk on the “splitter” end so I don’t “split” anything accidentally, and very carefully advanced the jack. What was handy was having a coarse fast-travel pump on this jack, so I was limited in the amount of force I could actually apply. The point is not to actually PRESS it on, but just slide the O-rings onto the lands. There should be practically no actual force applied, and I would periodically nudge the headers to stay in alignment with the tube.
Once it’s popped in, the headers can rotate on the tube, so they can be leveled off with a bench top or long straight surface.
Cleanliness is key for the gaskets, so I used brake cleaner and a 3D printer scraper to fully clean off the mating surfaces on the engine block.
I don’t have photos of this process in entirety, but I followed Nick’s advice of pasting the gaskets onto the mating surface with silicone sealant (applied in a thin noodle around all the bolt holes and on top of all the passage outlines), squeezing it down just a little, but then letting it cure slightly – still flexible, but keeping everything in place.
This ensures that I didn’t have to jiggle 2 gaskets and a (not very light) oil cooler assembly….
…while still having to rotate it 180 degrees back into position.
I fed through one bolt on each side while holding it up, and let it hang there while I inserted the other ones.
The procedure here was to gently snug every bolt a little (watching the silicone mush out some), then walk away and come back the next morning to do the final torque.
And then I decided to REALLY amp up the Full Send by pouring another gallon of Purple Colored Degreaser into the radiator and chasing it all with water as the engine warmed up. This will now become its “coolant” for the remainder of the build. At some point the future, I’ll drain it and repeat the process again, and hopefully the cooling system will be de-grunged enough.
Now that this repair is complete, and I could boot up the thing any time without potentially causing more damage, the fun part can begin: Sizing the turbos, and doing placement testing.
This is it! After a year of hyping myself up with the likes of Murdervan and Spool Bus, and even longer hearing “Yo that thing needs to be diesel” with regards to Vantruck… it’s happening.
I’m never going to do an engine swap
-me, presumably way back when
With Vantruck’s Ford 460 big block increasingly sounding like it’s going to shed pistons into my lap or something, and me having absolutely zero desire to repair it properly (“If it’s coming out, it’s never going back in”… to hell with that damn thing), I figured it was time to get moving! This project will probably end up – by design – another long-running explorative journey like many of my past contraptions, just in a pretty new domain.
That’s been my M.O. for a long time now: Do just a little bit of preparation and research, then just send it and see what happens. If you know just enough to get yourself into trouble but barely not enough to get yourself out, well, that’s where interesting things happen.
Why twin turbo?
Well it’s because one isn’t enough, duh.
You’d think it would be easier to just add one turbocharger to the IDI diesel, which is legendarily slow without some kind of assistance. But that’s because you haven’t worked on the Ford VN chassis. I first learned this was a thing when I dug into Spool Bus and I’M SORRY, WHAT IN THE BRITISH WHITWORTH FUCK
Yeah. To keep commonality with the parts for the F-series trucks, aftermarket turbo kit makers kept the whole thing in the center of the V8, above the transmission. Fair enough. In the trucks, this setup would be against the cab firewall.
In the van, it’s your center passenger, and you can pet it while driving (Don’t do this, it gets hot). The Internet is rife with van addicts (Face it, if you like something this painful, you’re an addict, not an enthusiast) talking about heat shields and how hot it gets the interior lid. The interesting thing is, you can still buy a brad new IDI van turbo kit from Hypermax. If I wanted to spend money, I could make my problems go away pretty fast.
But first of all, that’s not why we’re here on this website. We’re here to watch me do everything wrong on purpose and complain why it doesn’t work, but in the process create something that amounts to a hot take, but with Arduinos and welding.
In messing with these vans over the past year or so (and working on Vantruck for longer), I know there are some unused pockets of space under the cab around the back of the engine. If you invoke the “Every part in a Ford Econoline is 0.25 inch away from every other part” design mantra of the original engineers, I therefore saw an opportunity to put two smaller turbochargers in these spaces instead of one larger one up top, and got curious. In asking around if that was an okay thing to do, I got the general answer “Yeah you just combine their outputs it’s fine”.
Second, I don’t really want to just saddle Vantruck with this setup if I can avoid it. It’s not really possible for me to demux the motivation from the first point, but my There is probably a better way sense is tingling. Spool Bus, despite the thick fiberglass batting on the doghouse cover and the heat shield on the turbine, really does suffer from “Warm Paperwork Pocket Syndrome”. I’ve legitimately left gas station corn dogs in the side pocket of the doghouse before to keep them hot on trips.
So, as long as I don’t have a pressing need to make something that works, I can take my time to entertain both myself and the Internet. Also, “twin turbo” anything just gets the automotive sphere up in a flurry of excitement, about as much as “15 horsepower electric shopping cart”.
Commence: Operation IDIocracy
And so I have my challenge laid out. The high-level mission is to get myself a turbodiesel Vantruck using the IDI engine family – both for period-correctness and for their general longevity and durability. Also, hehe funny snail noises.
However, if I can explore some new directions for the van nation, so much the better. If the “Two small turbos instead of one big one” approach is successful, it means a lot of engine hole space gets cleared up, which benefits serviceability (legendarily impossible otherwise) and airflow for cooling. Or, the available upstairs space will make increasing performance like adding intercooling easier.
The mission brief is therefore:
Explore twin low-mounted turbochargers for the 6.9/7.3 IDI vans using the space between the engine and transmission and frame rails
Design for “minimal invasiveness” installation. Most of the van turbo kits require surgery, like drilling holes in valve covers and valley pan gaskets, cutting this and moving that, etc. I think I’ve identified areas where I can improve on tapping into existing oil feeds/return spots, bolt holes, and so on.
Performance increase goals are going to be limited to “Be reasonable on a modern highway”. While twin turbos is always a way to get the BIGGER AIR for bigger gainz, I’m going to see how far I can take the OEM injection pump volume. Vantruck will never Fast, nor do I intend on towing an entire hotel, but it needs to do better than the now fuel-injected 460. Someone else can make a drag racing van.
The biggest takeaway here is that I have no idea what I’m doing and it’s funnier because of that. Gotta remember, all of my experience is not in the Car Universe. In fact, some of the hardest and most infuriating parts of this to date have been figuring out what Car People named a specific part that I otherwise know on McMaster-Carr as something else. Or vice versa i.e. I found a part on McMaster or Misumi by narrowing specifications and dimensions, spend good American-made money on it, and someone just goes “Oh yeah, that’s a Size 6 Inverted Johnson Fitting and you can buy it on eBay for $4.99″ and I’m just sitting here going nowhere on the packaging does this part say Johnson anything.
Operation IDIocracy will span 4-ish phases:
Experiment on an existing diesel van component placements, routings, and escape paths. Ideally this van will be the transplant core as well.
Take everything out and rebuild/send out as needed. I’ll probably do something similarly scoped to the Mikuvan Engine Rebuild Fiasco , and not go totally hard but enough to replace wear parts and things that leak, as well as put in some “Stage 1” bulletproofing mods.
The most uncharted phase for me – removing the 460 and C6 transmission from Vantruck and preparing the wiring, fuel system, and suspension for the IDI. Then shoving everything in! The Internet leads me to believe that this part isn’t difficult, just very heavy.
Taking care of loose ends and making sure things actually work well. I’d like to have a whole suite of diesel instrumentation that isn’t just round generic gauges bolted onto places. This is also where it will finally get dual exhaust stacks!
Speaking of the Inverted Johnson Fitting, there is a hidden agenda that will be thematic to this experiment, and if you know me, you know what it is: I’m going to purposefully buy the sketchiest Chinesium possible and see what happens. In exploring this realm, I got immensely curious if those $150 Chinese Choo-Choos are actually worth anything, and I’m eager to find out. Same for other scary cheap generic Chinese performance parts – the hell is it actually made of and will it Do The Thing?
As of this post, I’ve really only kind of gotten through #1. I anticipate being able to get to 2 and half of 3 (the “removing the 460” bit) by the time Motorama comes around. While I have a nominal goal of being able to van up to Motorama, this is not a standing requirement. Chances are it’ll be ongoing and I’ll keep picking at stuff as I figure out ways to improve it!
So in a way, consider this a new phase of the website. I’m sick of robots, drones are my work so I’m also sick of drones, and I have space now so no need to keep the projects small like scooters and go-karts. It’s time to embrace the ven.
Hey! What happened to Overhaul!?
Yeah, where I said “I’m only really through #1 in the list” I meant that Overhaul 3 and BattleBots 2021 really took up most of the year. I have all the build photos, videos, and documents per usual.
The thing is, I haven’t really been feeling the sport for a good few years at this point, because it’s not where I’d prefer it be to keep my interest. BattleBots as of late has felt more like just a money drain (Wow, I didn’t know I could keep up with a 5-figure-per-year hobby) for relatively little return; just more of the same patterns I see at other events, with Bigger Money.
Yes, spinners are (have been) ruining the sport and burning people out. There is no changing this view, and I’m not sorry. I have plenty of ways to explode my money, trust me. This is just my way of saying the vans are a better return on my investment in terms of energy spent versus amusement, instead of spinning a piece of steel real quick.
So, Overhaul 3 exists, and we went to BattleBots 2021. I can say I was highly satisfied with the bot’s performance this time around, as a lot of the things I was out to rectify from OH2 were demonstrated in the box. There will be interesting merchandise as well.
Can’t really say I want more than that! The build reports will happen when they happen. This is more interesting to me for the time being.
Anyhow, we move onto…
Surrogate Airframe Testing: Meet Simpvan
Ever since I regretted everything about selling Murdervan last September, I’ve been regularly skulking the Facenet for another IDI van. This is a pretty narrow search box; while the IDI series made it all the way to 1994, technically spanning a Ford van body generation, I focused on the 3rd generation which Vantruck is, since I wanted (without further expertise and insider knowledge) as 1:1 representation as I could get.
As I’ve said before, these things command a premium over the gas engine models because of their reputation with apocalypse people. So I passed on several nice or clean ones ($$$$) and watched a few others escape due to distance; I wasn’t hurting THAT much to have more yard occupancy rates. The right combination of “Not running and don’t want to deal with it” and “Eh, close enough” had to come up.
One day in March, it did:
Okay, not only is the price great, but even more importantly it was only 20 minutes away. I mean, that’s literally worth a few hundred dollars in trailer rental and fuel anyway, not to mention spending 10 odd hours on the road each way!
Simpvan was the first meme mission I took Spool Bus on. So I’ve officially hit Tier 3 Memery here: A meme, retrieved by one of my memes, is now retrieving a meme itself.
Why is it named Simpvan? Well, the seller is an attractive tattooed young lady with a penchant for making embalmed animal part art and knife juggling. Consider this a one-time upfront payment in lieu of the Onlyfans subscription. Also, something about a down payment for a more useful car (The hell do I know about that?)
I made a critical mistake when trying to pull this thing back into the yard: I slowed down.
This was still the end of winter, really, and I hadn’t done a good job (read: a job at all) keeping the side year clear of leaves. With Spool Bus being light in the back and two wheel drive, it got stuck slipping on leaves pretty much instantly.
We dismantled the train, splattering vans everywhere on the street, and got my friend with his 4×4 Silverado to do the yard orbital insertion.
And here it is, resting wherever we glided it to.
Simpvan is a 1985 model E250 short body with the 6.9 liter IDI (the 7.3 liter occurred in 1988). It’s surprisingly low miles, and the interior is actually in great shape and every fitting and knob/button work, except the front blower motor which is worn out.
And…… there wasn’t anything wrong with it.
In my posts about Murdervan and Spool Bus, I noted that the IDI family of engines has a few “Marble sitting on top of a mountain” variables where if you let maintenance slide, they become a lot to handle quickly. Ventilating fuel lines requiring the mechanical fuel pump to re-prime the injection lines every time it sits for a while. Corroded or broken battery cables and lugs which reduce the very fast cranking speed needed to build compression. Dysfunctional glow plugs or controllers.
Simpvan had a mild combo of all three of those – the fuel lines aerating was probably the worst, as it would actually dribble diesel from the injector fittings. The battery terminals were “bodged” to say the least, so they couldn’t have been too healthy.
I had to remedy those battery terminals by cleaning them up and re-squashing them to make good contact again. I also inspected the bottom of the engine block where the grounding lugs attach, and cleaned those up. After that, it was just like 3 minutes of accumulated cranking to prime the fuel lines, and off we went.
And that was it, really. This was mid to late March now, and we’ve just gotten word that BattleBots was prepping the 2021 season. So I gradually transitioned off to getting Overhaul’s affairs in order. I had 1.0 robots and some spares, but the goal was to generate 2.0 full working bots.
Simpvan, meanwhile, existed as A Thing (Hurray, Spool Bus has a friend in the pile corner again!). What I did do was use it as an excuse to practice some of the surgeries that I would have to do.
I used “Well I should get straight front panels for it” as an excuse to dive into releasing the radiator center support which would need to be removed to extract the engine. It also let me see where things like the A/C condenser connect, as well as some year variations I’ll need to account for. I found out where all the hidden screws are for removing the fender and other parts (Hint: Some lie under the windshield wiper cowling and up behind the rolled wheelwell edge… Good luck and pray they’re not rusted shut)
The replacement panels came from a 1990 van that I found in one of the local you-yoink-it yards. I keep an occasional eye on these listings since I can always use more interior parts or body trim pieces specific to the ven. I of course also practiced more surgery on the junkyard van, like physically removing the A/C condenser, lines, and radiator, as shown here.
I’ve never taken those front quarter panels off Vantruck before, and in doing so for Simpvan, I found a few places that might need attention Vantruck when I get to it. Namely, the drains for the windshield cowling area were completely blocked, and accumulated dirt and leaves was starting to rust out the area. I suspect Vantruck has the same issue.
There was one shortcoming with Simpvan that made me keep my finger on the Craigslist button after BattleBots was over. It still has the C6 transmission, the same one as Vantruck. While this is fine and dandy (and desirable to some people, as the C6 is all mechanical and also legendary for being serviceable with a rock), I was interested in holding out for a later model year and the E4OD transmission, which would let me ditch the Gear Vendors appendage. The E4OD also has a locking torque converter and a better overdrive ratio than a Gear Vendors box. The 1988-1991 model years would also have the 7.3 liter variant, which has its own yearly improvements as well
Adding to the Household: Meet Snekvan
Soooooooo we know how this story ends.
After BattleBots, I got right back to my prowling, and found a perfect vandidate a few hours away in Kentucky.
Hard to argue againt a $700 starting price, explicit statements about IT DOESN’T RUN, and looking like it’s been sitting in the open forever. I jumped on this almost immediately after confirming that it does have the E4OD with the seller.
Off we go! I picked Vantruck for this 800-mile combined mission, despite [Angry 460 sounds] because I don’t think I can deal with Spool Bus for that long, given that none of the interior fittings are working. Besides, it’ll be a good (maybe?) final mission and sendoff for the 460. Was I going to make it back over the Cumberland Mountains pulling another 5500 pounds behind me? Who knows!?
10/10, item as described. This thing was propped up on jackstands when I got there, and the seller was trying to replace the front right wheel (flat, and dismounted from the wheel bead seat) with the spare tire (not any better, honestly, but at least it was round).
This thing was absolutely roached. Allegedly prior to this guy stashing it, it was a farm truck for a horse ranch for a while before being stashed under a tree for many years.
And it shows! The interior was absolutely covered in dirt, hay particles, junk, and proooobably manure. The underside was entirely caked in an unknown filth made of diesel, motor oil, and probably more manure.
At least that meant the frame wasn’t rusty.
If I thought nothing in Spool Bus worked, even less things worked in this. The ignition switch was broken off inside. Random wires ended in the middle of the cab. The bodies of dozens, if not hundreds of wasps filled the dashboard crevices.
It was perfect.
And, it kept spawning snake skins as I inspected everywhere. These were not small snake skins, there were several of them, and I kept wondering if I was going to imminently find the snake.
In celebration of this, Snekvan was named.
I ended up having to help out the seller beat and lever the front passenger side wheel off. The lug nuts were seized, and the wheel itself was “attached” to the brake rotor hub and the force of dropping the van onto the ground was needed to break that free – pull the jackstands, lift the jack all the way up, crank the steering wheel all the way to the left, twist the handle, and run.
We spent a good hour and a half on this, fending off live and very angry wasps, which were living in the fenders, using brake cleaner spray. For my troubles, I got $100 off the list price. Fair enough for some menial shop labor by two stooges!
The loadout was relatively painless, as the apartment driveway sloped downwards. It was largely a push and gravity load, and I used Vantruck’s everyday-carry pull-along tool to seat it onto the tow dolly.
I slowly tugged it to the nearest gas station where I also whipped out the EDC chains and chain binders. No way I was going to trust the tired and frayed looking wheel straps with this “1999 Mazda Miata”.
Furthermore, I bought and “installed” a can of Slime for each rear tire. They were fairly extensively dry-rotted, so I figure I’d buy myself a little bit of insurance in case they started letting go. Would tire goo have done anything against a tread separation or sidewall explosion? Probably not, but it made me feel better.
Over 7 hours of taking it easy later, we’re back in the zone. Besides constantly sounding like it was about to explode, the trip was uneventful. There were numerous areas where I went “Hmm, this is going to hurt coming back the other way”. Hurt it did, but I suppose a Ford 460 will run like garbage forever, if any of the plumber and landscaping vans around here are to be believed by their sound.
The next morning, I finally got to take a detailed look at what the hell I just bought again.
Yeah, this thing is completely bodged in every way. I have no idea what anyone was trying to accomplish, but I had to tape off numerous bare connections in the battery trays and wrap up disintegrating insulation. It looked like at one point it had a large power inverter in the back, because an 8 gauge 3-conductor power cord ran all the way from this driver’s side battery bay along the frame rail. That was no more, though, along with seemingly a lot of the other wiring. No headlights at all, no running lights, no horn, wipers, or much else.
I spent most of the day doing “The usual tricks” to fire it up, but the wiring was too far gone and it was barely responding to ether. At the end of the day, with the aid of some friends, we shoved it up the driveway using Spool Bus as a pusher and my Random Yard Tire strapped to its front as a force transmission medium. This one was going to need some more extensive surgery and digging over the course of the week.
I ended up completely bypassing and replacing the existing heavy-gauge battery cables. Because I didn’t have a single run of 2/0 cable, I doubled up some of this old 2 AWG audio cable I had. Good enough for now, and better smaller cable with clean connections than a large cable with burnt out ends. I have a little collection of battery terminals, so I rigged some new ones on also.
There was some… unique attachment methods involved. To clean up the existing starter cable end, I separated the strands and hacked at it with a stainless steel wire brush. That was actually able to scrape off most of the oxidation, leaving me some shiny copper to clamp down.
Because the ignition switch was destroyed, I rigged up a start button. The blue switch interlocks the injection pump fuel shutoff solenoid, which has to be powered to allow fuel to charge the high pressure side.
After much ado, it seems like the problem was just bad wiring and “Everything inside the engine is covered in goo”. Eventually, I got it to light off and behave.
That start on video was one of the last ones the starter it came with managed to pull off. It burnt out the day after as I was re-priming the fuel system trying to boot it up again!
Once I got it running and warmed up, I could start checking out other systems. Power steering? Leaks from every orifice, seal, hose connection, and fitting. Vacuum pump? Maybe. Brakes? What are brakes?
I did make sure that the transmission had all 4 gears and that it shifted quickly with no slippage. So it seems like the transmission is in decent, rebuildable shape, which was a positive.
What was a problem though was the cooling system. There was a bunch of congealed oil goop in the radiator, in the overflow tank, and everywhere. This thing has clearly run (and sat) a long time with a leaking oil cooler:
The IDI oil cooler is this pipe bomb looking thing on the drive’s side under the exhaust manifold. It’s more a of a time bomb, though – it’s just two header blocks shoved onto a tube bundle with 2 O-rings to keep your high-pressure oil from mixing with low-pressure coolant. Guess what wins as soon as the O-rings age and crack?
The manifestation of this is oil appearing in the coolant when you pull the radiator cap, but with no other accompanying signs of head gasket failure. Coolant doesn’t appear in the oil since that circuit operates at a lower pressure.
And for Snekvan, this appears to have been happening for years. I’ve never dove into this repair before since Simpvan and Spool Bus are not affected…. yet. But now’s the chance to go on an oily fun adventure.
Next up on Operation: IDIocracy, I’ll basically be following Nick Pisca’s directions on doing this service as a few choice components arrive.