Starting from now, I’m going to post mini-pics in 512 pixel-wide preview mode and then the linked pictures will be at 75% camera resolution. I realized that thumbnails suck, and a 512px preview didn’t do much for a 1024 pixel picture.
Anyways, the box of aluminum puzzle pieces turned into…

One of the steering arms for the 4-wheeler. The wheelmotor pod will sit on the end, and will be able to swing about 200 degrees or so. The steering motor mounts in the circular cutout, and there will be a reduction geartrain running through the arm itself (the Lexan plate is a placeholder, but may actually be used). The whole thing mounts to the chassis through the flat plates on the left.

Mating holes drilled and tapped. I took this one, and both regret it and am glad I did it. Some of the holes didn’t quite line up, and there were enough awkward angles that a drill press couldn’t be used. So it was hand drill, clamps, and alot of patience. The screws are temporary and will be replaced with hardcøre cap screws later on.
So now that I’m twice as buff because of all the hand-tapping, I should do the rest… hey, it’s Spring Break, after all. Gotta look good for the ladies.
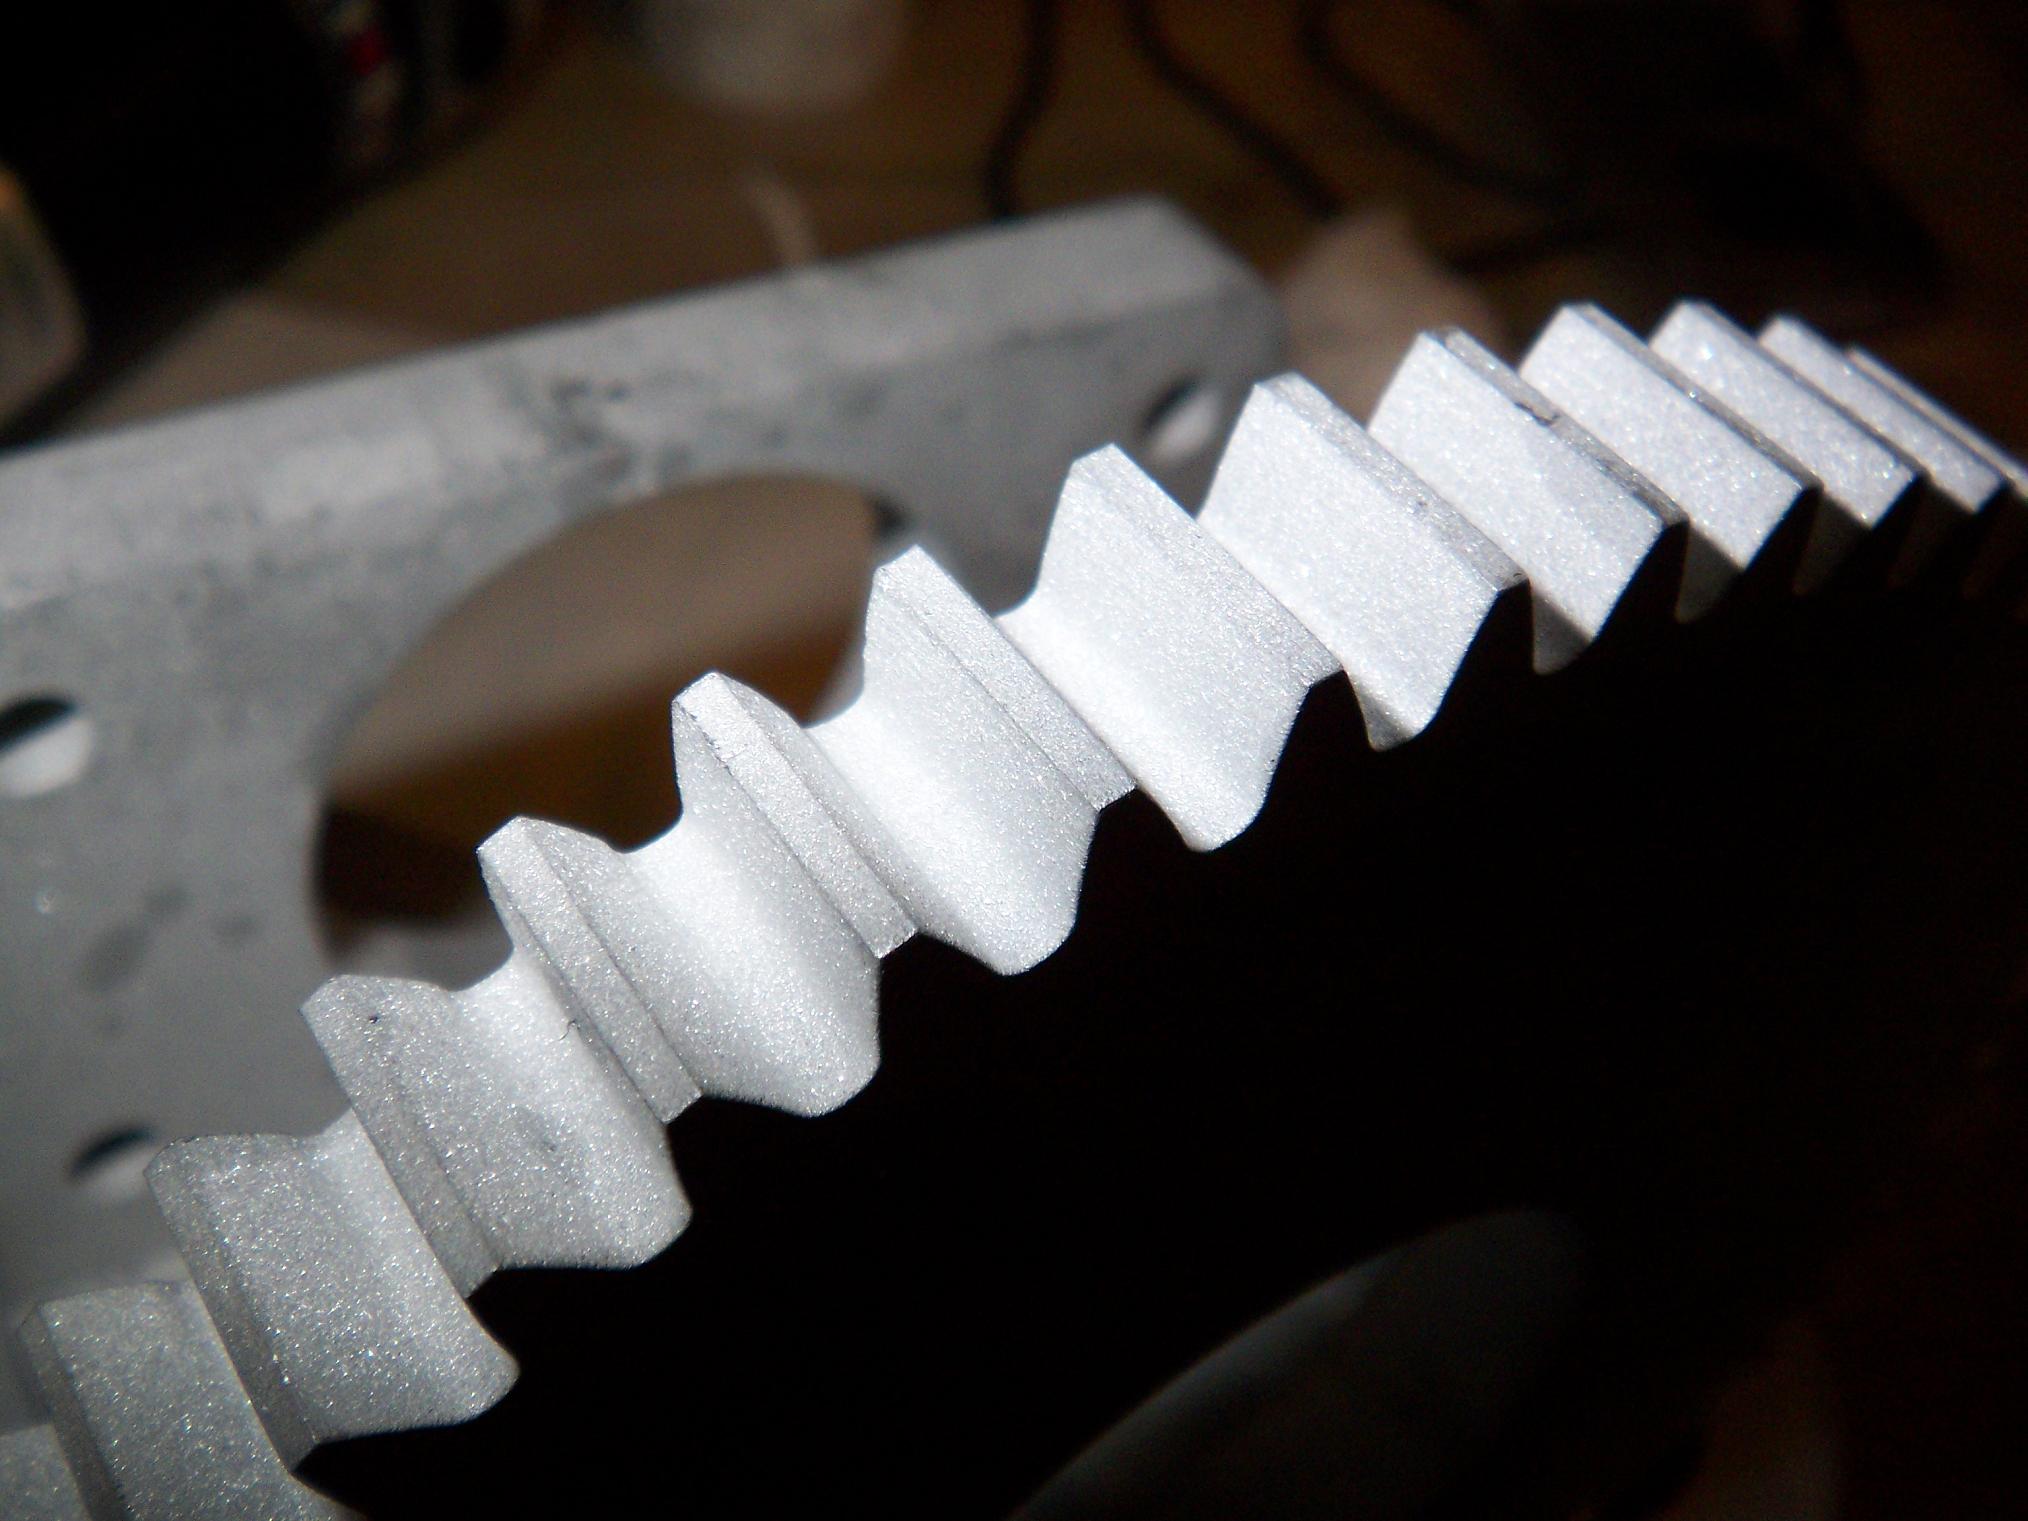
Here’s a closeup of the steering gear. This is the waterjet on a good day (and on slow, ultra-fine finish mode). Even without a tilting head, it does great on 1/2″ aluminum.
Update: In fact, I like it SO much that I made part of it into another rotating site banner image. Hit refresh enough and you might get to see it.
And now for an intermission. After the great threading ordeal was over, I decided to head over to MITERS with my 4″ steel pipe and try to turn it into a 3.25″ steel pipe. I was a bit iffy about shoving such a large piece of stock onto the lathe, and tried a few ways. It ended up turning (teehee) out rather well.

First pass. Lots of chatter and earsplitting noise, due to two factors. One, I’m using the wrong bit for the job and the tip is far too angled. This problem was overcome by rotating the bit such that the left face was flush against the end of the pipe, which closer approximates how you’re supposed to do it. This solved the chatter issues.
However, the lathe has only 3 speeds: slow, medium, and fast. And slow is not slow enough to turn a 4″ steel pipe (surface speed-wise), so I was actually cutting almost twice as fast as I was supposed to. But it’s a carbide bit, which is supposed to allow a ~100% increase in machining speed…. so maybe it balances out.
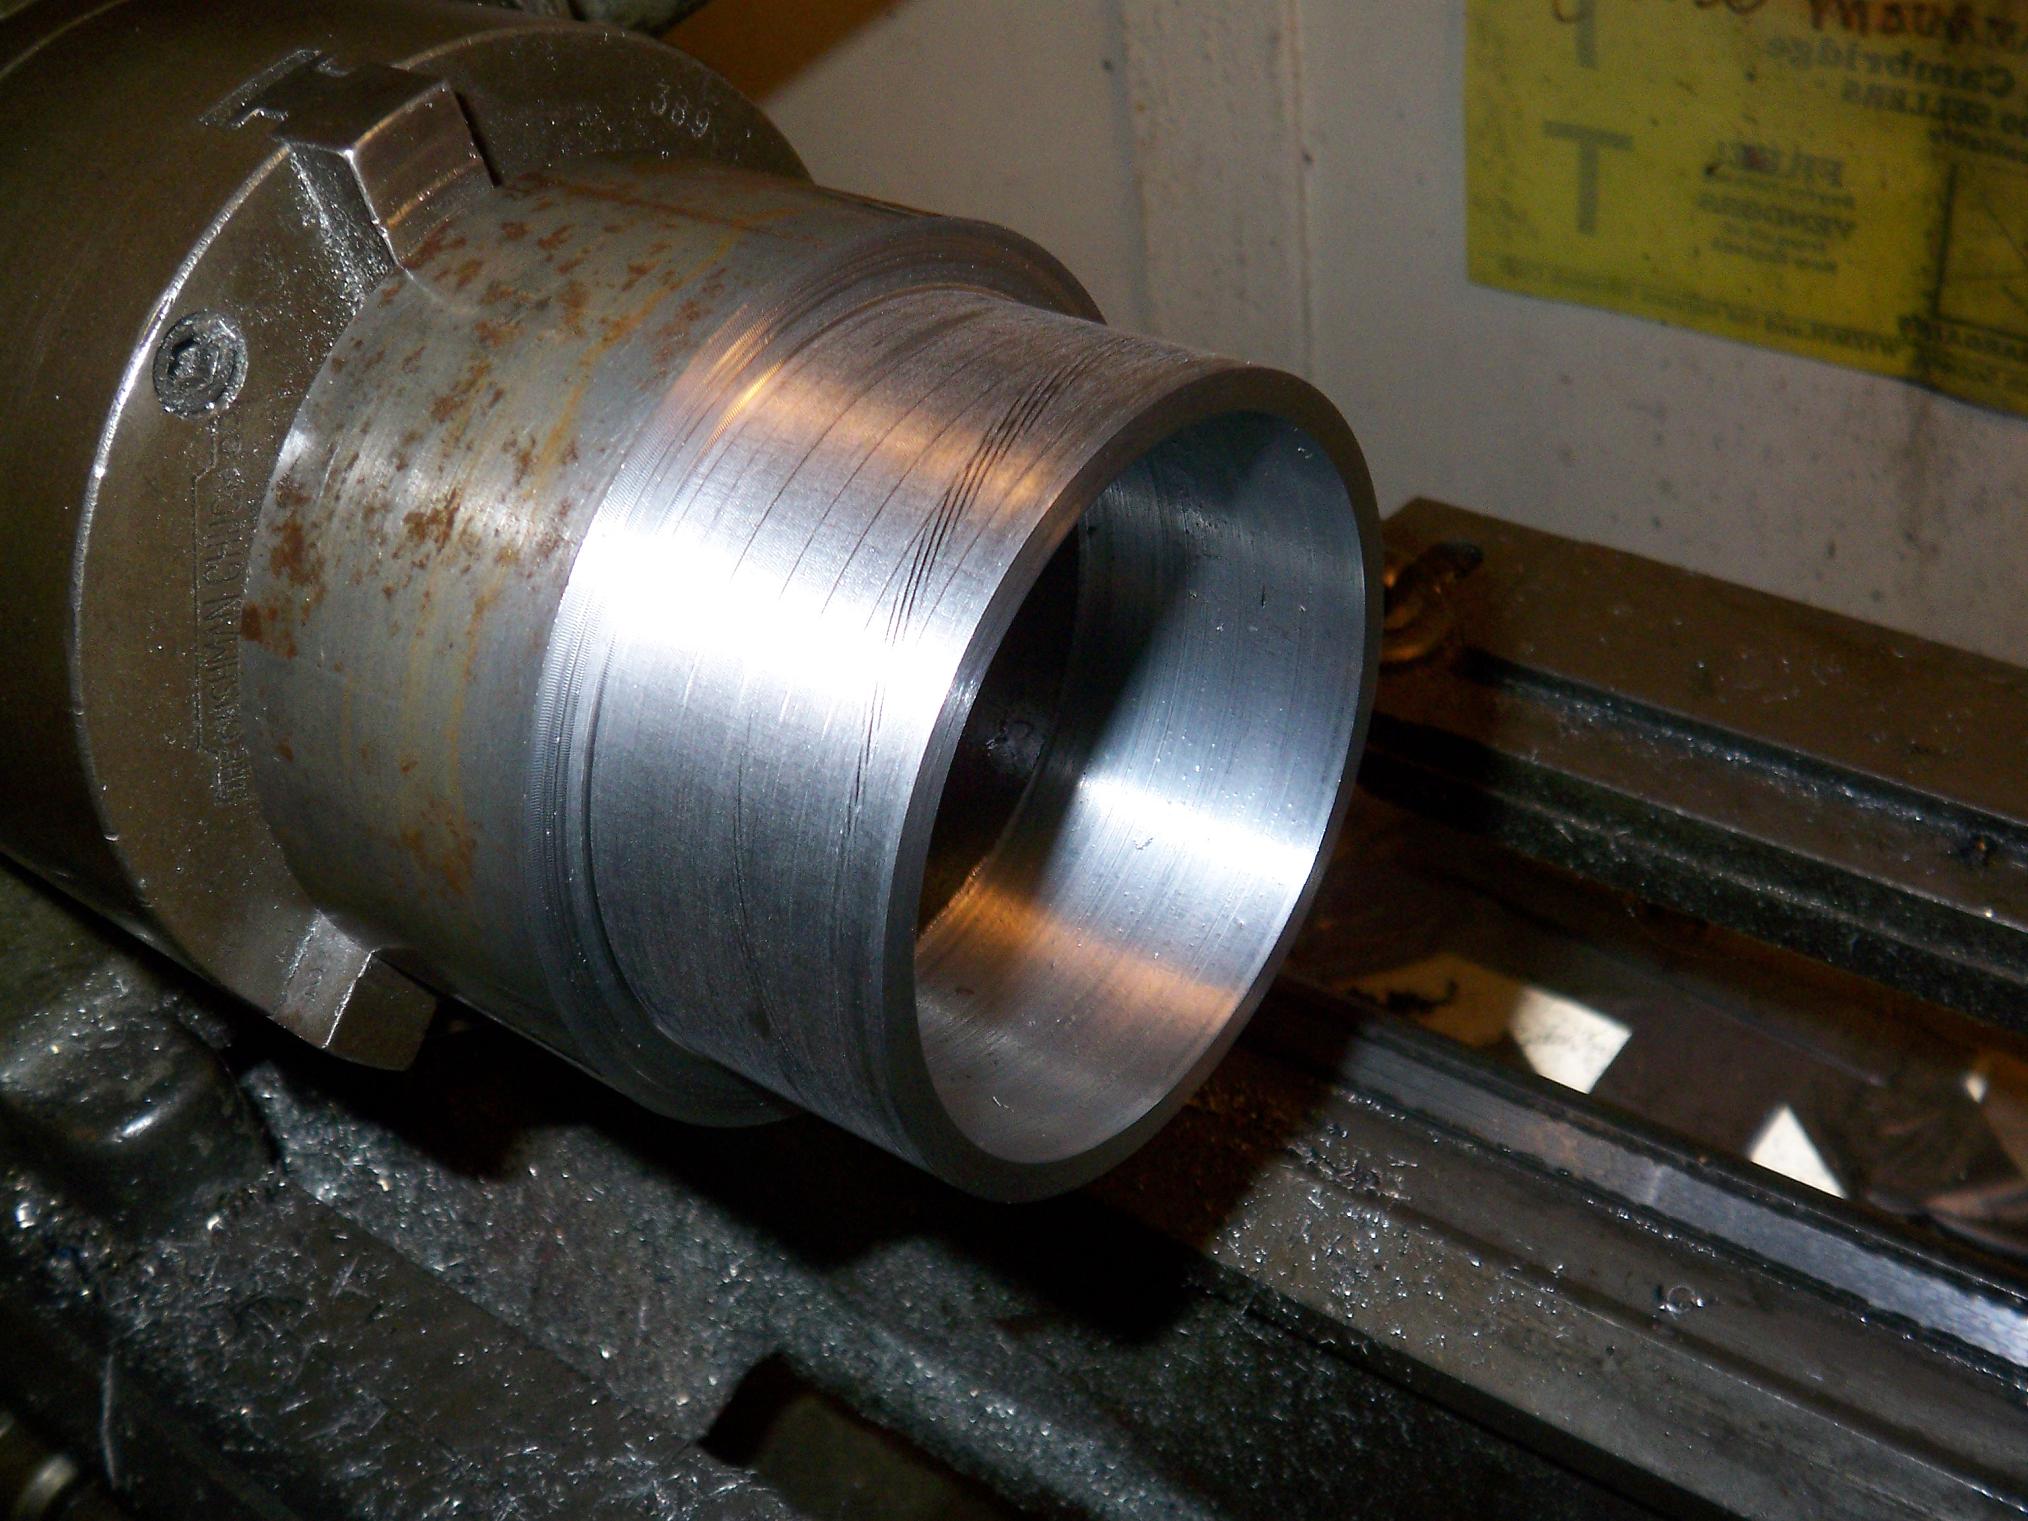
Almost there. There’s still a bit of chatter, but most of it was overcome by a slow power feed, light cuts, and plenty of cutting fluid automatic transmission fluid mixed with differential gear oil. It took around 20 passes in all to reduce the diameter from 4″ to 3.245″. I probably could have done it in less, but wanted to tempt neither fate nor the robot gods.
During this time, I generated so much smoke from the cutting that when I finally turned around to look, the room was hazy. Naturally, not wanting to set off any alarms, I opened all the doors and windows as quickly as possible, and waited for the cloud to dissipate.

So, now that 10 years have been taken off my lifespan, the One Ring is done. Dimensionally, everything is within .003, which is freakin’ good enough. The ID, however, is a bit too large by about a quarter millimetre 0.01″. Which is actually beneficial, since that 0.2mm air gap was a really, really tight goal to hold anyway. I’d rather have some more space.
Now, onto the artifacts. For some reason, I find lathe-curl dynamics rather amusing, and have been in a contest with myself to generate the longest continuous lathe curl. My record with a 3″ aluminum round has so far been 25 feet, enough to stretch across the MITERS room and back a bit. The steel didn’t want to draw out as much, but was still cool to look at.
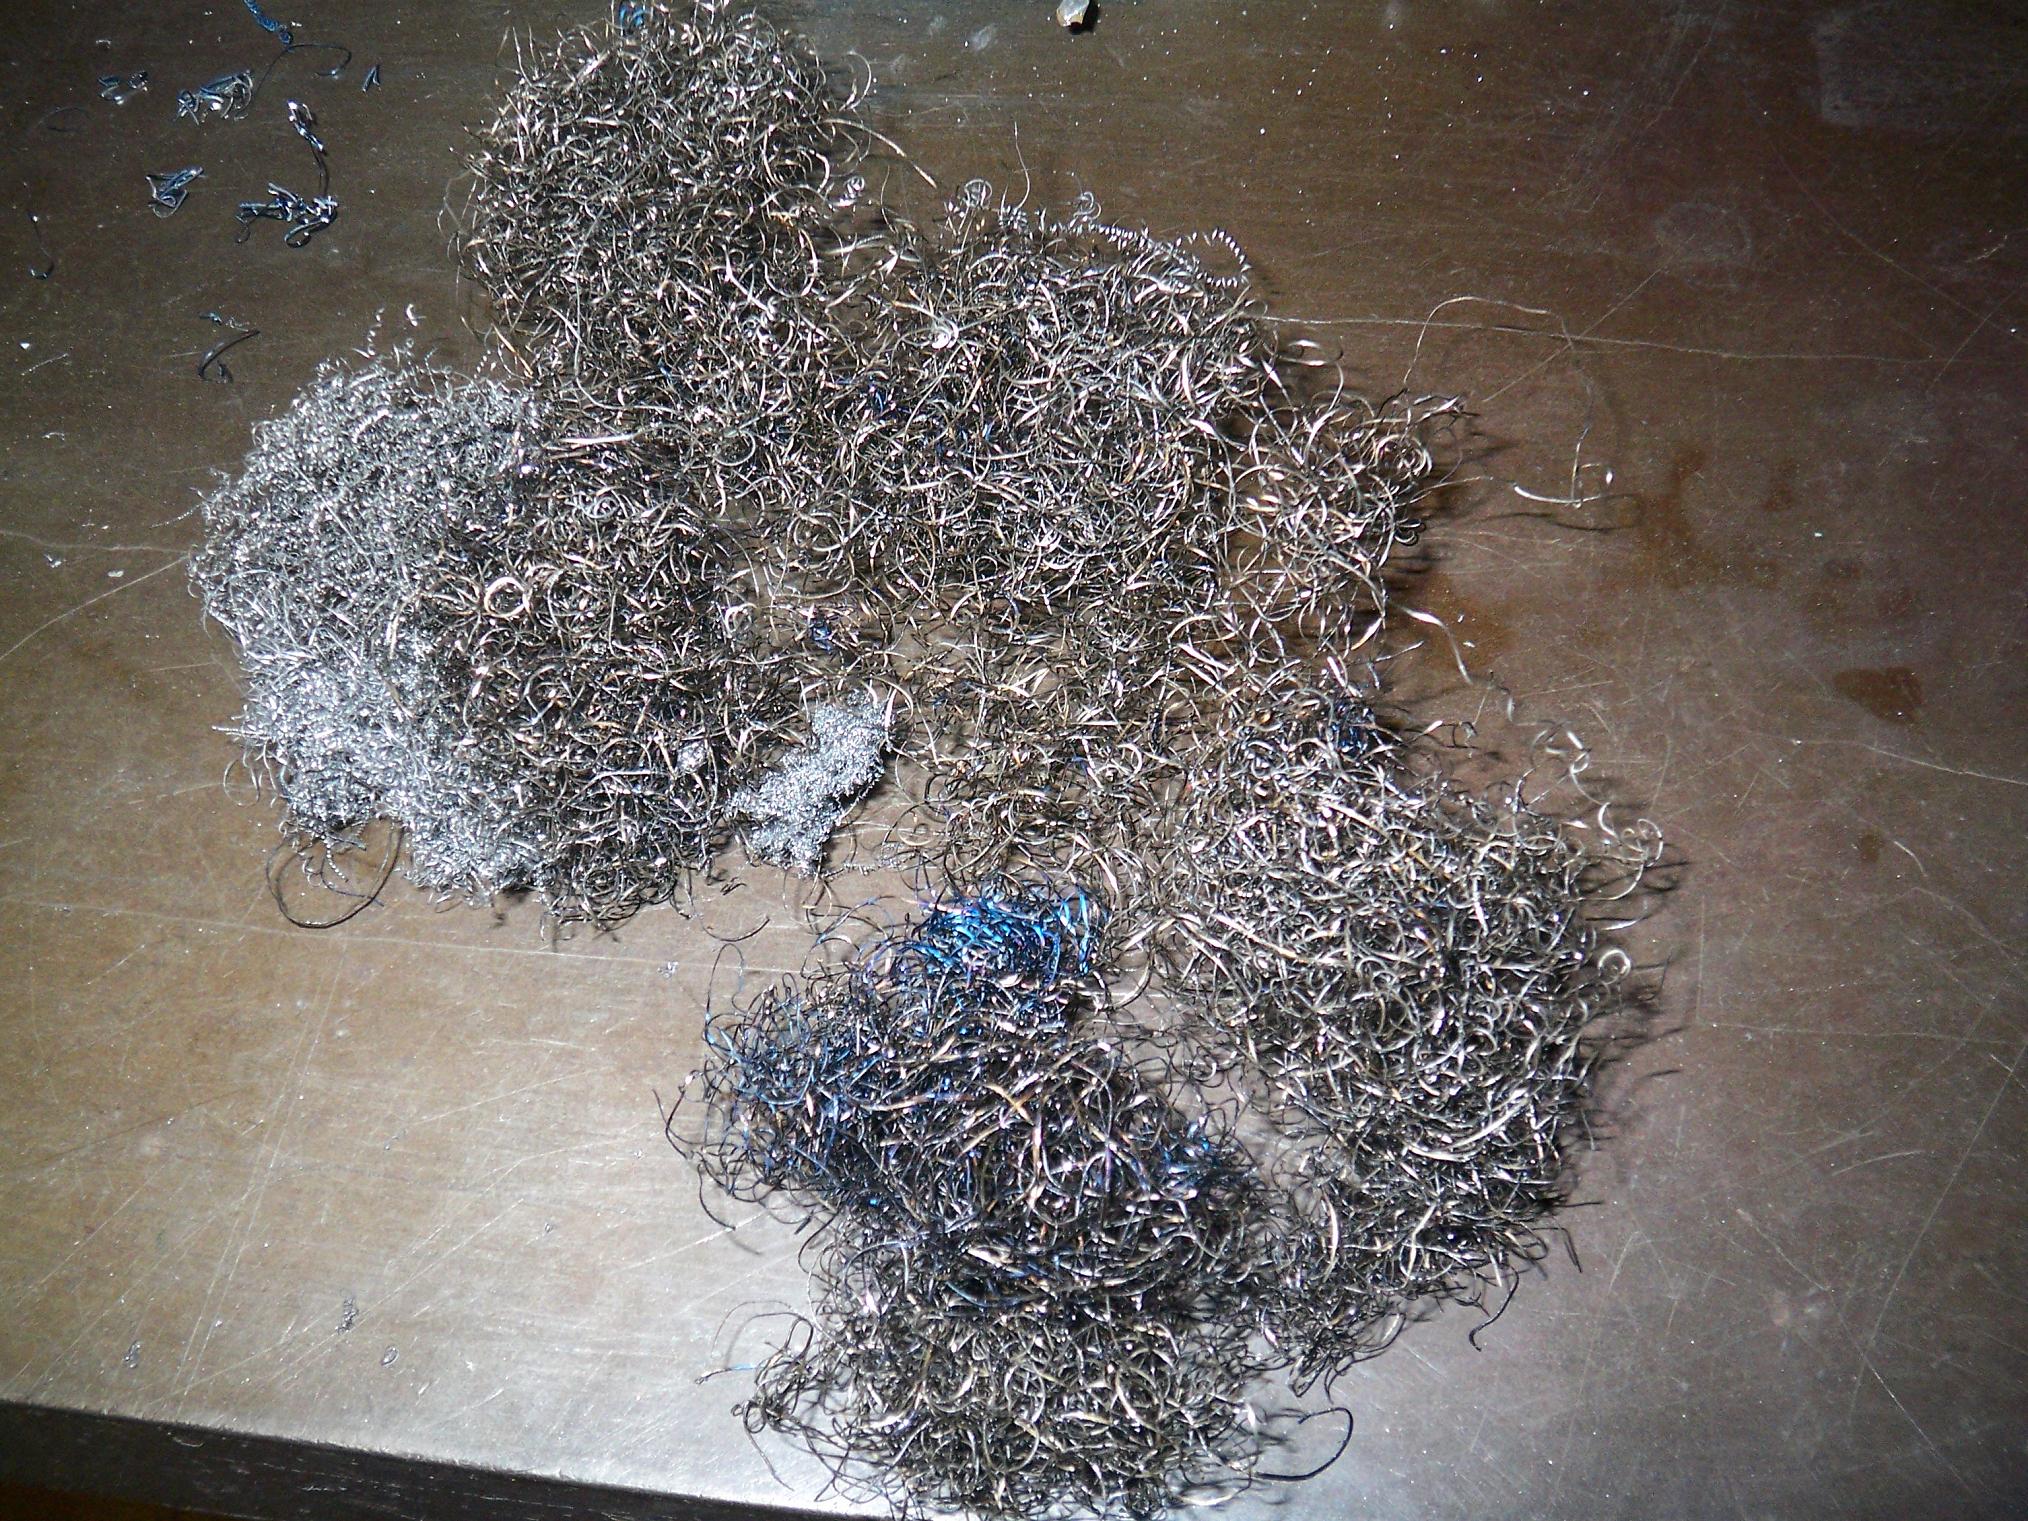
These were from boring out the ID of the pipe with my not-boring-bar. They would clump together inside the pipe, bob around, then when I pulled the tool back out, would roll out and fall onto the ground. They were nicknamed lathe hairballs by the other MITERers.
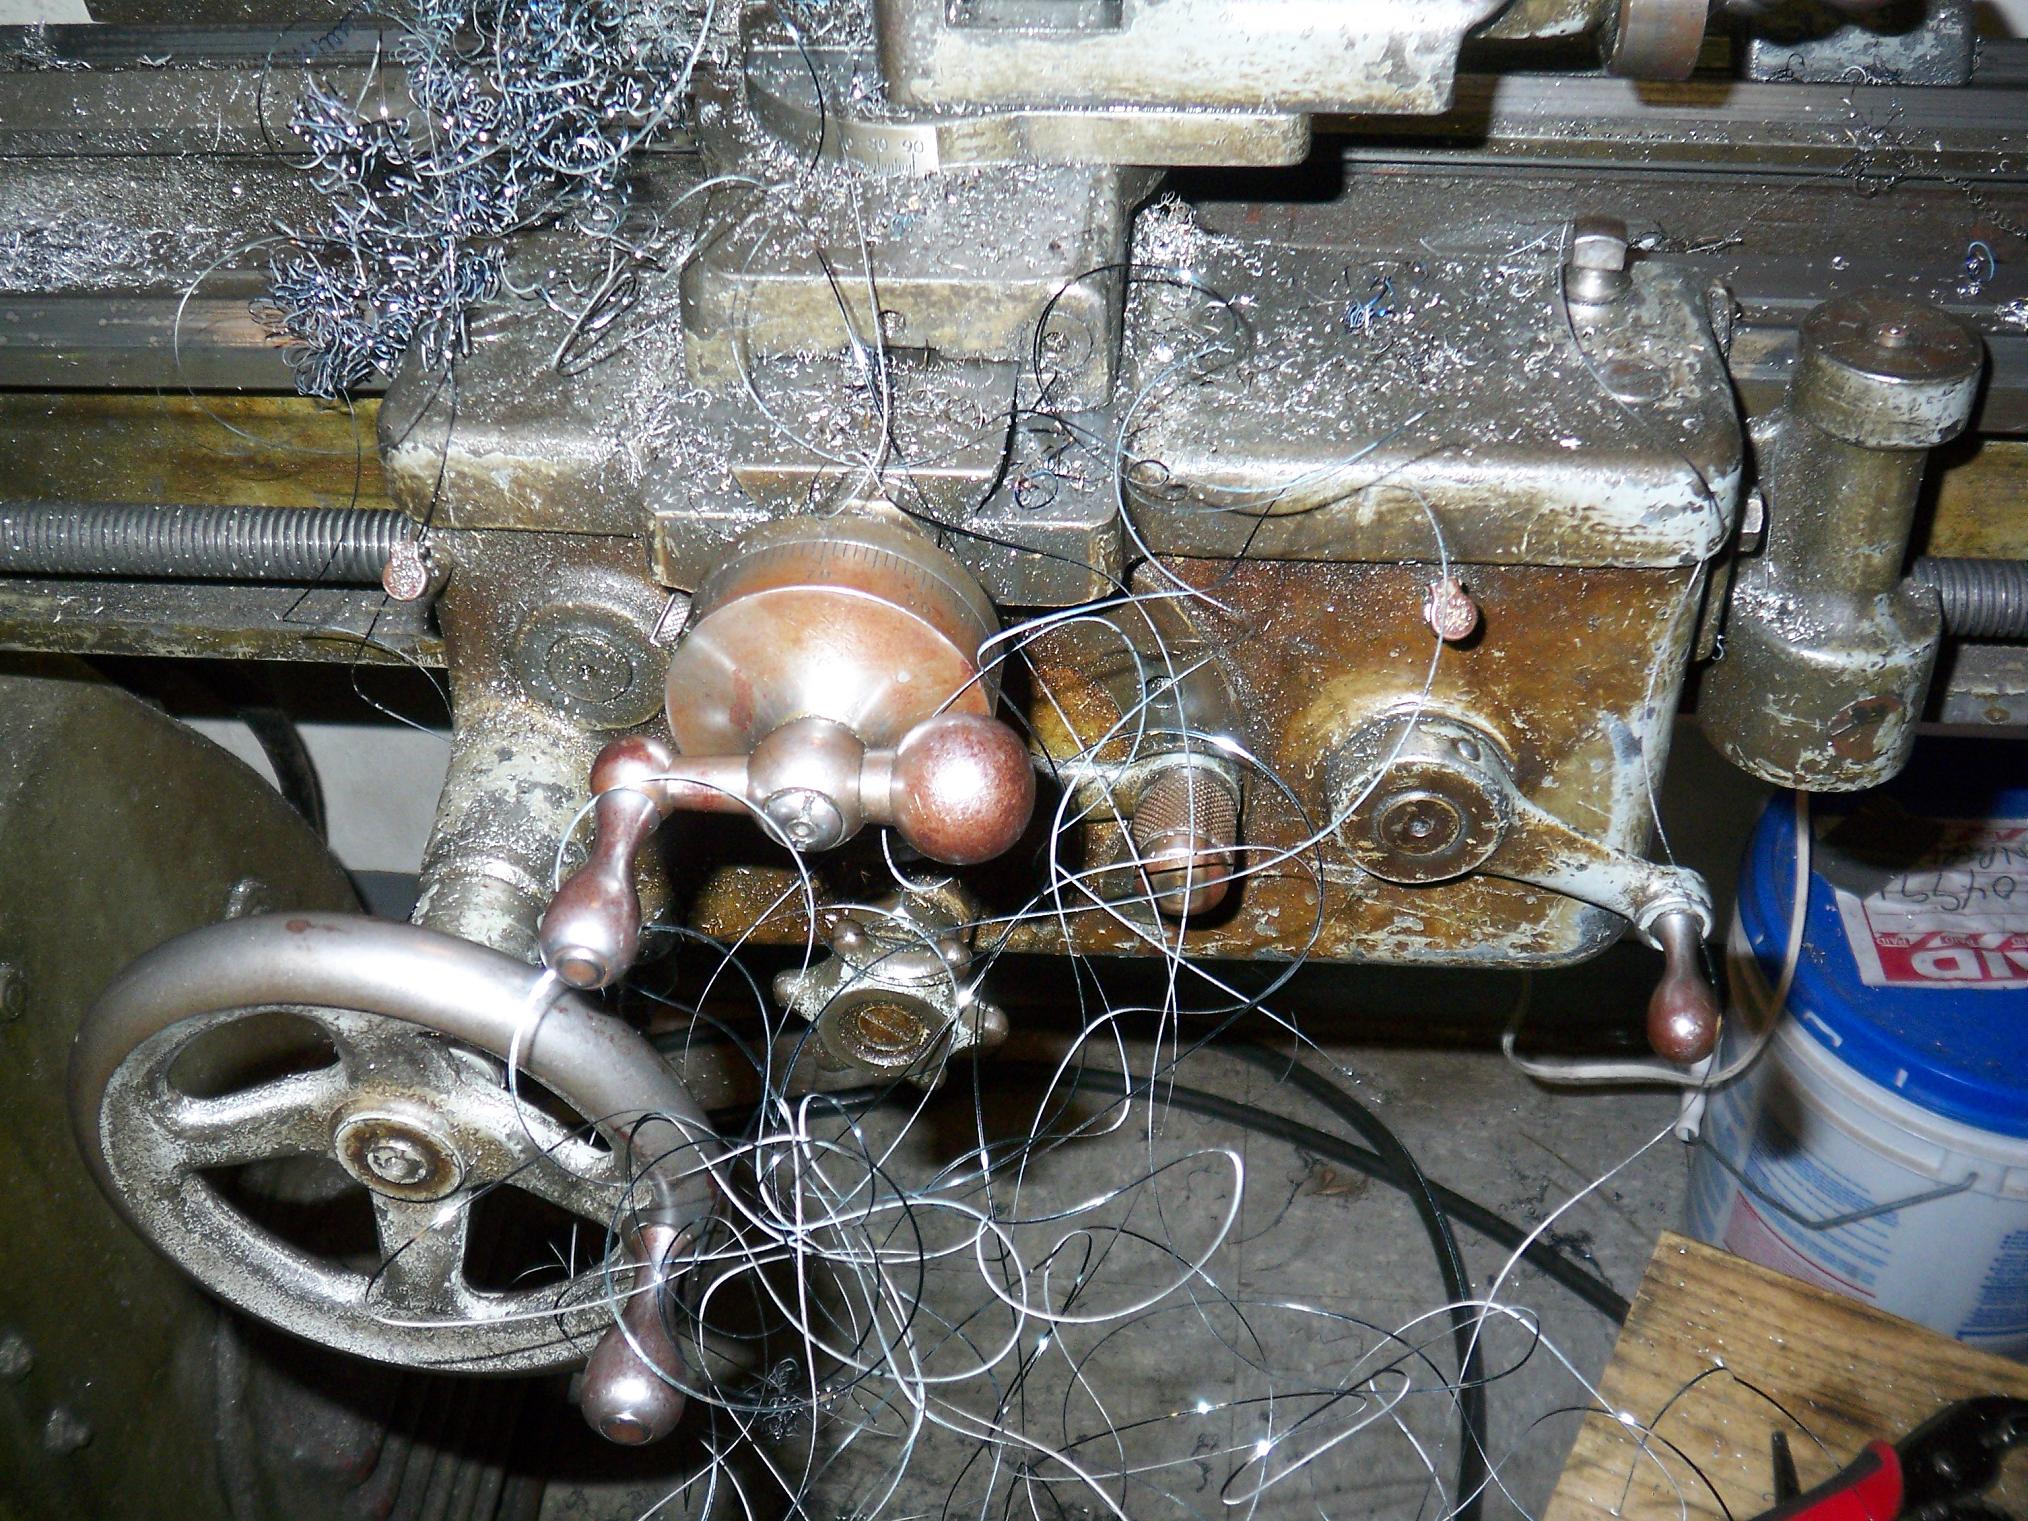
Here’s one of the ginorm-o-curls I’ve been looking for. Somehow, they find an island of stability in the clump that gathers by the bit, and then extend straight out and form very wide curves, which then proceed to get tangled in everything. I had to stop this cut because I couldn’t reach the levers any more. Without pushing aside razor-sharp, oil-covered smoking steel slivers, anyway, which doesn’t turn me on at all.
And now I present… the Mass.

This is the conglomeration of all the curls from all the OD-reducing passes from the night. Each pass resulted in a big clump of curls, so I just kept piling them on…. and on…. and on some more. Average 12oz WD-40 can for scale.
It has an enthralling iridescence that the camera flash drowns out. There’s all shades of colors, from purple to blue to blue-silver to plain silver and dull gray, but blue is predominant. Part of the reason, I think, is the sudden cooling of extremely hot steel slivers by the oil I dunked the whole thing in. I effectively heat-treated the curls. A process like this is used industrially (and more carefully…) to make hardened steels.
The only fitting fate for such a clump is, of course, as decoration. It now sits on the tool shelf, monitoring all in the room.
So, tomorrow (today!) is Sunday. Will I rest on Easter Sunday? Nah, not even that’s enough to get me to stop building things. The ML guys will probably be off, but I’ll be working on the side plates, hopefully. Magnets are due to arrive by Monday or Tuesday along with my bearings.
Something better move by the end of the week, or I’m going to be pissed


