With family visiting and Media Lab partying for the past two weeks, there’s been a drop in bot productivity. But with new parts for Ãœberclocker arriving, it’s time to get back to Pop Quiz so I’m not switching between “big bot” and “little bot” mode. So here’s Pop Quiz updates from the past two weeks, as well as some miscellanea that’s been going on.

How do you carve a UHMW circle out of a square? Simple, a hole saw. I used a 1 3/8″ hole saw to make the internal hole, then drilled the perimeter screw holes, then finished it off with a 2″ hole saw on the outside.

Next came throwing the ring on the lathe and shaving the OD down to 1.75″. Not a critical dimension, so I took a bit of liberty with proper machining procedure.
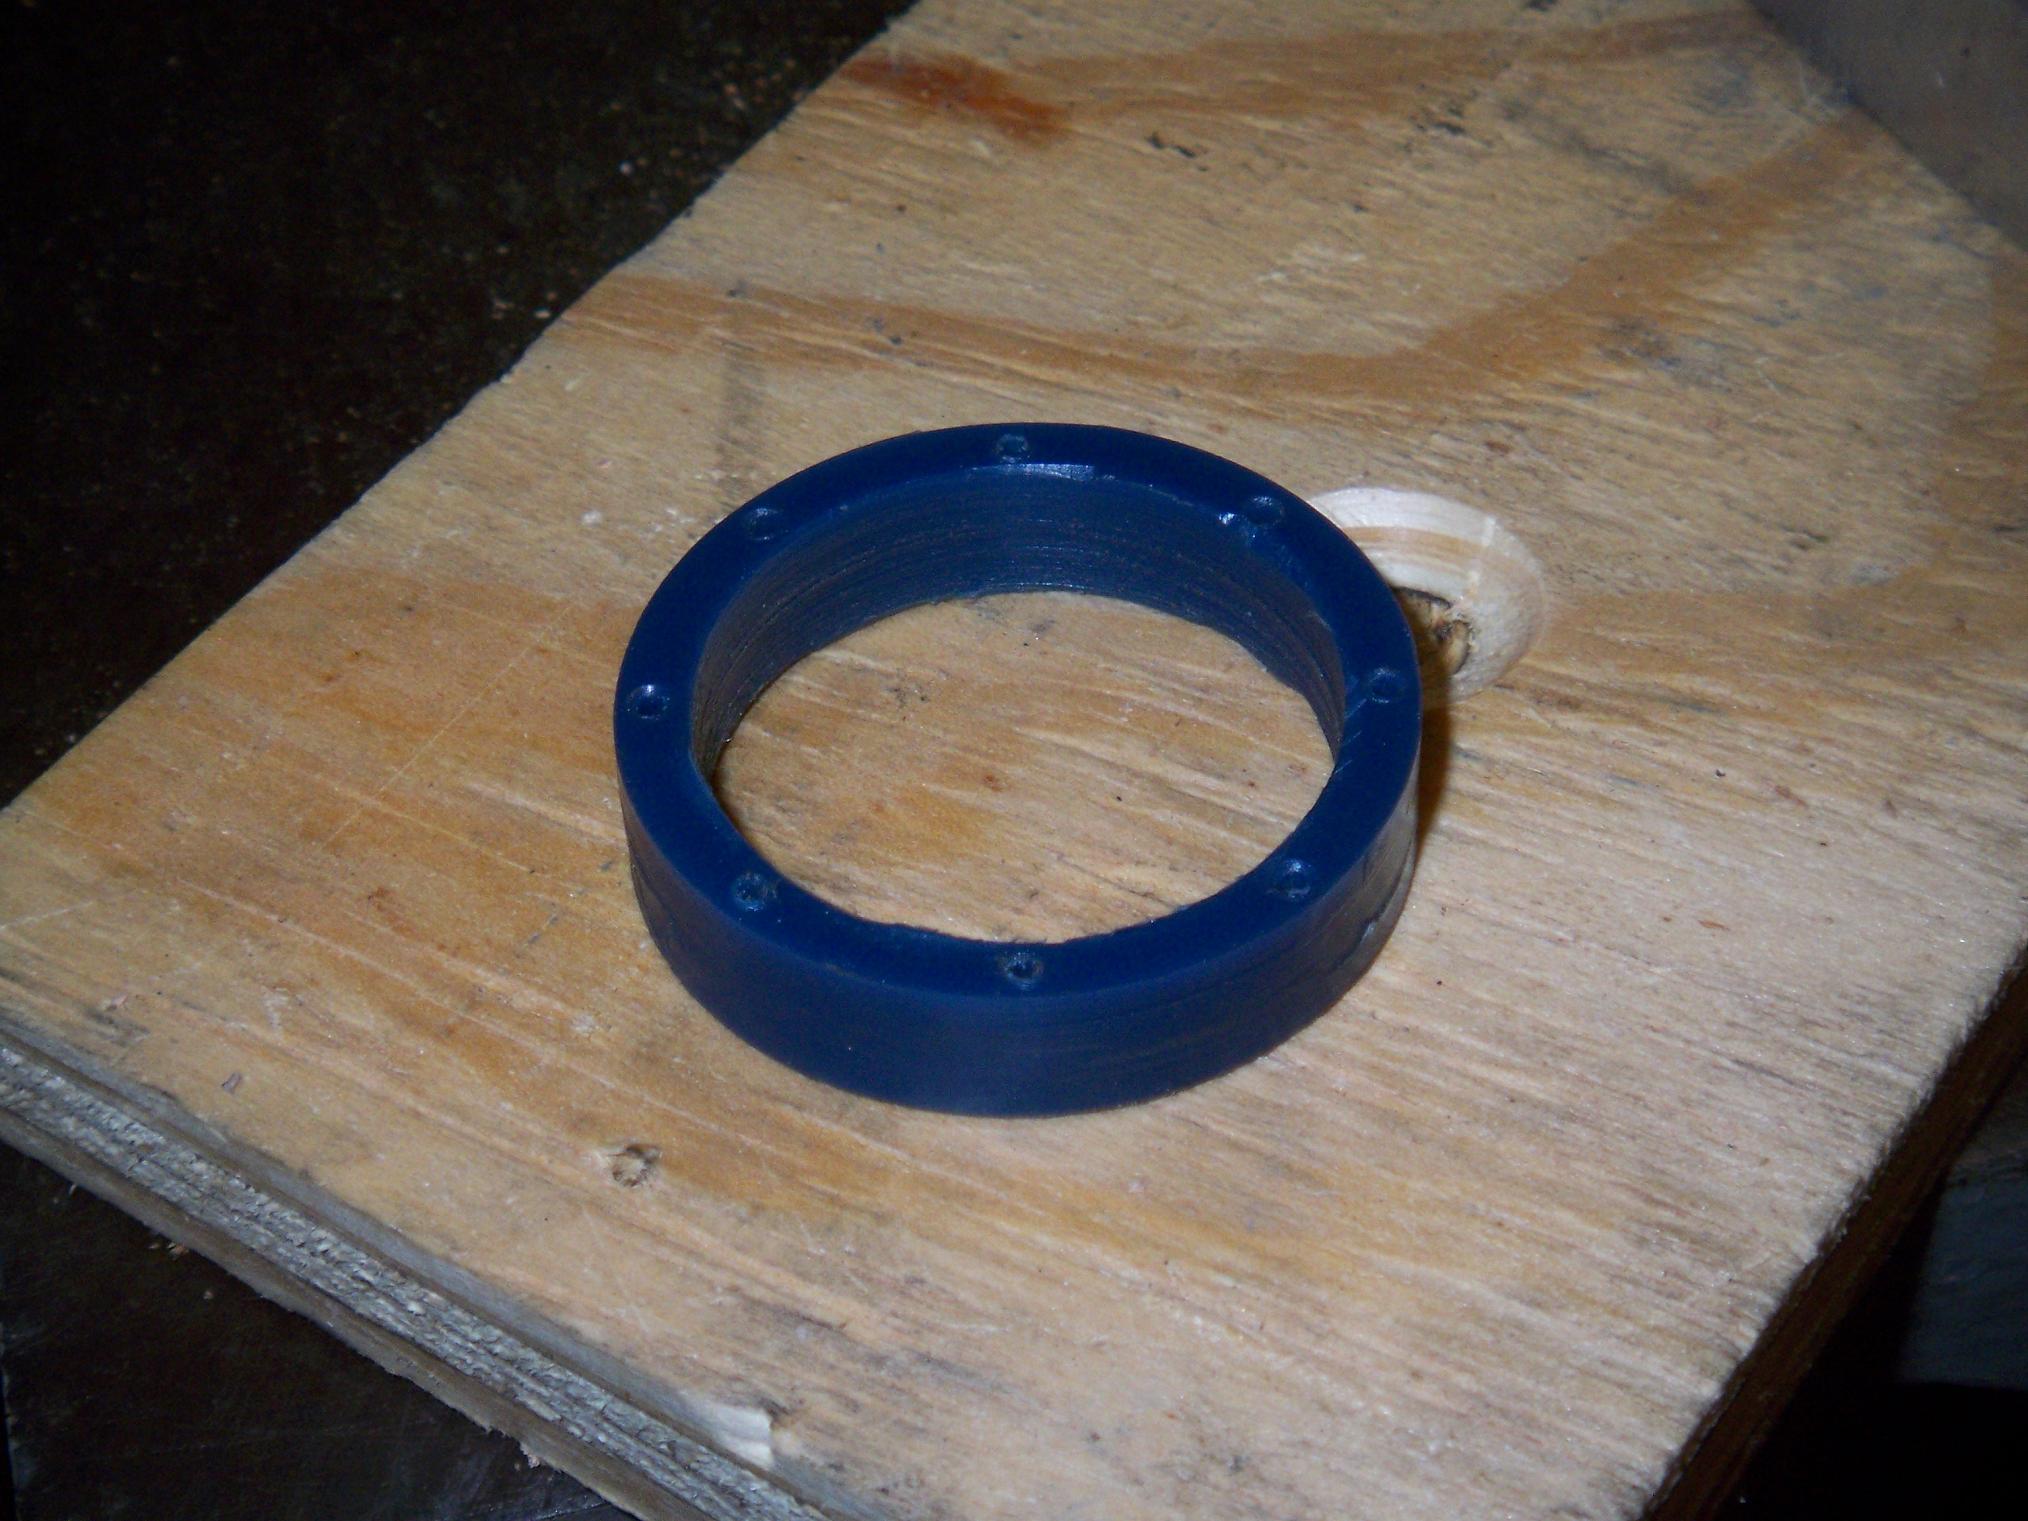
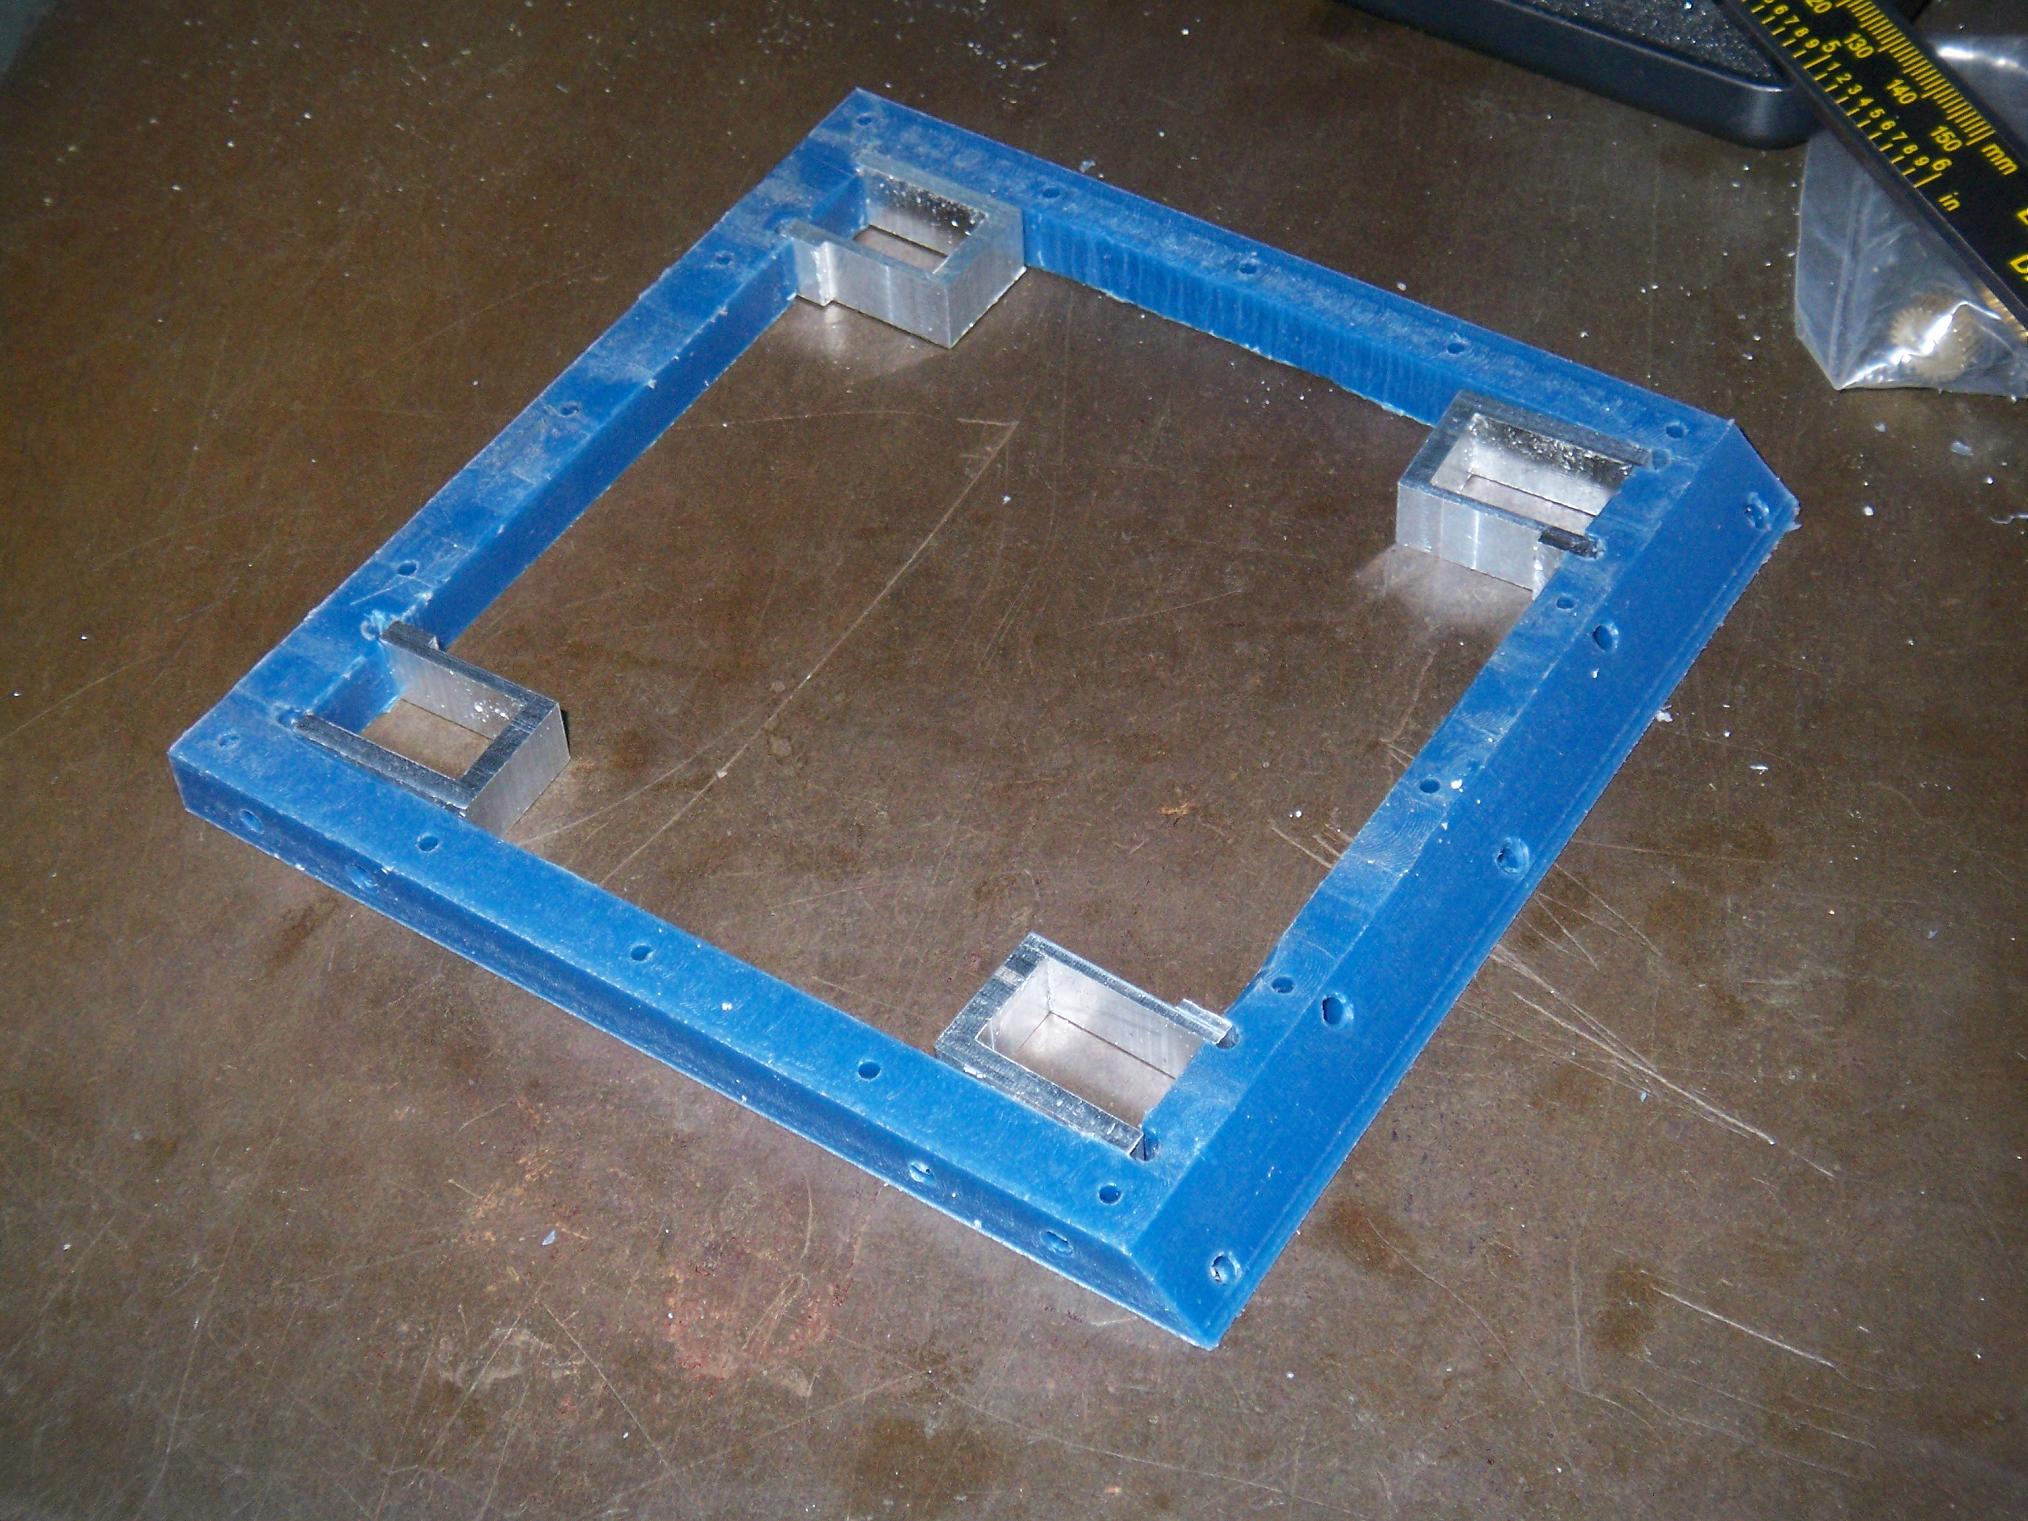
The completed motor ring thing. The screw holes are for #2-56 screws, four through the top and four through the bottom. This binds the motor to both the top and bottom plates, which is much better than the single-supported motors of Pop Quiz 1.

Next came the task of assembling the motor magnets. I decided again (for some reason) to use two half-magnets to make one magnet, which was problematic for installation. Of course, I neglected to make any sort of spacer….
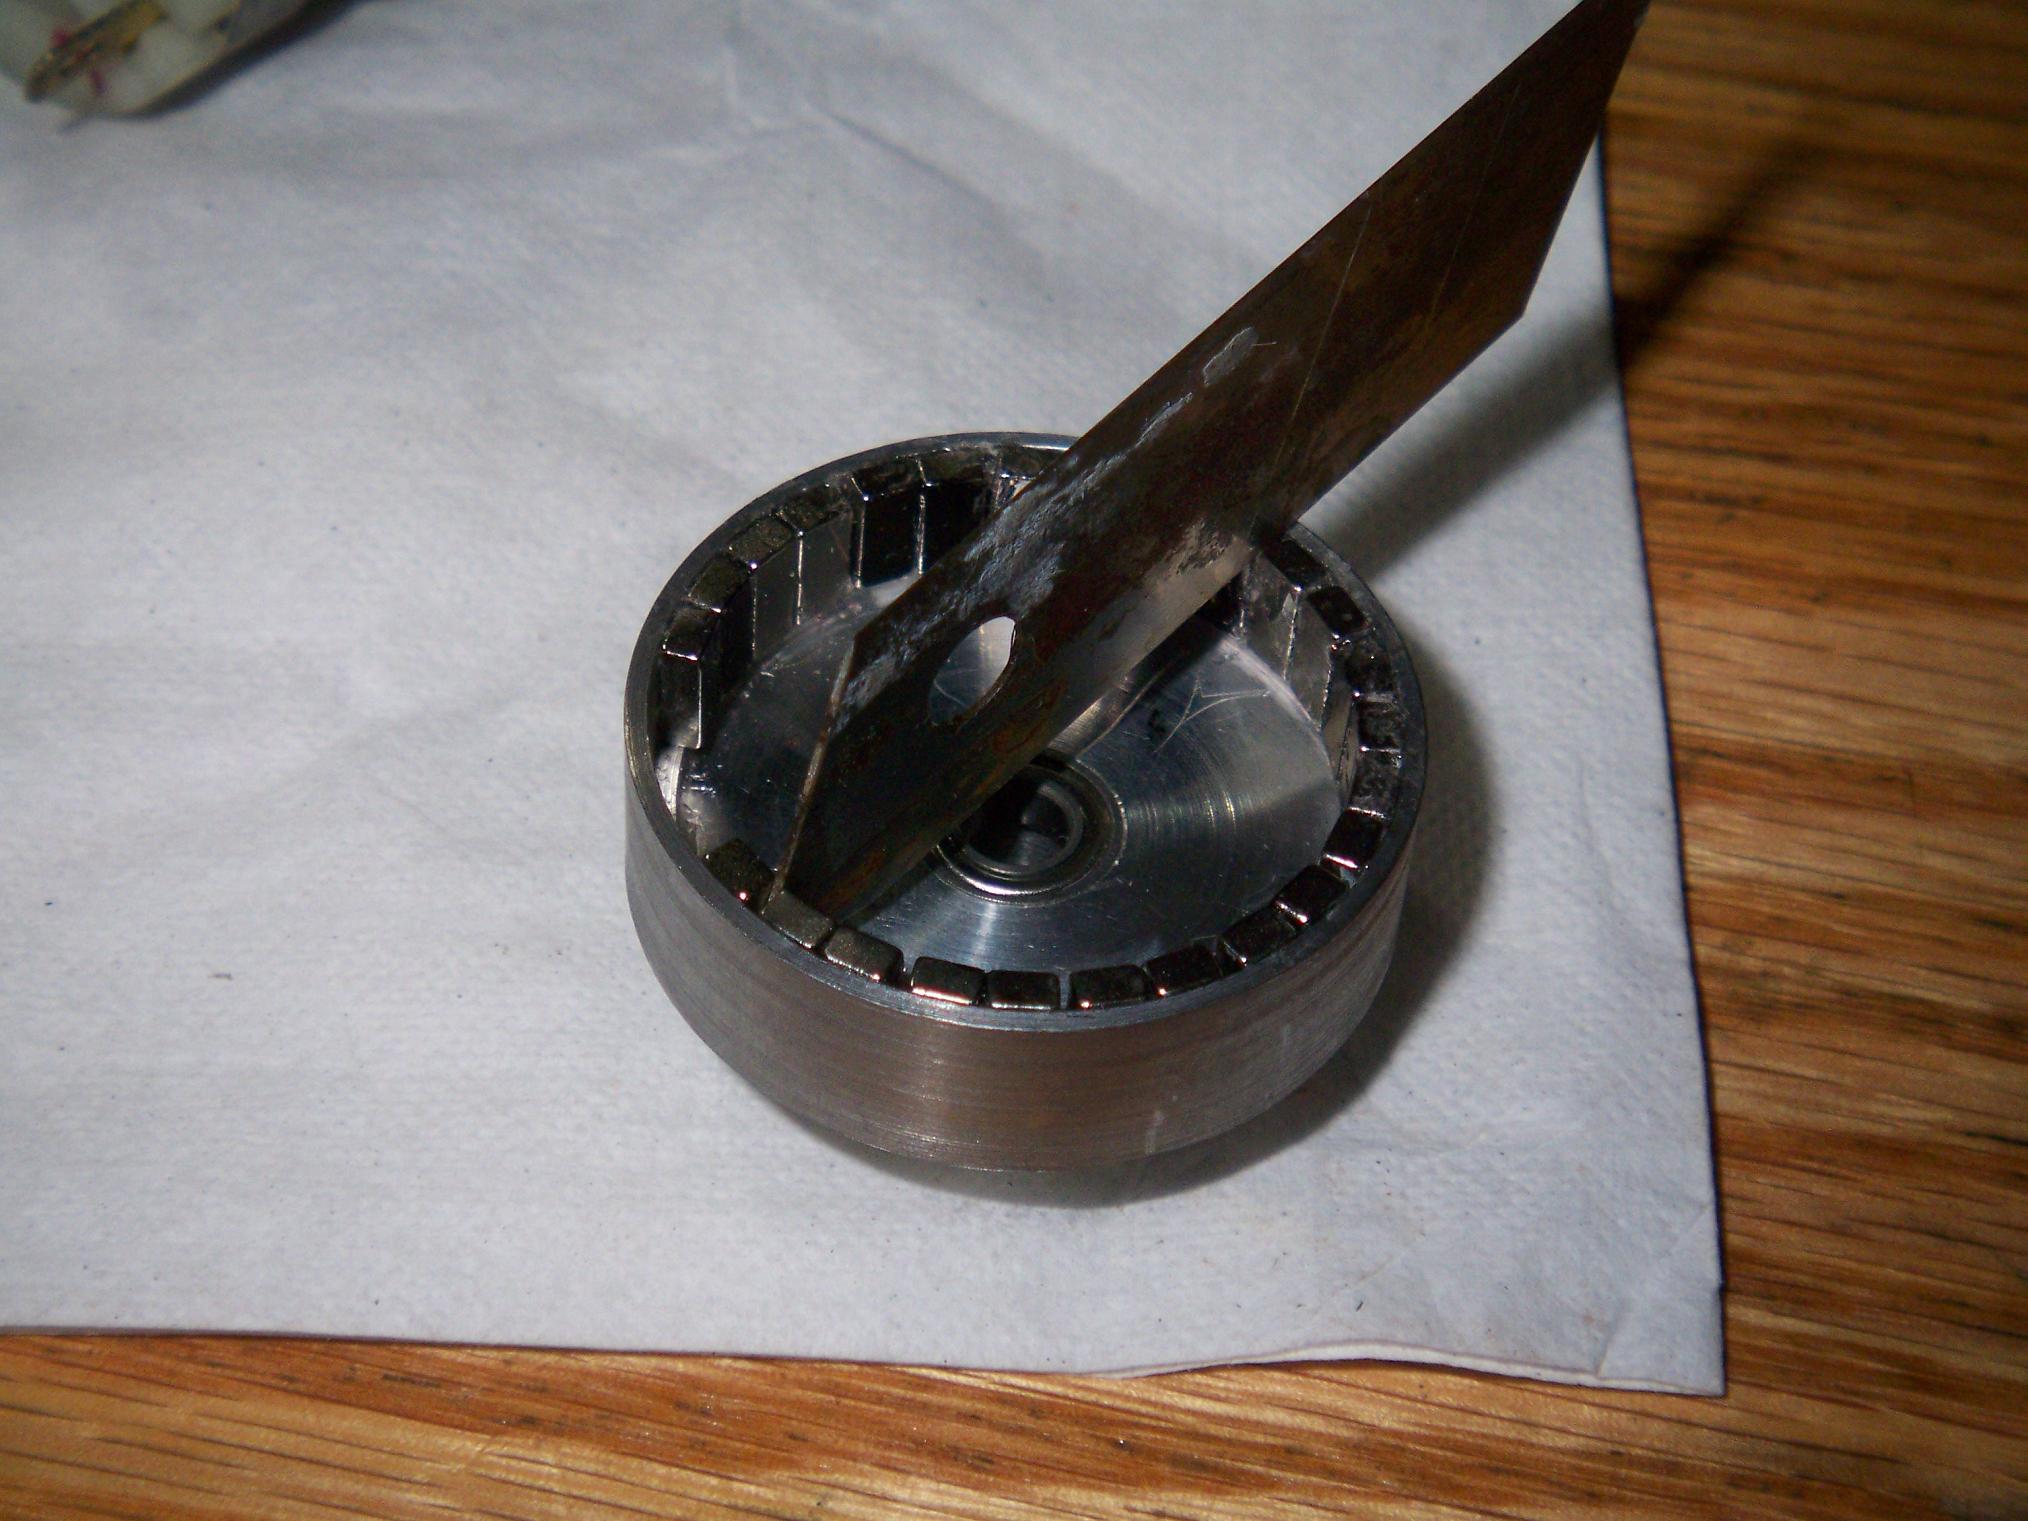
…so I tried a host of random objects wedged between the magnets, most of which didn’t work very well. Only when I got around halfway did I realize that the blade out of a utility knife was a nicely sized shim for the magnets.

So the finished magnet ring has “less than consistent” spacing. I hope this doesn’t negatively affect the operation too much.

Slamming everything together gives the outer appearance of the finished motor. I have yet to wind the motor itself – this will happen soon.
Now that the motor is pretty much complete, let’s go back to working on the drivetrain!

I gave up on finding .75″ x 1.5″ aluminum box extrusion since it seems to be an odd size. I didn’t need all of the cross section, but figured nobody made .75″ x 1″ C-channel. The only place I could find it was online, and I’d have to wait a few days for shipping.
So what’s the solution? DIY aluminum channel! I could actually make the piece exactly the height I needed to minimize postprocessing that way. Here’s the .9375″ x .75″ x .125″ wall aluminum channel emerging from a rectangular stock piece. Essentially, it was ramming a 3/8″ endmill into the thing until I was satisfied with the depth, then finishing off the sides to 1/2″ wide.
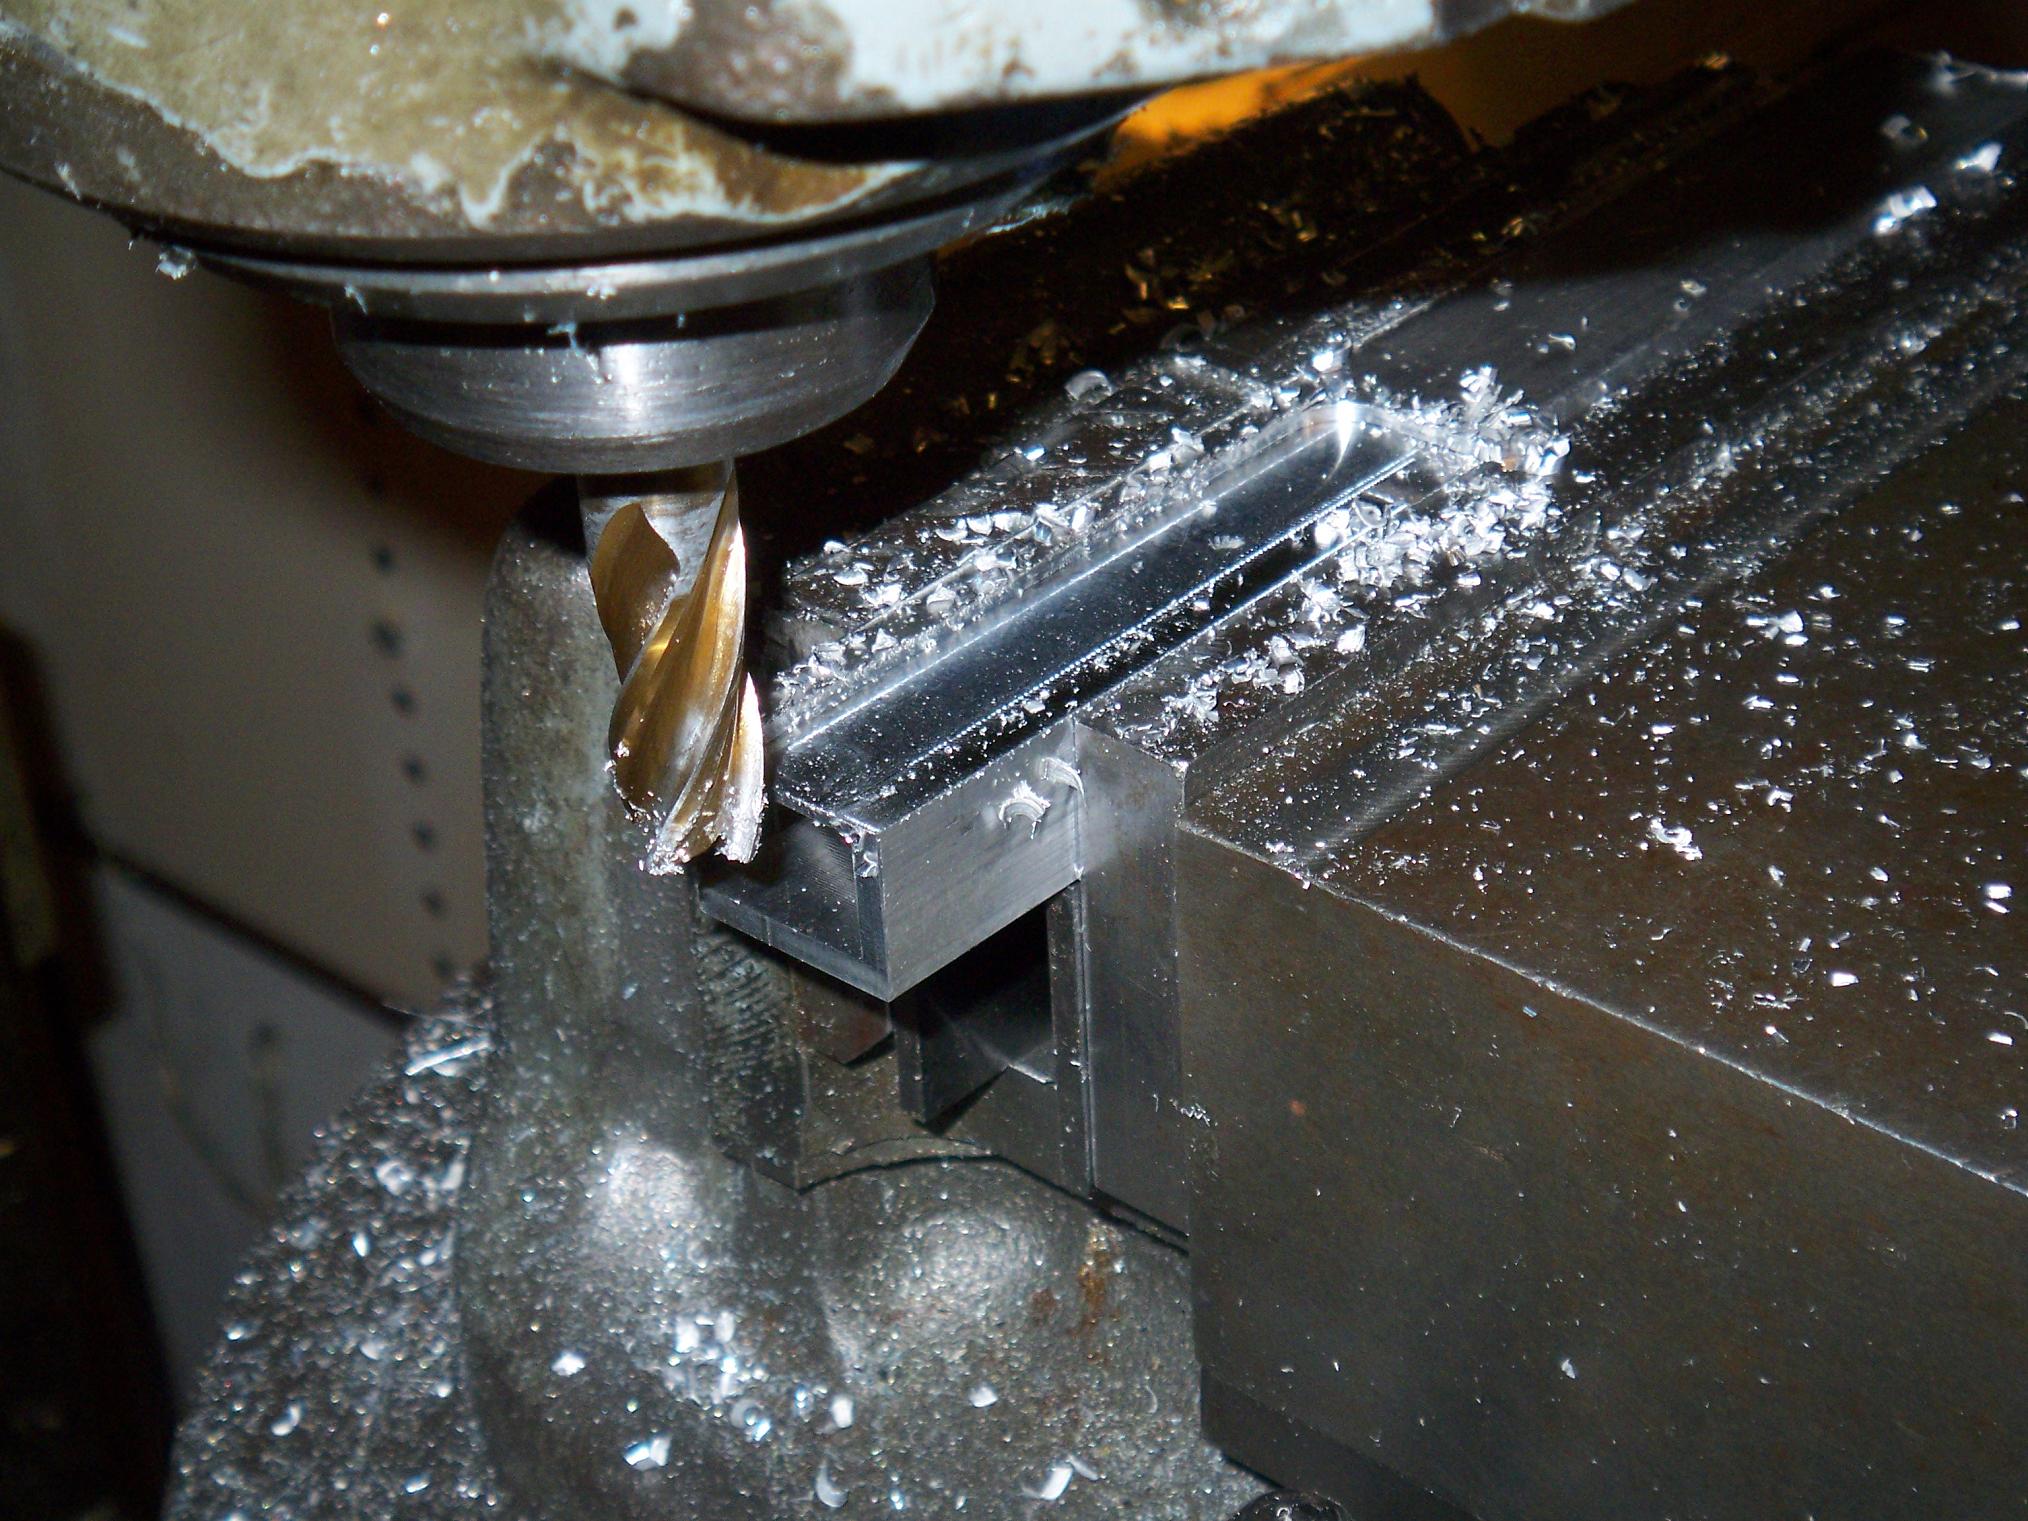
While the channel was still attached to the barstock, I turned it around and machined the little indent that will hold the motors.

Finished and ready for sectioning into individual drive pod frames! The finish on the internal channel is absolutely crazy.
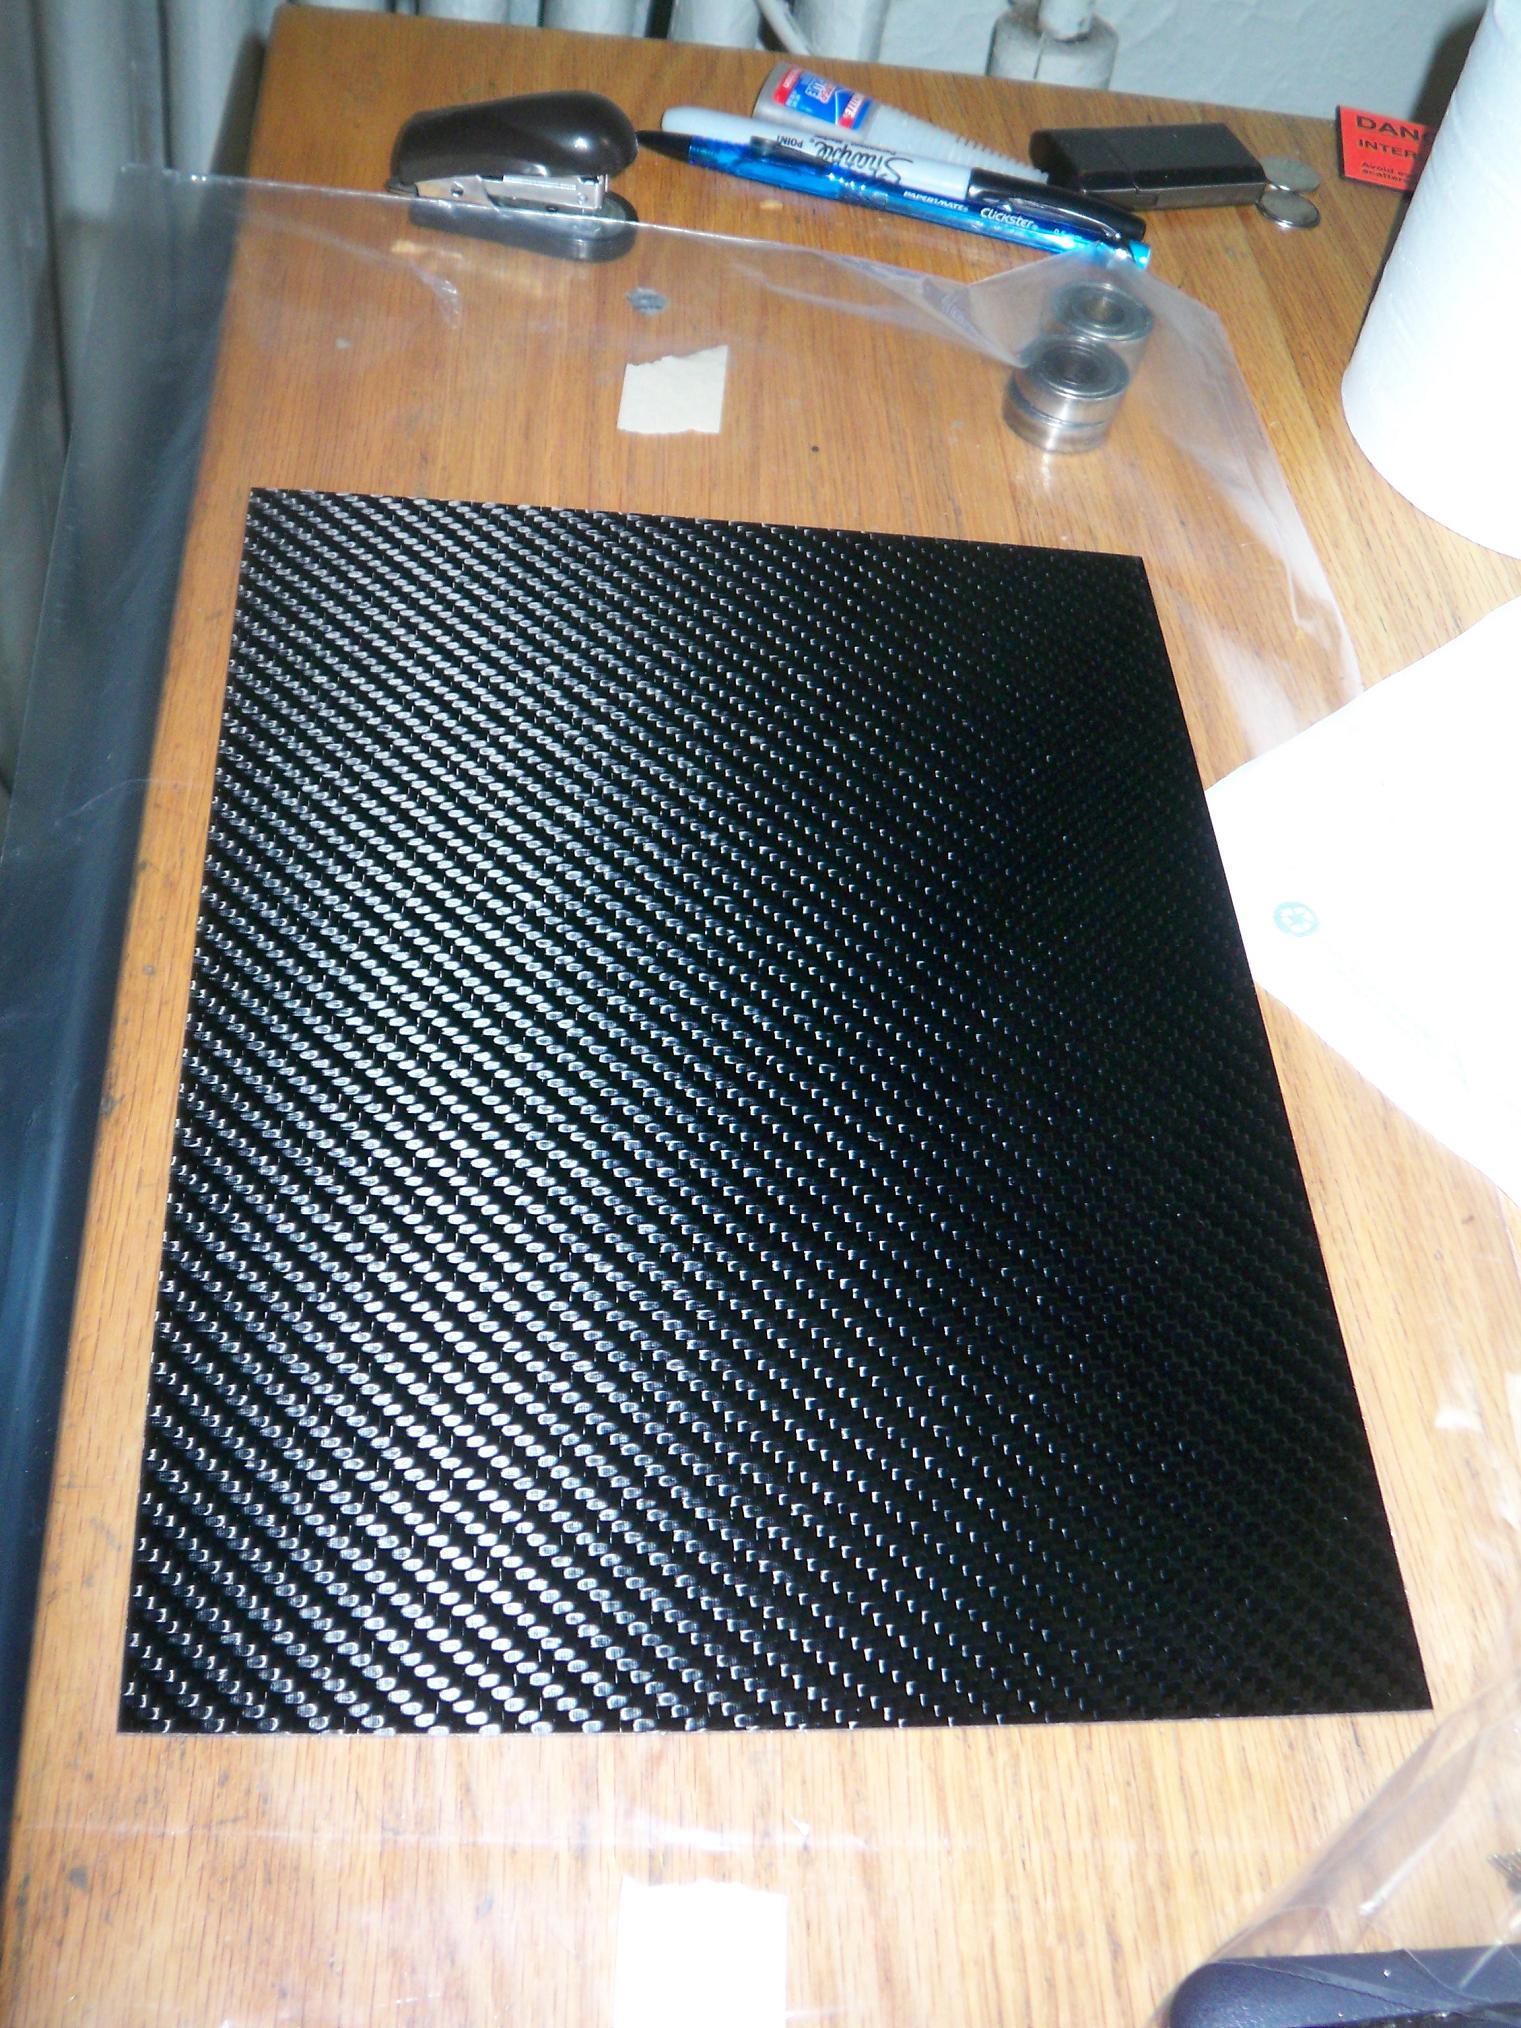
Meanwhile, the carbon fiber panel that will become the bot’s top and bottom awaits. I’m not yet sure how to go about carving said top and bottom plates out of this yet. The Media Lab’s PCB prototyping machine looks promising, since it can use thin carbide bits and already machines fiberglass circuit board panels, and I would only have to feed it a drawing file.
I cut off four chunks of “drive pod stock” and milled them down to 3/8″. Here are the unfinished frames sitting in their final mounting spots.
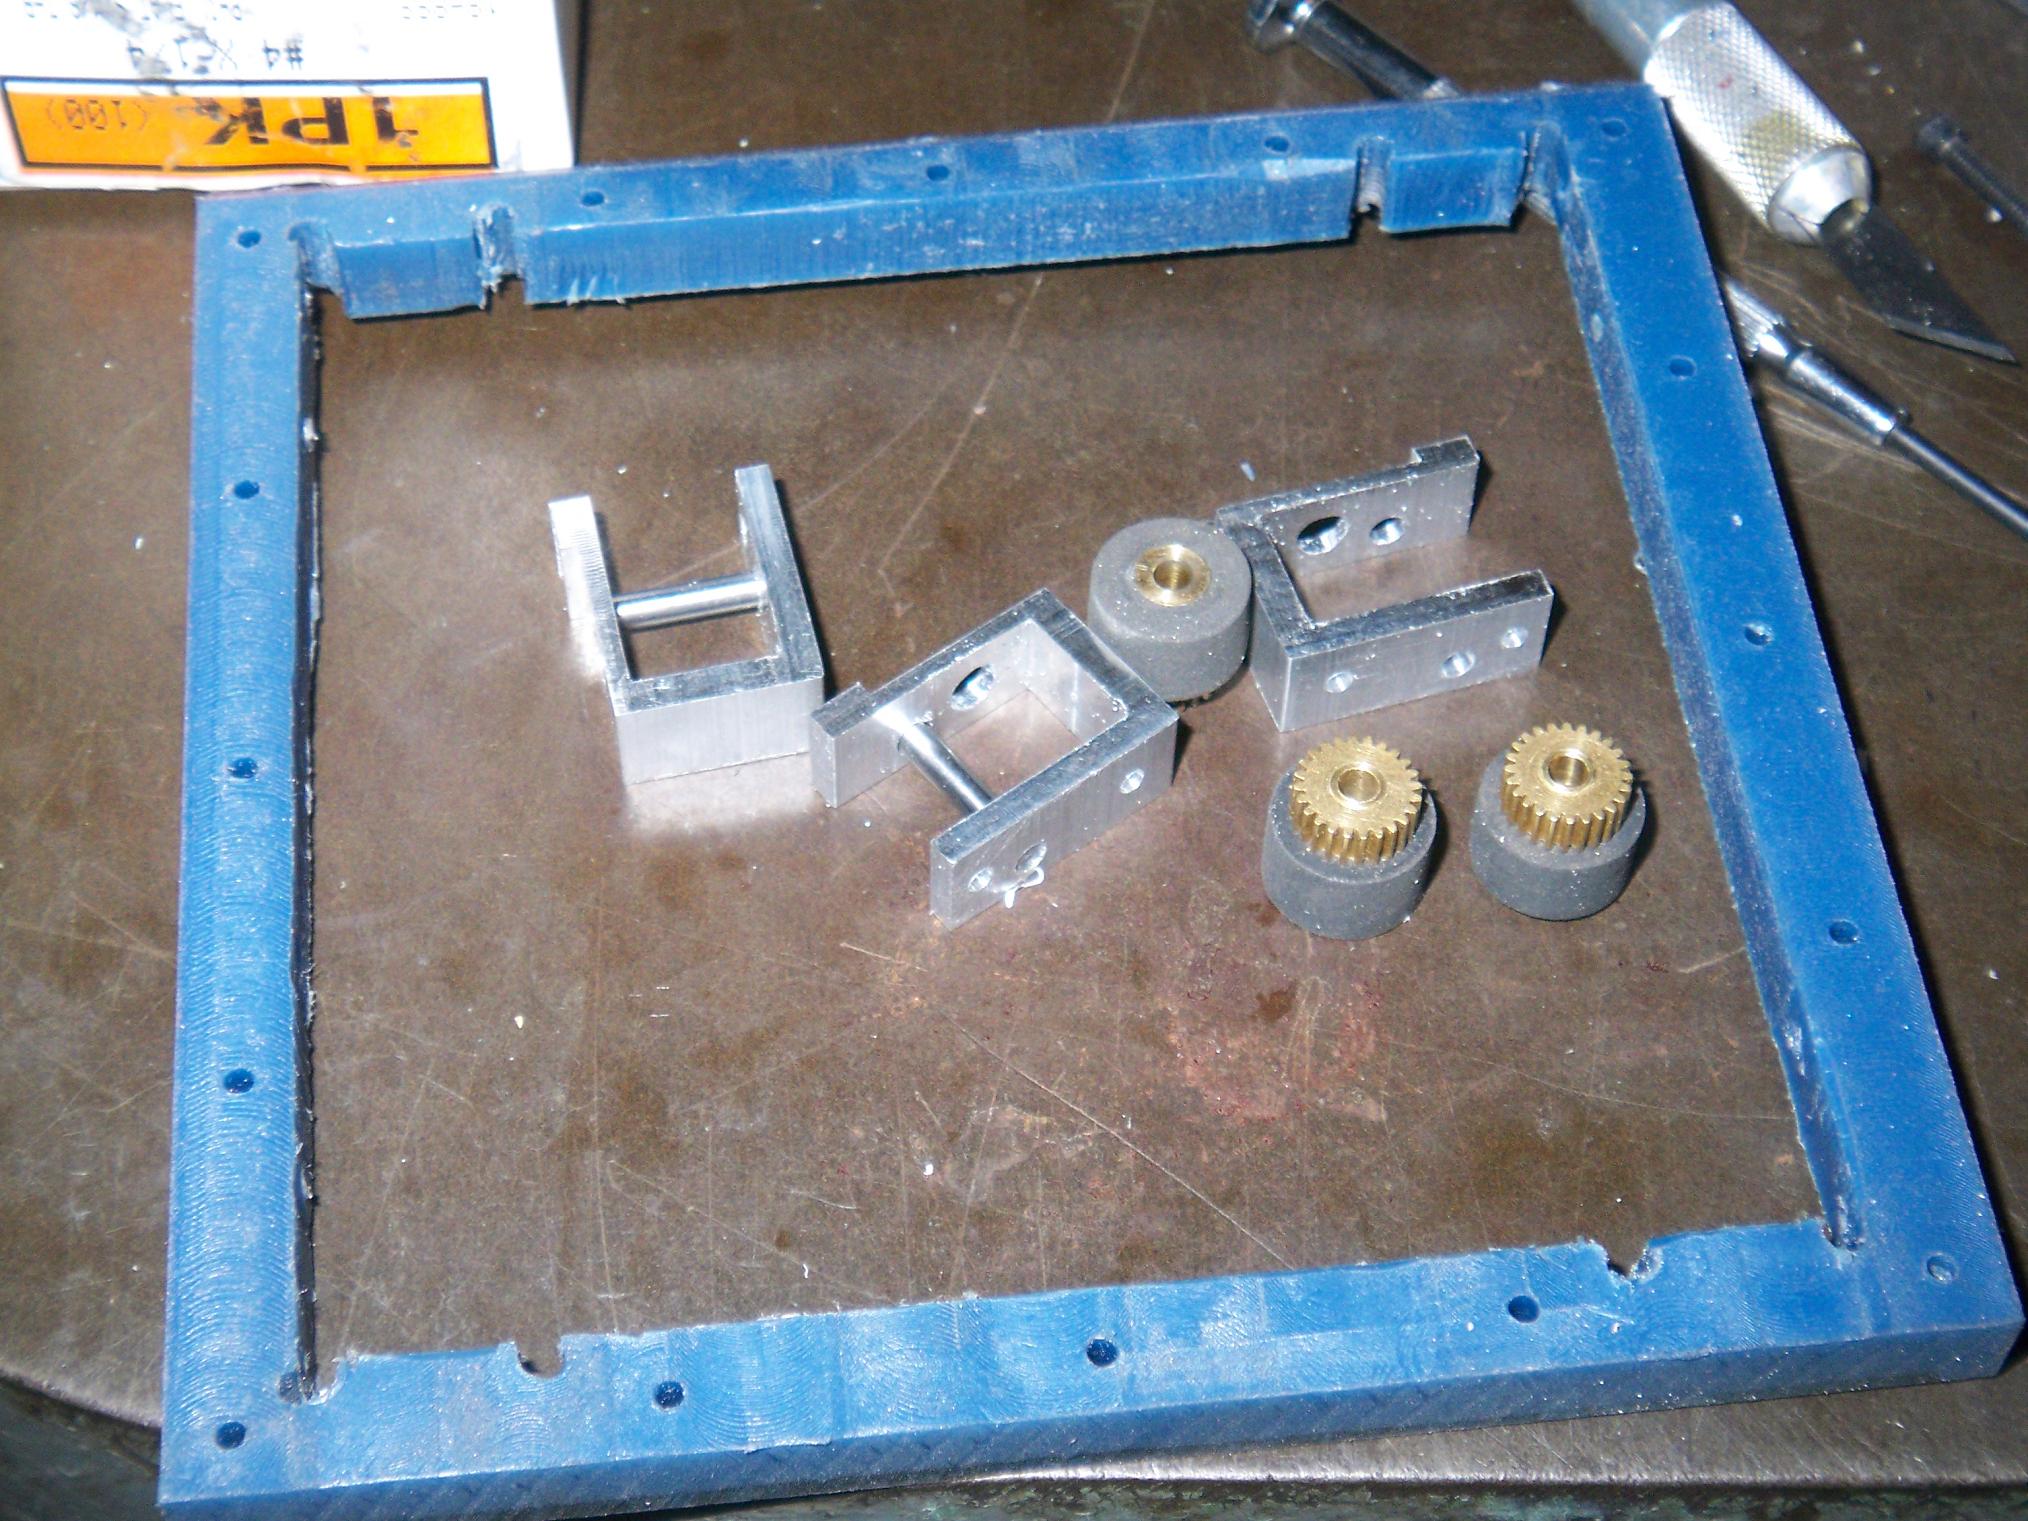
After drilling the requisite holes, here are some of the drive pod frames with axles installed. The axles are 1/8″ steel rod, and is just shoved into the axle hole – they will be retained by the motor on one side and the bot frame on the other.

A finished drive pod, cf. design drawing. The milling machine allowed spot-on placement of the gears, so it actually runs smoothly. The motor itself will be retained with adhesive, hopefully of a non-brittle variety so it can take impact. That means there really isn’t any changing parts with this design – something I decided to just go with due to design and part constraints.
Let’s hope that doesn’t bite me in the ass.

Drive pod test mounted. The wheel has clearance issues with the frame, and rubs against it significantly. This is due to the squish-fit that I used to place the wheels on the drive hubs, making their diameter significantly larger.
I’ll mill off the portion of frame between the channel to allow for wheel clearance later.
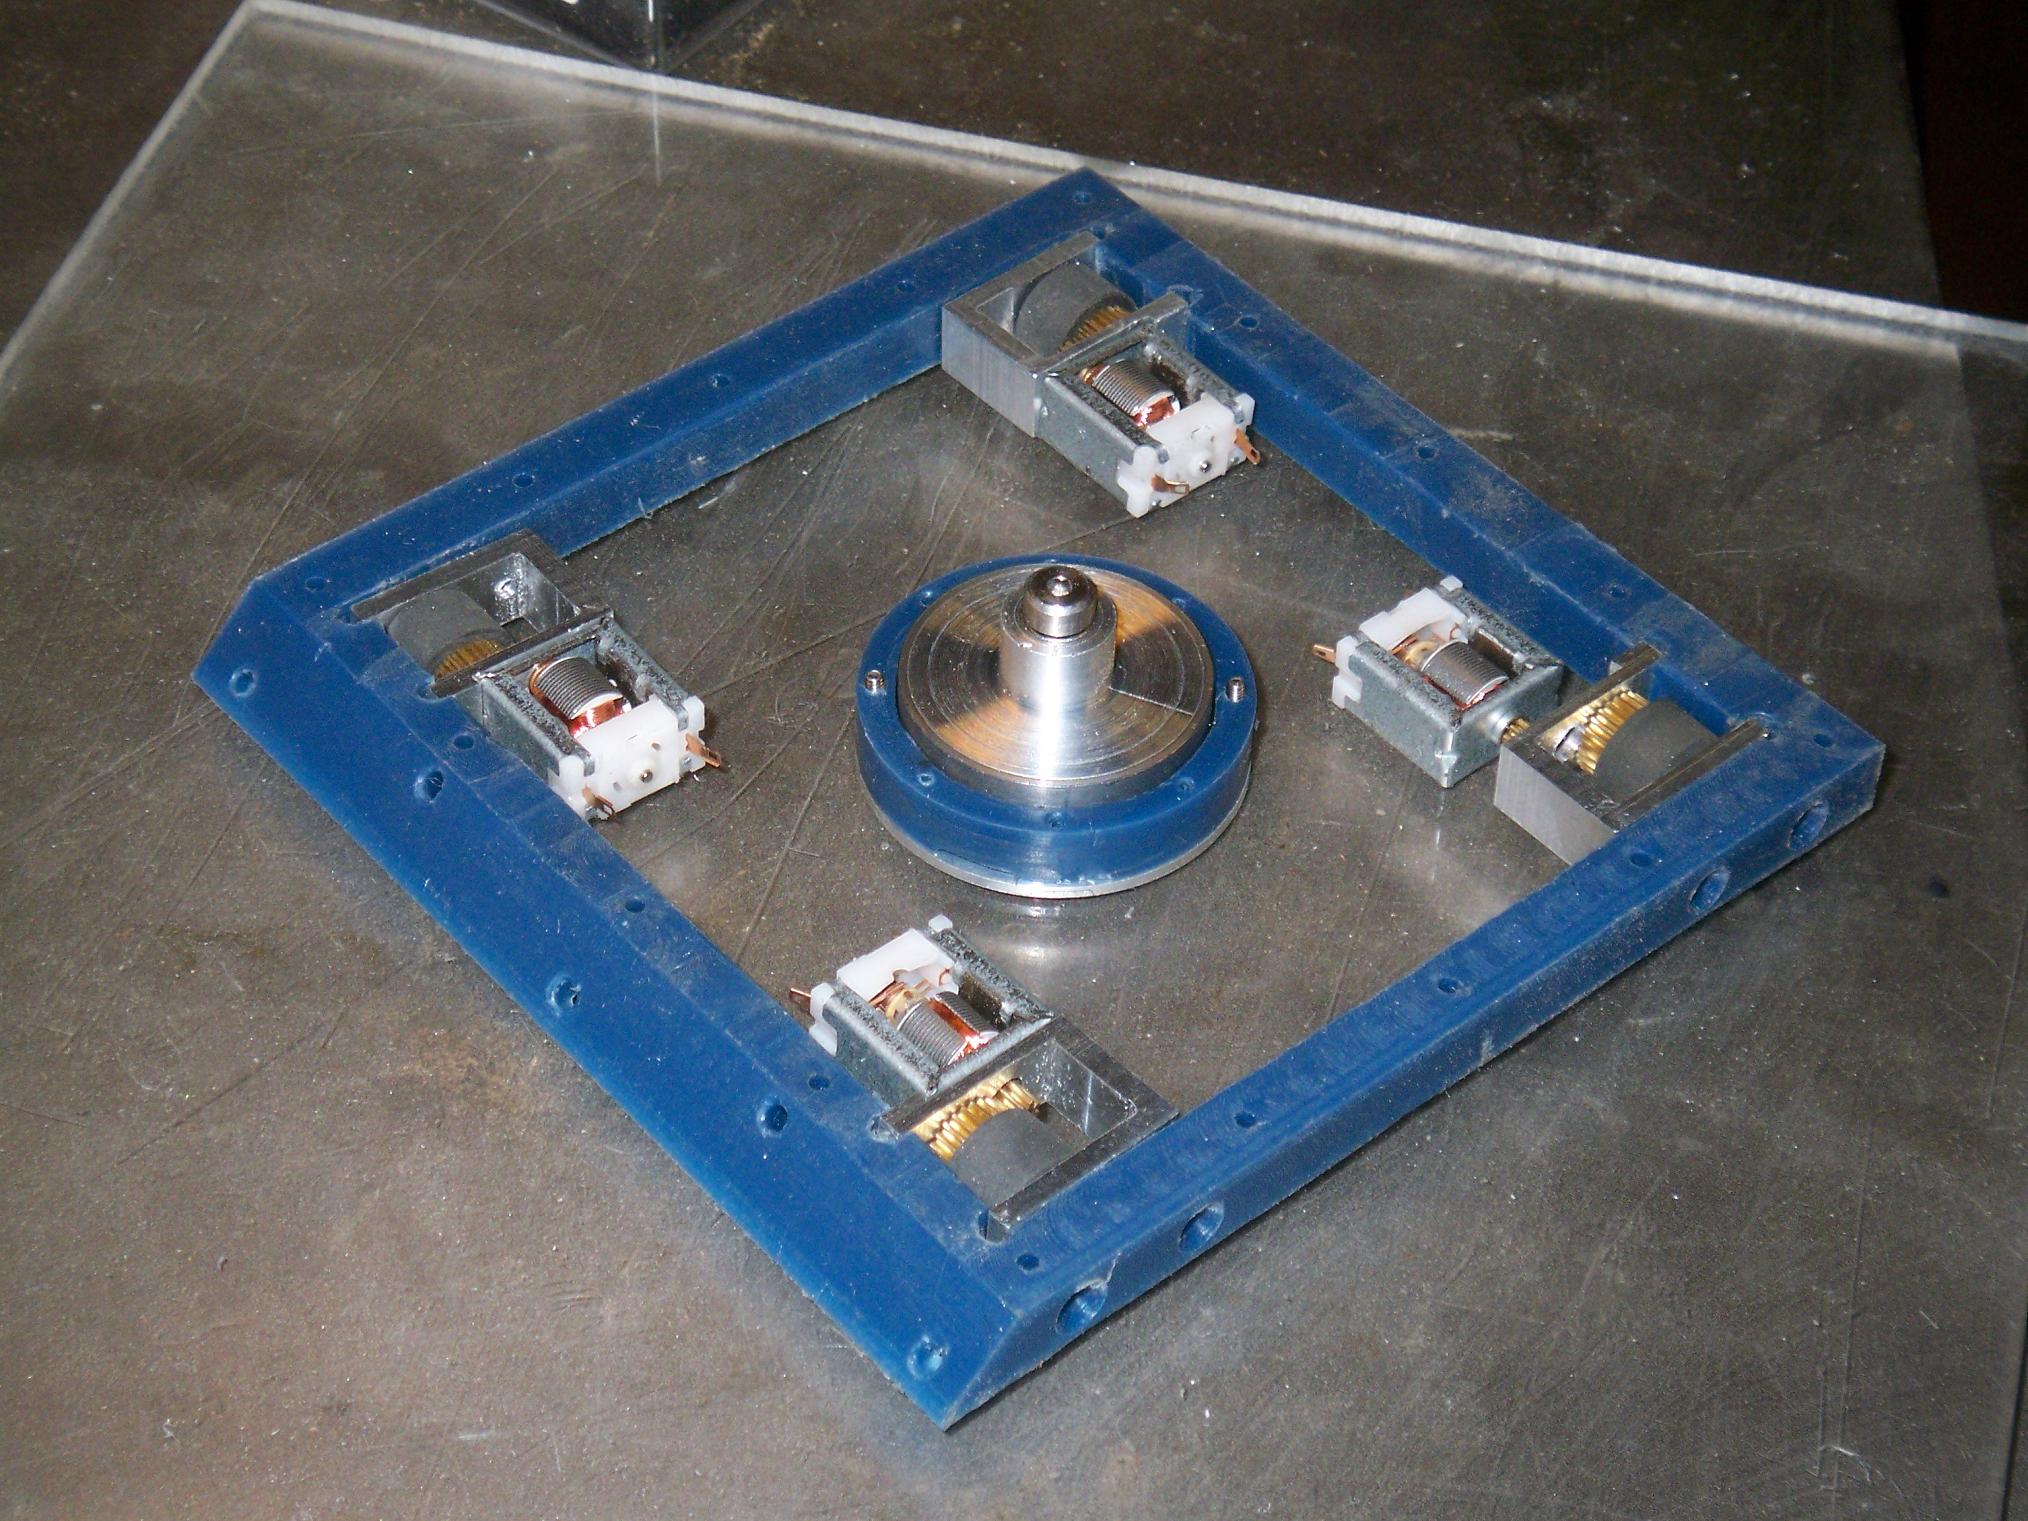
And after a night of mad milling (is THIS why they made CNC with automatic part and tool changing?), all four drive pods completed. Pop Quiz is getting close to the “Looks like a robot… kinda” stage. I hope to test drive the platform soon – I’m really not sure about the torque capability of these motors, and it’s better to find out that I suck at life now than when Dragon Con is next weekend.
So, enough robots. Now for some shenanigans – the Media Lab has started up again for the summer session. As usual, I’m taking on some heavier-duty work than most of the undergraduate lab lemmings. For instance, I’m partially in charge of new powertrain and control system design for the Roboscooter (which means lots of playing with brushless motors and vehicle computers to come). On top of that, I’m also involved with the mechanical bits of the 4-wheeler prototype.
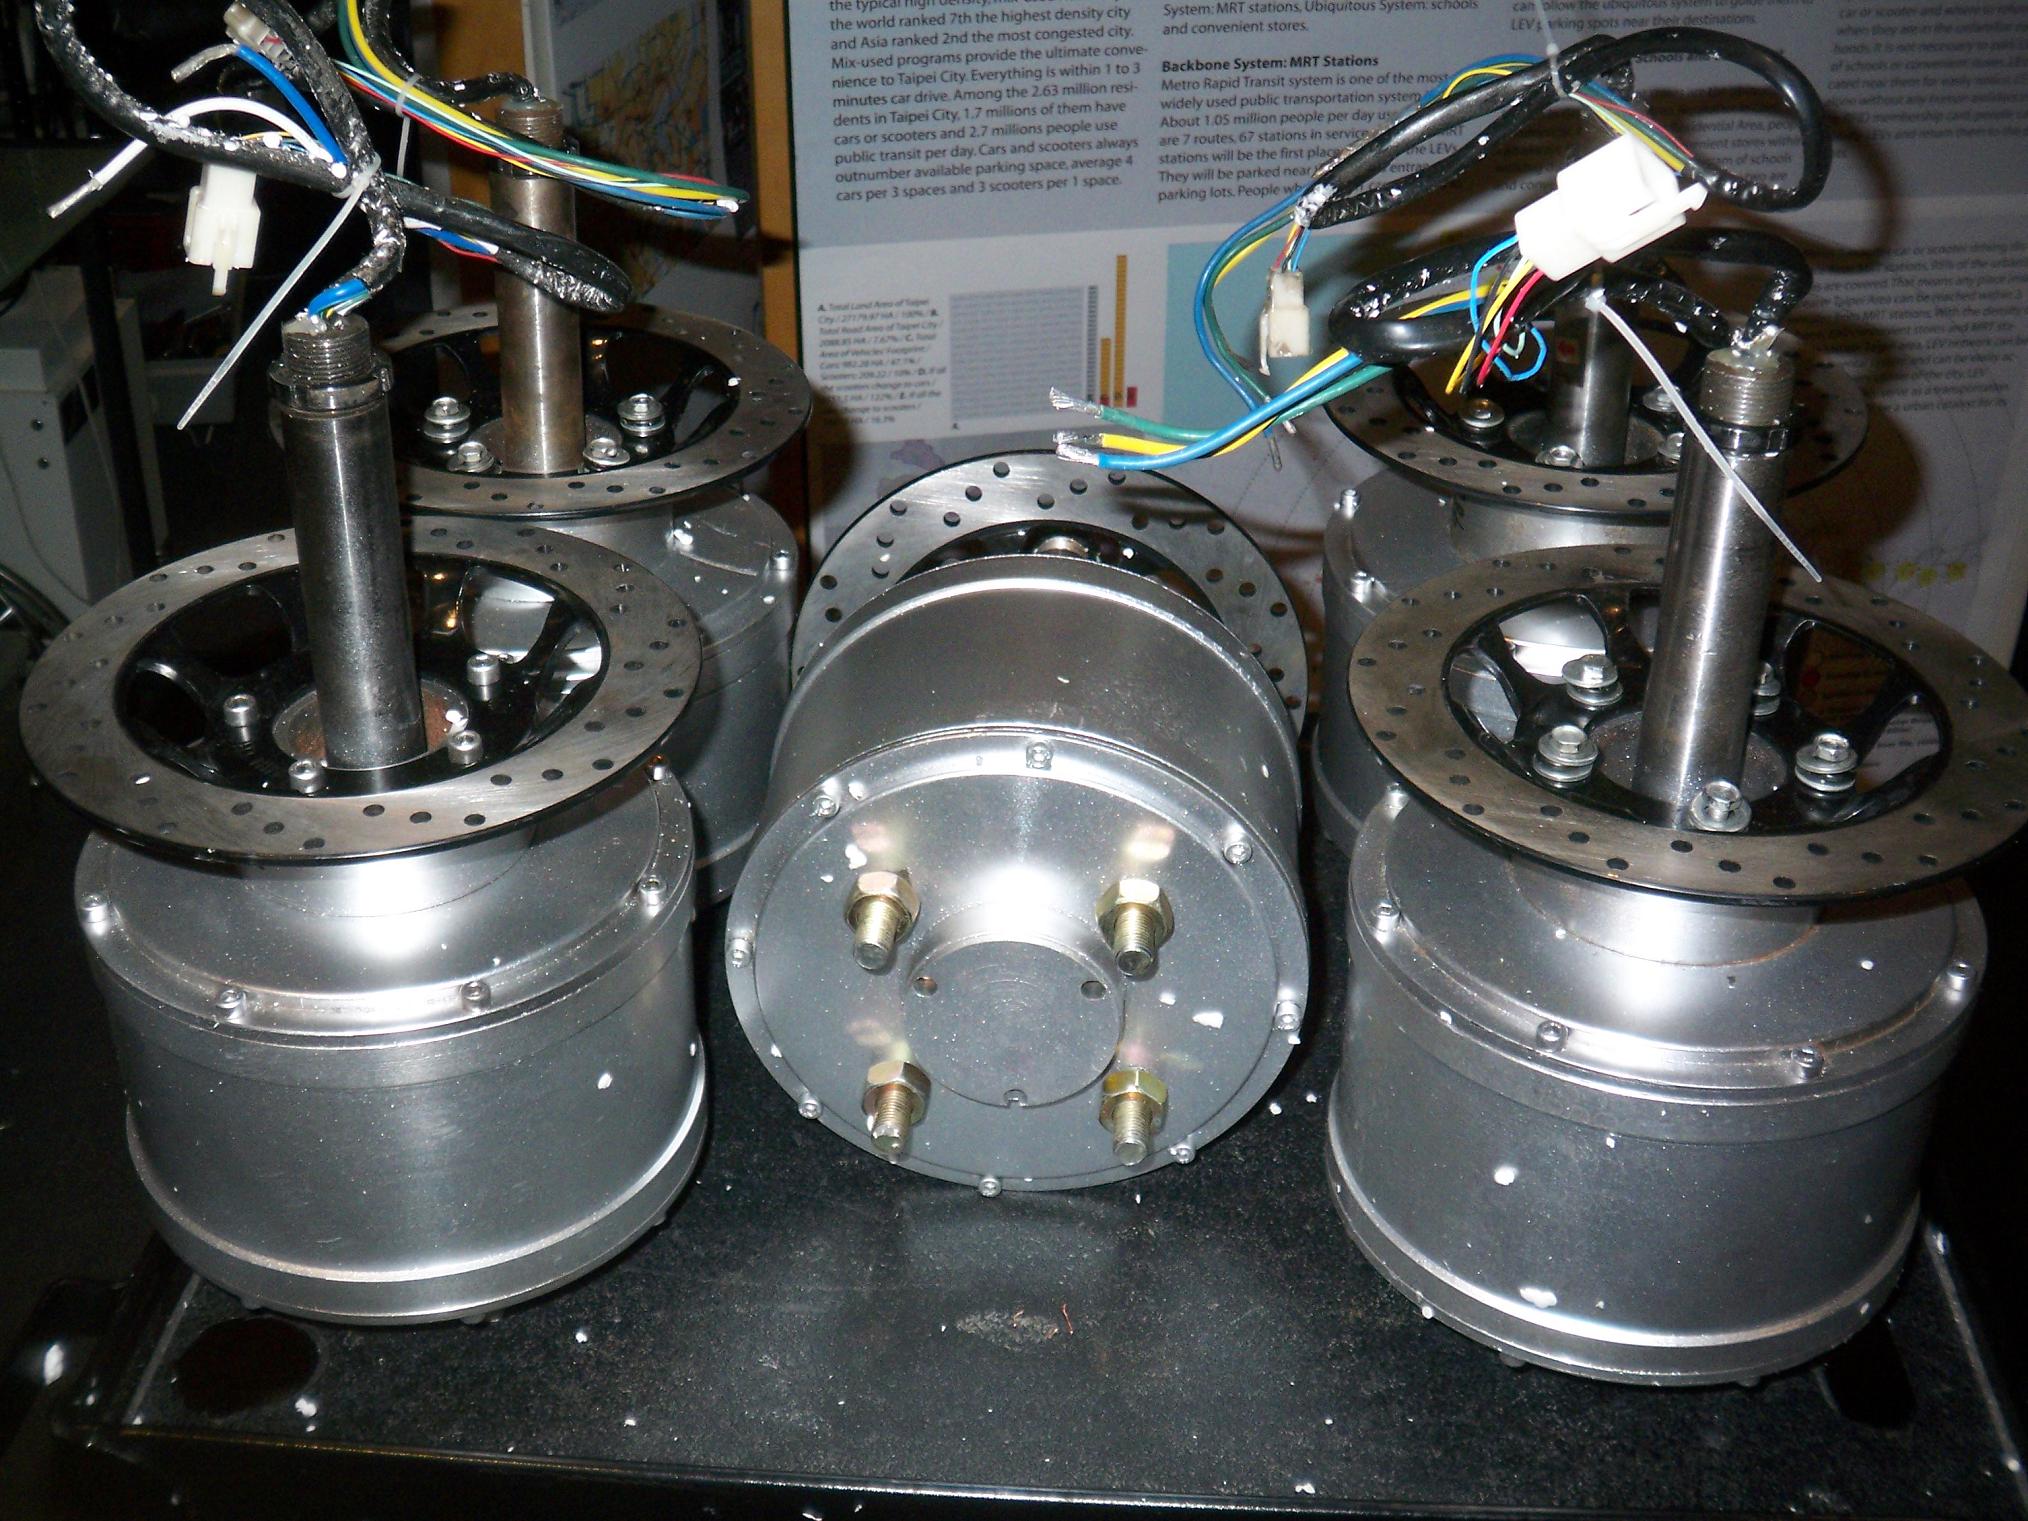
The shenaniganometer is on. Here’s some epic motors that we received a few days ago. A solid 25 pounds each, with kart sized disc brakes attached (and calipers provided), running 48 volts nominal and rated for an amazing….. 7 horsepower. Right.
Designed to be hub motors for some small electric vehicle…
Along with the epic motors are some epic controllers.
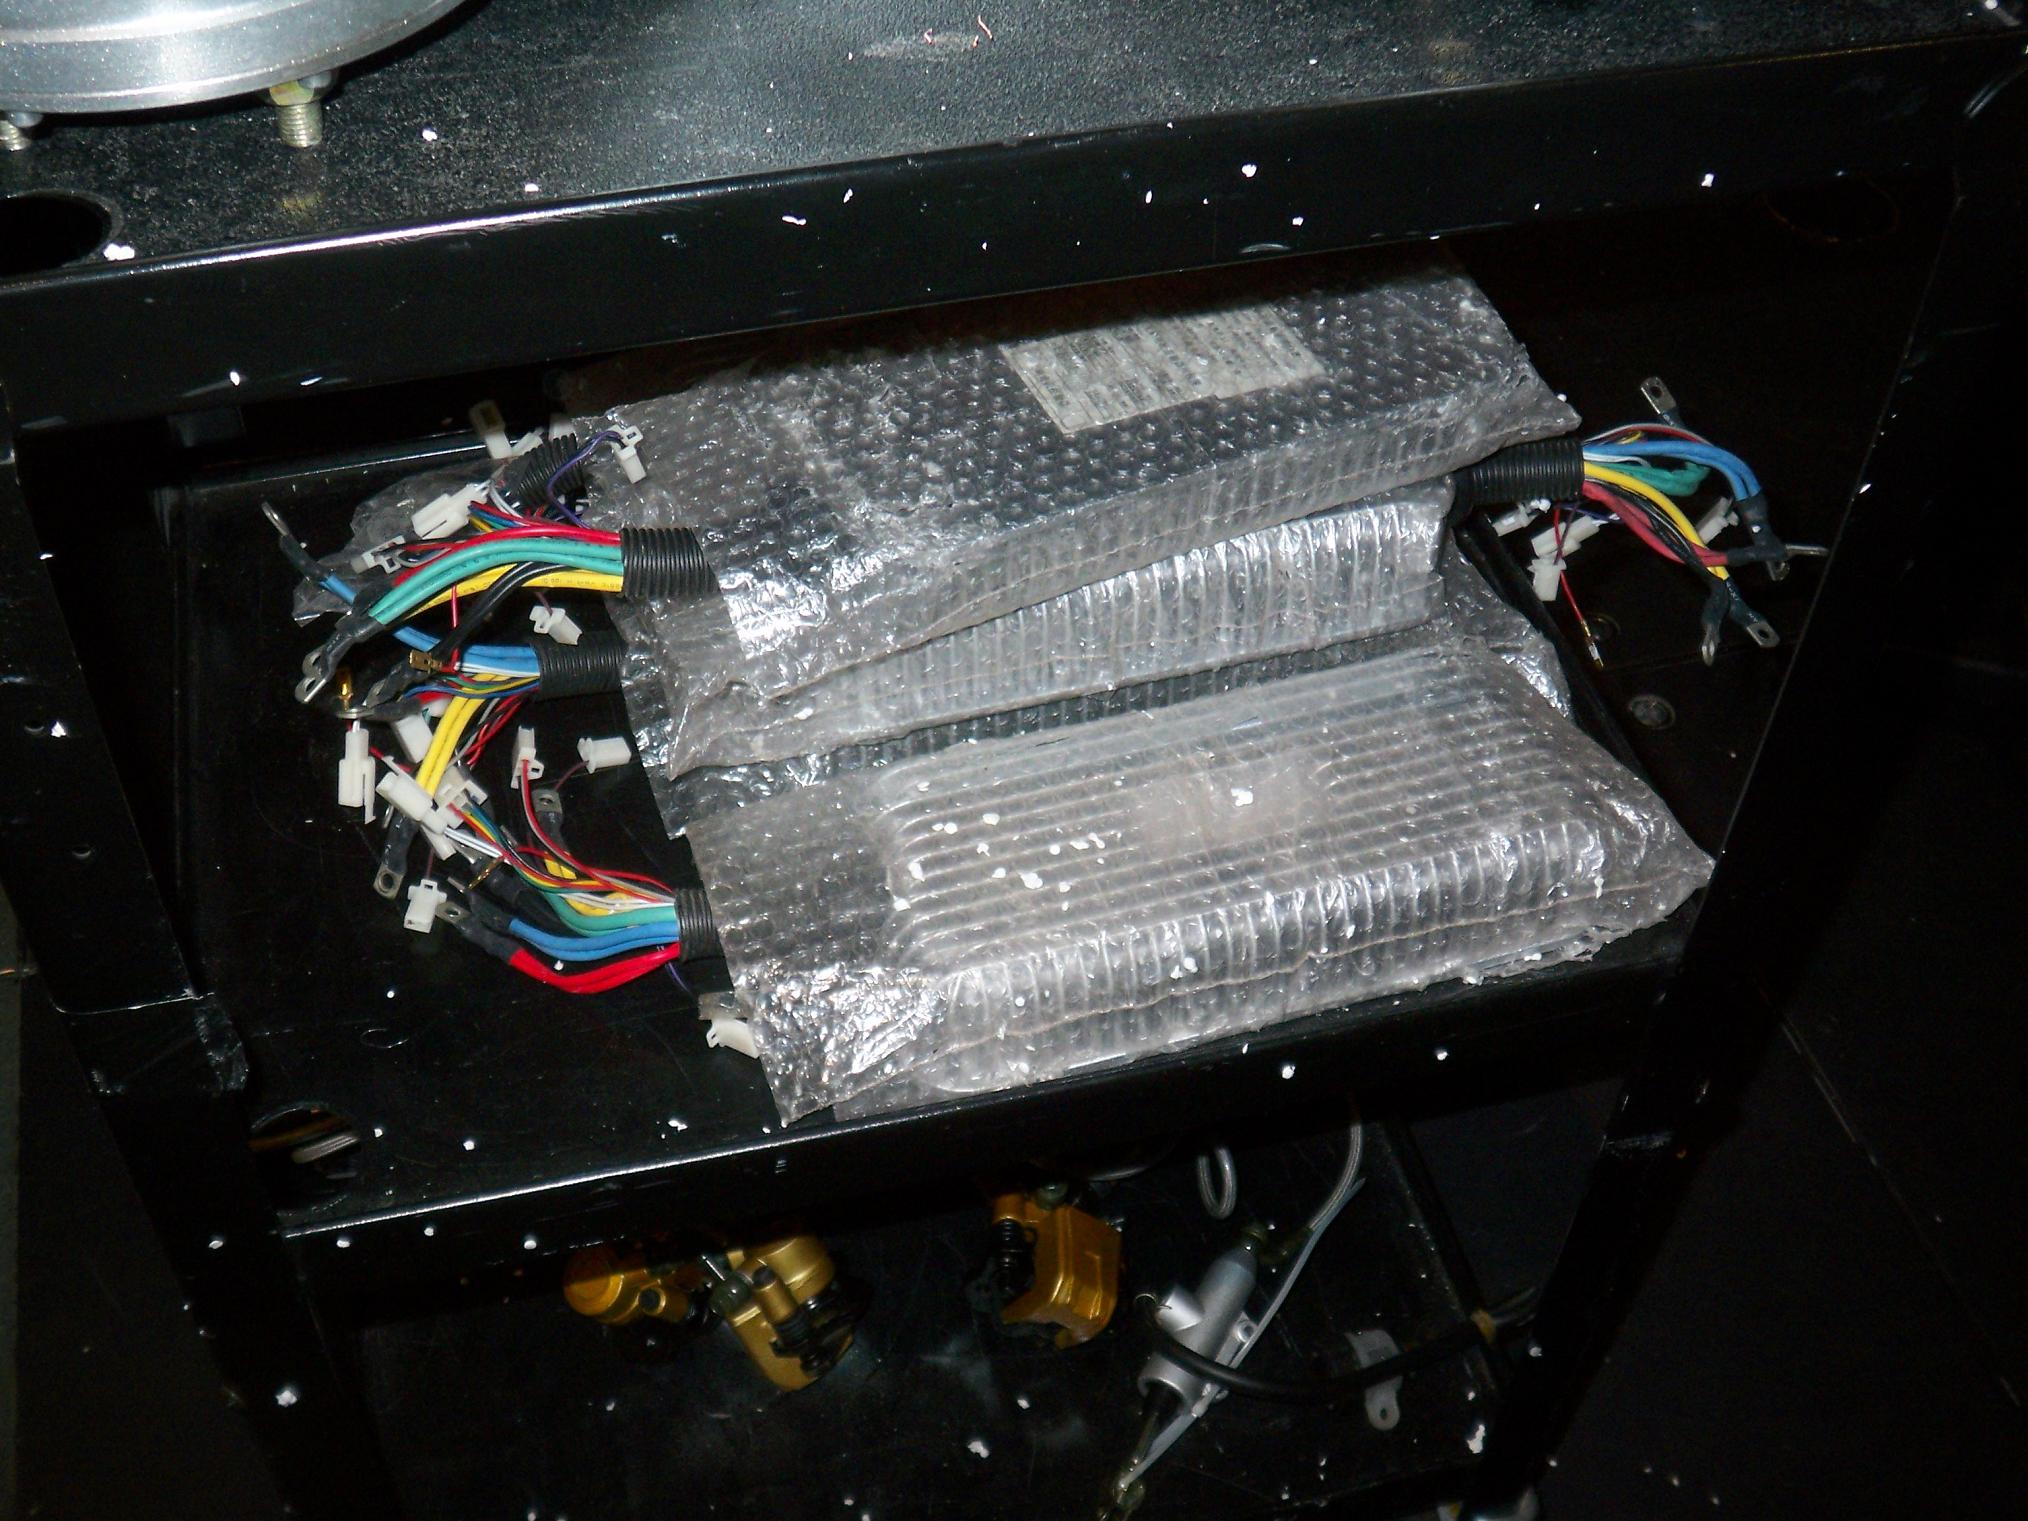
Almost a foot long and weighing about 6 pounds each. According to the sticker on the back, it can push an amazing… 2000 watts?
HUH? I really hoped it was missing a zero, but no, all 5 of them say 2000 watts output. Whatever. This is currently not my jurisdiction, so I don’t care… but how epic do you think I can make one of those motors? I want to take the cover off one to see what’s inside, but after we’re done playing with them.
Meanwhile, back at MITERS, I discovered a set of epic batteries.
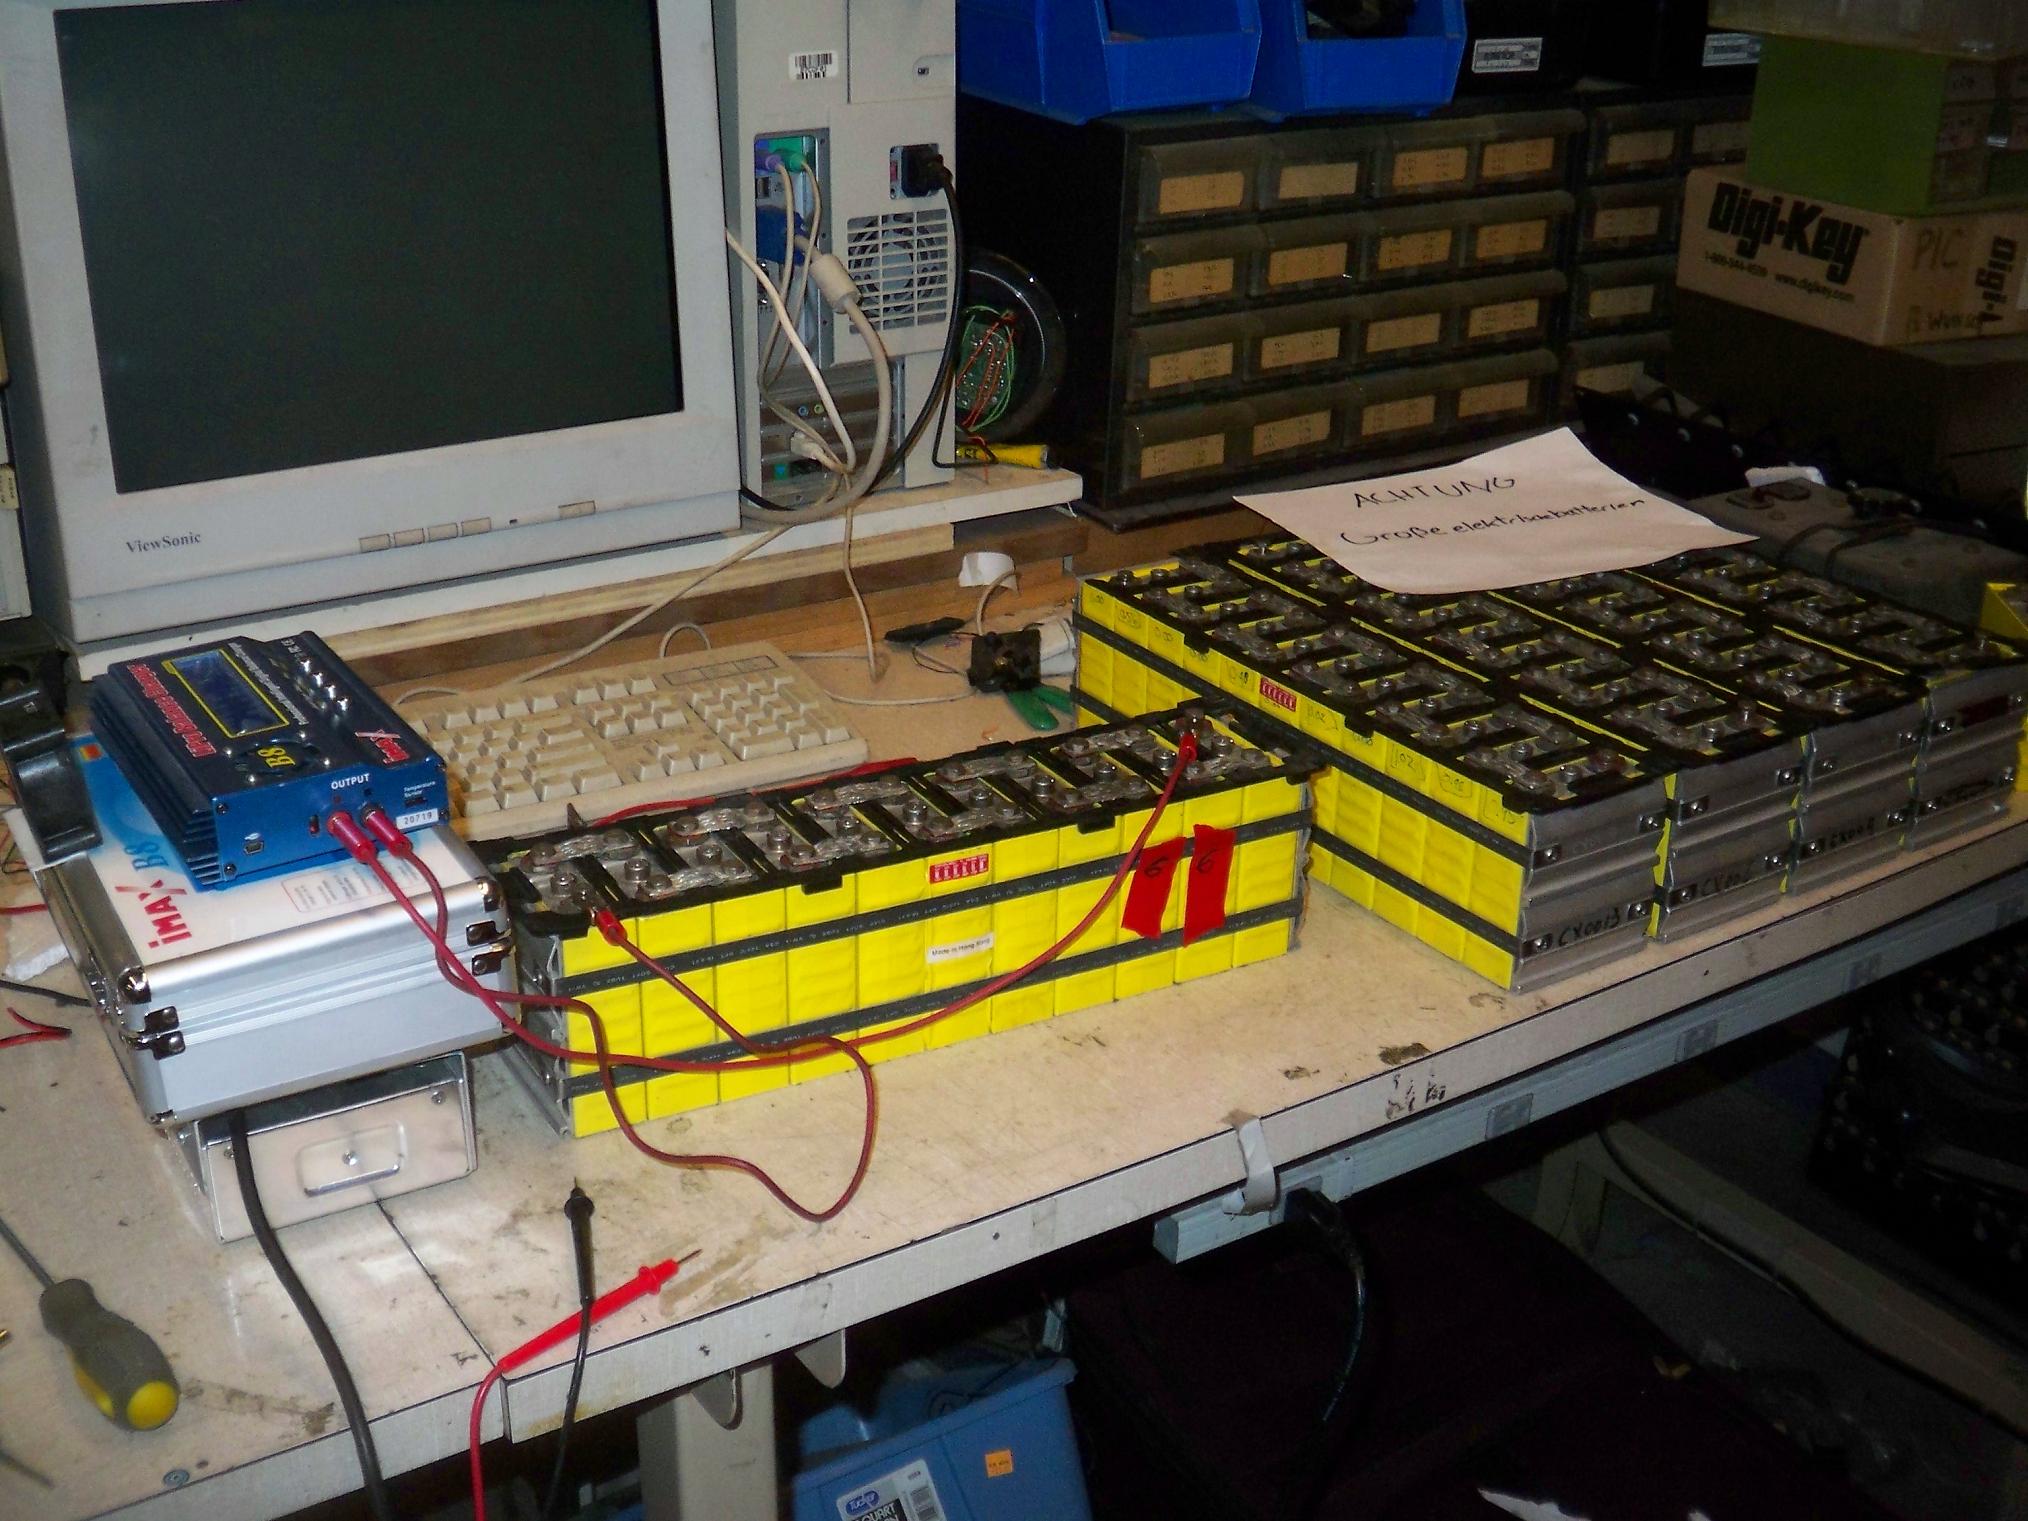
These large rectangular cells are legit electric vehicle batteries. They’re rectangular and about a quarter of the size of a standard construction brick each. I am told they were hand-me-downs from the Solar Electric Vehicle Team when they moved onto something more badass. Each pack is 13.2 volts nominal, and either nickel cadmium or metal hydride.
They’ve been sitting idle for a few years in the back room at MITERS and the SEVT garage, so some cells are dead. These are cells way larger than what I can deal with using my equipment, so the cells that are really dead I might just have to take out of the packs instead of trying to revive them.
There are five packs, three of which seem to be healthy, and the rest having 3 or 4 dead cells each. I will probably consolidate the last two into one good pack.
The charger has consistently dumped about 30AH (taking all day) into the healthy packs, so I am led to believe these are 25 or 30 amp-hour cells.
Next, the shenaniganometer rises even higher as I also received this DC-only, but still epic controller from a massive Media Lab cleanout.

That’s right, 400 amps and 48 volts. That’s 16 kilowatts. I also snagged the throttle box that goes with it.
…
Epic batteries, epic controller, all I’m missing is an epic DC motor.
I smell shenanigans.