Poor Melontank.
Another victim of my “randomly open another bracket” style of ADHD-engineering, LBS has been sitting in a pile for a few weeks now thanks to me becoming acutely interested in failboats. With Make-A-Bot finally down for the count after baking its extruder controller, I now have the chance to pry myself away from staring at it and revisit LBS. Part of the reason for the slowdown is the lack of motivation due to the nearing end of winter. The past few days of warm weather has pretty much melted all the accumulated snow away, and what’s left is just hard solid frozen chunks of ice – not very fun. But, LBS can work on (ideally) any terrain, so I’m going to finish it off because I’ve committed too much funds to just ditch the project and repurpose the parts.
As I came to discover, I missed cutting a few parts during the last major waterjet run. Additionally, some of my hardware has gotten lost in the recent rerganization at MITERS, so that’s now going to lead to more delays as I either find it or give up and order more.
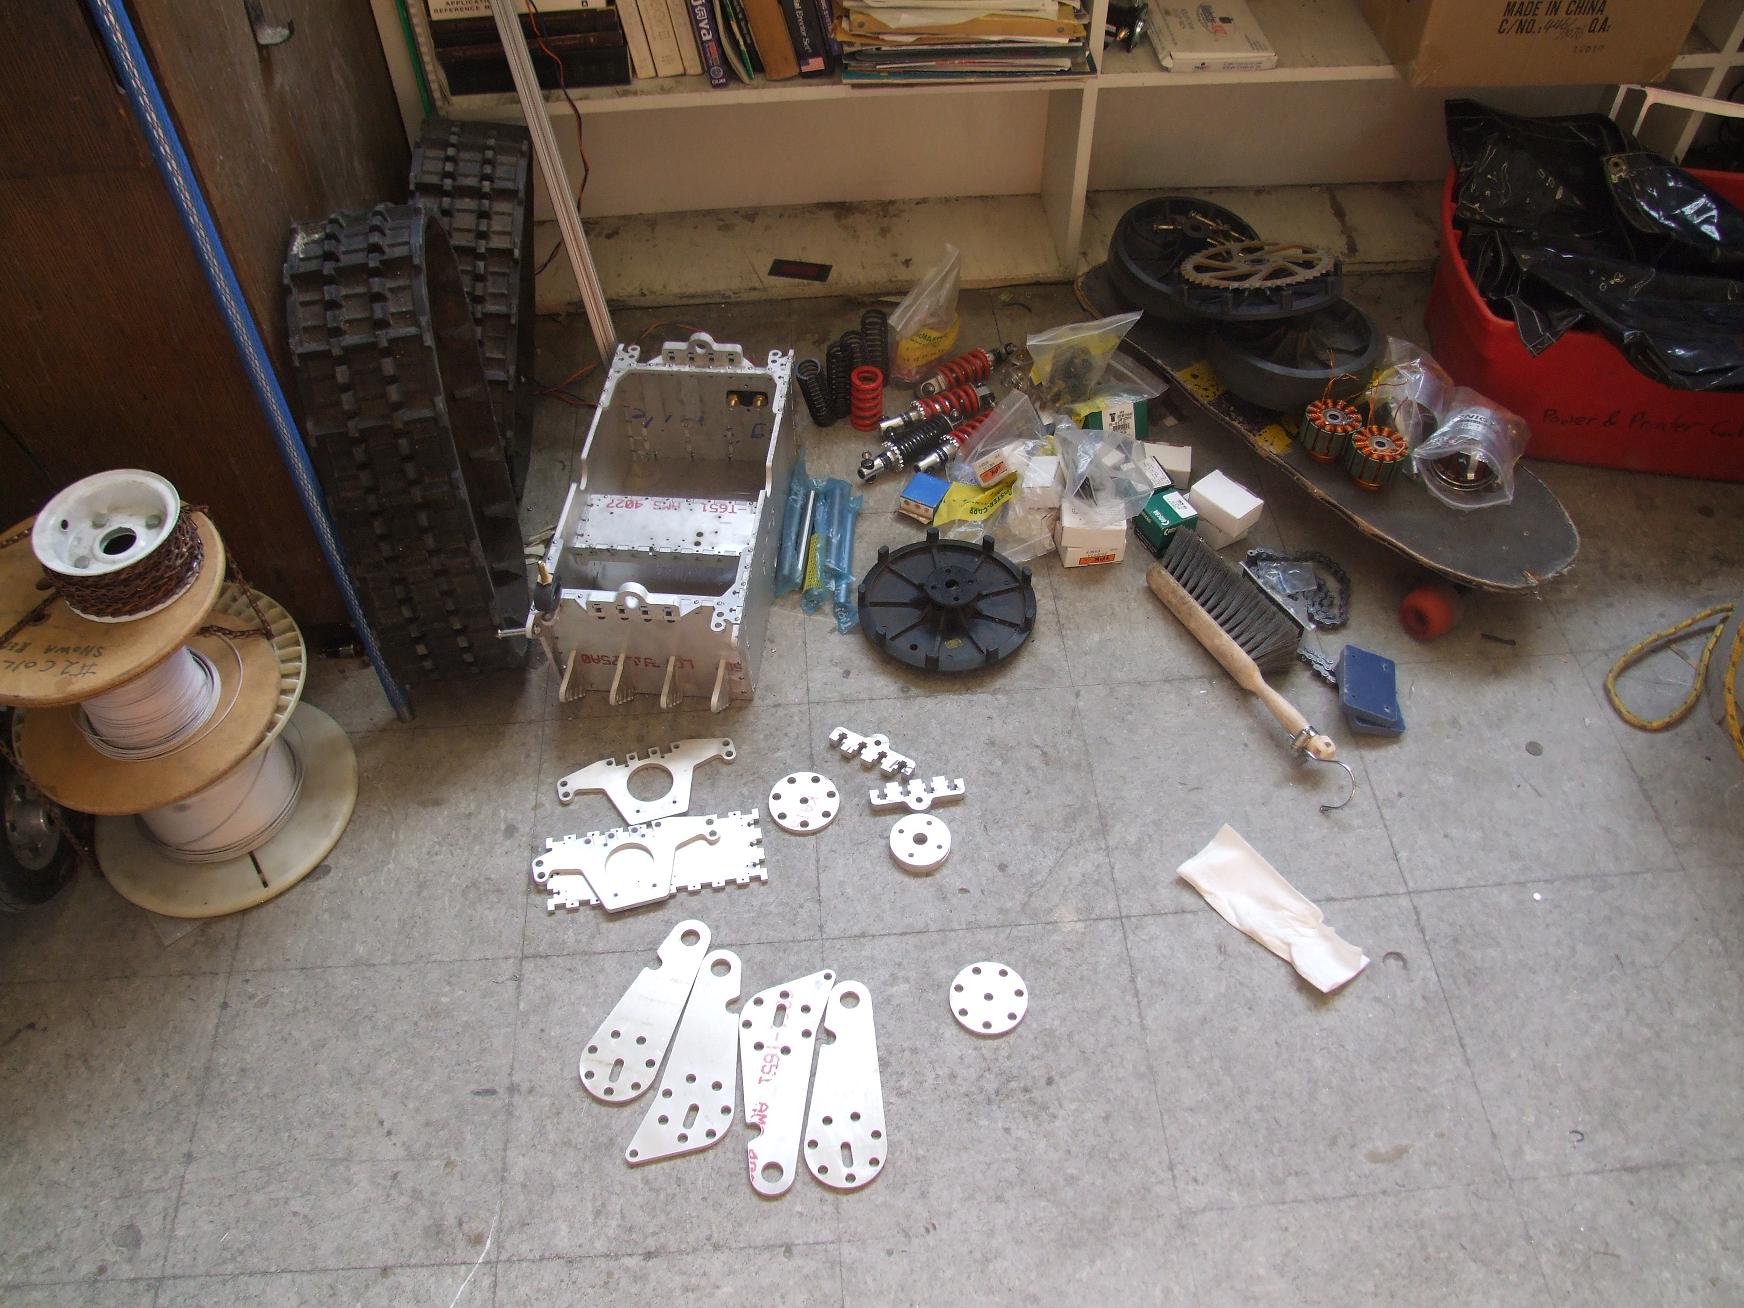
Here’s the pile of LBS, which was formerly under the workbench that is now halfway across the room. There’s been alot of reshuffling lately, to put it lightly.
I laid out all the flat parts that will form the new track side plates only to discover that I was missing four of those round 7-holed biscuit plates (for lack of a more descriptive scientific term). It turns out I may have only cut enough for one track module, judging from reviewing my tool files for the machine. Oops.

First order of business was assembling the “biscuit plates” onto the side plates, which involved tapping something like 56 holes.
What? Actually tapping a thread again? That’s definitely something I haven’t done in a while. But old is new, and spiral point taps in a cordless drill make for easy beast-threading of 1/4″ aluminum. Add in the fragrance of aluminum Tap Magic (that Shane and Amy don’t like because they’re crazy) and this process went rather quickly.

Next, I decided to knock out the four large standoff-axles that bridge the side plates. I have no clue why I chose to go with 5/8″ steel for this. It’s so ridiculously oversized, and hard-anodized aluminum would have done just fine as a bearing surface for the large nylon track sprockets. Even worse, I’m not sure why I went with the case hardened shafts. I think it’s just because they were the cheapest on McMaster for whatever reason.
Either way, a normal drill bit wouldn’t touch this stuff until I broke through the casehard layer with a carbide endmill shoved into the tailstock.

The Old Mercedes looked great in the winter afternoon sunlight today, so I took the opportunity to snap a picture. The 1956 South Bend 10L has been with the club for almost 2 decades. Even though the tailstock is now a good .01″ out of level, all the headstock bearing shims have been bottomed out, and the cross slide has 2/3 of a turn of backlash, it stills hauls and kicks ass (for work close to the chuck – it also turns a natural .01″ per foot taper because of the almost .005″ of bed wear at the front). #dontmakethemliketheyuseto

A while back, I scrounged some interesting looking springs from a pile of crufted hardware. Turns out they were a great fit over the cheap mountain bike shocks I picked up for the bogie suspension. I actually think they might be too soft – since I can actually manage to compress them slightly with my hand – but I think they’re better than the 750 pound per inch “springs” that came with the stock units. For 750lb/in, I might as well just bolt the tracks to the body with rubber blocks. All four shocks were “re-sprung”.

Alright, that’s pretty much all I can do for now. Both motors have been rewound, but haven’t been terminated yet. I also need to locate some 4.5″ long bolts to reassemble the drive sprocket with, and get the supplemental biscuit plates cut. It’s even more disorganized than last time!