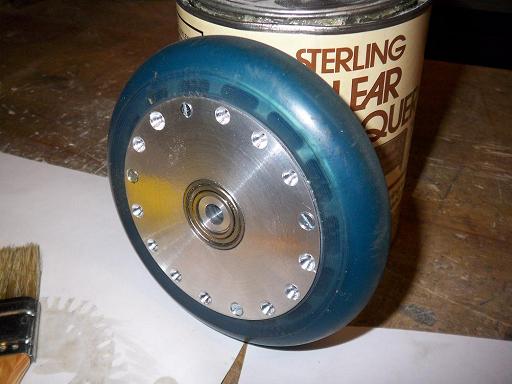
It’s shiny. Really shiny.
After another day of furious metal shaving, the structure of the motor is mostly complete. Here are some in-process pics.
 Motor side plates before length trimming. They were done step-by-step, one then the other, such that I had to move the asstastic tool holder as little as possible. In retrospect this was probably not the best option, since I did not have the luxury of a tailstock center, so the runout from rechucking a few times is probably obscene, but out of retrospect – oh well.
Test fitting a side plate before finishing the holes.
Putting the stator together. No, that’s not the final winding. The wire coils are there to hold the individual laminations in-line while I pressed the whole thing onto the mount and while the epoxy hardened.
 Threading the holes in the ring. Here’s Critical Design Flaw #1 (you knew it was coming somewhere!). The wall of the ring is too thin for anything other than, say, 2-56 screws. However, the waterjet made the holes bigger than 2-56 clearance-size. Oops. The next option was #3 screws, which are stupid and rarely used. Then #4, which was just on the edge of bursting through the walls of the ring. I risked it anyway, and things turned out okay.
 Hey, the internal ferrous magnet ring. This was actually a rolled strip of 1/32″ steel. This is Critical Design Flaw #1.5, because in retrospect it would have been much better and more effective to make the whole ring from a piece of steel. I wouldn’t have to worry about the ring bursting out and implanting itself in my face, and the magnetic flux would have a better path to travel through. The bolt holes wouldn’t be so close to the edge, and the whole thing would be stiffer anyway.
 The precarious seam that somehow holds everything together.
 Test installation of the guts. Hey, it seems to be working out!
Actually, it doesn’t. The tolerances and machining imperfections disagree with eachother. Normally, this wouldn’t be that much of an issue, but inside the motor, the airgap between the stator and the magnets is tiny by design. Throw in a dubious lathe with no centers, repeated rechucking, transferring work between different machines, and my awesome skillz, and the magnets don’t fit in. A bit of sanding made things slide in, but it’s inconsistent over the course of one revolution.
There’s alot of improvements that could be made before I continue, such as redoing the can out of steel. Everything else seems to be fine – it rolls smoothly and there is indeed clearance for wiring and windings.
I could redo it, or I could hire it out to a machine shop to take my inconsistencies completely out of it. Although it’s fun to DIY, some times you just want things to work.
It’s finals season, so I have other priorities (like TB4.5-SP1!) to worry about before continuing on this. There’s nothing that prevents it from working conceptually, just manufacturing.
So that probably means SR is going to be on hold for a little while. But it’s still REALLY SHINY!


