And we’re back! This is a special edition of Big Chuck’s Auto Body Center, and it’s one which is super special to me because it represents the largest systemic rework and installation I’ve ever done on a vehicle: Vantruck is now no longer carbureted; instead, it has a FITech EFI system. No more massaging unicorns to try and get the thing to run right!
Being a car-thing, the process was rife with what I call “tribal knowledge” – the “go on this forum and ask these people / read this thread” kind of Do You Know a Muffin Man documentation which I absolutely dread. As someone who isn’t a car guy by history, I once again found myself in the position of potentially saving hours of testing and debugging which would have been more intuitive to someone who’s worked on automotive systems extensively, or if the manual & official documentation had been more complete.
So that’s why I’m going to write this down in excruiciating detail, because I know I’ll forget half the reasons why I did something in a few months, and plus now so can you. I really hope to clear up some of the mysticism around the product by putting it in long form with my own analytics. To skip the opening movie and go directly to the installation and tuning, click here. And my summary of the install here.
The story begins with this:

Hey, if you ever wondered how a muffler works, there it is! They’re deceptively simple inside. While I’ve seen the diagrams and videos explaining how they work, that still isn’t the same as seeing…. your own…. up close.
That is the result of an epic afterfire. What led up to it was about 10 minutes or so of completely normal operation as I headed to help a friend move apartments (“Yes! Finally a reason to justify the ownership of a 21ft long dually truck in Boston!”). There after, it suddenly started running extremely rich, very quickly. I’d put a link to explain those terms here, but the top hundred Google results or so are all “How do I tell if my engine is running lean or rich?” followed by dozens of car bro comments on debugging carburetors.
The bottom line is loss of power, black smoke out of the exhaust and all, followed by the onset of puffs and pings as pockets of unburnt fuel ignited in the exhaust system. And then it exploded.
Did I mention I was in rush-hour traffic? So besides farting black smoke on people, I just grenaded the muffler surrounded on all 4 sides by probably grimacing tech/biomed workers wondering which flyover state I drove in from. And then it caught on fire.
You see, the muffler is positioned sort of directly inside of the frame rails, and when it opened up, it did so towards the frame rails. Fresh hot exhaust gases and probably gasoline droplets began cooking the frame. Right next to the opening, as it turns out, was the forward bed mount rail with its rubber bushings. Which proceeded to catch on fire and billow more smoke.
So now I’m in the middle of rush hour and smoke is emanating from under the truck. I pull the most illegal possible U-turn over the median (because who is going to stop me?) and rolled into a shopping center. At this point I didn’t know where the smoke was coming from, but I was paranoid about the forward fuel tank being involved, so I ran into a restaurant and demanded a fire extinguisher because there was now a burning vehicle in their parking lot. They happily obliged, and I puffed the bushing out.
I had Vantruck towed back (by the same dude as before, no less) later that night after deciding it was not going to make it back to base with the muffler still pointing at the same spot.

And then I straight piped it. Hey, inspections aren’t for another few months! You can see the crystalline residue from the compressed water extinguisher’s output, which smelled like vinegar and had the appearance of green coolant, and a little bit of charred wiring that leads to the running board lights. Behind the wire and barely visible are the cooked rubber mounts.
Luckily, my extra thicc steel slats that mount the bed appear to have kept the fire underneath for the most part, and there was no significant damage to the bed that I could see. The event all went down after the muffler bomb in about a minute, so I’m fairly sure the frame isn’t heat-damaged, just the rubber mount and my pride.
I resolved that day to never deal with carburetors again. I didn’t even bother looking at it or taking anything apart, because the next time I opened the hood, it was getting removed completely. I don’t care how whisperable they are, I’ll take an inferior performing system for consistency over something which requires constant jiggling and knob turning. What if that randomly decides to happen in the middle of Detroit?
Yeah, yeah, I’m a Mechanical Engineer and all, shush. I’m pretty convinced that emissions laws ruined carburetors, turning them from simple mechanical devices to complex vacuum-this valve-that nonsense…. and Vantruck’s carburetor belongs squarely in the latter category. When the magic gas-dispensing unicorns get that bad, they’re going to get euthanized.
Which brings us to….
the install

YEEEEAAAHHH. One of the first things I did when I got back to the shop was start scouring eBay and Craigslist for nearby EFI rigs. I had been investigating this as a stopgap option between caburetion and my electric install (The dream is still alive). The Holley Sniper, Fitech GoEFI, and MSD Atomic TBI were all on my list, and appeared to share similar functions.
I found a single listing in New Hampshire for the Fitech full kit, including the miniature nuclear reactor on the left, a high-pressure fuel pump and sump, all for 1K, making the Fuel Command Center basically free. Sure, why not!
I was on the fence before, but this event pushed me over the edge. Right now I can’t have a half-taken-apart project vehicle, so when that day comes, I’ll sell the whole powertrain to make that cost back if need be. The explosion went down on Friday, and I was on the road Monday to pick up the unit. Because fuck everything, especially careburetors.

Here we go! I picked out the following Saturday to get as much of it installed as I could. First order of business was mounting the nuclear reactor. Seriously, what else does it look like!? From doing research after I bought it, this device seems to have overheating issues, so mounting it was a tradeoff. I didn’t want to stick it under the body, since I’d then have to run new high-pressure rated fuel hosing up to the engine bay (almost all of the existing connections and hoses were designed originally for low pressure pumps). And under the hood was convenient for those reasons, but next to the engine seemed to be a no-no.

I found a spot on the drivers’ side just behind the headlight. There is a round cutout with direct grille access for moving air. I’d just have to relocate one of the horns, which I did by mounting it to the same stud as its brother.

The reactor mounting bracket is secured by a single overtightened 5/16″ bolt sandwich with lockwashers and regular washers of incrementing sizes. What, did you expect me to engineer a decent mount when I had access to unbridled mechanical terrorism instead?

The FCC installed and initially plumbed. This reactor thing is supposd to be a ‘returnless’ system, so it should only have one low-pressure input fuel line. It has a vent hose connection which is supposed to go back to the fuel tank. I just connected it to the Return port of the magic fuel tank switching valve anyway, since obviously it would need to vent to the same tank it’s drawing from.

Don’t talk to me or my son ever again.
This removal was fairly simple. I undid the throttle cable (which was a ball joint… I’d never seen this before, since Mikuvan’s throttle cable ends in a pinch lock like a bike), unfastened the fuel line, vapor collector lines, and random vacuum lines, and then loosened the 4 nuts retaining the whole carb.
The problem was that I now had a mess of vacuum lines. A lot of research let me to find that the majority of these control emissions-related functions – some are heat-triggered, some are manifold vacuum triggered, and so on. Well, good thing Vantruck is emissions exempt in Massachusetts, because I’m never going to hook these back up. I capped every vacuum line I could find that wasn’t the distributor; other vacuum functions like the transmission modulator and brake booster had their own direct-to-manifold fittings.

The next job was to transfer over the throttle lever. I did this figuring that nobody made the ball joint that was on the thing, and since it was riveted in, I’d have to salvage the entire linkage (which is ALSO riveted/stamped in). Come on, people. I used an angle grinder to carefully shave the stamped connection and pulled the lever off.
Later that day, I found the ball joint on the shelf at Pep Boys. Ah well…

Here is the lever installed and both of the throttle flaps connected. The secondary linkage connection point (to the right of the big nut) is at a bad spot to be effective. This arrangement would really only let the secondary open about 45 degrees. I may play with it later, but I’d rather run on 1 barrel and a pony keg forever than keep trying to get all four barrels in on the action.

And back on we go. The little ball chain is the connection point for the cruise control vacuum actuator (Crap, I should go check if that still works…)

Continuing the “plug the vacuum line” game after hooking up the new fuel hose, which I synthesized from the fittings provided in the kit and some sections of 5/16″ EFI-rated fuel hose from Pep Boys. The High pressure side was now plumbed.

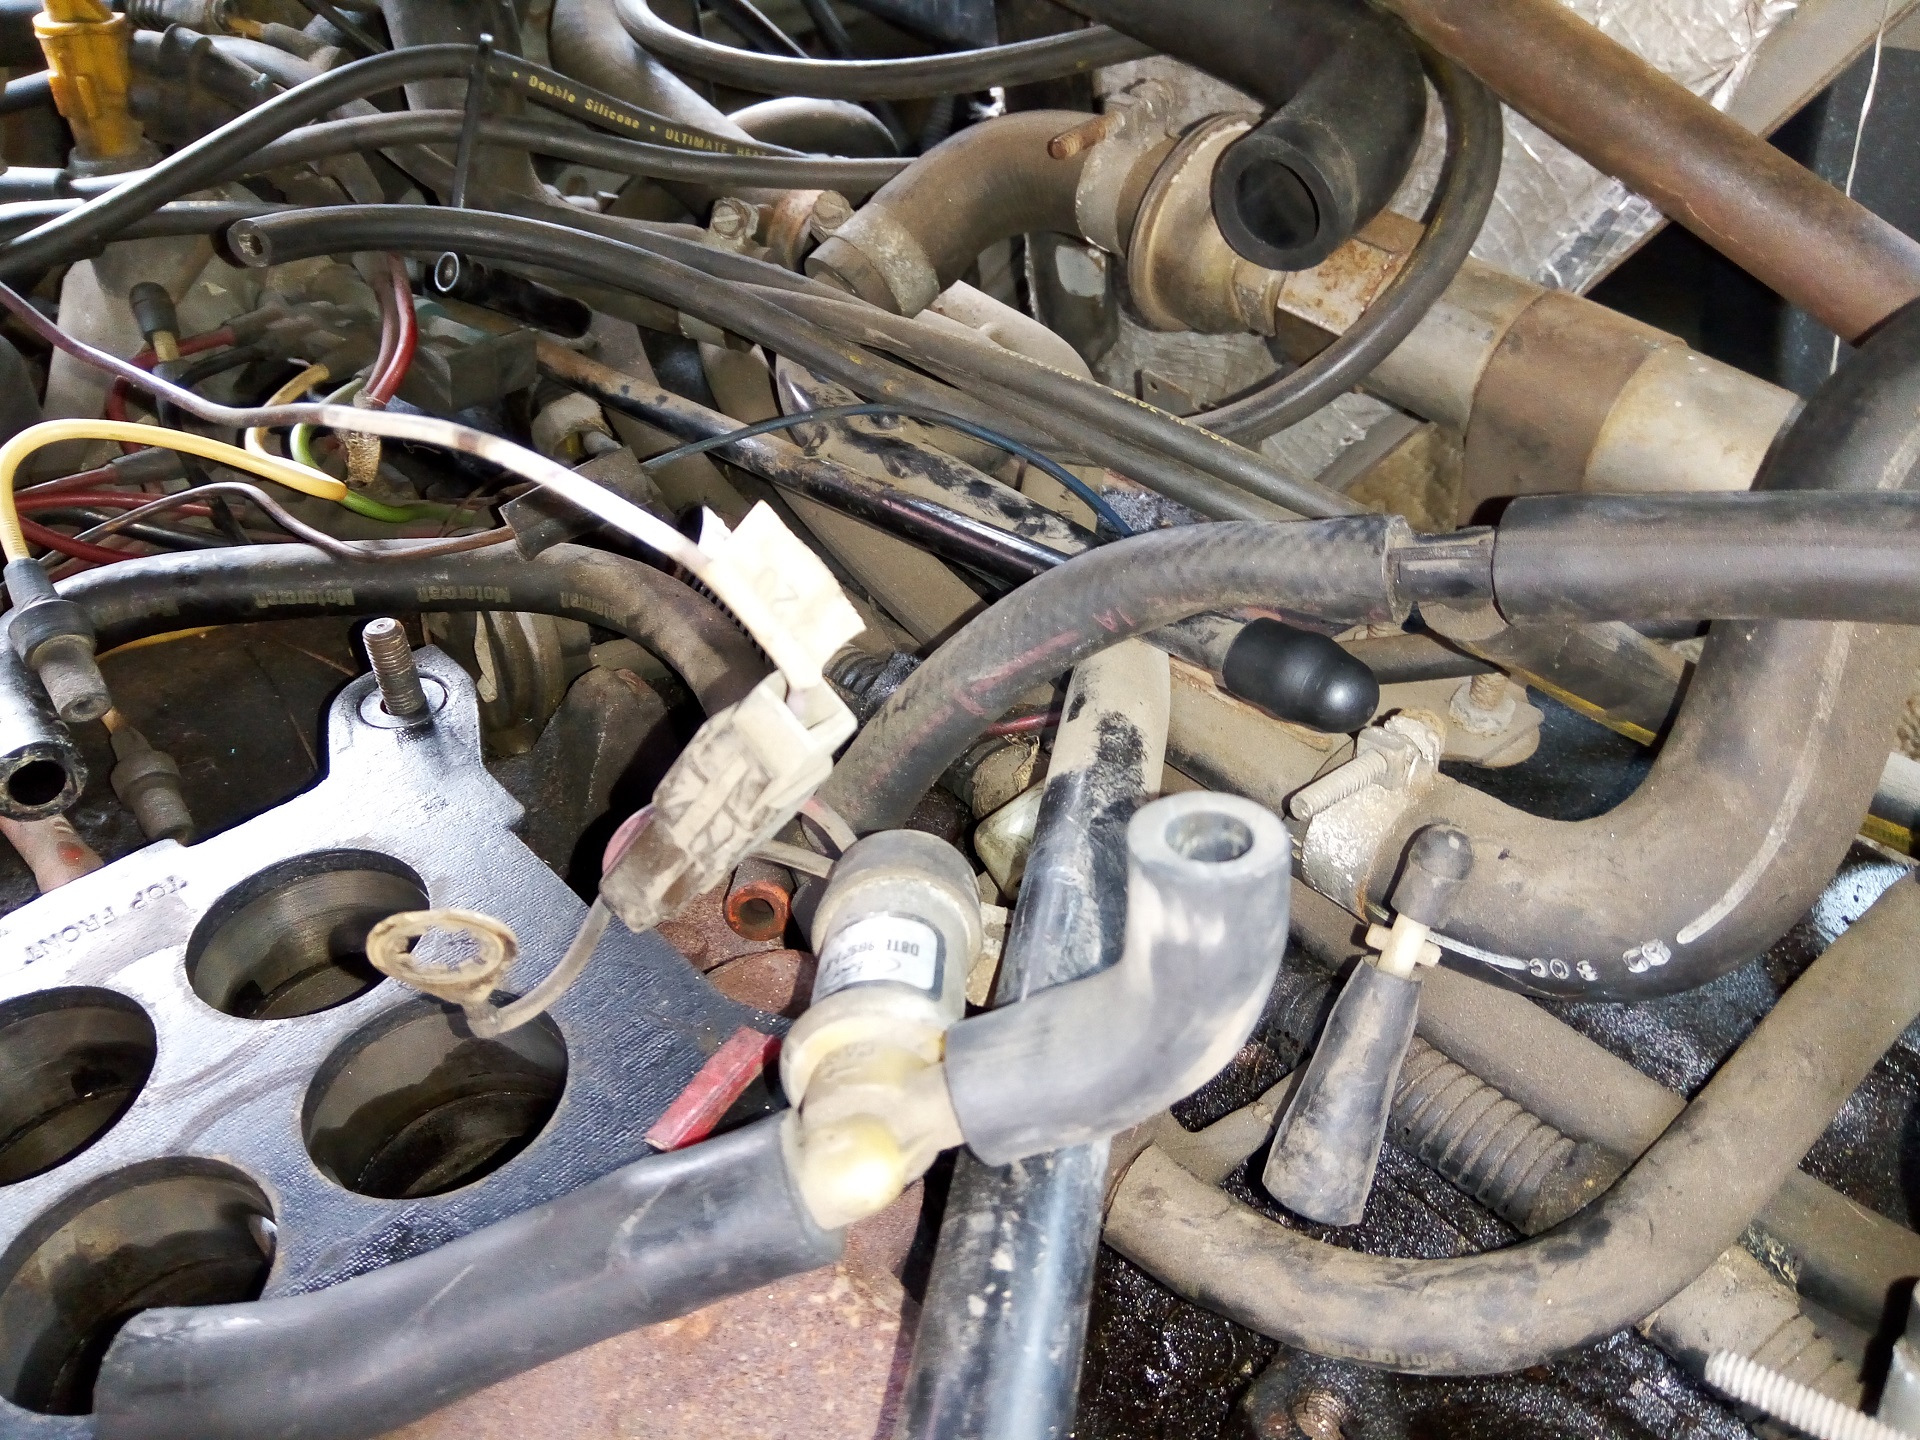
Next, I dove under to route the oxygen sensor. The kit has a wideband O2 sensor with a provided clamp-on bung, so installation was simple with a step drill. That exhaust pipe looks rusty, but it’s all surface and still has reasonable wall thickness all-around. I installed this as close to the Y-point of the exhaust manifold downpipes as I could stuff the drill, since the transmission was still behind me.
I’m told that the clamp mount is less secure and more prone to leaking than welding it. I’ll check on this thing periodically, but I’m not busting out a welder. Remember, if I play my cards right, it will be Tesla powered in a year or two and all of this internal combustion hogwash is leaving. Keep the dream alive.

The vacuum line plugging game continues at the back. Most of these are now vapor collection lines. Since all of that has been rendered obsolete by fuel injection, I also went ahead and removed all of the control valves which formerly led to the carburetor too. The only connections to the vapor system I’m aware of now is the fuel tank. Maybe if this affects operation, I’ll find which line went to the purge control system and hook them back up. Until then, rot in hell, stupid vacuum bullshit.
The thick cable coming out of the TBI unit is the O2 sensor cable, which was just long enough to reach the spot I ended up drilling at, with something like less than an inch of slack. Yay!

Another vacuum-powered accessory to go was an air intake diverter plate. It opens and closes based on temperature – when the engine is cold, it pulls from near the exhaust manifold which heats up quickly, helping warm the intake air. When the engine warms up, it intakes from the front of the grille. Well guess who’s forever intaking from the front of the grill now!?

Vacuum powered this, vacuum powered that. Seems like the better these trucks ran, the more they sucked.
This yellow thing was connected to a coolant bung next to the water pump – it seems to be the thermal switch which lets the temperature-dependent emissions ratchets and clanks access the manifold vacuum. It went away so I could locate the TBI unit’s water temperature sensor there instead, and all of its connected lines were plugged. I’m sure I’ve plugged the same circuit multiple times now. I don’t care.

Performing final hose routing… I labeled literally everything, even if it’s supposed to be dead obvious. Because if there’s one thing I’ve learned from working on silly vans, it’s that nothing is obvious the way I’d like it to be, and That Doesn’t Mean It Works.

I wired in the fuel pump with the provided Big Red Wire and my own section of ground wire, which was tied to the frame nearby.

One random thing I found was the underhood light being directly connected to the battery positive, through a fusible link. Now hold on…. there is no way this wasn’t someone’s random hack. Why would you connect a light bulb directly, unswitched, to the battery!? I figure this must be why the underhood light socket was empty – because otherwise, you’d have a light bulb draining your battery constantly!
I tied this circuit away as I cleaned up the battery-side wiring for powering the ECU. It may…. return some day?

The next wire to be installed is the ignition sensing wire. I’m setting up the system in “easy mode” since I am not inclined to take apart the distributor to lock out the centrifugal and vacuum advance system (good explanations starting about 60% down the page). Since the engine ran great (when it wasn’t shitting itself), I figured all the timing components were adjusted correctly already.
I wanted electronic timing control, of course, but it seems like this was one aspect which wasn’t self-learning, and I would actually need a dynamometer to really take advantage of it to get the maximum performance possible. Hey, you know what else makes this thing haul ass? Two Tesla motors!

So at this point I had ECU power, oxygen sensor, coil sense, and fuel pump. The last thing to do now is the ignition key swich. There wasn’t a good exposed point to do this cleanly at, so I spliced it in line with the associated ignition module wire. That yellow push-on connector, also fitted to my other wire splices, won’t be there forever. Just for the first run, since it’s not very vibration proof.

And it’s ALIVE! Well, partially. This is really where the fun began, and the whole activity began to remind me of tuning a custom 3D printer: You have to perform a multi-variate gradient descent kind of optimization of several variables at once, from a baseline configuration.Everything is changeable, so you can actually arrive at the same result from different directions with different end settings. And there is not a single correct answer. Kind of like building silly go-karts!
This process really took me longer than the install itself (which the advertised 3-5 hours, by the way, is utter bullshit but I’ll get to that!) and occurred over a few days of road testing and annoying the neighbors in the parking lot.
the problems
First, I had trouble getting it started at all. It would crank for 15-20 seconds at a time, and then very begrudgingly begin to idle. I couldn’t tell if it wasn’t getting enough fuel (too lean) or too much (too rich, engine being flooded). Being that my initial few pulls were at night, I couldn’t see if the exhaust was emitting dark smoke (too much fuel). Some times, when it did start and run, it would then idle well.
Other times, the screen would go blank and the ECU would reset, cutting the ignition and shutting the engine off.
When it did successfully start, run, and warm up (about 1/3rd of the time), I noticed that the Idle Air Control position, which is recommended to be between 3 and 10 by the manual, would never really rise above 0-2 no matter where I had the idle position screws adjusted to. I even accidentally backed them all the way out, causing the throttle butterflies to stick in the barrels (needing a hard shove on the throttle pedal to free them).
I deduced that the hard starting and the random cutting out was two separate problems. With the day pretty much done and any more bald eagle emitting from the now straight-pipe exhaust going to really piss off the households across the street, I decided to return the next day.

One of the things I noticed in the daylight was that the exhaust did indeed shoot out black smoke while it was desperately trying to climb up to idle speed (which itself took a few seconds). As I found out from asking around, this is a pretty classic sign of too much fuel at start causing the engine to flood out, and the gradual acceleration is the clearing of the unburnt fuel out of the cylinder. There were settings to adjust how much fuel the injectors add at start under the Prime Fuel Multiplier and Crank Fuel [temperature] labels. I decreased Prime Fuel to 0 and Crank Fuel down about 10 units each at a time, but I couldn’t really make the starting more reliable or less sooty.
However, I also found that while the engine was running was how low the battery voltage was showing compared to what it should be while the engine is running. I found that it varied significantly between about 11.5 volts to as low as 10 volts, with a variation of 0.3 or more. And it was constantly changing. The battery, meanwhile, was sitting at an expected 13.5 volts.
Uh oh. That to me was a sign of a bad ground or bad power wire. I know all the positive connections were secure (the little orange things have never let me down despite not being a long-term solution), but couldn’t figure out where the unit derived its ground. A call to FiTech support (and a 30 minute hold wait) confirmed that the unit grounds through its machined casting bottom and a bare spot above one of the mounting stud holes.
Oh, the bottom that’s touching a thick rubber gasket and the machined spot which is attached to a very rusty stud and equally rusty nut? That one? Great! I cleaned the stud with a wire brush and used a new zinc-plated nut – and the ground problem went away! I had stable 13.0v on the ECU readout and could now try to replicate my other problems.
I didn’t get a chance to fully differentially diagnose the starting issue, though, because while on the phone I discoverd that my unit’s firmware was well out of date. The new firmware included a setting to modulate the fuel pump PWM% to prevent overheating – great, I’ll upgrade immediately. Updating the firmware was basically dragging and dropping an entire operating system and folder structure onto the handheld programmer’s SD card. I see that they employ real software developers!
Obviously, it started on the first pull thereafter and settled to idle very quickly. So I’m not entirely sure if it was solved by the grounding remedy or the new firmware has more correctly set initial conditions – the Crank Fuel settings were all zeroed out compared to my original firmware. I’m also not sure if the previous owner changed them or not from the older firmware’s stock settings; the guy’s story was he ran the engine it was installed in for a very short time before deciding to move in a different direction with his entire project.
I personally lean towards “grounding issue” because another symptom I wasn’t sure was quite correct was that when I first keyed on, the injectors would fire wildly. I was told in the manual to expect a click, but what I got were several dozen if not hundreds of clicks. Some more poking in the FiTech Owners Facebook group showed me that the wild clicking is the result of noise on the coil sense line. I could buy that a bad ground would cause enough apparent voltage swing on the coil to falsely trip the logic.
Either way, with the grounding issue resolved and Vantruck starting consistently without smoking up the whole neighborhood, I returned to fiddling with the Idle Air Control setting, which still had problems moving from zero.

I was informed by the group that if the vehicle has secondary air injection (smog pumps), that this would cause issues with running because the exhaust would have fresh air injected into it, causing it to read artificially lean. Well, Vantruck has not one, but two of them!
I could buy this as a reason why the IAC motor was shutting the valve off completely. Say the air pumps make the exhaust gases read too-lean. That says to it more air than fuel is being inducted than necessary. Because the idle fuel and RPM target is something you set, it can’t just increase fuel, because it will also increase the idle RPM. It has only one variable of control: the IAC valve.
To test this theory, I just removed the air pump belts.

Aha, and the IAC instantly leaps up to the mid 20s. This actually seemed to run fine, but I decided to re-adjust the throttle linkage and the idle control screws to put it in the recommended range of 3 to 10.
One of my mistakes in fidding with the throttle linkage was trying to tune the idle control screws with both of them connected together. I really wasn’t sure what was moving what, and it took a while of either not being able to change the IAC steps, or backing one of the screws out so far it wasn’t touching the butterfly stops any more.
This was my “A Car Guy would know better” moment. I found out that you should disconnect the primary and secondary, adjust the idle control screws separately, then connect them together with the linkage set to the right length.
I started with both idle control screws cranked rather far in to ensure they were touching the stops. This caused Vantruck to want to idle at 1800 RPM, which was quite exciting. I then adjusted the secondary throttle stop out until it was just barely not sticking (closing too far) and Loctite’d the screw in place.
Then I did the same to the primary throttle using the IAC step value as a guide. I turned the screw outwards slowly until the IAC settled above zero, then out some more as it increased in value (throttle too closed, I’m gonna open more).

I finally got it to settle between 5-8. At the behest of some group members, I changed the Loop Up and Loop Down settings upwards to make the IAC respond faster (settling to idle from revving high quicker) as it was taking a few seconds to find the idle again after throttling.
After the engine could start and run reliably, I began turning down the Crank Fuel and Prime Fuel settings again to see if I could get it to use less fuel on startup. I ended up settling on -20 and -30 for the 65 degree and 170 degree (basically, summer-cold and warm restart) Crank Fuel settings, with Prime Fuel remaining at zero. Obviously, I have no way to test the 20 degrees Crank Fuel setting at the moment, but in the coming months….

After travelling to Pep Boys on its own power to pick up some air filter studs (the stock one no longer fit), I made one final linkage adjustment to connect the secondary throttle less sloppily, and closed up the system.
The story doesn’t quite end there. On a 60-mile test loop around the Route 128/I-95 corridor, I had a moment where I lost fuel feed in the middle of some afternoon traffic, and had to scramble to the rightmost lane. It seems like the FCC is still overheating, taking a few minutes to cool back down before some sort of thermal fuse/breaker resets. Either way, that was an embarrassing few minutes taking up space on I-95 during somewhat rush hour.
After it cooled off, I decided to high-tail it back to base, whereupon getting off the highway, being in regular street traffic, it died again.
Another few minutes of sitting around in a parking lot with the hood open again, and I was able to make it back to the shop (and subsequently after it cooled completely, on a local Home Depot and Taco Bell run) with zero problems. The day afterwards, I was able to run on another ~30 minute local mission without issues, but the FCC was too hot to comfortably touch afterwards. So it seems like the system’s heating time constant is between 30 and 45 minutes to failure.
There are several modifications that people make to the FCC to ensure it can cool off, which I will attend to later in the week. The FCC is a “returnless” system, which simplies installation, but seems to imply the fuel pump basking in a small puddle of rapidly heating gasoline. It also means it’s heating a sealed container of gasoline to 200-fucking-something degrees. What. The modifications involve repurposing the “vent” hose as a real fuel return line – luckily for me, I already have a return system set up, so the modifications will just need to be made and then the pump can cycle through fuel quickly.
And there we have it. Vantruck is now no longer powered by unicorns. What mythical animal should the FITech rig be? Some friends suggested a griffin, but I think I’ll stick with some sort of Pokemon.
So how satisfied am I so far?
3/5 stars, might not recommend
It’s not the functionality of the system (past the quirkiness of the FCC, which looks impressive but didn’t seem to be that well thought out). In fact, I want to love everything about it, and it seems like many people do. Maybe my love for it is just caused by my abject hatred of caburetors. But the process to get there is extremely arduous and it seems like I am far from the only one who has faced some seemingly common issues.
Here’s what I see as problems:
- The documentation provided does not explain what the variables and settings mean in detail, only that there are some that you should change to certain ranges for most applications. It exists to a limited degree in the “Basic User Manual”, but what would be helpful is company-provided presets for certain engine ranges, or known working configs for a specific engine year range. This exists as people sharing calibration files, but it really needs to be an official thing.
- The documentation is scattered as blog-like posts on FITech’s website and .doc files provided with the firmware drop, and a lot of additional documentation simply exists as answers to FAQ posts by users. And they apply to different firmware and hardware revisions without any indication – there’s no version control for the documentation.
- There is practically no debugging or troubleshooting guide. I feel like the unsteady injector clicking (caused either by the ground problem or the noise on the coil sensing line) should be at the top of one. The only source of troubleshooting I used in this install was my mechanical/electronic engineer’s intuition and asking people.
- As a result, the setup and install really relies on the “guru” or “tribal knowledge” system, or as I call it, “Do You Know a Muffin Man?” where you find someone who’s done it before and ask them about it. I tend to have a dim view of these systems if it’s a product which should have a company’s dedication behind it. If it’s some open-source hackable, I find it more tolerable, since the idea there IS that the community builds up something that’s greater than all of its members’ individual contributions.
- Even the Basic Setup guide still assumes a lot about “car guy” knowledge. I don’t know how much you can really stray from this, since installing an entire new fuel system is kind of not a generalist task. Maybe this is just compounded by the frequency of needing to refer to a user community for guidance, and it’s on me to learn some of these hobby- or trade-specific things.

lul and then wut
The FCC’s problems are seemingly still being worked through and they may have an ‘official solution’ soon, but I think even a general informational document, like a service bulletin, that has the overheating issue spelled out would have been less frustrating. Hey, I’ll loop the damn thing into the air conditioning circuit if I have to, just tell me that I have to! I’ve had to piece together from the user groups the steps needed to modify the FCC to use a true return line.
In the mean time, I’ve at least gotten everything back to the state where it works 100% of the time, 60% of the time! Consider me a happy customer. There will probably be more setting jiggling posts coming, since you never truly finish tuning a homebuilt 3D printer. In summary, the problems I faced and the remedies I used:
- Poor ground. Symptom: Unstable RPM readings, unstable and too-low battery voltage readings, sporadic injector firing (many clicks) on key-on. Remedy: Be better grounded. I polished the attachment hardware, some people run a dedicated line to the battery.
- Hard starting. Symptop: long cranking, gradual buildup to idle while sounding like it’s running on 3 or 4 cylinders, and smoky exhaust indicating too-rich condition. Remedy: Adjusting down the Prime Fuel and Crank Fuel values. Problem might have been solved by proper grounding.
- IAC value too low. Symptom: The IAC floored itself to 0 and stayed there. Remedy: Proper adjustment of throttle linkage to use idle stop screws, removal of SAI/smog pump drive belt.
- IAC value too high. Symptom: The IAC ended up around 24-30. Remedy: Proper fine adjustment of the throttle linkage. Though some in the community now say that having it around 20 seems to be better anyway. The books still recommend 3-10.
- FCC overheating. Symptom: It gets too hot to touch and will fail to push any pressure. Remedy: Updated firmware to latest version to enable PWM control, but it may still be facing sporadic overheating problems. Future remedy as of now will be modifying the canister to use the VENT line as a Return line, and also connecting the onboard fuel pressure regulator to the vacuum system.
Congratulations on removing a carburetor from your life!
Although that Fuel Command Center dingus seems /suspiciously/ complex.
I have long opined that the quickest way to acquire the Tribal Knowledge is to, in the spring, acquire an air-cooled volkswagen, a copy of http://a.co/bHfOsBu, and marinate (i.e. attempt to rely on said VW) for six months (at which point it will be winter and if you do not get said car off the road around here it will turn into a small pile of iron oxide–but either way you’d know what you need to know). Otherwise, just keep doing what you’re doing; by the time you start installing your electric drivetrain you’ll know everything you need to know about gas engines. :->
And yes, emissions control ruined carburetors by mandating a tighter, more precise control loop that was fiendishly difficult to implement without electrons. Of course afterwards you have a tighter, more precise control loop…
So they put a returnless (prone to fuel heating at partial throttle) high pressure fuel pump inside a surge tank, and recommend mounting it in the engine bay? Good R&D, 8/8 m8, such wow.
Honestly, dude, even if you do the return mod, move it back near the fuel tanks and run some high pressure line to the engine bay instead. Get it far away from heat sources and as close to the fuel source as possible…
AND WELD THE O2 SENSOR BUNG ON BEFORE IT LEAKS AND CAUSES ERRANT SENSOR READINGS DAMMIT
Yeah, my knee jerk reaction there is “make sure your oxygen sensor doesn’t leak because it might cause you to run too rich and, well, blow up your muffler.”
Man, are those clampy-jingles actually that bad? Relocating the FCC (running all high pressure hosing) and welding the bung are all actual work :v
I have to dive under it periodically right now to check on the fuel filters anyway. Will just tighten it a notch each time!
Thanks for posting this. Fitech purchased already and been on the FB page. The sum total of post on the FB board has me concerned that the system is a dud. Learning curves I can handle. Love the reistor human detector!
It doesn’t seem to be a dud, but it does seem to be ripped right off the engineering office floor and shipped.
So, practically, if you mount oxygen sensor properly, there’s a whole class of problems that you’re _much_ less likely to encounter, and my perspective would be that it’d probably worth the effort if were intending to be relying on it for, say, six months. (But then I moved to the ‘burbs and need my car for things like obtaining food that doesn’t make me sick.)
Philosophically, you replaced the carburetor because throttle-body injection had a better control loop–don’t you want it to have reliable inputs to that control loop?
I mean, that was kind of my question – is the clamp-on system really that bad, and even if there were a small leak right at the site, would that significantly influence the bulk of the exhaust gases its reading? I’m just trying to gauge the sensitivity here. I can understand a large upstream leak such as at the manifold or Y-pipe union being an issue.
Mostly morbid curiosity…
When Vantruck eventually gets its PxxD, will it be front mounted and adapted to the existing drive shaft and solid rear axle? Or will it be rear mounted with new independent suspension to take full advantage of the PxxD transmission and differential?
Side note: Kinda sucks that Teslas on iaai.com all seem to require proper ‘automotive industry’ business licenses to bid, which means I would have to go through a broker. There is a rather tasty 2016 Model X P90D in Tampa with an ERC within $3000 of the ACV, so might go for pretty cheap. Front right side is scrap, but interior, battery, and rear drive should be in decent condition.
For both Mikuvan and Vantruck the plan is to adapt the existing live axle to a DeDion axle using the existing leaf spring axle mounting locations. Basically I’d cut off the ends of the axles to use the mounting geometry, weld a new offset crossmember between the two (like an epic 4″ tube bed in a shallow U shape) and the drive units mount to the frame in the center. Some amount of magic to convert the remaining former live axle stubs to half-shafts and CVs will be needed.
Check out what they did on the Ford Ranger ev’s back end. That’s basically what I was planning.